
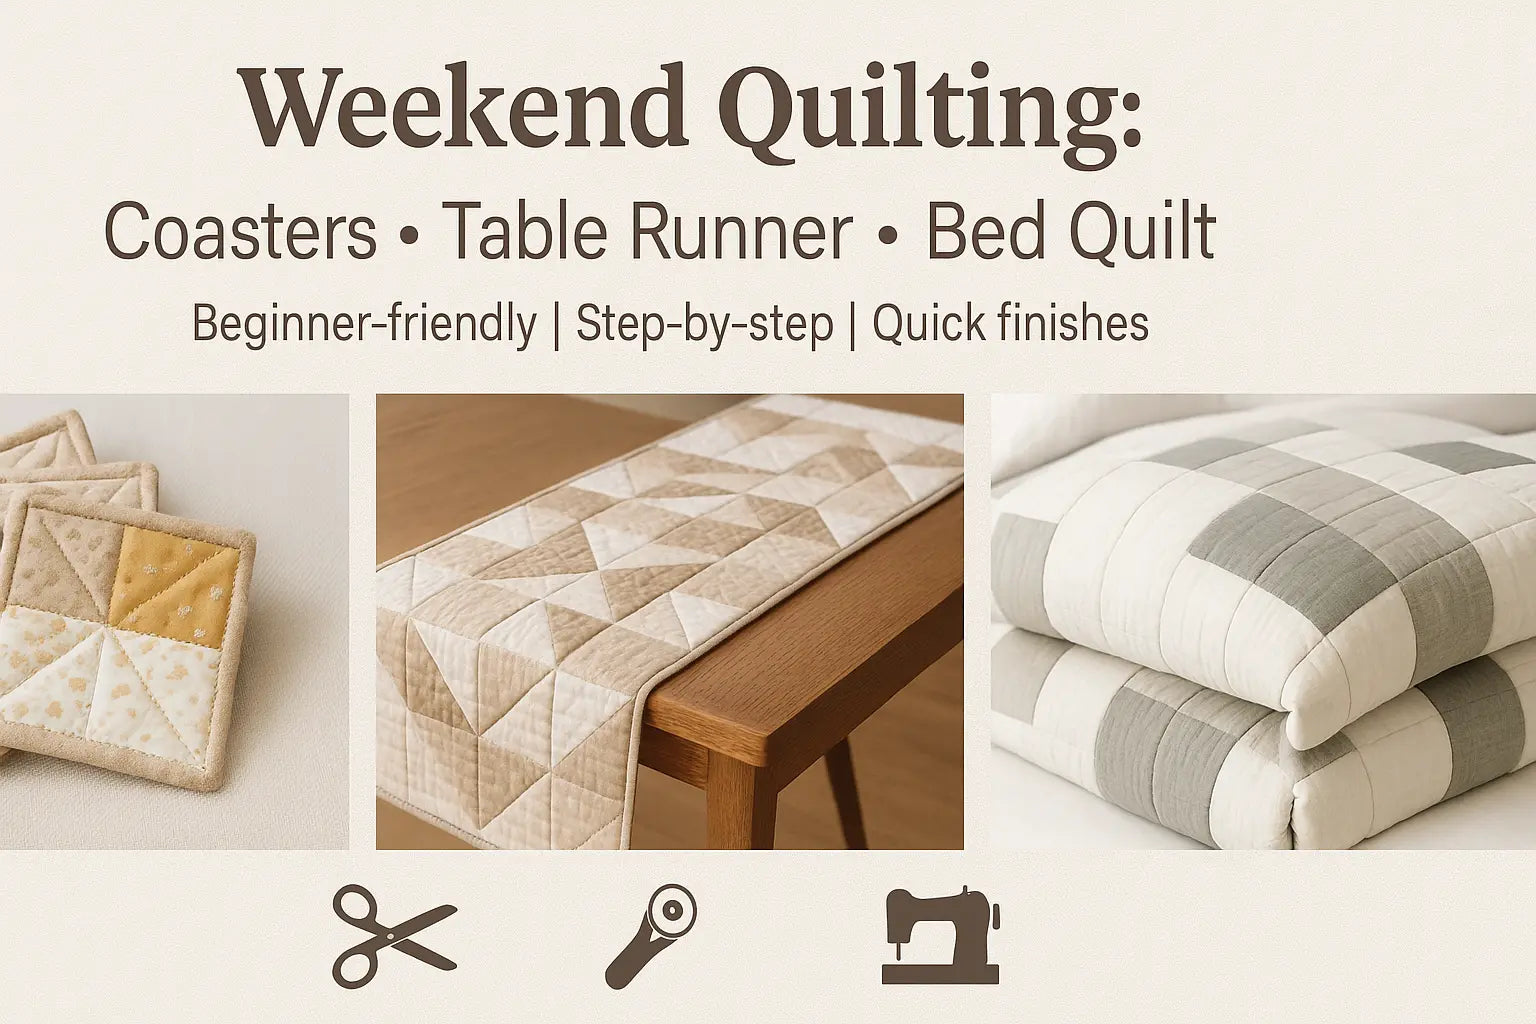
3 Easy Quilting Projects You Can Finish This Weekend
Quilted Coasters • Table Runner • Beginner Bed Quilt
Meta title: Easy Quilting Projects: Coasters, Table Runner & Bed Quilt (Beginner)
Meta description: Learn how to make quilted coasters, a table runner, and a cozy bed quilt. Step-by-step materials, instructions, sizes, tips, and FAQs—perfect for beginners.
Why these three?
They’re fast, photogenic, and beginner-friendly. You’ll practice the core skills—cutting, piecing, quilting, and binding—on a tiny project (coasters), scale to a small decor piece (runner), then apply it to a full quilt.
Project 1: Quilted Coasters (4" × 4")
Skill: Beginner • Time: ~45–60 min for a set of 4 • Size: 4″ × 4″ each
Materials
-
Fabric scraps (top & backing)
-
Low-loft batting squares (4″ × 4″)
-
Thread (poly or cotton), sewing machine
-
Rotary cutter, mat, quilting ruler
-
Pins or clips, iron
-
Binding strips (1¼″–1½″ wide) or premade bias tape
Steps
-
Cut top, backing, and batting to 4″ × 4″.
-
Layer backing (right side down) + batting + top (right side up). Clip.
-
Quilt straight or diagonal lines ~½″–1″ apart through all layers.
-
Trim & square to exactly 4″ × 4″.
-
Bind with narrow binding; miter corners; stitch down.
-
Press flat. Make a matching set.
Pro tips
-
Low-loft batting keeps coasters flat.
-
Chain-piece multiple tops to speed up.
-
Use a walking foot if your machine has one.
Project 2: Quilted Table Runner
Skill: Beginner • Time: 2–3 hours • Typical size: ~14″ × 40″ (customize to your table)
Materials
-
3–4 coordinating quilting cottons
-
Batting & backing cut to runner size
-
Thread, sewing machine
-
Rotary cutter, mat, ruler, pins/clips, iron
-
Binding strips (2½″ wide)
Steps
-
Cut strips (e.g., 3″ × WOF) or 5″ squares.
-
Arrange your layout (mock up on a table; snap a photo).
-
Piece rows with a ¼″ seam; press seams to one side.
-
Layer backing (right side down), batting, runner top; baste.
-
Quilt straight lines, a simple grid, or gentle diagonals.
-
Trim edges flush.
-
Bind: attach 2½″ binding; miter corners; stitch to finish.
Pro tips
-
Use high-contrast fabrics for a striking pattern.
-
A walking foot reduces shifting on long seams.
-
Add seasonal colors for easy repeat content (fall, holiday, spring).
Project 3: Simple Patchwork Bed Quilt
Skill: Confident beginner • Time: Weekend+ (piecing) • Sizes (approx.)
-
Twin: 68″ × 88″ (e.g., 12″ finished blocks in 5 × 7 layout)
-
Full/Queen: 88″ × 96″ (e.g., 12″ blocks in 7 × 8 layout)
Materials
-
3–5 coordinating cottons (yardage depends on size; plan for extra)
-
Batting & backing to match size (piece backing if needed)
-
Thread, sewing machine
-
Rotary cutter, mat, ruler, pins/clips, iron
-
Binding strips (2½″ wide)
Steps
-
Plan & cut: choose block size (e.g., 12″ finished). Cut squares/rectangles.
-
Lay out your design on the floor/wall; photograph to remember placement.
-
Piece rows with a ¼″ seam; join rows; press.
-
Layer backing (RS down) + batting + quilt top (RS up); baste.
-
Quilt: straight-line grid, echo seams, or gentle waves.
-
Trim the sandwich to square.
-
Bind: attach binding; miter corners; finish by machine or hand.
Pro tips
-
Prewash bright fabrics to minimize color bleed.
-
Use a walking foot for smooth quilting across large layers.
-
Add a hanging sleeve or quilt label before binding, if desired.
Troubleshooting & FAQs
Do I need a walking foot?
It’s optional but highly recommended for the runner and bed quilt; it feeds layers evenly.
What batting should I use?
Low-loft cotton or cotton/poly blend is forgiving for beginners and presses nicely.
How wide should binding be?
2½″ strips for runners/quilts; 1¼″–1½″ for coasters (thinner looks cleaner on small items).
Can I machine-bind everything?
Yes. Stitch binding to the back first, fold to the front, and topstitch close to the edge.
Supplies Checklist (copy & save)
Quilting cotton • Backing fabric • Low-loft batting • Thread • Rotary cutter • Self-healing mat • Quilting ruler • Pins/clips • Iron • Binding strips • Walking foot (optional)
Callouts to Feature (great for social captions)
-
“Beginner-friendly: master cutting, piecing, quilting, and binding in three projects.”
-
“Coasters in under an hour, a runner in an afternoon, and a weekend bed quilt.”
-
“Swap colors seasonally for endless content.”
SEO Keywords
quilting for beginners, quilted coasters tutorial, how to make quilted coasters, DIY quilted table runner, table runner quilting pattern, beginner bed quilt, simple patchwork quilt, quilting supplies list, binding a quilt, walking foot quilting, low loft batting, quilting cotton fabric, rotary cutter safety, quilt binding strips, quilting tips and tricks
Long-Tail Phrases
how to sew 4x4 inch quilted coasters step by step, easy quilted coaster pattern for scraps, beginner table runner quilting tutorial with binding, simple patchwork table runner instructions, best batting for quilted coasters low loft, how to bind a quilt with 2.5 inch strips, beginner bed quilt step by step instructions, straight line quilting for beginners, how to layer backing batting and quilt top, quilting with a walking foot explained, quick weekend quilting projects for gifts, how to piece quilt rows with quarter inch seams, press seams for a polished quilt finish, mitered corners on quilt binding tutorial, how much fabric for a twin size patchwork quilt, full queen bed quilt layout using 12 inch blocks, using seasonal colors for quilted table decor, chain piecing tips to speed up quilting, how to square up a quilt after quilting, machine binding vs hand binding pros and cons


