
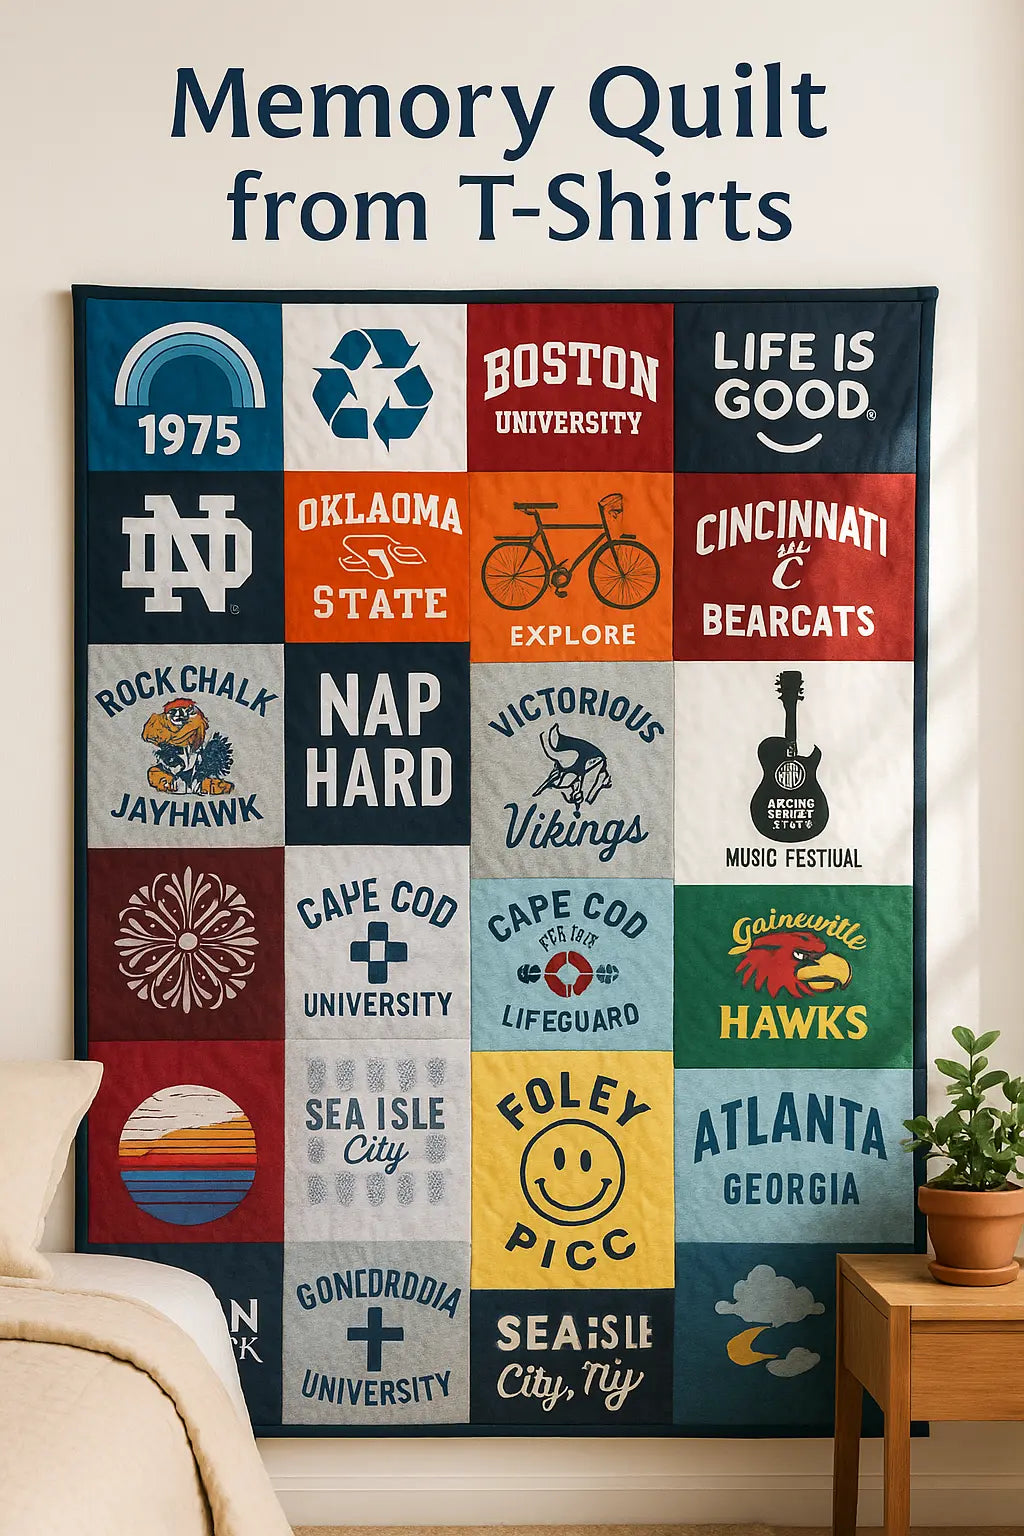
Memory Quilt from T-Shirts
Skill: Confident Beginner • Time: Weekend+ (prep-heavy but rewarding)
Size (approx.):
-
Throw: 60″ × 72″
-
Twin: 70″ × 90″
-
Full/Queen: 85″ × 95″
Materials
-
15–30 old T-shirts (fronts, backs, pockets — any meaningful graphics)
-
Woven fusible interfacing (lightweight, enough for each shirt square)
-
Quilting cotton (optional for sashing, borders, and binding)
-
Batting (match quilt size)
-
Backing fabric
-
Thread, sewing machine
-
Rotary cutter, mat, ruler
-
Square quilting ruler (12½" is ideal)
-
Iron, pins, pressing cloth
-
Binding strips (2½″ wide)
Steps
-
Deconstruct the shirts
Cut side seams, sleeves, and necklines to isolate usable fabric. -
Fuse interfacing
Apply woven fusible interfacing to the wrong side of each panel to stabilize jersey. -
Square the blocks
Trim stabilized panels to uniform size (e.g., 12½″ square for 12″ finished blocks).
Add borders if needed to bring smaller prints up to size. -
Layout your quilt top
Arrange blocks in rows or columns on a wall or floor. Use photos to remember layout. -
Piece the rows
Stitch blocks with a ¼″ seam. Add sashing or cornerstones if desired for spacing. -
Layer the quilt
Quilt sandwich: backing (RS down), batting, quilt top (RS up). Pin or spray baste. -
Quilt the layers
Use a walking foot for stability. Try straight lines, crosshatch, or echo around designs. -
Bind the quilt
Attach 2½″ binding strips. Machine or hand finish. Miter corners for a clean look. -
Label the quilt
Add a corner label with the recipient’s name, maker, date, and a brief note or quote.
Pro Tips
-
Use woven interfacing — it keeps blocks square and prevents jersey from stretching.
-
Sashing and cornerstones help separate busy graphics and make layouts feel cleaner.
-
Add a border or solid binding to frame your design and pull it all together.
-
Prewash all shirts and press well with steam off to protect prints.
FAQs
Can I use different block sizes?
Yes! Use filler strips, mini blocks, or background fabric to fill gaps mosaic-style.
What if some shirt graphics are smaller than 12″?
Frame them with cotton fabric or add to a block layout with other small elements.
Do I have to use interfacing?
Yes — without it, stretchy T-shirt fabric will pucker and distort your seams.
Story Prompts (Great for journaling or adding in a gift card!)
-
When did you get this shirt?
-
Who were you with?
-
What memory does this represent?
-
If this shirt could talk, what would it say?
Care & Longevity
-
Wash cold, gentle cycle.
-
Tumble dry low or air dry.
-
Avoid high heat — especially on thick screen prints.
SEO Keywords
memory quilt from t-shirts, how to make a t-shirt quilt, beginner t-shirt memory quilt, fusible interfacing for quilt blocks, t-shirt quilt tutorial, how to stabilize t-shirts for quilting, sashing for t-shirt quilt, label ideas for quilts
Long-Tail Phrases
how to make a memory quilt from old t-shirts step by step, how to stabilize jersey knit for t-shirt quilting, beginner-friendly tutorial for custom memory quilt, quilt block layout for shirts of different sizes, how to use woven fusible interfacing for quilt blocks, how to bind and label a quilt made from shirts, sentimental gift ideas using old t-shirts, best batting for memory quilts with stretchy fabric, modern quilt layout for graphic t-shirts, diy t-shirt quilt with sashing and borders


