
Hey everyone. Today you're going to learn how to turn plain white batting into photography reflector and diffuser panels — so your quilt photos come out soft, bright, and true to color.
Here we go. Here's the problem most of us run into. You finish a quilt. You're proud of it. Then you take a picture, and the colors look muddy. Or one corner is in shadow. Harsh window light blows out your whites. Overhead light makes hard, ugly shadows.
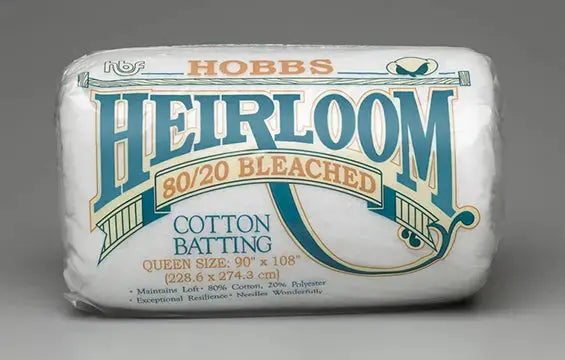
Photographers fix this with two simple tools. A diffuser softens harsh light. A reflector bounces soft light into the shadows. And white 80/20 cotton-poly batting does both jobs beautifully. It's already in your sewing room. It's light, it's matte, and it's white without being shiny. Shiny is the enemy here — you want gentle light, not glare.
Why 80/20? The cotton gives it body and a soft, even surface. The little bit of polyester helps it hold its shape and resist wrinkles. And wrinkles matter. A wrinkle in your panel can show up as a shadow line in your photo. The bleached white version is my pick for this job, because natural batting can lean a little warm and nudge your colors yellow.
Materials
- White 80/20 cotton-poly batting — one craft-size package covers both panels
- Two frames: PVC pipe and elbows, wooden stretcher bars, or a large embroidery-style frame — about 24 x 36 inches is a great starter size
- Binder clips or clothespins for stretching
- Scissors or a rotary cutter and mat
- A second piece of batting, loose, for reflector-only use (no frame needed)
- Optional: a layer of white muslin, if you want an extra-soft diffuser
How to build your panels
- Cut your batting. Cut a piece about 2 inches larger than your frame on all sides. That extra gives you something to grab and pull. Don't stress about perfect edges. Nobody sees the back of the panel.
- Stretch it over the frame. Clip one long side first. Then pull gently across and clip the opposite side. Work your way around. You want it drum-tight and smooth, not saggy. If you see a wrinkle, unclip that corner, smooth it out, and clip again. Takes ten seconds. Worth it.
- Check your loft. One layer of low-loft 80/20 makes a gentle diffuser. Want softer light? Add a second layer. Each layer softens more. Test it and see — completely up to you.
- Set up the diffuser. Bright sun or a strong lamp on one side. Panel between the light and your quilt. Quilt on the other side. The batting spreads that harsh light out so it falls soft and even. It's like moving your quilt from noon sun into nice open shade.
- Set up the reflector. Now put your framed panel — or just a loose piece of white batting — on the shadow side of your quilt, angled toward it. It catches light and bounces it back into the dark areas. No batteries. No cords. Just light doing the work.
- Shoot and compare. Take one photo without the panels. Take one with them. Zoom in on your colors. You'll see it right away. I sure did, the first time I tried this on a quilt with a lot of white in it.
Tips and variations
Pick the right weight for the job. Low-loft batting is your diffuser friend — light passes through it evenly. Save the high-loft scraps for something else; thick, puffy batting blocks too much light and can look blotchy. For a reflector, loft matters less, because you're bouncing light off the surface instead of shining it through.
Mind the color. White batting reflects neutral light. Black batting does the opposite — hold a piece on the shadow side and it deepens shadows for a dramatic product shot. Both tricks live in the same scrap bin. Play with them.
Go frameless for travel. A yard of white batting folds flat in your tote. Drape it over a chair back at a guild show or a friend's house and you've got a reflector anywhere. I keep one in my photo kit right next to the camera stuff, and it also pads the camera bag. Two jobs, one scrap.
Don't prewash for this one. For quilts, prewashing is a whole conversation. For panels, skip it. You want the batting smooth and flat, and washing adds crinkle. A quick pass with a steamer takes out fold lines if yours has been stored folded.
And here's your permission beat, because you know it's coming. Your first photos won't be magazine covers. Mine weren't either. Move the panel six inches. Try again. It's not a race, and you're your own worst critic. If I can do this, y'all can do it.
Alrighty. Thanks for hanging out with me today. Go rescue those quilt photos — the quilts deserve it. We'll see you next time. Bye.
Shop Hobbs Heirloom Bleached 80/20 Batting Package at Linda's Electric Quilters.


