
Glasses get scratched in purses, coat pockets, and glove boxes — usually right after you clean the lenses. A soft quilted case fixes that in under an hour, uses a favorite fat quarter, and is exactly the right size for a stocking. Make one for a reader on your gift list, one for your car sunglasses, and one for yourself.
What You'll Make
One padded, fully lined glasses case, about 4½ by 7½ inches finished — roomy enough for most reading glasses and standard sunglasses, with a soft lining that will not scratch lenses and a simple snap at the top to keep everything inside. It is a friendly first project if you are new to sewing small gifts: straight seams, no zipper, and no binding.
Materials
Seven of the eight items below (88%) come straight from Linda's — links included so you can grab exactly what we used.
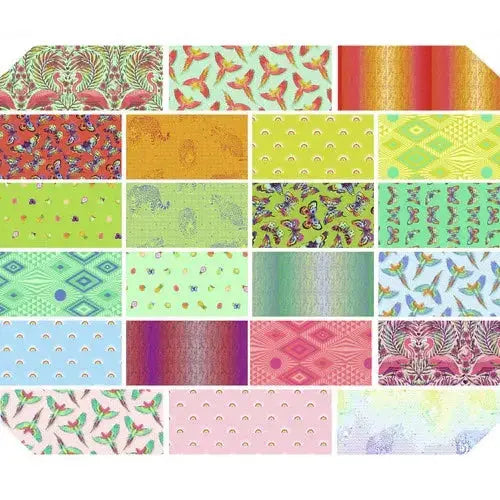
- Tula Pink Daydreamer Fat Quarter Bundle — one fat quarter for the outside; one bundle makes several cases
- White Bella Solids Cotton Wideback Fabric Per Yard — a small piece for the soft lining
- Floriani Heat N Sta Fleece (Fusible) 45" x 1yd — for the padding that protects the lenses
- 900 Sinai King Tut Cotton Thread — for sewing and topstitching
- Olfa Deluxe 45mm Rotary Cutter — for cutting the rectangles cleanly on a cutting mat
- Quilting Corsage Pins — for holding the layers while you sew
- Quilters Perfect Klip It Quilt Binding Clips — to hold the top edge neatly before topstitching
- One small sew-on snap and an iron — snaps are available at most craft stores or your local quilt shop, and the iron you likely already have at home
Steps
- Cut your pieces. Cut two rectangles of the fat-quarter fabric, two of the lining fabric, and two of the fusible fleece, each 5 by 8 inches. Close the rotary cutter blade whenever you set it down. If your sunglasses are extra large, slip them between two cut pieces now and add ½ inch to the width if they feel snug.
- Fuse the fleece. Following the fleece package directions, iron one fleece rectangle to the wrong side of each outer rectangle. Press, do not slide the iron, so the layers bond evenly.
- Sew the outside. Pin the two outer pieces right sides together. Sew down one long side, across the bottom, and up the other long side with a ¼-inch seam, leaving the top open. Backstitch at the start and finish.
- Sew the lining. Pin the two lining pieces right sides together and sew the same three sides, but leave a 2-inch gap in the middle of the bottom seam for turning later.
- Join the two pouches. Turn the outer pouch right side out and smooth the corners out gently with a fingertip or a chopstick — never scissors. Leave the lining wrong side out, slide the outer pouch inside it, and line up the top edges and side seams. Pin or clip all the way around the top.
- Sew the top. Sew around the top edge with a ¼-inch seam, backstitching where you start and stop.
- Turn and close. Pull the whole case right side out through the gap in the lining. Sew the gap closed with a few stitches close to the fold, then push the lining down inside the case.
- Press and topstitch. Roll the top edge gently between your fingers so the seam sits right on the edge, press, and hold it with the clips. Topstitch around the top about ⅛ inch from the edge.
- Add the snap. Mark the center of the top edge, front and back, about ½ inch down from the topstitching. Hand-sew one half of the snap to the lining on each side, knotting securely, and check that the two halves meet.
Tips
Test the fit before you add the snap: your glasses should slide in easily without forcing the side seams. Batch-sew these — cut four or five at once and chain them through each step, and an afternoon turns into a stack of stocking stuffers. A printed outside and a plain, light-colored lining pair nicely, because you can spot your glasses at a glance inside a dark purse. Skip stiff stabilizers; soft padding is the point, and a rigid case is harder to turn.
Where to Get Everything
Start at Linda's: the Daydreamer fat quarter bundle for the outside, White Bella Solids wideback for the lining, Floriani fusible fleece for padding, Sinai King Tut thread, the Olfa rotary cutter, corsage pins, and Klip It clips — 88% of the list. For the rest, a small sew-on snap is an easy find at most craft stores or your local quilt shop.


