
Walk into any quilt shop, and you'll find them—neatly folded, colorful stacks of fabric called fat quarters. This popular pre-cut, typically measuring 18 inches by 22 inches, is a total game-changer for quilters and crafters alike, offering way more creative freedom than a traditional quarter yard. This guide will walk you through everything you need to know to confidently start your next project using this versatile fabric cut.
What Is a Fat Quarter
So, what exactly is a fat quarter? Think of it as a quilter’s secret weapon. It gives you the same amount of fabric as a standard quarter yard, just in a much more useful, squarish shape that is perfect for a huge variety of projects.
Let’s break it down. A yard of quilting cotton is usually about 44 inches wide. If you ask for a standard quarter yard, the shop will cut a 9-inch strip straight across that width, leaving you with a long, skinny piece measuring 9 inches by 44 inches.
But a fat quarter is cut completely differently. To get that signature shape, a full yard of fabric is first cut in half down the middle of its length, creating a piece that’s 36 inches by 22 inches. Then, that piece is cut in half across its width. The result? Two perfectly manageable rectangles measuring roughly 18 inches by 22 inches each. It's this "fatter" dimension that makes all the difference for your projects.
The Shape That Changes Everything
The real magic of a fat quarter is its incredible usability. Born out of the need to solve the waste and frustration caused by skinny quarter yards, this cut became a cornerstone of modern quilting. A narrow 9-inch strip is fine for sashing or borders, but it severely limits your ability to cut larger quilt blocks, often leaving you with awkward, unusable scraps.
A fat quarter, on the other hand, opens up a world of possibilities for your creative projects. You can easily cut a full 12-inch square, a couple of 10-inch squares, or a whole slew of 5-inch charm squares from a single piece with very little waste. This efficiency is a lifesaver, especially for beginners learning to piece their first quilt blocks. You can learn more about how precuts have shaped the craft by exploring modern quilting industry trends.
A skinny quarter yard is like a narrow hallway—you can only go one way. A fat quarter is like a spacious room, giving you the freedom to arrange your furniture (or quilt blocks!) however you want.
This simple shift in how the fabric is cut makes it a must-have for so many projects:
- Building a Stash: It’s the perfect way to collect a wide variety of prints and colors without having to buy a full yard of everything, ensuring you always have inspiration on hand.
- Cutting Efficiency: The squarish shape is far better for cutting the most common quilt block sizes, meaning less fabric ends up in the scrap bin and more goes into your beautiful project.
- Project Versatility: It's the ideal size for everything from complex quilt blocks to small, fun projects like tote bags, zippered pouches, and placemats.
Before we dive deeper, let's look at a side-by-side comparison to really see the difference.
Fat Quarter vs Traditional Quarter Yard at a Glance
| Attribute | Fat Quarter | Traditional Quarter Yard |
|---|---|---|
| Typical Dimensions | 18" x 22" | 9" x 44" |
| Shape | Rectangular, almost square | Long, narrow strip |
| Total Area | 396 square inches | 396 square inches |
| Best For | Quilt blocks, appliqué, medium-sized pattern pieces, building a fabric stash. | Strips, sashing, borders, binding, and small piecing. |
| Cutting Flexibility | High – Can cut larger squares and shapes. | Low – Limited to narrow pieces. |
As you can see, while they have the same total fabric area, how you can use them is worlds apart. The fat quarter is the clear winner for versatility in most quilting projects.
Ready to see for yourself why this cut is a quilter’s best friend? Stocking up on a few curated fat quarter bundles from Linda's is the easiest way to get a perfectly coordinated palette for your next masterpiece.
Visualizing the Cut: How a Yard Becomes a Fat Quarter
Ever stand at the cutting counter and wonder how they magically produce those perfectly chunky fat quarters? It's not magic, just a little bit of smart geometry that unlocks a ton of creative potential for your next project. Once you see how it’s done, you'll walk into a fabric shop with a whole new level of confidence.
Let's start with a fresh bolt of quilting cotton. When you ask for one yard, you're getting a piece that measures 36 inches long and about 44 inches wide (from selvage to selvage). Think of this as your starting block.
From One Yard to Four Fat Quarters
To get to a fat quarter, the first step is to cut that yard of fabric right down the middle lengthwise. This simple slice turns your one yard into two equal pieces, each measuring 18 inches long by 44 inches wide. These are what we call half-yard cuts.
Next, each of those half-yard pieces gets cut in half again, but this time across the width. That second cut divides each 18" x 44" piece into two squarish rectangles. And voilà! You've got four beautiful fat quarters, each measuring approximately 18 inches by 22 inches. This clever method is what gives the fat quarter its wonderfully usable shape.
This simple diagram breaks it down perfectly, showing how one yard of fabric is turned into four fat quarters.
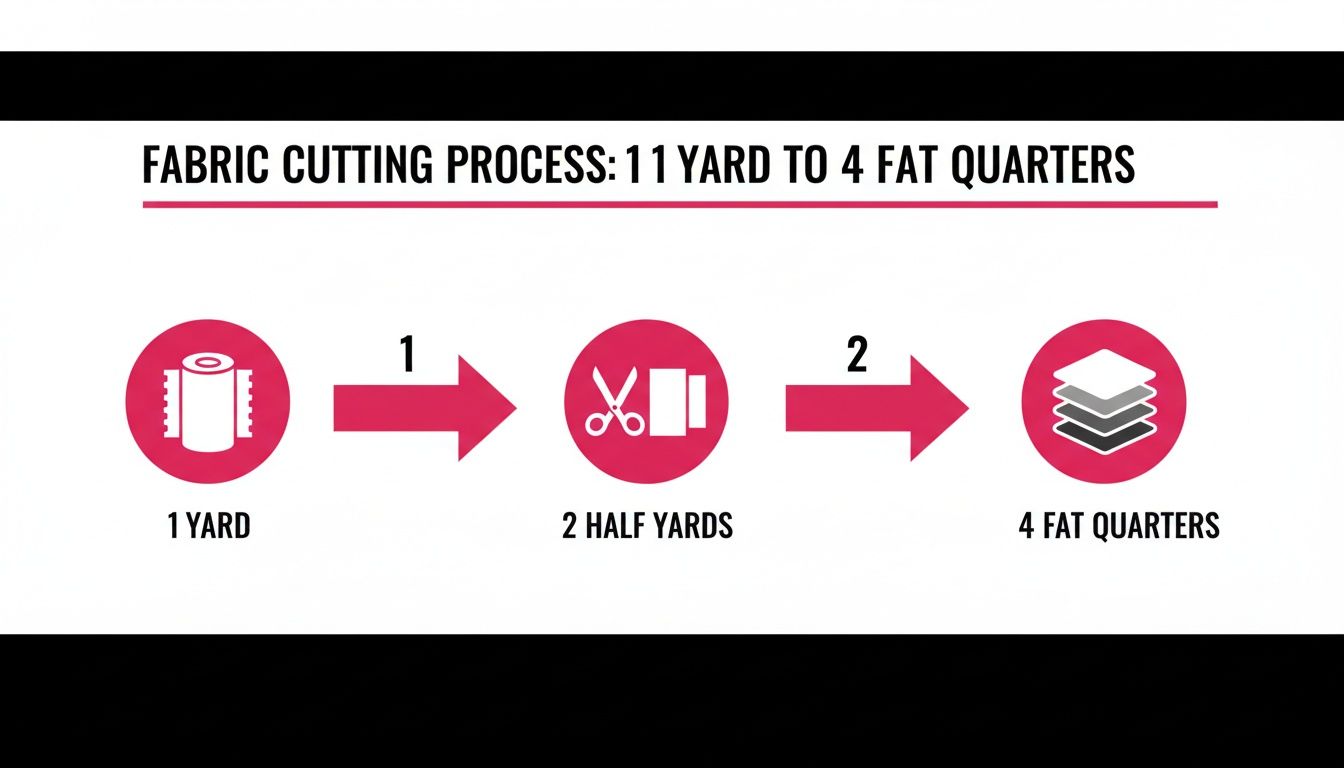
You can see why it's called "fat"—it keeps half the fabric's width, giving you so much more room to play with for your patterns.
Pro Tip: This cutting logic applies to other precuts, too. A fat eighth, for example, is just a fat quarter cut in half, leaving you with a handy 9" x 22" piece.
Why Quilters Love This Cut
This specific cutting method is precisely why the fat quarter is a quilter’s best friend. That 18" x 22" shape—born from halving a half-yard—gives you way more flexibility than a skinny, traditional quarter-yard. It lets you cut larger shapes for all kinds of patterns without ending up with a pile of useless scraps. If you want to dive deeper, you can find more great insights on the versatility of this fabric cut.
Once you understand how a yard becomes four fat quarters, you can start seeing the potential in every piece of fabric. It makes planning your projects and buying fabric so much easier, whether you're getting a single yard to cut yourself or grabbing a gorgeous curated bundle.
Now that you're in on the secret, it’s time for the fun part! Head over to Linda's and explore our amazing selection of high-quality fat quarter bundles to find the perfect inspiration for your next creation.
Unlocking the Cutting Potential of a Fat Quarter
Alright, now for the really fun part—turning that gorgeous fat quarter into the building blocks for your next project. Let's dive into how you can maximize every single inch of that fabric and see why the unique fat quarter size is such a quilter's secret weapon.

That generous 18" x 22" rectangle is so much more than a convenient cut of fabric. It’s a powerhouse. It gives you the real estate to cut larger shapes and blocks that are simply impossible to get from a traditional, skinny quarter-yard. Understanding this is what transforms a humble fat quarter from just another piece of fabric into one of the most versatile tools in your sewing room.
From One Fat Quarter to Many Possibilities
A single fat quarter can be sliced and diced into the most popular precut sizes with barely any waste. The whole reason fat quarters were invented was to solve the problem of the old 9" x 44" quarter-yard cuts, which were great for strips but not much else. The fat quarter's design lets you cut bigger, more useful pieces for modern quilt patterns, slashing your scrap pile by up to 50% in many cases. You can read more on how precuts revolutionized quilting efficiency if you want to go down that rabbit hole!
So, what can you actually get from just one piece for your project?
- Charm Squares: You can easily get twelve perfect 5" x 5" squares, which are the bread and butter of so many patchwork projects.
- Layer Cake Squares: You can cut two 10" x 10" squares, the foundation for tons of larger, more complex quilt blocks.
- Jelly Roll Strips: It’s possible to cut seven 2.5" x 22" strips, perfect for sashing, bindings, or those fun strip-pieced quilts.
This incredible flexibility makes the fat quarter size a smart and economical way to build a fabric stash that you’ll actually use.
The secret to a fat quarter's value isn't just its area—it's the shape. That extra width opens the door to cutting block sizes and appliqué shapes that a narrow quarter yard simply can't accommodate, giving you true creative freedom.
Visualizing Your Cuts
Think of your fat quarter as a blank canvas for your project. Before you even pick up your rotary cutter, a little planning goes a long way to making sure almost every bit of that beautiful fabric ends up in your project, not the scrap bin.
For instance, if your pattern needs two 10" squares, you can make one clean cut at the 10-inch mark along the 22-inch side. This leaves you with two 10" x 18" pieces, which you can easily trim down, plus you get a bonus 2" x 18" strip for free!
This is the kind of smart cutting that unlocks the true value of every fat quarter. It’s how quilters create those stunning, intricate designs without having to buy yards and yards of extra fabric, saving both money and material.
Ready to start cutting? First, you need the perfect fabric for your project. Go explore the gorgeous curated fat quarter bundles at Linda's to find a palette that sparks your creativity and put these techniques into practice.
How Many Fat Quarters You Need for Your Quilt
The spark of a new quilt idea is thrilling, but it almost always leads to that one big question: "How much fabric do I actually need for this project?" Figuring this out ahead of time is the secret to shopping with a plan, staying on budget, and avoiding that dreaded mid-project fabric run.
Let’s get into the simple quilt math that makes it all click. The number of fat quarters you'll need really comes down to two things: the finished size of your quilt and the size of the blocks you're cutting. Just one fat quarter can give you at least two 10" x 10" squares or a whopping twelve 5" x 5" squares. You can see how quickly a quilt top comes together—that's the real magic of the fat quarter size.
Estimated Fat Quarters Needed for Common Quilt Sizes
To help you get started on your next project, we've put together a quick reference guide. This table gives you a solid estimate for the most common quilt sizes, assuming a simple patchwork top without any fancy sashing or borders. Think of these numbers as your starting point.
| Quilt Size | Approximate Dimensions | Estimated Fat Quarters Needed |
|---|---|---|
| Baby | 36" x 52" | 12 - 16 Fat Quarters |
| Throw | 52" x 64" | 24 - 30 Fat Quarters |
| Twin | 70" x 90" | 35 - 45 Fat Quarters |
| Queen | 90" x 108" | 50 - 60 Fat Quarters |
| King | 110" x 108" | 60 - 70 Fat Quarters |
Remember, these estimates are just for the quilt top. You’ll still need to grab extra yardage for your backing and binding, and a little more if you decide to add sashing between your blocks.
The Quilter's Golden Rule
Ask any experienced quilter, and they’ll tell you the same thing. It’s a lesson every one of us learns, sometimes the hard way: always buy a little extra.
A couple of extra fat quarters are your safety net for any cutting mistakes, design changes, or last-minute inspirations. It’s far less stressful to have a little extra than to run out of a fabric you can no longer find.
Think of it as your project's insurance policy. That extra fabric is what saves you from the panic of a miscut or the sudden realization that your pattern needs just one more block to look perfect. It gives you the freedom to create without worrying about running out.
With this guide in hand, you’re ready to plan your next quilt with total confidence. A great place to start is by browsing the beautifully curated fat quarter bundles at Linda's. It’s the easiest way to get a palette you love, with all the fabrics you need to bring your project to life.
Creative Projects Beyond the Quilt Block
Think fat quarters are just for quilts? Think again! While they're the perfect building blocks for a stunning quilt top, their handy size makes them a go-to for a whole world of smaller, satisfying projects. This is where that fabric stash you’ve been lovingly collecting really gets to shine.
The generous 18" x 22" dimensions give you just enough fabric for a quick and rewarding make. It’s the perfect amount for those projects that need more than a scrap but less than a full yard, letting you dip into your favorite prints without committing to a massive undertaking.
Quick and Creative Fat Quarter Ideas
Diving into a smaller project is a fantastic way to try out new techniques, play with bold fabric combinations, or just enjoy the thrill of a fast finish. The rectangular shape of a fat quarter is perfectly suited for items that need a bit of structure and surface area.
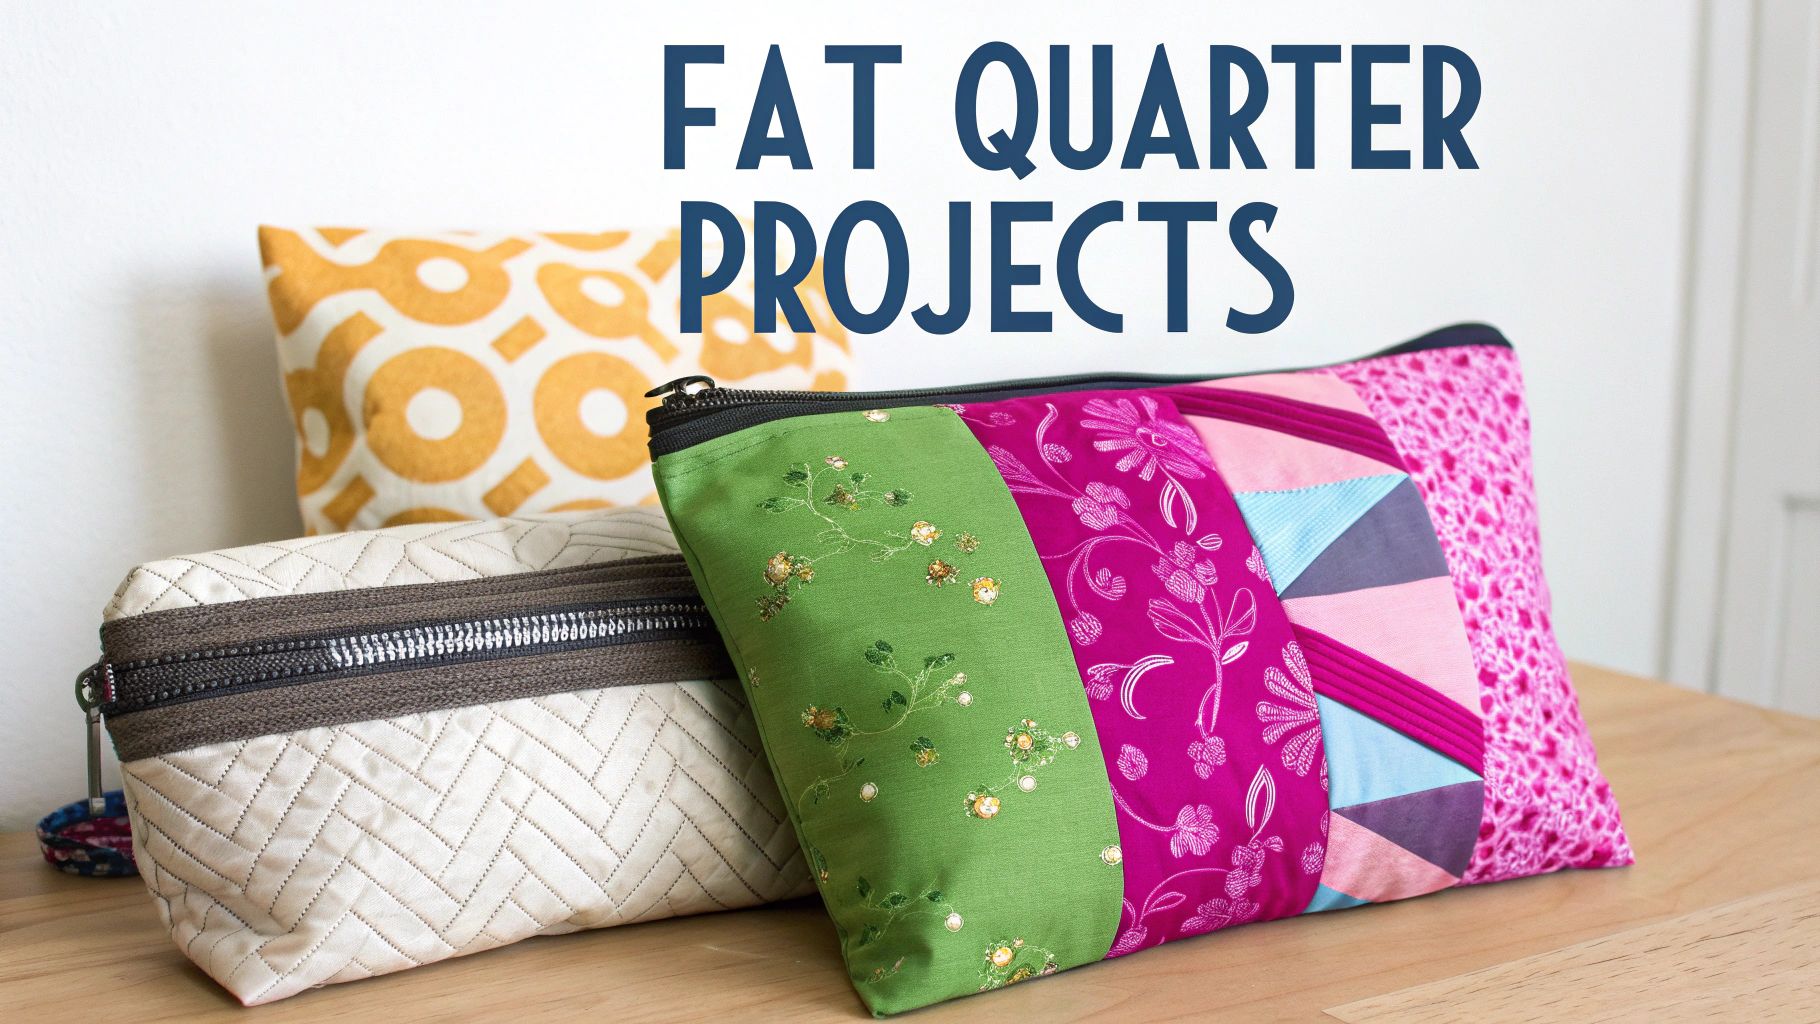
Here are just a few project ideas that put the fat quarter size to brilliant use:
- Stylish Tote Bags: A single fat quarter is often just right for one side of a small tote. Grab two coordinating fat quarters for a beautiful exterior, and a couple more to create a fun, contrasting lining.
- Chic Zipper Pouches: This is probably one of the most popular ways to use a single fat quarter. There's plenty of fabric to cut both the outside and lining pieces for a cute makeup bag or pencil case.
- Custom Placemats: Instantly brighten up your dining table! A fat quarter gives you the perfect dimensions for a standard placemat top, making it super easy to whip up a matching set.
- Decorative Throw Pillows: You can create an 18-inch pillow cover front with just one fat quarter. It’s such an affordable way to switch up your home decor for every season.
Using a fat quarter for a small project is like painting a miniature masterpiece. It lets you focus on the details, perfect a new skill like installing a zipper, and walk away with a beautiful, functional item in just one afternoon.
Each of these ideas shows off the real value of having a diverse stash. They're quick, don't require a mountain of materials, and give you that wonderful feeling of accomplishment.
Ready to bring one of these fun projects to life? Every great make needs the right finishing touches. Explore the amazing selection of high-quality threads, zippers, and notions at Linda's to find everything you need to complete your next masterpiece.
How to Build and Organize Your Fabric Stash
For any quilter, a fabric stash is more than just a pile of cloth—it’s a personal library of potential, an artist's palette just waiting for the next great project idea. Growing that collection is one of the real joys of quilting, and fat quarters are, hands down, the best way to do it.
So, how do you start building your dream stash? There are really two ways to go about it. Buying curated fat quarter bundles is an amazing shortcut. You get a perfectly coordinated stack from a single designer’s collection, which guarantees your project will have that professional, cohesive look right out of the gate.
The other path is to hunt and gather individual fat quarters yourself. This is how you really develop your own unique aesthetic. It lets you snag that one-of-a-kind print that just speaks to you, fill in color gaps in your collection, or collect specific themes over time. Honestly, most of us do a little bit of both!
Simple Organization for a Usable Stash
Once you start bringing fabric home, keeping it organized is the secret to actually using it in your projects. It’s easy to get overwhelmed by a messy pile, but a simple system can make finding that perfect piece a total breeze.
A well-organized stash invites you to create. When you can see what you have, you're more likely to dive in and start a new project instead of feeling paralyzed by the clutter.
Ready to get sorted? Here are a few easy methods quilters swear by:
- By Color: This is the most popular method for a reason! Fold your fat quarters neatly and arrange them in rainbow order. It makes pulling fabrics for a color-specific quilt ridiculously fast and fun.
- By Designer or Collection: If you're a fan of certain designers, keeping their collections together is a great way to preserve the intended color story for a future project.
- By Theme: It can also be super helpful to create separate bins for things like florals, geometrics, holiday prints, or novelty fabrics.
To keep your growing fabric hoard tidy and easy to get to, check out some effective storage solutions like clear storage bins with lids. They keep the dust off while letting you see your beautiful collection at a glance.
Building your stash should always be fun, never a chore. Keep an eye out for special promotions at Linda’s—it's the perfect time to add gorgeous, high-quality fabrics to your library without breaking the bank, so you're always ready for your next project.
Frequently Asked Questions About Fat Quarters
Even after all that, you might still have a few questions rattling around. It's totally normal! Let’s walk through some of the most common things quilters ask about fat quarters, so you can snip and sew with absolute confidence.
Is a Fat Quarter the Same as a Quarter Yard of Fabric
Nope, and this is probably the biggest point of confusion for new quilters! While they are technically the same amount of fabric, their shapes are worlds apart. A standard quarter yard is a long, skinny piece that’s typically 9" x 44". A fat quarter, on the other hand, is cut into a much more useful rectangle, coming in at about 18" x 22".
That "fatter" shape is precisely why the fat quarter size is a quilter's best friend. It gives you the width you need to cut larger squares and other shapes that modern quilt patterns often call for.
Should I Pre-Wash My Fat Quarters Before Use
Ah, the great debate! Honestly, there’s no single right answer, and experienced quilters fall into both camps. Many will pre-wash everything to get any potential shrinkage out of the way and to prevent bold colors (I'm looking at you, deep reds and navy blues!) from bleeding onto lighter fabrics.
On the flip side, some quilters love the crisp, straight-from-the-bolt feel of unwashed fabric. It has a certain stiffness that can make rotary cutting a bit easier and more precise.
The best advice I can give is to be consistent. If you wash one fabric for a project, wash them all. This ensures all your pieces will shrink (or not shrink) at the same rate and play nicely together in the final quilt.
If you’re worried about colors running but don't want to pre-wash, you can always toss a color catcher sheet in with your finished quilt during its first wash. It's great peace of mind!
Why Are Fat Quarters So Often Sold in Bundles
This is one of my favorite things about them! Fabric designers release entire collections where every print is designed to coordinate perfectly. Bundles are a genius way for shops to offer you a little piece of every single print in that collection.
It means you get a perfectly curated palette to work with, guaranteeing your project will look cohesive and professionally designed. Plus, it's a super affordable way to build your stash with a ton of variety without having to buy a half-yard of every single print. It’s like a creative jump-start for your next project!
Hopefully, those answers clear things up! Now you're ready to dive into that next project without hesitation. The amazing team here at Linda's Electric Quilters is always ready to help you find whatever you need, from gorgeous fabrics to the right tools for the job.
Explore our incredible selection of quilting supplies at Lindas.com today!


