When you're dreaming up a new quilting project, getting the dimensions just right is the first step to ensuring it looks perfect on the bed. For a queen size quilt, the go-to standard measurement is typically 90 inches by 108 inches.
This size is designed to give you a beautiful, generous drape over a standard queen mattress, which measures 60 inches by 80 inches, making sure your entire project perfectly covers the bed.
Your Quick Reference for Queen Size Quilt Dimensions
Starting a new quilting project means getting your numbers straight from the get-go. Nailing down the correct queen quilt dimensions is the foundation for a finished piece that fits exactly how you envisioned, whether you're aiming for a cozy comforter or a dramatic, floor-sweeping showpiece.
Knowing these basic measurements upfront saves you a ton of time and helps you buy the right amount of fabric and batting. First things first, you have to know the size of the bed you're working with. Getting familiar with a standard queen mattress size is the starting point for all your other project calculations.
Standard Measurements at a Glance
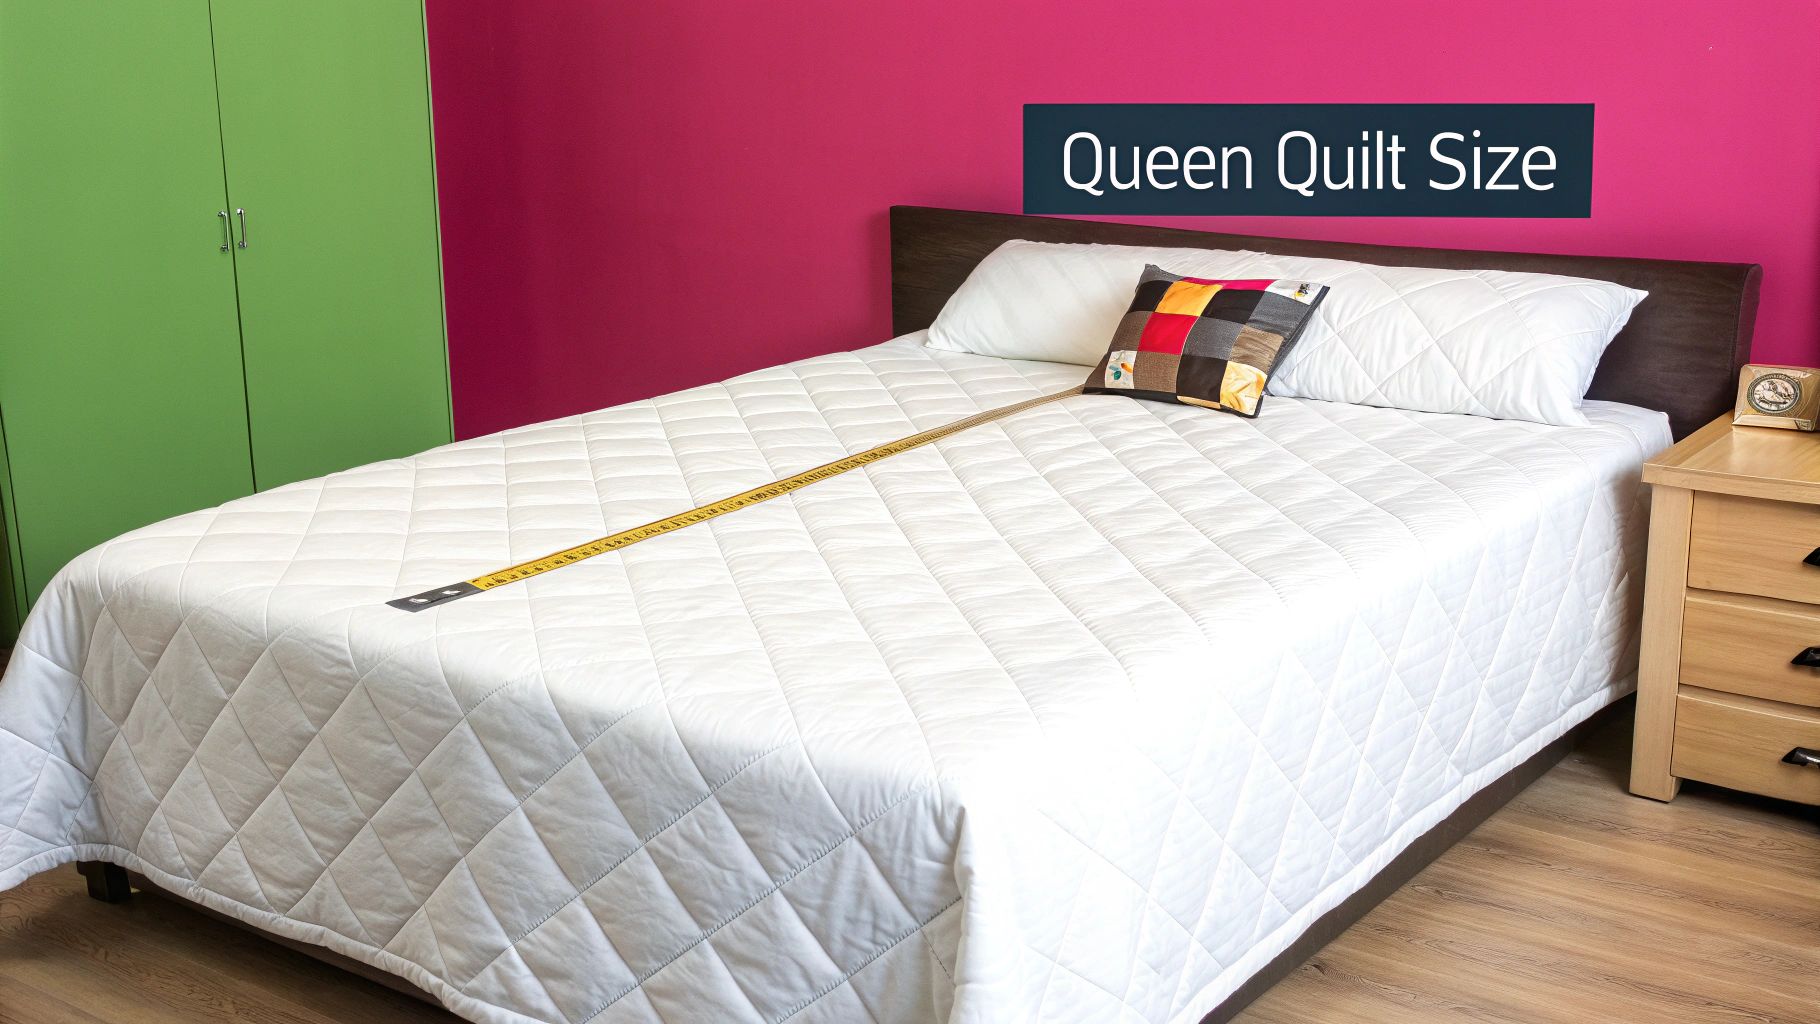
For most projects, a few key numbers will give you a reliable baseline. A typical queen quilt measuring 90 inches by 108 inches is designed to drape perfectly over a standard 60-inch by 80-inch queen mattress. This gives you about 15 inches of overhang on each side and a generous 14-inch drop at the foot for that luxurious, fully-covered look.
This diagram is a great way to visualize how the mattress, quilt top, and drape all work together in your project.
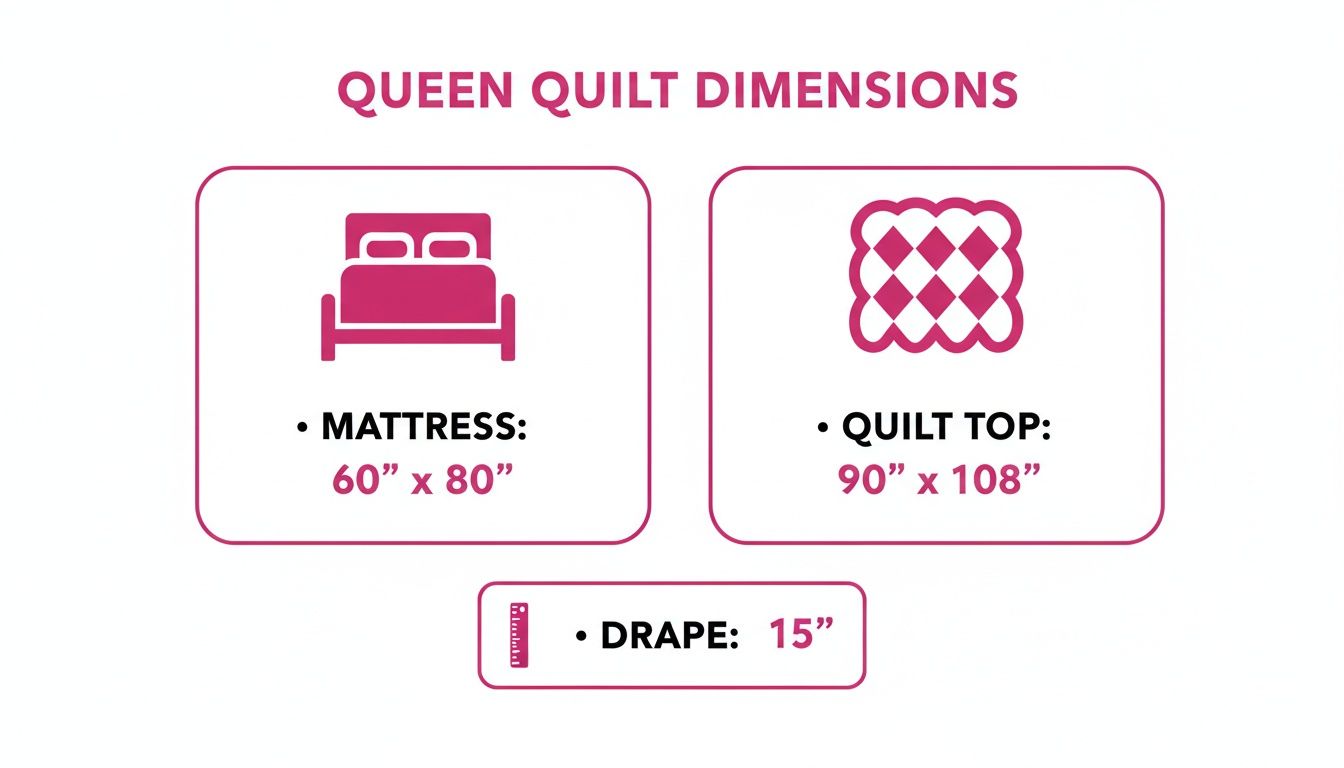
As you can see, the 90" x 108" quilt top gives you a 15-inch drape on the sides of a 60" wide mattress. That’s usually ideal for covering mattresses that are up to 12-14 inches deep.
To make things even easier, here's a quick cheat sheet for the standard components of a queen size quilt project. This table lays out the typical sizes you'll need for each layer, assuming your mattress is about 12 inches thick.
Standard Queen Quilt Component Dimensions
| Quilt Component | Standard Dimension (Inches) |
|---|---|
| Finished Quilt Top | 90" x 108" |
| Batting | 94" x 112" |
| Quilt Backing | 98" x 116" |
Remember, these numbers give you that crucial extra material around the edges for quilting and binding, so you aren't left short at the end of your project. They're a solid starting point for any creative endeavor.
With these key numbers in hand, you're all set to start gathering your materials! At Linda's, we have a beautiful selection of fabrics, pre-cut batting, and all the coordinating threads you need to create a quilt that fits your bed flawlessly. Stop by to get everything you need to finish your project!
Why Standard Dimensions May Not Fit Your Bed
While the classic 90" x 108" is a fantastic starting point for a queen quilt project, you might find it just doesn't quite work for your bed. Bed styles and mattresses have changed a lot over the years. What used to be a standard depth is now all over the map, which is why so many of us quilters end up making custom-sized quilts to get that perfect, polished look.
The number one reason for this is mattress depth. A few years ago, a 10-12 inch deep mattress was the norm. But today, with plush pillow-tops and cushy Euro-top models, it’s common to see mattresses that are 14 to 18 inches deep, or even more. Toss a 2- to 4-inch mattress topper on there for extra comfort, and you've added significant height that a standard quilt just wasn't designed to handle.
This is where a standard-size quilt can fall short—literally. That 15-inch side drop suddenly isn't long enough to cover the sides of your deep mattress, leaving the box spring or bed frame peeking out from underneath. Not the look we're going for in our finished project!
Planning the Perfect Quilt Drop
The "drop" is simply how far your quilt hangs down from the top edge of the mattress. Figuring out your ideal drop is where you can really start to personalize your quilt's dimensions to match your style. You've got a few great options for your project:
- Cover the Mattress: A shorter drop that just skims the bottom of the mattress offers a clean, modern look. This works especially well on platform beds where you want to show off that beautiful frame.
- Reach the Box Spring: This is probably the most common goal for quilters. The drop needs to be just long enough to completely hide the mattress, meeting the top of the box spring or bed rails for a tidy finish.
- Drape to the Floor: For a truly grand and traditional feel, design a quilt that drapes all the way to the floor. It’s a luxurious look that completely conceals the bed frame and makes a real statement.
Adding a Luxurious Pillow Tuck
Another detail to consider for your project is the pillow tuck. This is where you add extra length to the top of your quilt—usually between 10 to 20 inches—so you can fold it back over your pillows. It creates that tidy, "hotel-style" finish that looks so inviting. It’s not just for looks, either; it helps keep your pillows clean and covered.
A pillow tuck is one of my favorite tricks for making a bed look professionally styled. That little bit of extra length creates a seamless, welcoming appearance that elevates the whole room.
When you start factoring in a custom drop and a pillow tuck, it becomes clear why standard measurements are just a guide. Taking a few moments to measure your own bed and decide on these stylistic touches is the most critical step in making a quilt you'll absolutely love. Once you nail down your ideal dimensions, you can shop for all the beautiful fabrics and quality batting you need right here at Linda's with total confidence.
How to Measure Your Bed for a Custom Fit
If you want a quilt that looks like it was made just for your bed, you have to ditch the standard queen sizes and pull out a measuring tape. It’s a quick step that makes all the difference between a quilt that fits and one that looks truly custom and drapes perfectly. Taking a few minutes to measure will save you from the disappointment of a finished quilt that’s too short or hangs awkwardly.
The whole process is pretty simple—all you need is a flexible measuring tape and a notepad. Before you even think about fabric for your project, you need to know your bed's true measurements. If you're not even sure what size bed you have, this handy guide on choosing the perfect bed size is a great place to start.
Step 1: Gather Your Key Measurements
First things first, strip the bed. Get it down to just the mattress and any toppers or pads you use every day. Don't skip this part! Those extra layers can add a surprising amount of height, and you need that number to be accurate for your quilt project.
Now, grab your tape measure and get these three measurements:
- Mattress Width: Measure across the top of your mattress, from the left edge to the right edge.
- Mattress Length: Measure from the very head of the mattress down to the foot.
- Mattress Depth: Measure from the top seam of your mattress down to the bottom seam. If you have a plush topper, measure from the top of that topper all the way down to the bottom of the mattress.
Jot these down. A standard queen should be around 60 inches by 80 inches for width and length, but that depth measurement can be all over the place.
Step 2: Determine Your Ideal Quilt Drop
Next, you need to decide how far you want the quilt to hang down the sides of the bed. We call this the "drop." To figure this out, measure from the top edge of your mattress down to wherever you want the quilt to end. Maybe you want it to just cover the mattress, or maybe you want it to hide the box spring or go all the way to the floor. It's your call for this project.
Example: Let's say your mattress is 14 inches deep, and you want the quilt to cover both the mattress and the 2-inch bed rail it sits on. Your ideal drop would be 16 inches (14" + 2").
This drop measurement is what really personalizes your quilt’s fit.
Step 3: Calculate Your Final Quilt Dimensions
Alright, time for a little math to pull it all together. This simple formula will give you the finished dimensions for your quilt top.
-
To find your quilt width:
(Mattress Width) + (Desired Drop x 2) = Final Quilt Width -
To find your quilt length:
(Mattress Length) + (Desired Drop) = Final Quilt Length
Notice you only add the drop once to the length—that’s because you don’t need it hanging off the head of the bed where your pillows go. If you want to include a generous pillow tuck in your project, you'll want to add an extra 10 to 20 inches to your final length.
Let's walk through an example with the numbers from before:
- Mattress Width: 60"
- Mattress Length: 80"
- Desired Drop: 16"
Width Calculation: 60" + (16" x 2) = 92 inches
Length Calculation: 80" + 16" = 96 inches
There you have it! Your custom quilt top size is 92" x 96". With these exact numbers in hand, you can confidently shop for the perfect amount of fabric and the right size batting here at Linda's to get your project started.
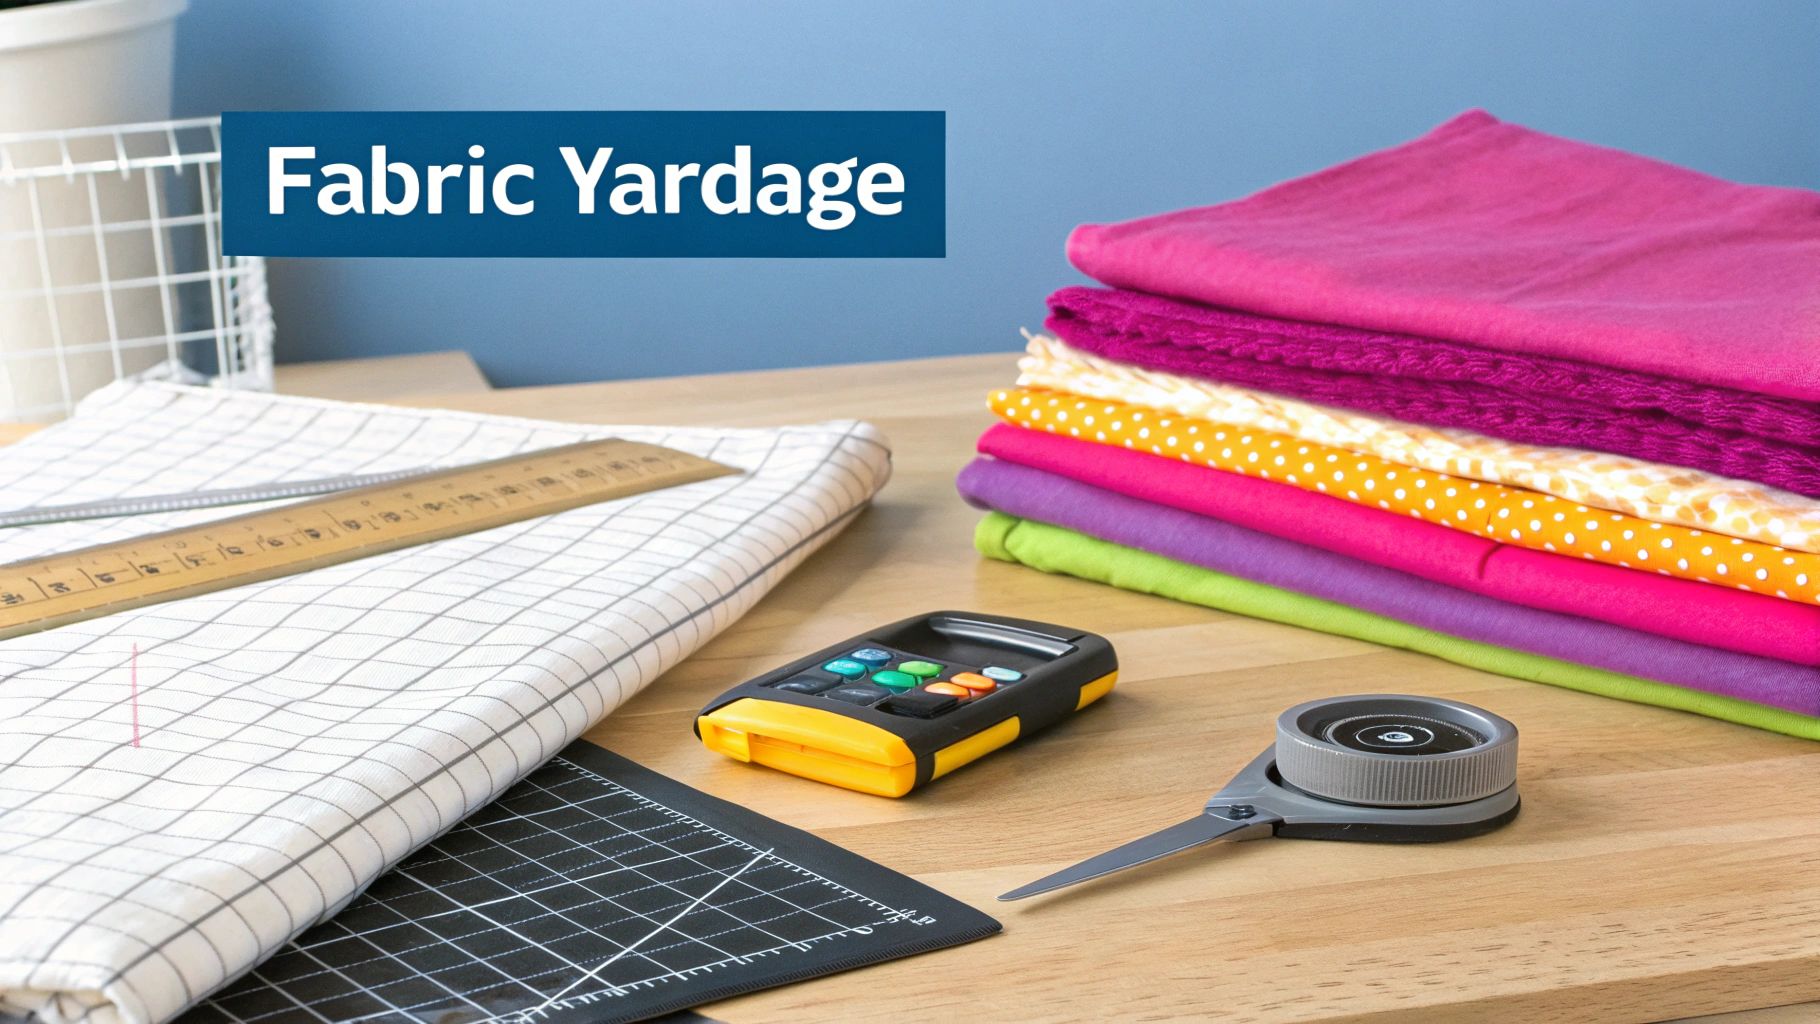
Calculating Fabric Needs for Backing and Binding
Okay, you've nailed down the perfect dimensions for your queen quilt top. What's next? Time for a little bit of quilter's math to figure out exactly how much fabric you'll need for your backing and binding. We've all been there—that sinking feeling when you run out of fabric halfway through a project. A few simple calculations up front will save you that headache and a last-minute trip to the fabric store.
Getting these numbers right isn’t just about avoiding stress; it’s about giving your quilt that beautifully polished, professional look. The backing is your quilt's foundation, and the binding is the final frame for all your hard work. Let's make sure they're perfect.

Calculating Your Quilt Backing Yardage
Your backing fabric always needs to be bigger than your quilt top. This isn't optional—it's essential for the quilting process. The golden rule is to add 4 inches of overage on all four sides. We call this extra bit "quilter's grace," and it gives your longarmer (or you!) the room needed to load the quilt onto the frame and manage any shifting or shrinkage that happens during quilting.
So, the formula is simple:
- Backing Width: Quilt Top Width + 8 inches
- Backing Length: Quilt Top Length + 8 inches
Let's say your finished quilt top is 92" x 96". Your backing fabric needs to be 100" x 104". Trust me, this buffer is non-negotiable if you want a smooth, pucker-free finish on your project.
Most quilting cottons come on a bolt that's 42-44 inches wide, what we call Width of Fabric (WOF). That's obviously not wide enough for a queen quilt, which means you'll need to piece the backing. Here’s how to figure out your yardage.
Using our 100" x 104" backing example:
- Decide on Seam Direction: You can piece your fabric with vertical or horizontal seams. It's smart to calculate both ways to see which one uses less fabric. For this walkthrough, we'll go with vertical seams.
- Figure Out How Many WOF Pieces: Divide the backing width you need by your fabric's width. (100" ÷ 42" = 2.38). You can't use a partial piece, so you'll have to round up to 3 full lengths of fabric, which you'll sew together side-by-side.
- Calculate Total Yardage: Each of those three pieces needs to be 104 inches long. So, multiply the number of pieces by the length (3 pieces x 104" = 312"). To turn that into yards, just divide by 36 inches (312" ÷ 36" = 8.67 yards). It's always best to round up, so you should buy 8.75 yards of fabric for your project.
To make things easier, here's a quick reference table for common queen quilt sizes.
Fabric Yardage Estimates for Queen Quilt Backing
This table gives you a ballpark idea of how much standard 44-inch wide fabric you'll need for different queen-sized quilt projects.
| Finished Quilt Size (Width x Length) | Required Backing Size (with 4" overage) | Estimated Fabric Yardage (44" WOF) |
|---|---|---|
| 90" x 90" | 98" x 98" | 8.25 yards |
| 92" x 96" | 100" x 104" | 8.75 yards |
| 96" x 108" | 104" x 116" | 9.75 yards |
| 100" x 112" | 108" x 120" | 10.0 yards |
Remember, these are estimates! Always do your own math based on the actual width of the fabric you purchase for your project.
Calculating Your Binding Fabric
Binding is that final, satisfying step that encloses all the raw edges of your quilt project. The math here is pretty straightforward and is based on the perimeter of your quilt.
-
Find the Perimeter: Add up the lengths of all four sides of your finished quilt top.
- (92" + 92" + 96" + 96") = 376 inches
-
Add a Little Extra: I always add another 10-15 inches to this number. You'll need it for neatly turning the corners and joining the ends of your binding strip.
- 376" + 15" = 391 inches
-
Determine How Many Strips: Most quilters cut their binding strips 2.5 inches wide. To find out how many you need, divide your total length by the usable width of your fabric (which is usually around 40-42 inches after you trim off the selvages).
- 391" ÷ 42" = 9.3 strips. Again, always round up, so you'll need to cut 10 strips.
-
Calculate Final Yardage: Multiply the number of strips by how wide you're cutting them (10 strips x 2.5" = 25"). This means you need a piece of fabric that's 25 inches long. A 0.75-yard cut will give you plenty to work with for your project.
Now that you have your numbers, you're all set to pick out the perfect fabrics. For a fantastic selection of high-quality quilting cottons that will bring your project to life, check out the collection at Linda's Electric Quilters.
Choosing the Right Batting for Your Quilt Project
Think of batting as the heart of your quilt. It's that hidden middle layer—sometimes called wadding—that gives your quilt its warmth, its weight, and its unique personality. Getting this choice right can completely change the final look and feel of your project, so it’s worth taking a moment to consider your options.
The batting you select will determine how your quilt drapes over a bed and how much your beautiful quilting stitches pop. It's every bit as crucial as your fabric and thread in bringing your vision to life.
Comparing Common Batting Fibers
Every fiber offers something a little different, and honestly, the "best" choice often just comes down to what you want from the finished quilt. Each type plays with your fabric and stitching in its own way, impacting your final project.
- Cotton Batting: This is the go-to classic for a reason. It gives you a soft, natural, low-loft feel, creating that flat, traditional look we all love. A 100% cotton batting is beautifully breathable, perfect for a quilt you'll use all year, and it just gets softer with every wash.
- Wool Batting: If you’re chasing warmth without the bulk for your project, wool is your answer. It’s wonderfully light and airy but packs a punch when it comes to insulation. Wool also has a natural springiness that gives your quilting stitches gorgeous definition.
- Polyester Batting: Known for its high loft and resilience, polyester is fantastic for creating those puffy, dimensional quilts. It’s a workhorse—resisting mold and mildew, holding its shape wash after wash, and it’s usually easier on the wallet.
- Blends (Cotton/Poly): An 80/20 cotton/polyester blend really does offer the best of both worlds. You get the soft, breathable nature of cotton paired with the strength and stability of polyester. It’s no wonder this is one of the most popular choices for all kinds of quilting projects.
Understanding Loft and Quilting Distance
Beyond the fiber itself, you’ll want to pay attention to two key specs for your project: loft and quilting distance. Loft is just a fancy word for the batting's thickness or puffiness. Low-loft creates a flatter, more antique-style quilt, while high-loft gives you that plush, comforter-like feel with really pronounced stitches.
Just as important is the recommended quilting distance you’ll find printed on the batting package. This number is the maximum space you can leave between quilting lines before the batting starts to shift or bunch up inside your quilt. Sticking to this guideline is absolutely essential for making a project that lasts.
The sheer popularity of queen size beds has a huge impact on what’s available. In fact, current trends in the quilting world show that 40% of all pre-cut batting sales are in queen dimensions. That tells you a lot about its importance for both home quilters and big manufacturers. You can find more fascinating insights on quilt size trends over at NectarSleep.com.
If you want a truly no-fuss solution that saves time and guarantees a perfect fit, consider grabbing a pre-cut queen size batting. Here at Linda's, we have options that let you skip the measuring and cutting so you can get right to the fun part—the quilting! Explore our selection of high-quality batting to find the perfect foundation for your next masterpiece.
How to Account for Shrinkage and Quilting Draw in Your Project
You’ve done all the math and figured out the perfect custom dimensions for your queen quilt project. But hold on—there are two sneaky culprits that can shrink your project right before your eyes: fabric shrinkage and quilting draw. Honestly, learning to plan for these is what separates a good quilt from a great one, making sure your finished quilt is the exact size you intended.
First up is shrinkage. This almost always comes from your fabric, especially 100% cottons. They’re notorious for shrinking about 3-5% on average during that first trip through the washer and dryer. This is exactly why so many seasoned quilters swear by pre-washing their fabric. It gets all that shrinking out of the way before you ever make a cut, so your perfectly pieced blocks stay true to size.
Understanding Quilting Draw
The second thing to watch out for is quilting draw, which some people call "pull-in." This happens when you add your quilting stitches through the quilt sandwich (top, batting, and backing). Every single stitch pulls the layers just a tiny bit tighter, causing the whole project to contract.
The more dense your quilting, the more draw you'll get. A simple stitch-in-the-ditch design will have very little pull-in. But if you're planning a complex, all-over stipple or some beautiful custom free-motion work, you could easily lose an inch or more on all sides.
As a general rule, expect your quilt to shrink by at least one inch in both length and width from quilting draw. For really dense quilting, plan for even more.
The best way to fight this is to build a small buffer into your initial measurements from the get-go. When you cut your quilt top, batting, and backing, adding an extra inch or two gives you a fantastic safety net. This small addition easily makes up for the pull-in from the quilting, ensuring your quilt still fits the bed perfectly after that final stitch is made.
Best Practices for Managing Shrinkage
Here are a few tips I always follow to manage these variables and get a perfectly sized quilt every time:
- Pre-Wash Your Fabrics: Just do it. Wash and dry all your quilting cottons before you start your project. This stabilizes the fabric and saves you from unpleasant surprises down the road.
- Add a Buffer: When you cut, add 1-2 inches to your planned quilt top dimensions to account for quilting draw. You’ll be glad you did.
- Consider Your Batting: Don't forget the batting! Some types, especially cotton, can also shrink. Always check the packaging—some manufacturers note shrinkage of up to 5%.
By planning for these little shifts, you stay in complete control over your final queen size quilt dimensions. Now that you've got every detail covered, you're ready to find the perfect materials. Explore the amazing selection of high-quality fabrics and batting at Linda's Electric Quilters to bring your project to life.
Common Questions About Queen Quilt Dimensions
Even the most seasoned quilters run into questions mid-project. It happens. When you're deep in the weeds of getting your queen quilt dimensions just right, having a quick answer can save you a lot of headaches (and seam ripping!). Let's clear up some of the most common questions I hear.
One of the big ones is whether a standard queen quilt will work on a California queen bed. The short answer is no, not really. A California queen mattress is longer and a bit narrower (60" x 84"), so your standard quilt will come up short. This is why our first step in any project is always to measure your specific bed first!
Then there's the question of the perfect "drop." Honestly, this comes down to personal taste, but a good rule of thumb is to make sure the quilt covers the mattress sides and the box spring or bed frame. This gives your project that clean, professional look without the quilt puddling on the floor.
Finding the Right Fit and Fabric
"So, what size is actually the best for a queen bed?" I get this one a lot. The most common recommendation you'll see across the quilting world in the US is 90 x 108 inches. This size gives you a generous 15-inch drop on both sides and the foot, which is perfect for most modern mattresses (usually between 7-15 inches deep). It also leaves enough fabric for a nice pillow tuck. You can discover more insights about quilt sizes to see how the community landed on these standards.
Pro Tip: Don't be afraid to think outside the box for your backing! A high-quality, high-thread-count bed sheet can be a fantastic, budget-friendly option for your project. They're often wide enough to use without piecing, which is a huge time-saver.
Finally, let's clear up some terminology. What’s the real difference between a quilt, a comforter, and a coverlet? It’s a good question.
- Quilt: What we do! It's a three-layer sandwich (top, batting, back) held together with stitching that creates the beautiful patterns we love.
- Comforter: This is usually much puffier than a quilt. It's filled with down or synthetic fluff and has minimal stitching—just enough to keep the filling from shifting around.
- Coverlet: Think of this as a lightweight, decorative bedspread. It's often woven rather than quilted and is meant to be a thin top layer.
Knowing these little distinctions helps you talk the talk and clarify exactly what beautiful project you're bringing to life.
Now that you have all the answers for nailing your queen size quilt dimensions, you're ready for the best part—getting your supplies! Linda's Electric Quilters has everything you need to bring your vision to life, from gorgeous fabrics and premium batting to the perfect coordinating threads.


