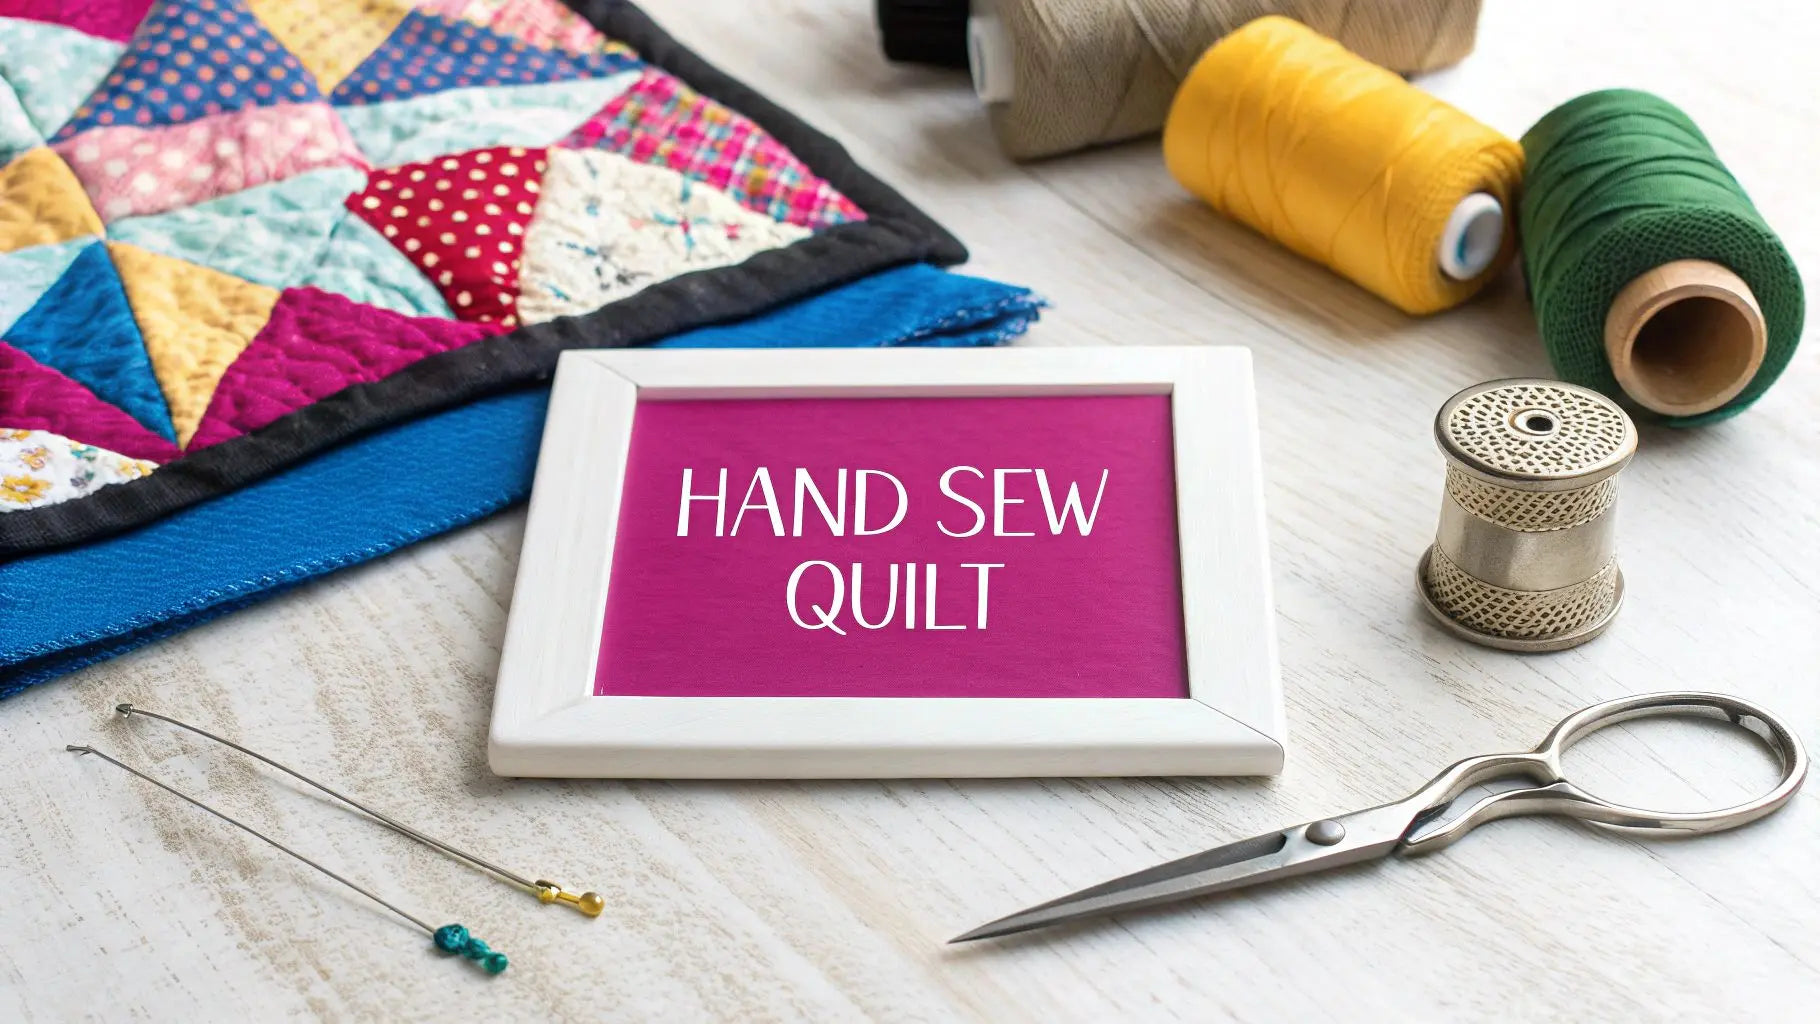
There's something incredibly special about making a quilt by hand. It's a slow, beautiful process of taking simple pieces of fabric, joining them with just a needle and thread, and layering them with soft batting. Stitch by stitch, you create a warm, functional piece of art. The whole journey is an educational and rewarding experience, breaking down into three main stages: gathering your supplies, prepping your fabric, and getting comfortable with a basic running stitch to bring it all together.
The Timeless Joy of Hand Quilting Your First Project
Starting your first hand-sewn quilt is so much more than a craft project—it's a chance to slow down, unplug, and create something that will truly last. In a world that moves so fast, the quiet, rhythmic motion of a needle pulling thread through fabric is a wonderful escape. Every single stitch is a small victory, turning a stack of fabric into a cozy masterpiece that's filled with your care and attention.
This guide is here to walk you through every step, so you can feel confident from the start. We're going to break down the whole process into easy, manageable chunks. Forget feeling overwhelmed! From picking out the perfect fabrics to tying that final knot, you'll have all the know-how you need to complete your project successfully.
Why Hand Quilting Endures
The love for hand quilting isn't just surviving; it's thriving. So many of us are drawn back to the simple, tactile joy of working with our hands and connecting with a traditional art form. This isn't just a trend—it's a craft with deep roots that just keeps growing.
The numbers don't lie. The global quilt market is booming, and it's easy to see why. A whopping 65% of quilters say they do it for the therapeutic benefits alone. The craft saw a huge 25% surge in sales in Europe and North America after 2020, becoming a real cornerstone of artisanal making. You can learn more about these fascinating quilting market trends and their growth.
Your Creative Journey Starts Here
Making a quilt entirely by hand is an adventure in patience and creativity, but it's something anyone can do, no matter your sewing experience. The basic skills are simple to pick up, and the process itself is incredibly forgiving. Honestly, the real beauty of a hand-sewn quilt isn't in perfect, machine-like stitches, but in the unique character and love you put into every single one.
Here’s the roadmap for your project:
- We'll start by gathering the right tools and materials to set you up for success.
- Then, we'll cover how to prepare your fabric to avoid any puckering down the line.
- You'll master the essential stitches that are the foundation of all hand quilting.
- Finally, we’ll finish your quilt with a beautiful, durable binding.
Ready to dive in? The very first step is finding materials that make you happy. You can explore an amazing selection of vibrant fabrics and essential notions at Lindas to find everything you need to bring your vision to life and finish your project.
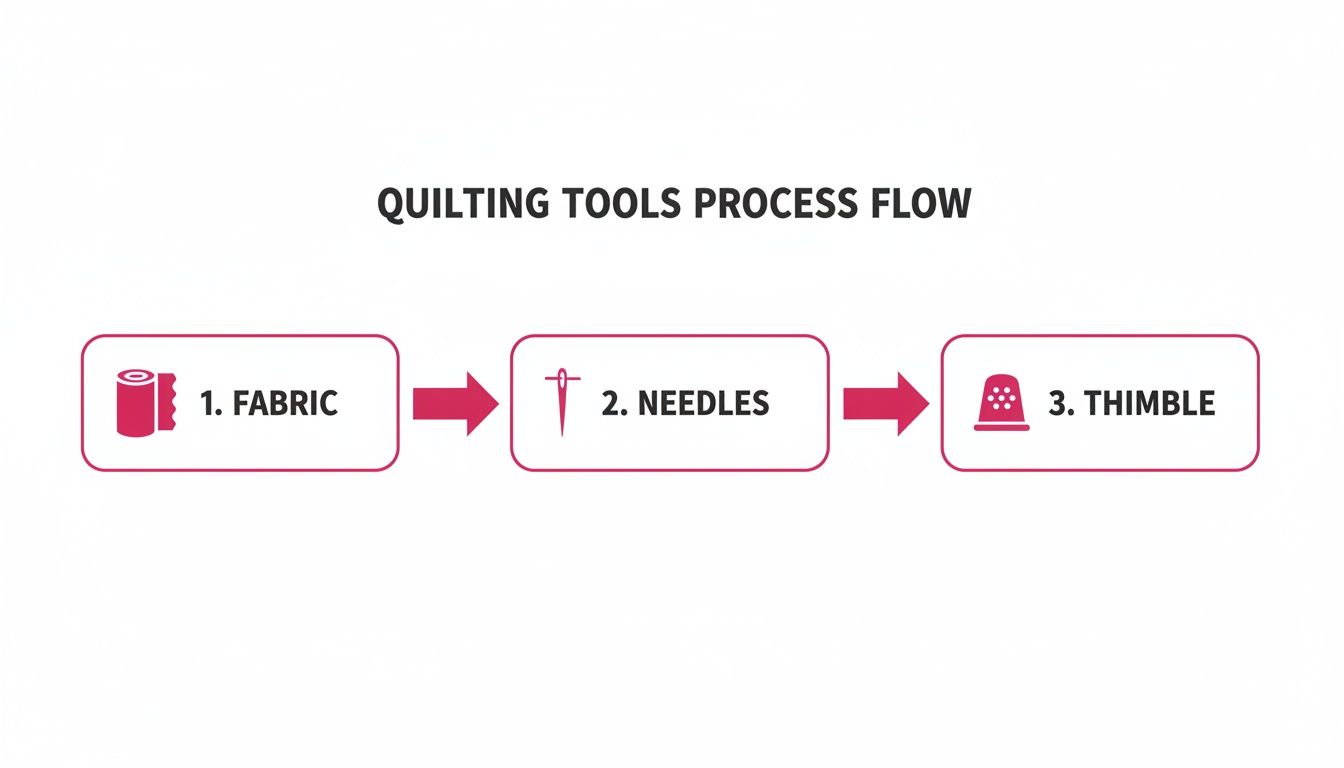
Assembling Your Hand Quilting Toolkit
Before you dive into that first stitch, let's get your tools in order. Think of it like a chef prepping their station—having the right supplies makes everything smoother and, honestly, a lot more fun. You don't need every gadget out there, but investing in a few quality basics will make a world of difference.
Trust me, starting with good tools is one of the best things you can do for yourself. It turns potential frustration into pure quilting joy. At Lindas, we have all the amazing products you'll need to complete your project.
Needles, Threads, and Thimbles
These three are the heart and soul of hand quilting. Getting this trio right is absolutely essential for both your comfort and the quality of your stitches.
- Needles: The industry standard for hand quilting is a type of needle called a 'between.' They’re shorter than your average sewing needle, which gives you fantastic control for making those tiny, even stitches we all strive for. A size 8 or 9 is a great starting point. Quality needles, like the ones you'll find in Linda's curated collection, make a huge difference—they just glide through the fabric.
- Thread: You need a thread that can stand up to being pulled through fabric layers hundreds of times without fraying or tangling. My go-to recommendation for beginners is Perle cotton in 8wt. It’s strong, has a beautiful sheen that makes your stitches stand out, and is a dream to work with. Stay away from regular sewing thread; it just isn't strong enough.
- Thimble: I’m going to say this loud and clear: do not skip the thimble! This little lifesaver protects the middle finger you use to push the needle through. A good leather or metal thimble that fits well means you can quilt for hours without getting sore. Pop over to Lindas to find one that feels snug but not tight—your fingertips will thank you.
Marking and Cutting Tools
A beautiful quilt starts with precision. Your accuracy in cutting and marking lays the groundwork for a finished piece that looks polished and professional.
A really sharp pair of fabric scissors is a must. Dedicate them to fabric only to keep them in prime condition for those clean, satisfying cuts. When it's time to mark your quilting lines, a Hera marker is a fantastic tool. It creates a subtle crease in the fabric without any ink, which means no marks to wash out later. For lighter fabrics, a simple water-soluble pen also works beautifully.
It's amazing to see how much people are falling back in love with handcrafted skills. This renewed passion is part of why the quilt market is expected to grow from $5.32 billion in 2024 to $7.8 billion by 2031. We're seeing trends like 'cottagecore' pushing handcrafted goods to grow 7-9% faster than mass-produced items. In fact, 72% of quilters under 40 say they prefer hand-sewing for that unique, personal touch. You can read more about the rising popularity of handcrafted quilts if you're curious!
Hoops and Batting Choices
Last but not least, let's talk about managing your quilt and giving it that cozy feel. A good hoop and the right batting are key.
A quilting hoop is like having an extra set of hands. It holds your quilt sandwich—the top, batting, and backing—nice and taut. This prevents the layers from shifting around and helps you create much more consistent stitches. A sturdy wooden hoop that’s about 14 to 18 inches is perfect for getting started.
Batting is what gives your quilt its warmth, weight, and texture. It's truly the soul of the quilt.
Pro Tip: The batting you pick will dramatically change how your quilting looks. A low-loft cotton batting creates a classic, flat look that’s very traditional. Go for a high-loft polyester, and your stitches will sink in, giving you a much puffier, more modern texture.
So how do you choose? Here’s a quick guide to some of the most common batting types we carry at Lindas.
Choosing the Right Batting for Your Quilt Project
Picking the perfect batting can feel overwhelming, but this educational breakdown simplifies it based on the look and feel you're going for. This table breaks down the most popular options to help you find the perfect match for your project.
| Batting Type | Key Characteristics | Best For | Pro Tip |
|---|---|---|---|
| 100% Cotton | Low loft, soft, breathable. Gets softer with every wash. Can shrink a bit, creating that classic crinkly look. | Traditional quilts, baby quilts, and anything where you want a light, breathable feel. | If you want to avoid that crinkled vintage vibe, just pre-wash your batting before you start. |
| Polyester | High loft, lightweight, and resists mold. Holds its shape well and really makes your quilting stitches pop. | Bed quilts that need extra warmth, tied quilts, or any project where you want a puffy, cloud-like texture. | Since it doesn’t shrink, it’s a great choice for modern quilts where you want a perfectly flat finish. |
| Cotton/Poly Blend | The best of both worlds. An 80/20 mix gives you the softness of cotton with the stability and loft of polyester. | All-purpose quilting. It's a fantastic, reliable choice for first-time quilters, from wall hangings to bedspreads. | This blend has a lovely drape and warmth without being too heavy, which makes it much easier to handle. |
| Wool | Incredibly warm but surprisingly lightweight. Resists creasing and has a springy loft that beautifully highlights quilting stitches. | Heirloom quilts, show quilts, and those extra-cozy winter blankets you want to snuggle under. | Wool is an absolute dream to needle through, making it a favorite for hand quilters. It provides amazing warmth without bulk. |
Ultimately, the best way to learn is to try different types and see what you love working with. Each one gives a unique personality to your finished quilt. Visit Lindas to find the perfect batting and all the other amazing products you need to finish your project.
Preparing Fabric and Building Your Quilt Sandwich
A truly beautiful, long-lasting quilt begins long before you make that first stitch. The secret to avoiding frustrations like puckering, shrinking, and shifting fabric all comes down to careful preparation.
Think of this prep work as laying the foundation for your project. Rushing it is like trying to build a house on shaky ground. A little time spent here pays off big time later, ensuring the whole process is smoother and the final quilt is something you'll be proud of for years.
The Importance of Pre-Washing and Pressing
I know how tempting it is to dive right in and start cutting up those beautiful new fabrics, but trust me on this: hitting pause for a pre-wash is non-negotiable. Cottons, the go-to for most quilts, can shrink up to 5% in their first wash. Washing them before you sew means you won't get any nasty surprises later, like a finished quilt that puckers and warps.
Pre-washing also gets rid of any factory chemicals and stops excess dye from bleeding—a real lifesaver when you're using high-contrast colors like a deep red next to a crisp white. Once your fabric is washed and dried, give every piece a good press with a hot, steamy iron. You'll have a perfectly flat, smooth canvas that's ready for accurate cutting.
Achieving Precision in Your Cuts
With your fabric prepped and pressed, it’s time for one of the most satisfying parts: cutting your pieces. Accuracy is everything here. It’s what makes your blocks fit together like a puzzle. While sharp scissors and a ruler can work, nothing beats the precision of a rotary cutter, a self-healing mat, and an acrylic ruler.
Before you make a single cut, double-check your measurements. If you’re making a bed quilt, it’s always a good idea to consult an Australian bedding size chart to make sure your final dimensions are correct.
A Quick Tip for Accuracy: Always square up your fabric first. This just means trimming a clean, perfectly straight edge along the grainline before you start cutting your actual pieces. This one little step guarantees every cut that follows will be perfectly square, leading to flawless seams.
Layering Your Quilt Sandwich
The "quilt sandwich" is the heart of your quilt, made up of three layers: the quilt top, the batting, and the backing fabric. Putting this sandwich together correctly is the key to a smooth, pucker-free quilting experience.
Here’s how you build it:
- The Backing: Start by laying your backing fabric right-side down on a large, flat surface. A clean floor works great. Use painter's tape to secure the corners and edges, pulling it taut but not stretching it out of shape.
- The Batting: Next, place your batting on top of the backing. Gently smooth out any wrinkles or folds, working from the center outwards.
- The Quilt Top: Finally, lay your finished quilt top right-side up over the batting. Again, smooth it carefully from the center outwards to get rid of any bunching.
Make sure your backing and batting extend at least 3-4 inches beyond the edge of your quilt top on all four sides. This extra room gives you some wiggle room while quilting.
This little visual is a great reminder that you only need a few quality basics to get started on your quilting journey.
Securing the Layers: Basting Methods
Basting is how you temporarily hold your quilt sandwich together so the layers don’t shift while you’re quilting. There are a couple of go-to methods, and every quilter seems to have their favorite.
Safety Pin Basting
This is a really popular method because it's fast. You just use special curved safety pins made for quilting to pin through all three layers.
- Pros: It’s quick, you don't have to do any sewing, and the pins are reusable for your next project.
- Cons: You have to maneuver your hands around the pins as you quilt, which can feel a little awkward at times.
- How to do it: Start pinning from the center and work your way out. Place a pin every 4-5 inches, which is about the width of your hand.
Thread Basting
This is the more traditional route, using a long needle and a contrasting thread to make big, running stitches across the quilt.
- Pros: This gives you a really secure hold with no hard pins to stitch around. Your quilt stays soft and flexible.
- Cons: It definitely takes more time than pinning.
- How to do it: Using a strong thread that’s easy to see (so you can pull it out later!), sew long stitches—about an inch or two each—in a grid pattern across the entire quilt.
Once your sandwich is basted and secure, you're ready for the magic part: the quilting itself. Find all the basting pins, needles, and thread you need at Lindas to get this step done right.
Mastering the Essential Hand Quilting Stitch
Alright, your quilt sandwich is perfectly basted and ready to go. This is where the real magic happens. With every pull of the needle, you’re about to transform layers of fabric into a genuine quilt, adding all that cozy texture, character, and strength that makes it an heirloom.
The quilting stitch is the very heartbeat of your project. Let's get you comfortable with a few key techniques so you can find that joyful, meditative rhythm everyone talks about.
And remember, don't get hung up on machine-like perfection from the get-go. The charm of a hand-sewn quilt lies in those subtle, human variations in each stitch. It's your signature, and it makes the quilt uniquely yours.

The Classic Running Stitch
The running stitch is the bread and butter of hand quilting. It's a simple, straight stitch that weaves through all three layers of your quilt, creating the lines and patterns that bring your design to life.
Your first goal should be consistency, not tiny stitches. A great starting point is aiming for 6-8 stitches per inch—this is a comfortable and totally achievable target when you're just starting out.
Finding Your Rhythm with the Rocking Motion
The real secret to making hand quilting feel effortless is developing what we call the "rocking motion." It's all about efficiency. Instead of pushing the needle through for one stitch and pulling it out, you'll learn to load multiple stitches onto the needle at once.
Here’s how to get the feel for it:
- With your thimble on your middle finger, push the needle straight down through all three layers.
- Use the fingers of your other hand underneath the quilt to feel for the needle tip and guide it back up.
- As the needle pops up, "rock" your wrist forward to dip the needle tip back down a short distance away.
- Keep this motion going to load 3-4 stitches onto your needle before you pull the thread all the way through.
Once this becomes muscle memory, you'll be able to work so much faster and create beautifully even stitches. Think of it like learning to ride a bike; it feels clumsy at first, but then it just clicks. Your thimble provides the power, while your hand underneath steers. It’s a gentle, fluid movement, not a forceful push.
Expert Insight: Many seasoned quilters find their rhythm by listening to the sound the needle makes. A consistent, quiet "pop-pop-pop" is a great audio cue that your stitch length and tension are nice and even.
The best way to get this down is to practice on a small scrap quilt sandwich. You can work on it without the pressure of messing up your main project. Grab a thread that contrasts with your fabric so you can easily see your stitches and check your consistency.
To get started, check out the fantastic selection of high-contrast, high-quality Perle cotton threads at Lindas. They are perfect for practice and make your stitches pop beautifully.
Beyond the Running Stitch: Other Essential Stitches
While the running stitch will handle about 90% of the work, there are a couple of other stitches that are absolute lifesavers for specific jobs, especially when finishing your quilt.
- The Backstitch: This is your go-to stitch for strength. It's perfect for locking your stitches at the beginning and end of a quilting line. It creates a solid, continuous line that almost looks like it was done on a machine. You just bring the needle up, take a small stitch backward, and then bring the needle up again a space forward from your starting point.
- The Whipstitch: You'll get very friendly with the whipstitch when it's time to attach your binding. This small, diagonal stitch is perfect for invisibly joining two folded edges of fabric. It’s neat, tidy, and incredibly durable, giving you that flawless edge.
Hand-sewing a quilt connects you to a craft with deep historical roots. Techniques made popular during the 19th-century "crazy quilt" era are still fundamental today. You’re starting with that simple running stitch (aiming for 6-8 stitches per inch) and will move on to whipstitches for the binding. This careful handwork results in durability that can outlast machine-sewn quilts by up to 50%—a key reason these heirlooms command premium prices in a global market valued at $4.5 billion. You can discover more about the modern quilting market at Craft Industry Alliance.
Once you're comfortable with these three stitches, you’ll have the complete vocabulary you need to create a beautiful and strong quilt completely by hand.
Putting the Finishing Touches on Your Quilt
You’ve done the hard work—your top is pieced, and every quilting stitch has been thoughtfully placed by hand. Now for the fun part: the final steps that elevate your project from a work-in-progress to a finished heirloom. This is where you frame your masterpiece and officially sign your name to it.
These last few moments with your quilt are some of the most rewarding. It's when all the separate pieces finally come together into a beautiful, cohesive whole.
From Simple Lines to Gentle Curves
Believe it or not, the quilting pattern itself is a finishing touch. While those incredibly elaborate designs you see online are stunning, sometimes the simplest patterns have the most impact, especially when you're just starting out. The real goal is just to secure the layers and add a little texture that plays nicely with your patchwork.
Here are a few classic, totally beginner-friendly ideas:
- Stitching in the Ditch: This is my go-to recommendation for a first quilt. You just quilt right inside the seam lines—the "ditch"—which makes your stitches practically disappear from the front. It’s a subtle way to let your piecing be the star of the show.
- Echo Quilting: This one sounds fancy, but it's super simple. Just quilt a line that runs parallel to your seams, about a quarter-inch away. It creates a beautiful ripple or "echo" effect that adds a ton of texture without a lot of fuss.
- Gentle Curves: Feeling a bit more confident? Try marking some gentle, wavy lines across the quilt. The soft, organic movement is a wonderful contrast to the crisp geometric lines of your patchwork.
Honestly, the best design is one you feel good about stitching. A simple pattern done with care and consistency will always, always look better than a complicated one that made you want to pull your hair out.
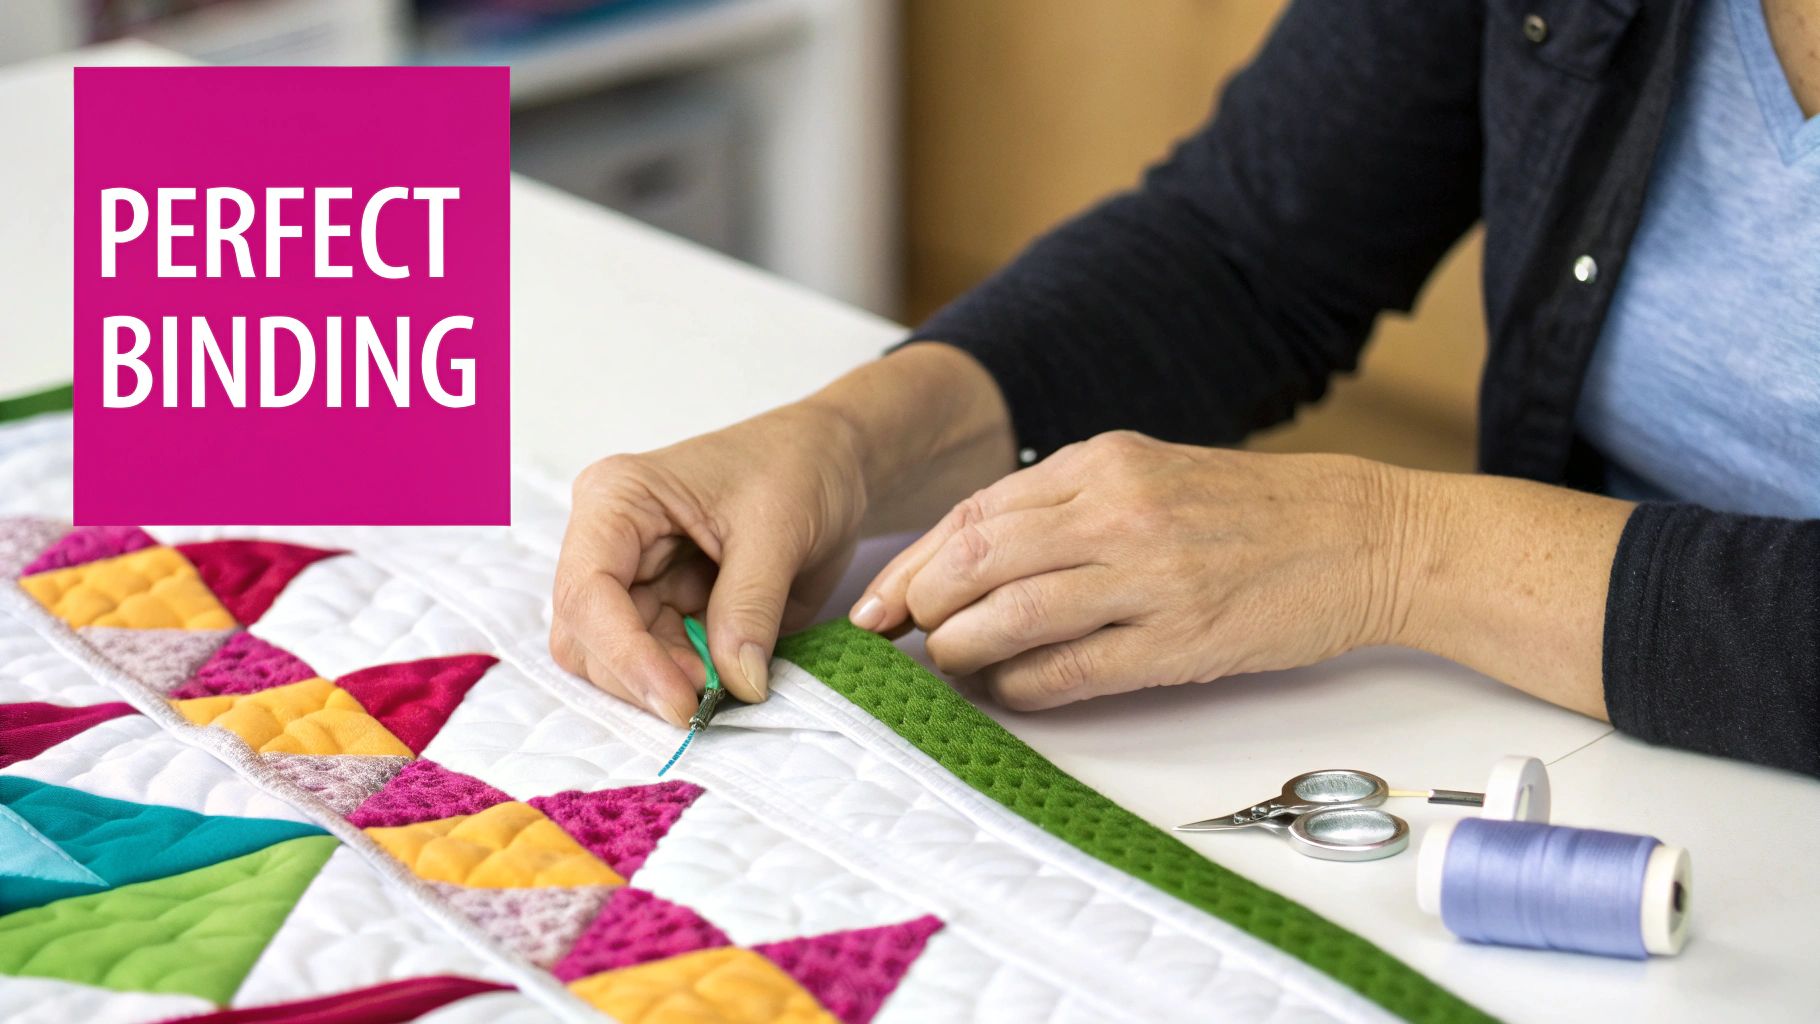
Creating and Attaching the Binding
The binding is that neat fabric border that encases all the raw edges of your quilt sandwich. Hand-applying the binding gives a quilt a durable, polished, and truly traditional finish.
First, you’ll need to make one long binding strip. I always cut my strips 2.5 inches wide. Measure the perimeter of your quilt and add about 10 extra inches just to be safe—you'll need it for joining the ends and turning corners. Sew your strips together end-to-end (a diagonal seam is best for reducing bulk) and press the whole thing in half lengthwise, wrong sides together.
Pro Tip: Cutting your fabric on the bias (a 45-degree angle) is the gold standard because it's stretchy, which is a lifesaver for quilts with curved edges. But for a standard square or rectangular quilt, cutting on the crossgrain works perfectly fine and saves a lot of fabric.
Time to attach it. Line up the raw edge of your folded binding with the raw edge on the front of your quilt. Using a quarter-inch seam allowance, start sewing. When you get a quarter-inch from a corner, stop, backstitch, and cut your threads.
Nailing Those Perfect Mitered Corners
Those crisp, perfect corners you see on quilts? They’re called mitered corners, and they are much easier to achieve than you might think. It’s all in the fold.
Here’s my foolproof method:
- Once you’ve stopped sewing a quarter-inch from the corner, fold the binding strip straight up and away from the quilt. This should create a neat 45-degree angle.
- Now, fold the strip straight back down so it’s perfectly aligned with the next raw edge of the quilt. That first fold should now be tucked underneath, even with the top edge.
- Start sewing again right from the top edge to lock that fold in place, and continue down the next side. Just repeat this little fold-and-stitch dance at all four corners.
After the binding is attached to the front, flip the whole quilt over. Wrap the folded edge of the binding around to the back, making sure it covers your machine stitching. I like to use binding clips to hold it securely in place. Then, settle in with your needle and thread and use a whipstitch or a blind stitch to sew it down. This final bit of handwork is my favorite part of the entire process—it's so peaceful and satisfying.
The Final Flourish: A Quilt Label
Every quilt tells a story, and the label is your signature. It’s a crucial little detail that documents your work for anyone who might cherish this quilt in the future. At the very least, a label should have your name, the year you finished it, and the city where it was made.
You can make a label from a simple scrap of light-colored cotton, write on it with a permanent fabric pen, and hand-stitch it to a corner on the back. This little tag ensures the story of your hard work and creativity is never lost. If you want to see how beautifully a finished quilt can come together, just look at the simple elegance of something like this beautiful linen quilt.
To grab all the supplies you need to put these professional touches on your own masterpiece, check out the amazing selection of binding tools and fabrics over at Lindas. You’ll find everything you need to finish your quilt with confidence and pride.
Your Hand Quilting Questions Answered
As you start your hand quilting adventure, a few questions are bound to pop up. Trust me, we’ve all been there! This section provides some final education to help you get back to stitching with joy and confidence.
How Long Does It Realistically Take to Hand Sew a Quilt?
This is the big one, isn't it? The most honest answer is: it really depends. Hand quilting is a marathon, not a sprint, and the real magic is in slowing down and enjoying the process.
To give you a ballpark, a beginner tackling a simple lap quilt might spend anywhere from 80 to 150 hours. For a bigger or more complex quilt, you could be looking at 200-400 hours. Don't let those numbers scare you! Even stitching for just 15-20 minutes a day makes a huge difference and will get you to the finish line.
My Stitches Are Uneven. How Can I Make Them Look Better?
First off, welcome to the club! Uneven stitches are a rite of passage for every single hand quilter. The first step is to breathe and let go of the need for absolute perfection. Those little variations are what give your quilt its handmade charm, and I promise your consistency will get better with every project.
Remember, the goal is consistency, not perfection. A quilt filled with even, rhythmic stitches is far more beautiful than one with tiny, tight stitches that cause the fabric to pucker. Relax your hands and find a comfortable motion.
Here are a few things that can really help:
- Get a Good Quilting Hoop: This is non-negotiable in my book. It keeps your fabric tension just right, which makes guiding the needle so much easier.
- Practice the 'Rocking Stitch': Remember that rocking motion we talked about? It’s all about building muscle memory. The more you do it, the more natural and consistent your rhythm will become.
- Use Your Scraps: Make a few small practice "sandwiches" with leftover fabric and batting. It's the perfect, no-pressure way to work on your technique.
What Is the Difference Between Hand Quilting and Tying a Quilt?
Both are fantastic ways to hold your three layers together, but they give you a totally different look and feel.
Hand quilting is what we've been focusing on—using a running stitch to create beautiful lines and patterns. This adds a rich texture and becomes an integral part of the quilt's design. It’s definitely more detailed and time-consuming.
Hand tying, on the other hand, is a much quicker method. You simply use yarn or thick floss to make individual stitches at intervals across the quilt, securing each one with a knot on top. This creates a cozy, almost rustic look with little tufts of yarn. It's a great choice for comfy quilts that are going to be used and washed a lot.
How Do I Avoid Puckering in My Quilt?
Ah, puckering. It’s the nemesis of every quilter, but thankfully, it’s almost always preventable with a little prep work. Puckers usually happen for two reasons: the layers of your quilt sandwich have shifted, or your stitches are just too tight.
Your best defense is a good offense. Always, always pre-wash and press your fabrics to get any shrinkage out of the way first. When you baste your quilt, be meticulous. Make sure every layer is smooth and secure, with pins or basting stitches placed every 4-5 inches. As you quilt, be mindful of your tension. You don't need to pull the stitches tight—just let them settle gently into the fabric.
Answering these questions is a great start, but having the right supplies can make or break your project. From the sharpest needles to high-quality batting that won’t bunch up, Lindas has everything you need to give your quilt a beautiful, professional finish. Check out the amazing selection and find your quilting essentials at https://lindas.com.


