Every quilt tells a story, stitched together with fabric, thread, and countless hours of care. But once the final binding is sewn, how do you ensure that story is never forgotten? The humble quilt label is more than just an afterthought; it's the final, crucial step that transforms your beautiful creation into a documented piece of art and a cherished heirloom. A well-crafted label is your signature, the quilt's birth certificate, and a message to future generations all in one. It preserves the 'who, what, when, and why' behind your work, protecting its legacy and adding immeasurable sentimental value.
Understanding the importance of a quilt label goes hand-in-hand with valuing your craft. For those who consider selling their unique creations, learning how to price handmade items effectively is crucial, and a professional label adds to that perceived value.
However, moving from a finished quilt top to a perfectly executed label can feel daunting. What information should you include? Which technique best suits your style and the quilt's purpose? From classic embroidered text to modern digital integrations, the possibilities are vast. This guide is your ultimate resource, providing a comprehensive roundup of quilt label ideas that cater to every style and skill level. We will explore eight distinct approaches, complete with actionable tips and educational insights to help you complete your project. Let's ensure your quilt's story is told for years to come with the perfect finishing touch. Find all the high-quality fabrics, threads, and notions to bring these ideas to life at Linda's Electric Quilters, your partner in every step of the quilting journey.
1. Personalized Text Labels with Quilt Information
The personalized text label is the quintessential method for signing your quilted masterpiece. It is a timeless and straightforward approach that serves as a permanent record of the quilt's origin, ensuring its story is passed down through generations. These labels transform a beautiful handmade item into a documented piece of family history, capturing the who, when, and why behind its creation. By including key details, you are not just labeling a quilt; you are archiving a memory.
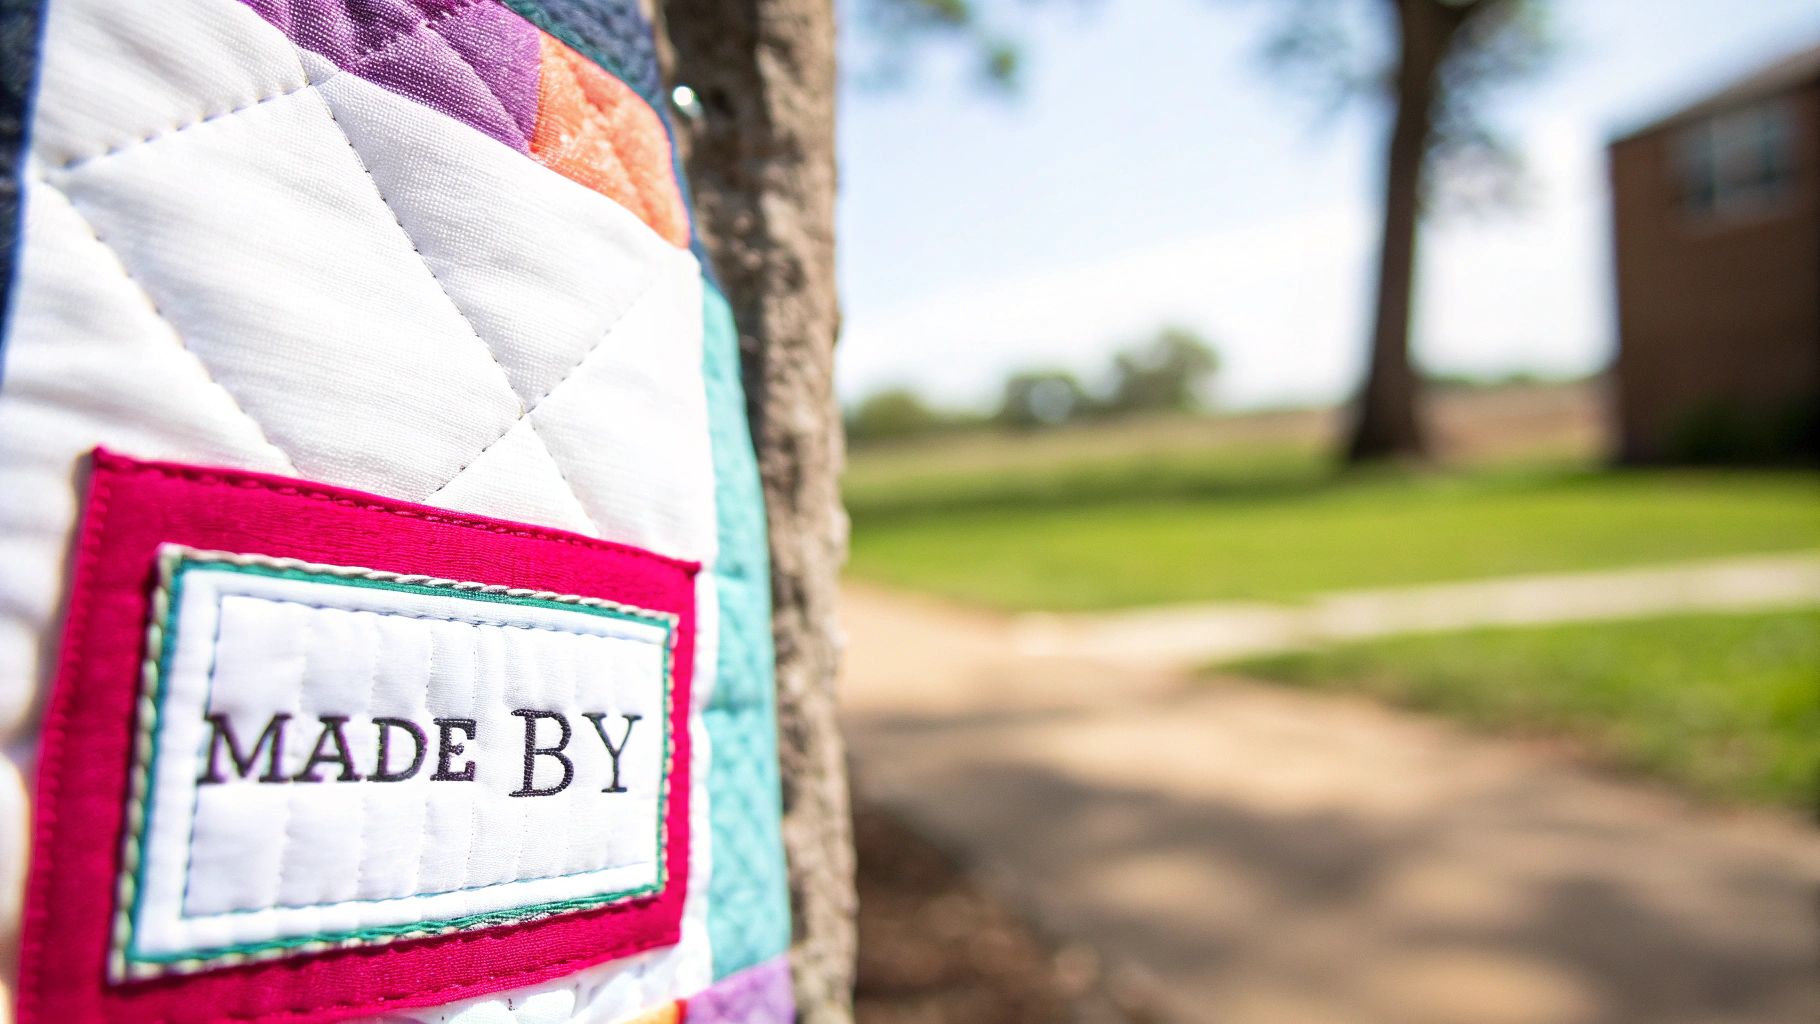
This method is incredibly versatile, suitable for everything from a baby's first quilt to a commemorative wedding gift or a large donation to a charity drive. The core function is to provide essential information in a clear, lasting format, making it one of the most fundamental quilt label ideas for every maker.
Essential Information to Include
While you can customize the text to fit the occasion, a standard label should include a few key pieces of information to properly document the work:
- The Quilter's Name: Always include your full name.
- Completion Date: Note the month and year, or at least the year, the quilt was finished.
- Location: Adding the city and state where it was made adds a lovely geographical context.
- Recipient's Name: If it's a gift, including "Made for [Recipient's Name]" makes it deeply personal.
- A Special Message: A short note, quote, or occasion (e.g., "For Your Graduation," "Happy 50th Anniversary") adds sentimental value.
Tips for Creating Your Text Label
Executing a beautiful and durable text label requires attention to detail. To ensure your label looks professional and lasts as long as the quilt itself, consider these tips:
- Choose the Right Materials: Start with a high-quality, pre-washed cotton fabric for the label itself to prevent future shrinkage. For longevity, use a permanent fabric pen like the Pigma Micron or a high-contrast embroidery thread that won't bleed or fade over time. You can find a professional-grade selection of these essential supplies at Linda's.
- Focus on Legibility: Your font choice matters. Whether you are handwriting, embroidering, or printing, select a clear and legible font. For a deeper dive into making your words impactful, these typography tips for effective text labels offer great principles, even though they are for a different medium.
- Placement is Key: The most common placement is the bottom right-hand corner on the back of the quilt, but the center can also work well. Ensure it is stitched securely on all four sides.
2. Pictorial and Illustrated Labels
Pictorial and illustrated labels elevate the simple act of signing a quilt into an art form all its own. This method involves incorporating hand-drawn, printed, or embroidered images directly onto the fabric label, creating a visual extension of the quilt's theme. These artistic additions can range from simple icons to elaborate scenes, transforming the label from a mere information tag into a final, beautiful flourish that complements the overall design.
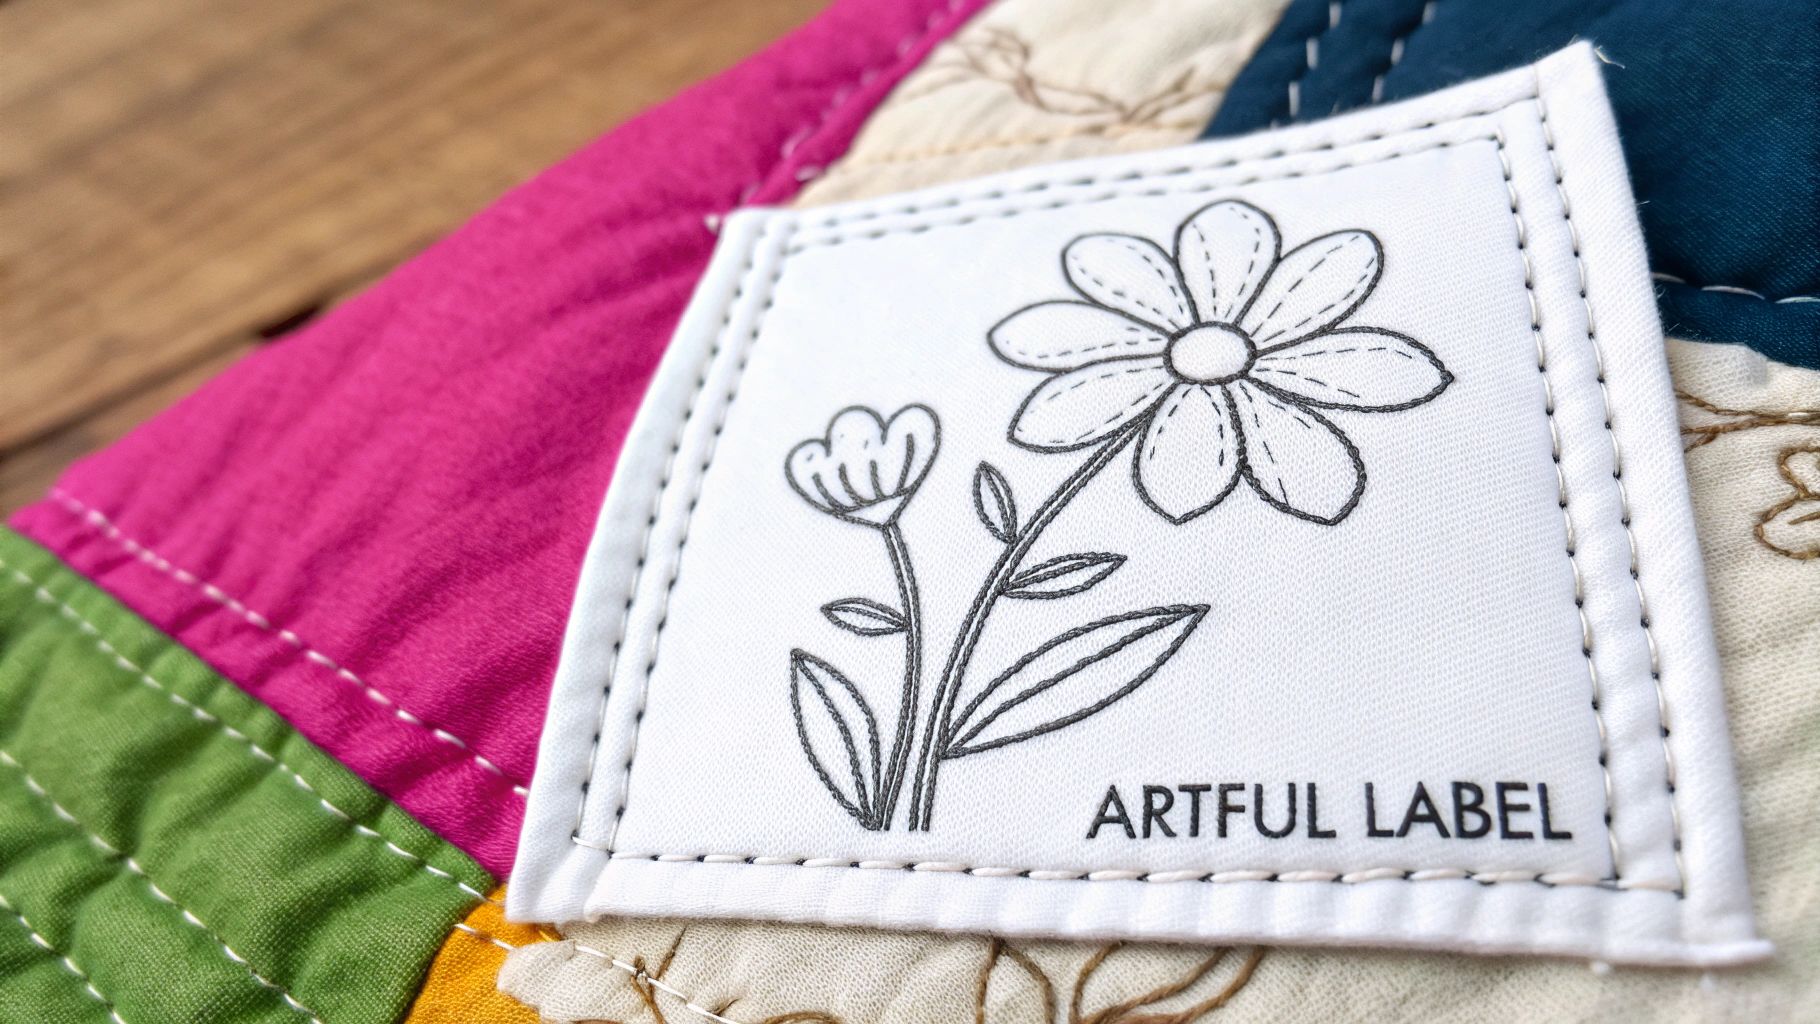
This creative approach is perfect for themed quilts where an image can instantly communicate the story or inspiration. For instance, a baby quilt might feature an illustrated animal from its fabric, a nature-themed quilt could have a delicate embroidered flower, or an art quilt could showcase the quilter's signature as a unique logo. This is one of the most expressive quilt label ideas for makers who want to infuse more personality and artistry into their finished work.
Essential Elements to Illustrate
While the artwork is the star, the label still serves a documentary purpose. The illustration should complement, not overshadow, the key details of the quilt's story.
- Thematic Icons: Choose an image that reflects the quilt's purpose or design, like a teddy bear for a child's quilt or a wedding bell for a newlywed's gift.
- A Key Quilt Block: Replicating a miniature version of a specific block from the quilt top is a clever way to tie the front and back together.
- The Maker's "Logo": Many modern quilters design a personal logo or symbol that they use to sign all their work, creating a recognizable brand.
- Core Quilt Information: Don't forget to include the quilter's name, completion date, and recipient's name alongside the artwork.
Tips for Creating Your Illustrated Label
Bringing a visual idea to life on fabric requires the right techniques and materials to ensure it looks professional and endures wash after wash.
- Choose Your Medium: You can draw directly onto fabric with permanent, archival-quality fabric pens. Alternatively, create a detailed embroidered image using a rich embroidery thread that coordinates with the quilt's color palette. For complex, multi-color designs, custom-printed fabric labels are an excellent option.
- Maintain Proportions: Ensure the illustration is scaled appropriately for the label size. A design that is too large can overwhelm the text, while one that is too small may lose its impact and detail.
- Test Your Design: Before applying the final label, always test your chosen method on a scrap piece of the same fabric. This allows you to check for ink bleeding, thread tension issues, or color vibrancy, guaranteeing a perfect result on your finished quilt.
3. Fabric Fiber Content and Care Instructions Labels
Beyond the sentimental value, a quilt is a textile object that requires proper care to ensure its longevity. A fabric fiber content and care instructions label is a practical, responsible approach to documenting your work. This type of label provides the recipient with crucial information about the quilt's construction and how to maintain it, preserving its beauty and structural integrity for years to come. It acts as a user manual for your handmade creation, preventing accidental damage from improper washing or storage.
This method is especially valuable for quilts made with mixed or specialty fibers like silk, wool, or linen, and for gifts given to individuals who may not be familiar with textile care. Popularized by professional quilters and textile conservators, this practical addition transforms your project from a simple gift into a well-documented heirloom, demonstrating a high level of craftsmanship and care.
Essential Information to Include
The goal of this label is to be as informative as possible. Clear and concise details will help the owner preserve the quilt exactly as you intended.
- Fiber Content: List the materials used. For example: "Top and Back: 100% Cotton, Batting: 80/20 Cotton-Poly Blend."
- Thread Type: Note the thread used for piecing and quilting, such as "Quilted with 100% Cotton Thread."
- Washing Instructions: Be specific. For instance, "Machine wash cold on gentle cycle with a color catcher."
- Drying Instructions: Provide clear directions, like "Tumble dry on low heat or lay flat to air dry."
- Special Considerations: Include warnings for specialty fabrics, such as "Do not iron silk appliques" or "This quilt has not been pre-washed and may bleed."
Tips for Creating Your Care Label
Creating a functional and durable care label is key to its effectiveness. A good label should be easy to read and able to withstand repeated washings.
- Document as You Go: Keep a project journal to track every material used, from the fabric lines to the batting brand. This makes creating an accurate label at the end much simpler.
- Use Clear Language and Symbols: Avoid jargon. Use simple, direct phrases for instructions. Incorporating universal laundry care symbols can also make the label easy to understand at a glance.
- Choose Durable Materials: Use a permanent, archival-quality fabric pen on high-quality cotton to prevent the ink from fading or bleeding. For a truly professional finish, consider having a custom label printed or embroidered with the information.
- Consult the Experts: If you're unsure about the best way to care for the specific materials in your quilt, the experts at Linda's can provide guidance on products purchased from our store to ensure your instructions are accurate.
4. Story and Narrative Labels
A story label goes beyond basic facts, transforming your quilt into a documented chapter of a personal journey. This narrative approach allows you to share the deeper meaning behind the project, detailing the inspiration, emotional connection, or significant life events that motivated its creation. It ensures that the quilt is not just seen but understood, preserving the heartfelt context for anyone who treasures it in the future.
This method is particularly powerful for memory quilts, art quilts, or projects marking a significant life passage. By weaving the story into the fabric, you are giving the quilt a voice, allowing it to communicate the love, challenges, and triumphs embedded in its stitches. It’s one of the most moving quilt label ideas for creating a true heirloom.
What to Include in a Narrative Label
A story label is deeply personal, but certain elements can help you craft a compelling narrative that resonates for years to come:
- The Inspiration: What sparked the idea for this quilt? Was it a person, a place, a piece of music, or a specific fabric?
- The Maker's Journey: Briefly describe the creation process. Mention any new techniques you learned, challenges you overcame, or special moments you experienced while making it.
- The Occasion or Purpose: Explain why the quilt was made. Examples include a grief quilt in memory of a loved one, a "chemo quilt" to provide comfort during treatment, or a travel quilt documenting a special trip.
- Emotional Significance: Share a heartfelt message or a few sentences about what this quilt means to you or the recipient.
Tips for Creating Your Story Label
Writing a narrative that is both meaningful and lasting requires careful thought and execution. To ensure your story is preserved beautifully, follow these tips:
- Be Concise Yet Evocative: You have limited space, so choose your words carefully. Write a draft and edit it down to its most essential, impactful elements. Use meaningful language that reflects the quilt’s significance.
- Choose a Durable Medium: For longer narratives, printing the text onto specialized fabric sheets using a high-quality inkjet printer is an excellent choice. Our selection of printable fabric sheets at Linda's ensures your story remains crisp and fade-resistant. Alternatively, a fine-tipped permanent fabric pen allows for a handwritten touch.
- Proofread Meticulously: This story becomes a permanent part of the quilt's history. Read it aloud and check carefully for any spelling or grammatical errors before attaching it to your quilt.
- Add Context with Dates: Including key dates, such as the start and end of the project or the date of the event it commemorates, provides a valuable timeline for future generations.
5. Signature Block Labels with Quilt Patterns
For the quilter who sees the back of the quilt as an extension of the front, the signature block label is an artistic and cohesive way to sign your work. This method involves creating a small quilt block that mirrors a design element from the main quilt top, turning the label itself into a miniature work of art. It functions as both a source of information and a final creative flourish, demonstrating skill and thoughtful design from corner to corner.
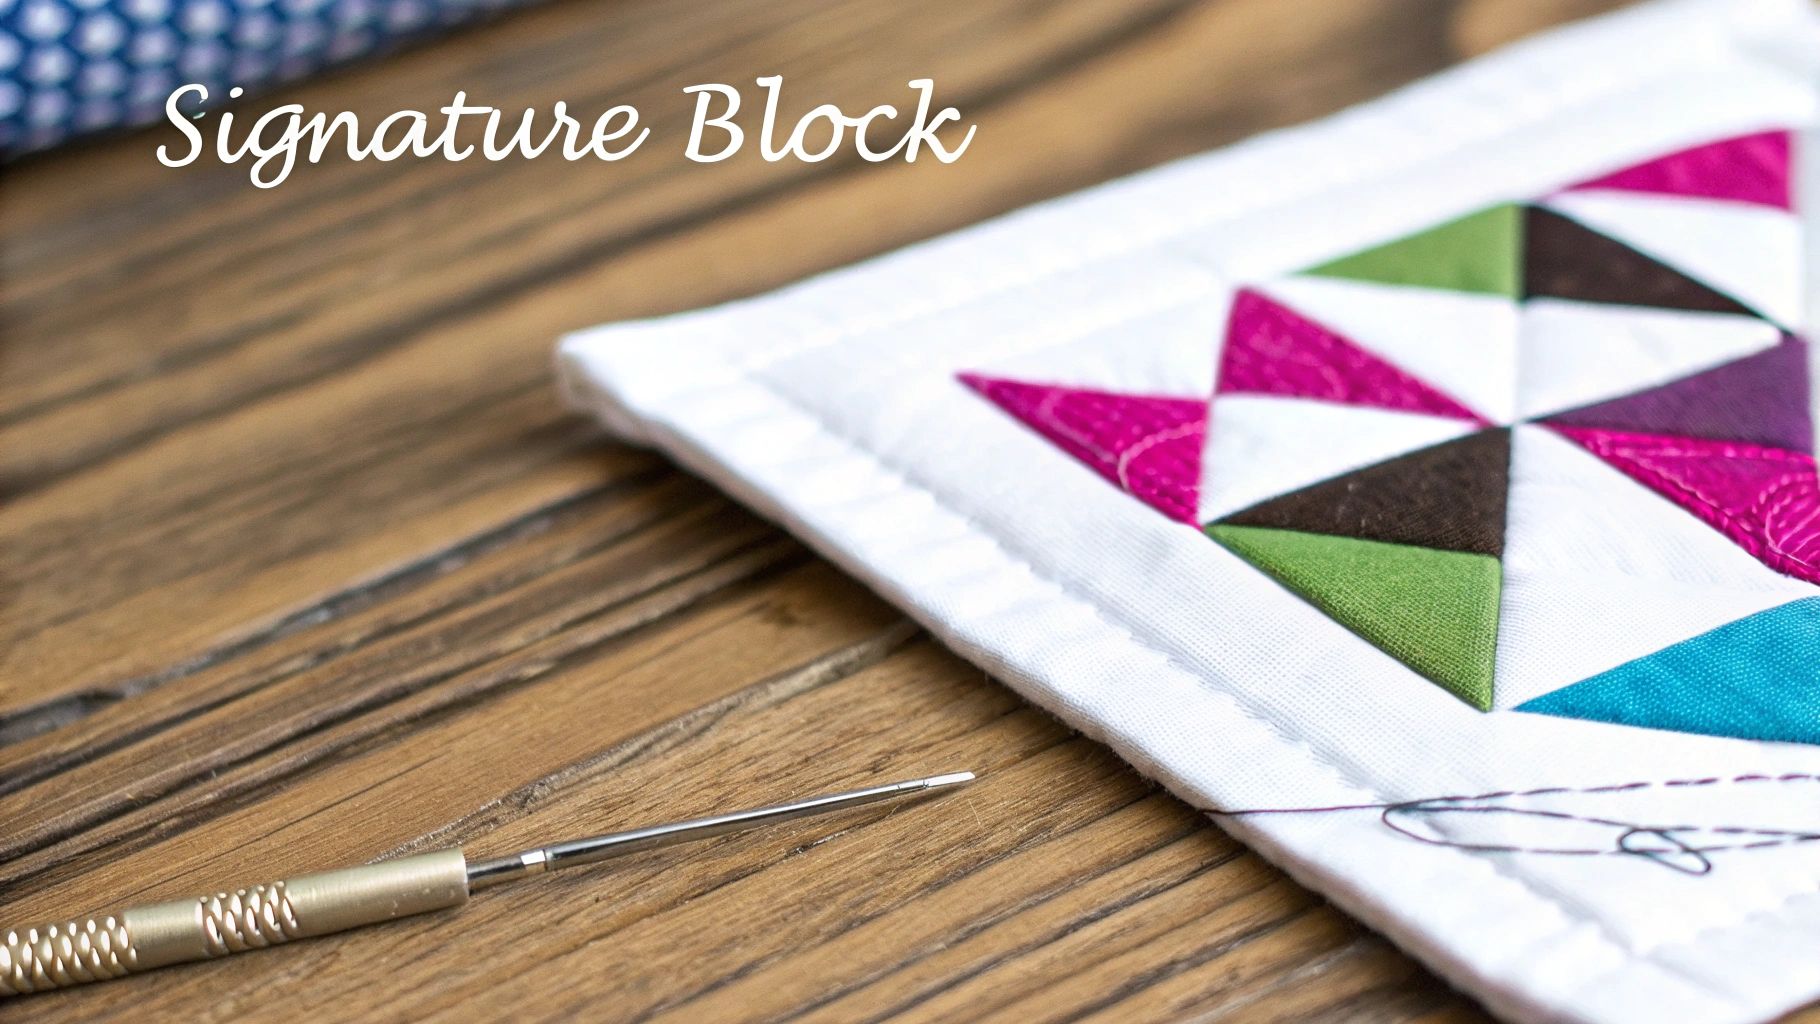
This approach is perfect for art quilts, competition pieces, or any project where you want a fully integrated design. By using leftover scraps from the quilt top, the label becomes a seamless part of the overall composition. It’s one of the most creative quilt label ideas for showcasing your piecing or appliqué skills on a small scale, ensuring your signature is as beautiful as the quilt itself.
Ideas for Signature Block Labels
The possibilities are nearly endless and can be adapted to any quilt style. The key is to echo a prominent design element from the quilt's front.
- Miniature Quilt Block: Recreate a single, smaller version of the primary block used in the quilt, such as a log cabin, star, or nine-patch.
- Echoed Appliqué: If your quilt features an appliqué motif like a flower or animal, create a small, simplified version of that same motif for the label.
- Abstract Geometric Design: For modern quilts, use leftover fabric strips to piece an abstract or improvisational block that reflects the quilt's color palette and style.
- Cornerstone Block: Design the label to look like a cornerstone block, often used in sashing, to tie it into the quilt's secondary patterns.
Tips for Creating Your Signature Block Label
Making a beautiful and proportional signature block label requires a bit of planning, but the stunning result is well worth the effort.
- Plan Ahead: Incorporate your label design into the initial quilting plan. This ensures you save appropriate fabric scraps and can size the block correctly.
- Use Cohesive Materials: Create the label using the same fabrics from the quilt top for a perfect match. Pair it with a high-quality thread from our collection at Linda's to ensure your stitching is both durable and beautiful.
- Keep it Proportional: A good rule of thumb is to make the label between 3 and 6 inches square, depending on the overall size of the quilt. It should be noticeable but not overpowering.
- Add Information Clearly: After piecing the block, you still need to add your essential details. You can embroider the text directly onto a solid fabric section of the block or stitch a smaller, plain label onto the pieced block.
For visual guidance on piecing a block that could be adapted for a label, watch this helpful tutorial.
6. Dated Series or Collection Labels
For the prolific quilter who creates themed works or participates in ongoing challenges, a dated series or collection label is a professional and cohesive way to document a body of work. This method involves creating a consistent, branded label design that unites multiple quilts, establishing them as part of a larger, intentional series. It transforms individual projects into a collectible set, telling a broader story of artistic exploration over time.
This approach is perfect for annual quilt challenges, monthly block-of-the-month clubs, or an artist's signature collection. By assigning a sequential number and maintaining a consistent look, these quilt label ideas add a layer of professionalism and collectibility, clearly communicating that each quilt is a piece of a greater whole.
Essential Information to Include
A series label builds upon standard quilt information by adding a layer of organizational detail that connects it to the collection:
- Collection Name: Give your series a distinct title (e.g., "The Four Seasons Collection," "2024 Monthly Mini-Quilt Challenge").
- Sequential Number: Clearly mark the quilt's place in the series (e.g., "No. 3 of 12," "Quilt 5/8," "2023 Edition").
- The Quilter's Name: Your name or studio name should be a consistent brand element.
- Date: Include the specific completion date or the year the series was produced.
- Individual Quilt Title (Optional): If each piece in the series has its own name, you can include that as well.
Tips for Creating Your Series Label
Executing a professional and uniform set of collection labels requires planning and consistency. To ensure your series is presented cohesively, consider these tips:
- Design a Reusable Template: Create a digital template using a simple design program. This ensures that your font, layout, and branding elements remain identical across every label, saving you time and guaranteeing a professional look.
- Use Consistent, High-Quality Materials: For a truly unified collection, use the same materials for every label. Printing your designs on high-quality printable fabric sheets provides crisp, permanent results that are easy to sew. You'll find the best options available at Linda's to get your project done right.
- Number Sequentially and Keep a Master List: Plan your numbering system before you start. Decide if you will use "1 of 12" or simply "No. 1." Keep a separate document or notebook that lists each quilt in the series with its corresponding number and completion date for your own records.
- Consider Professional Printing: For large series or for quilts you plan to sell or enter into shows, using a professional fabric printing service can provide a level of polish and durability that is hard to achieve at home, reinforcing the value of your collection.
7. QR Code and Digital Integration Labels
In an era where digital and physical worlds intertwine, the QR code label offers a modern twist on quilt documentation. This innovative method bridges the gap between traditional craftsmanship and contemporary technology, embedding a gateway to a wealth of online information directly onto the back of your quilt. A simple scan with a smartphone can unlock a dynamic story far beyond what a small fabric square can hold.
This approach is perfect for professional artists wanting to link to their portfolio, educators sharing technique tutorials, or storytellers wanting to preserve a detailed narrative with photos and videos. It transforms your quilt from a static object into an interactive experience, making it one of the most forward-thinking quilt label ideas for the modern maker.
Essential Information to Link
A QR code can direct the viewer to virtually any online destination. This allows for rich, multimedia documentation that brings your quilt's story to life in a way traditional labels cannot. Consider linking to:
- A Photo Gallery: Showcasing detailed shots of the quilt top, intricate stitching, or photos of the creation process.
- The Quilter's Portfolio or Blog: Direct viewers to your website or a blog post detailing the quilt's inspiration and journey.
- A Video Message: Record a personal video for the recipient explaining the quilt's meaning or demonstrating a specific technique used.
- Care Instructions: Link to a detailed webpage with washing and storage guidelines to ensure the quilt’s longevity.
- A Donation Page: For charity quilts, a QR code can link directly to the organization's website or a specific fundraising campaign.
Tips for Creating Your QR Code Label
Creating a functional and durable QR code label is straightforward, but it requires a few key considerations to ensure it works seamlessly for years to come.
- Choose the Right Materials: Print your QR code on high-quality printable fabric sheets using a reliable inkjet printer and pigment-based inks, which are more resistant to fading. At Linda's, we offer products that provide a crisp, scannable image. Always include a short, printed URL as a backup.
- Focus on Functionality: Use a free and reliable QR code generator like Canva or QR Code Monkey. Before attaching the label, test the printed QR code with multiple smartphone cameras and scanning apps to confirm it works perfectly.
- Placement is Key: Position the label in a flat, easily accessible area like a bottom corner. Ensure it is stitched securely on all sides to prevent edges from curling, which could obstruct the code and make scanning difficult.
8. Heritage and Provenance Documentation Labels
For quilts destined to become treasured heirlooms, a heritage and provenance label transcends simple identification. It acts as an official certificate of authenticity and a historical record, meticulously documenting the quilt's origins, materials, creation timeline, and ownership history. This approach is invaluable for preserving the story of quilts made from vintage fabrics, those marking significant life events, or pieces intended to be passed through multiple generations. It transforms the quilt into a tangible piece of documented family or cultural history.
This method is particularly suited for antique quilt restorations, family heirlooms with multi-generational ownership, or quilts crafted during significant periods like the Depression era. It provides a formal, detailed account that adds immense value and context, ensuring future owners understand its full significance. By adopting this archival approach, you are not just making a quilt; you are curating a legacy.
Essential Information to Include
A provenance label is more comprehensive than a standard text label. It serves as a detailed historical document for the quilt:
- Creation Timeline: Include both the start and completion dates to document the creation period.
- Detailed Maker Information: Your full name, city, and state are essential.
- Materials Sourcing: Document special fabrics, noting if they are vintage, repurposed from meaningful garments, or from a specific designer collection. For example, "Made from Grandpa's work shirts" or "Features 1930s feed sack scraps."
- Ownership History: If the quilt is passed down, leave space for future owners to add their names and the date of acquisition.
- Construction Notes: Briefly mention the pattern name or any unique techniques used in its creation.
- Care Instructions: Provide specific washing and storage instructions based on the materials used to ensure its longevity.
Tips for Creating Your Heritage Label
Creating a label that will last for centuries requires archival-quality materials and techniques. Your goal is preservation.
- Use Archival-Quality Materials: Select acid-free, lignin-free fabric for the label to prevent deterioration and discoloration over time. Use archival-quality, permanent ink pens or 100% cotton embroidery floss that is colorfast and fade-resistant. This ensures the information remains legible for generations.
- Document Thoroughly: Be as specific as possible. Instead of just "cotton," write "100% unbleached muslin backing." This level of detail is crucial for future conservators or family members. Consider keeping a digital backup of the label's information in a separate file.
- Consult the Experts: For verifying material origins or choosing the best archival supplies, the knowledgeable staff at Linda's can provide expert guidance. They can help you select the perfect threads and fabrics to ensure your label withstands the test of time, preserving your quilt’s precious history.
Quilt Label Ideas: 8-Point Comparison
| Label Type | 🔄 Implementation Complexity | ⚡ Resource & Time Efficiency | ⭐ Expected Outcome / Value | 📊 Ideal Use Cases | 💡 Key Advantages / Tips |
|---|---|---|---|---|---|
| Personalized Text Labels with Quilt Information | 🔄 Low — basic sewing; optional pro embroidery | ⚡ High efficiency; low cost; moderate attach time | ⭐ High sentimental value and clear provenance | 📊 Heirlooms, gifts, charity quilts | 💡 Use quality thread; include name & year; pre-wash fabric |
| Pictorial and Illustrated Labels | 🔄 Medium — design skill or pro services needed | ⚡ Moderate efficiency; higher design/production cost | ⭐ High visual appeal; distinctive collectible value | 📊 Themed, art, or exhibition quilts | 💡 Use high‑res artwork; test printing; match colors |
| Fabric Fiber Content and Care Instructions Labels | 🔄 Medium — requires detailed record-keeping | ⚡ Moderate time to document; low material cost | ⭐ High practical value; protects longevity | 📊 Sensitive fabrics, heirlooms, gifts | 💡 Keep detailed notes; use clear symbols; consult manufacturers |
| Story and Narrative Labels | 🔄 Medium — writing + space planning | ⚡ Moderate time to write/format; may need printing | ⭐ Very high emotional/sentimental impact | 📊 Memorial, healing, and artist statement quilts | 💡 Be concise; proofread; consider font size and durability |
| Signature Block Labels with Quilt Patterns | 🔄 High — piecing/appliqué and planning required | ⚡ Low efficiency; time- and material-intensive | ⭐ High aesthetic and professional presentation | 📊 Advanced quilters, shows, cohesive designs | 💡 Plan early; use leftover fabrics; keep label proportional (3–6") |
| Dated Series or Collection Labels | 🔄 Medium — template and branding setup | ⚡ Very efficient after templating; needs organization | ⭐ High collector and branding value | 📊 Series, challenges, professional portfolios | 💡 Create reusable templates; track editions; use consistent fonts |
| QR Code and Digital Integration Labels | 🔄 Medium — requires digital platform & testing | ⚡ Efficient for rich content; requires maintenance | ⭐ High extension of story, marketing, and documentation | 📊 Tech‑savvy makers, portfolio building, marketing quilts | 💡 Test QR codes; include backup text; maintain links; use short URLs |
| Heritage and Provenance Documentation Labels | 🔄 High — archival research and detailed documentation | ⚡ Low efficiency; archival materials cost and time | ⭐ Very high historical/authenticity and museum value | 📊 Heirlooms, museum pieces, family archives | 💡 Use acid‑free materials; keep digital backups; consult conservators |
Sign Your Masterpiece and Preserve Its Legacy
A quilt is more than just layers of fabric held together by thread; it's a testament to creativity, a repository of memories, and a tangible piece of your personal history. Throughout this guide, we've explored a vibrant tapestry of quilt label ideas, moving far beyond a simple name and date. Your quilt's signature is the final, crucial step in its creation, transforming it from a beautiful object into a documented work of art.
Labeling your quilt is an act of preservation. It’s a deliberate choice to honor the hours of planning, cutting, piecing, and quilting you’ve invested. By adding a label, you are claiming your work with pride and ensuring its story doesn't fade with time. You are providing the context that future generations will cherish, turning a warm blanket into an irreplaceable family heirloom.
Key Insights to Carry Forward
As you approach your next quilting project, remember the powerful role a label plays. It is not an afterthought but an integral part of the design and storytelling process. Let’s revisit the core concepts we've covered:
- Documentation is Paramount: From the essential details on a Personalized Text Label to the rich history captured in a Heritage and Provenance Label, the information you include provides invaluable context for the future.
- Creativity Knows No Bounds: Your label can be as artistic as your quilt top. Whether you choose an Illustrated Label, a cleverly integrated Signature Block, or a deeply personal Story Label, this small space is a canvas for your unique voice.
- Functionality Matters: Practicality is just as important as personality. Including a Fabric Fiber Content and Care Instructions Label ensures your quilt will be loved and cared for properly for years to come.
- Embrace Modern Technology: Don’t shy away from innovation. A QR Code Label offers a dynamic, expandable way to share your quilt’s journey, linking to photo galleries, video diaries, or blog posts that tell a much bigger story than a small fabric patch ever could.
Your Next Actionable Steps
Feeling inspired? The best way to make these ideas a reality is to start planning your label before you even finish your quilt. Consider which type of label best suits the project's purpose and recipient.
- Choose Your Method: Will you hand-embroider a delicate script, use a permanent fabric pen for a quick and classic signature, or print a detailed design directly onto the fabric?
- Gather Your Information: Write down the quilt's name, your name, the date, location, and any special notes or stories you want to include. Doing this now ensures you don't forget crucial details later.
- Select Your Materials: The quality of your label materials is just as important as the quality of your quilting cotton. Archival-quality pens, high-thread-count fabric for printing, and colorfast embroidery floss are essential for creating a label that lasts.
By embracing these quilt label ideas, you are not just finishing a project; you are curating your legacy. Each labeled quilt becomes a permanent record of your skill, your passion, and a specific moment in time. It’s the final brushstroke on your textile masterpiece, ensuring its voice will be heard for generations. Don't let another creation leave your sewing room without its story attached.
Ready to create the perfect finishing touch for your next masterpiece? At Linda's, we have a curated selection of high-quality Pigma pens, printable fabric sheets, and beautiful embroidery threads to bring any of your quilt label ideas to life. Visit Linda's Electric Quilters to find all the essential notions you need to sign your work with the elegance and durability it deserves.


