
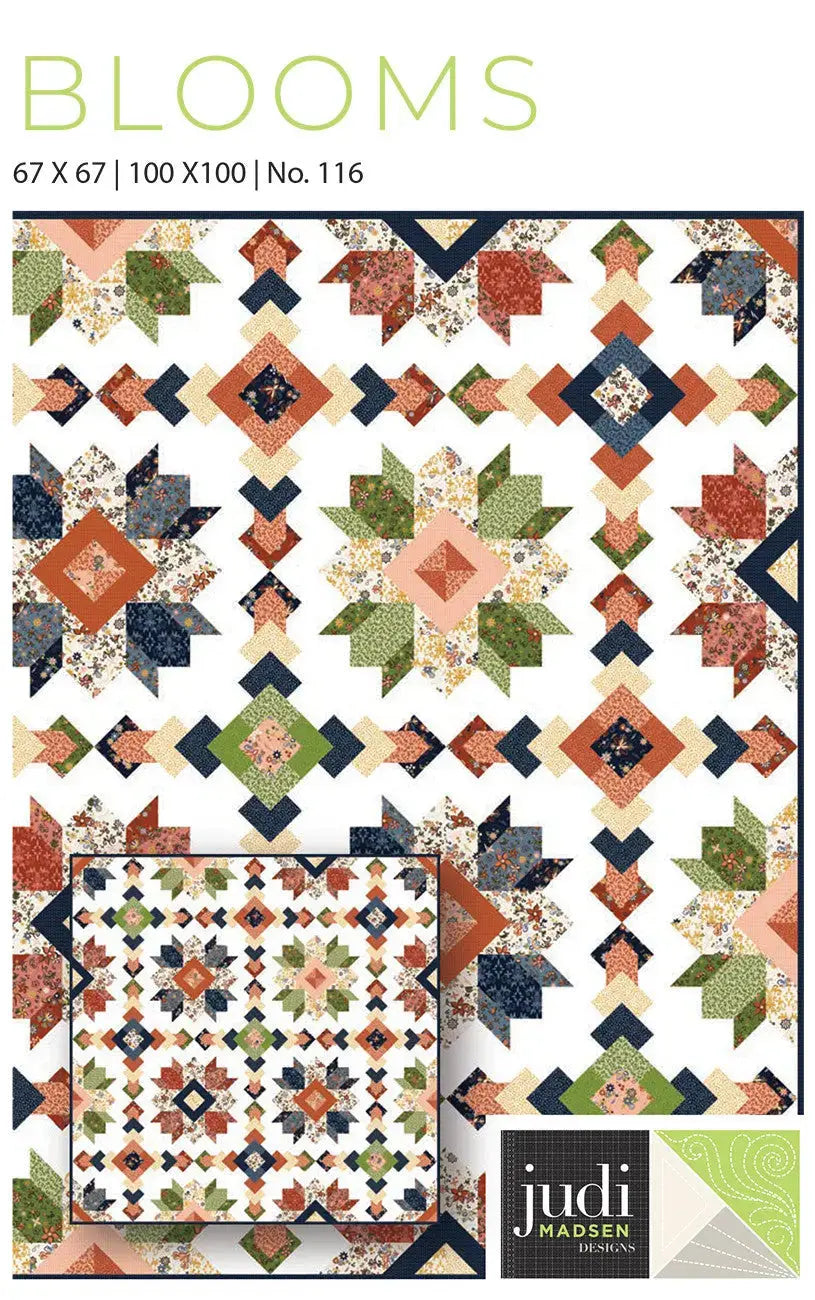
How to Make the Blooms Quilt: A Fat-Quarter Flower Quilt Pattern Guide
The Blooms Quilt Pattern is a printed paper pattern for a pieced, scrappy-style quilt built around adorable flower blocks, using fat quarters and a bit of yardage. The instructions are in full color with beautiful detail, so you can follow the construction clearly from the first cut to the finished top.
The pattern includes instructions for two sizes: a 67 inch by 67 inch quilt, and a larger 100 inch by 100 inch quilt. It is listed for intermediate sewists and uses standard machine sewing, which makes it a satisfying next step if you are comfortable with basic piecing and ready for a project with more blocks to organize and assemble.
What This Pattern Is and Why Quilters Love It
A quilt pattern is your roadmap. Instead of guessing at block sizes, yardage, and assembly order, you get a planned design you can sew with confidence. Blooms captures the beauty of a pieced and scrappy quilt while showcasing Judi's fabric line, Curated Blooms. That combination is part of its appeal: the flower blocks give the quilt a clear, cheerful focus, while the scrappy feel leaves room to mix prints and colors in a way that feels personal.
Fat quarters suit this design well: they let you bring in a variety of fabrics without large cuts of each one, and they are easy to sort by color family before you start.
How to Use the Blooms Quilt Pattern
- Read the whole pattern first. Before cutting, read through the full-color instructions from start to finish. Note which size you are making — 67 inch square or 100 inch square — and confirm you have the fat quarters and yardage that size requires.
- Choose and sort your fabrics. Lay out your fat quarters and yardage together in daylight. Group them by value and color, and decide which fabrics will carry the flower blocks and which will support them in the background and piecing.
- Cut carefully and label everything. Cut one block's worth of pieces first if you want a test run. Label each stack with a sticky note or clip so pieces for different blocks do not get mixed up on your cutting table.
- Sew a test flower block. Piece a single block using standard machine sewing, then press it and check its finished size against the pattern. Fix any seam allowance issues on the test block, not halfway through the quilt.
- Chain-piece the remaining blocks. Once your test block checks out, sew the rest in batches. Press as you go, and keep finished blocks in order so assembly stays calm and organized.
- Assemble, layer, and finish. Join your blocks following the pattern layout, then layer the top with batting and backing, quilt as desired, and bind.
Practical Tips for a Better Result
Press seams consistently and trim stray threads as you go — flower blocks look crispest when the piecing underneath is tidy. If a fabric feels too busy for a petal or center, swap it early; the scrappy design makes substitutions easy. Take a quick phone photo of your fabric pull, too. A photo often reveals a fabric that is too dark or too light before you have cut into it.
Care and Storage
Store this printed paper pattern flat in a labeled envelope or binder sleeve, away from pins and rotary cutters that can tear the pages, and out of sunlight and damp so the instructions stay legible. Write notes on a separate sheet tucked inside rather than across the printed pages.
Project Ideas
Make the 67 inch size as a generous throw for a sofa or reading chair. Choose the 100 inch size when you want a fuller bed quilt. It also makes a thoughtful gift quilt — pick colors the recipient loves, and let the scrappy piecing use favorite fat quarters from your stash. In soft pastels it reads fresh and springlike; in deeper tones, the same blocks carry right through autumn.
Shop the Blooms Quilt Pattern at Linda's Electric Quilters.


