
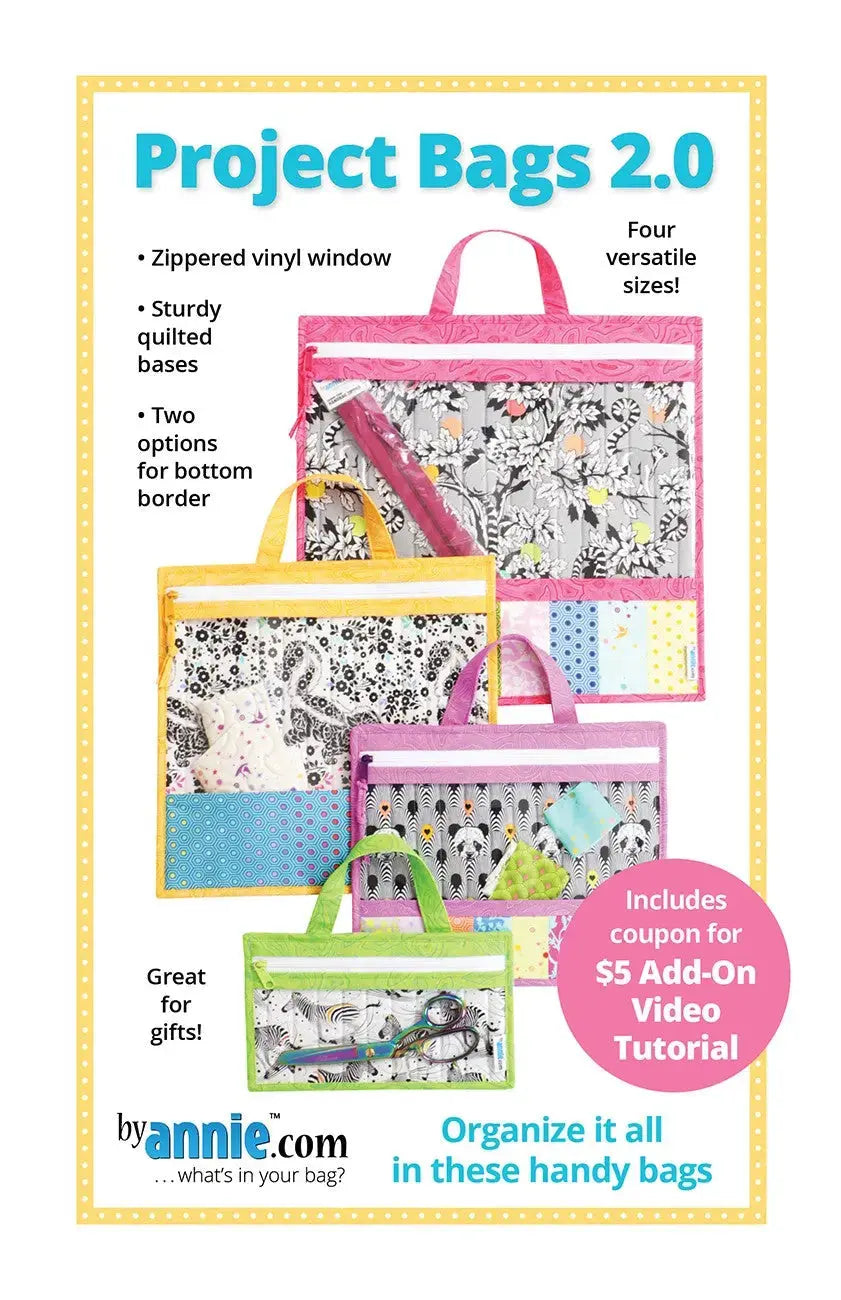
How to Sew Project Bags 2.0: Zippered, See-Through Bags to Organize Every Project
Every quilter knows the scene: one project on the machine, another cut and waiting, a third you are gathering fabric for — and pieces of all three migrating across the sewing table. Project Bags 2.0 is a pattern for handy zippered bags designed to stop that drift. Each bag holds everything for a single project in one place, so you grab one bag and get straight to work.
What Makes These Bags Different
These are not flimsy pouches. The bags have sturdy quilted bases that help them stand up and hold their shape, and vinyl windows so you can see the contents at a glance — no unzipping three bags to find the one with your blocks in it. A handle at the top can be used for carrying the bag or hanging it up. The medium, large, and jumbo bags also have colorful borders at the bottom, and those borders may be pieced or may feature a single fabric, which makes each bag a small design opportunity in its own right.
The pattern includes instructions for bags in four sizes: Small at 6.5 inches high by 10.5 inches wide, Medium at 10.5 inches high by 12.5 inches wide, Large at 13.5 inches high by 13.5 inches wide, and Jumbo at 16.5 inches high by 16.5 inches wide. Project Bags 2.0 is an update of Project Bags, which was released in 2016. Like a new edition of a textbook, this version features improved design and layout, easier-to-follow steps and diagrams, and the newest and best techniques.
How to Sew Them, Step by Step
- Pick your size first. Match the bag to the job: the Small for notions and small projects, the Medium and Large for most quilt projects in progress, and the Jumbo for big projects or bulky supplies.
- Choose fabrics with the border in mind. On the medium, large, and jumbo sizes, decide whether your bottom border will be pieced or a single fabric. Pieced borders are a wonderful way to use scraps that coordinate with the project going inside.
- Read the pattern through before cutting. The updated layout and diagrams reward a first read-through — you will see how the quilted base, vinyl window, zipper, and handle come together before your fabric is in pieces.
- Build the base. Follow the pattern to make the sturdy quilted base, which gives the finished bag its structure.
- Add the window and zipper. Work through the steps for the vinyl window and the zippered opening, taking your time so everything sits flat and even.
- Finish with the handle. Add the top handle for carrying or hanging, give the bag a final check, and load it up.
Practical Tips
Think one bag, one project: pattern, fabric, cut pieces, and the notions that project needs all live together. Because the window shows the contents, you can stack or hang several bags and still find the right one instantly. When you finish a project, empty the bag completely and it is ready for the next idea. Make your first bag in the size you will use most, then sew the other sizes assembly-line style once the steps feel familiar.
Care and Storage
Store empty bags flat or hanging by their handles so they stay ready to grab. Keep the vinyl window clean with a soft, dry or slightly damp cloth so it stays easy to see through, and avoid folding a bag sharply across the window for long periods. Loaded bags store beautifully on a shelf, in a closet, or hanging near your machine, and the handle makes them easy to carry to classes, retreats, and guild sew days.
Project Ideas Beyond Quilting
The pattern notes that these bags hold everything from sewing supplies to puzzles, games, and more. Use a Small for hand-sewing supplies by the sofa, a Medium for embroidery, a Large for a child's puzzle or travel games, and a Jumbo for a full quilt kit. Sewn in fabrics you love, they also make thoughtful gifts for a fellow maker.
Shop the Project Bags 2.0 at Linda's Electric Quilters.


