
How to Use a 5.5" Square Non-Slip Ruler: Squaring Blocks and Cutting Small Pieces Accurately
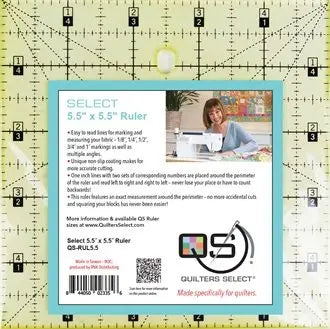
Small pieces leave little room for error — a shift of an eighth of an inch can throw off every point and corner that follows. The Quilters Select 5.5" x 5.5" Non-Slip Ruler is a compact square ruler made for measuring, marking, trimming, and squaring small units so they fit together cleanly.
What This Ruler Is
This is a 5.5-inch square quilting ruler from Quilters Select, a brand that has made non-slip rulers since 2016. Its markings include 1/8-inch, 1/4-inch, 1/2-inch, 3/4-inch, and 1-inch measurements, along with multiple angles for precise marking and measuring. A unique non-slip coating on the back helps hold the ruler — and the fabric under it — in place while you cut.
Two details set it apart. It is ambidextrous: the one-inch perimeter lines carry a dual-number system that reads left to right and right to left, so right- and left-handed quilters can measure from whichever edge suits the cut, without counting backward. It is also made for exact perimeter measurement, which supports precision when squaring blocks and helps eliminate accidental cuts.
Why Quilters and Sewists Use It
- Squaring finished units: A true square shape makes it easy to check that a block, half-square triangle unit, or appliqué background is the size it should be on all four sides.
- Cutting small pieces: Charm-square-sized pieces, small squares, and short strips are easier to manage under a ruler that is close to the size of the piece itself.
- Cleaner, more accurate cuts: The non-slip coating reduces the creeping and shifting that cause wavy edges and pieces that come out slightly too small.
How to Use It, Step by Step
- Start with pressed fabric. Press your fabric or unit flat first; wrinkles under a small ruler make accurate placement harder.
- Place the ruler on top. Set the ruler over the area you want to cut or check, aligning the perimeter lines with the finished size you need. Let the non-slip coating grip the fabric — you should not have to press down hard to keep it steady.
- Read from the edge that suits you. Use the dual numbers to measure from the left or the right, whichever keeps your cutting hand comfortable and your view of the markings clear.
- Square two sides first. To square a block, trim one edge, then rotate the unit and trim the adjacent edge, using the corner and perimeter markings to confirm the unit is truly square.
- Check the size before the final cuts. Measure across the unit in both directions. If one side is oversized, trim the remaining edges evenly rather than taking everything off a single side.
- Cut with a steady hand. Hold the ruler flat, keep your fingers well away from the cutting edge, and run your rotary cutter firmly along the ruler's edge in one smooth pass.
Practical Tips
Work in good light so the markings are easy to see against light and dark fabrics. When trimming pieced units, center the design first — align seams or points where you want them, then trim to size. For repetitive cutting, stack only as many layers as you can hold completely still. If a unit comes out small, check ruler placement before blaming your seam allowance — a thread's width off the line adds up quickly at this scale.
Care and Storage
Store the ruler flat, away from heat and direct sunlight, in a ruler rack, drawer, or on a peg — not leaning where it can warp or fall. Wipe it with a soft cloth if lint builds up on the surface or coating, and avoid stacking heavy items on it. The non-slip coating is designed to last, even if the edges show wear.
Project Ideas
Reach for it when squaring half-square triangles and four-patches, trimming small blocks for sampler quilts, and cutting squares for patchwork, mug rugs, and table runners. It is also handy for checking appliqué backgrounds and trimming embroidered blocks to a consistent size.
Shop the Quilters Select 5.5" x 5.5" Non-Slip Ruler at Linda's Electric Quilters.


