
How to Use Side-Threading Needles: Easier Threading for Hand Sewing and Embroidery
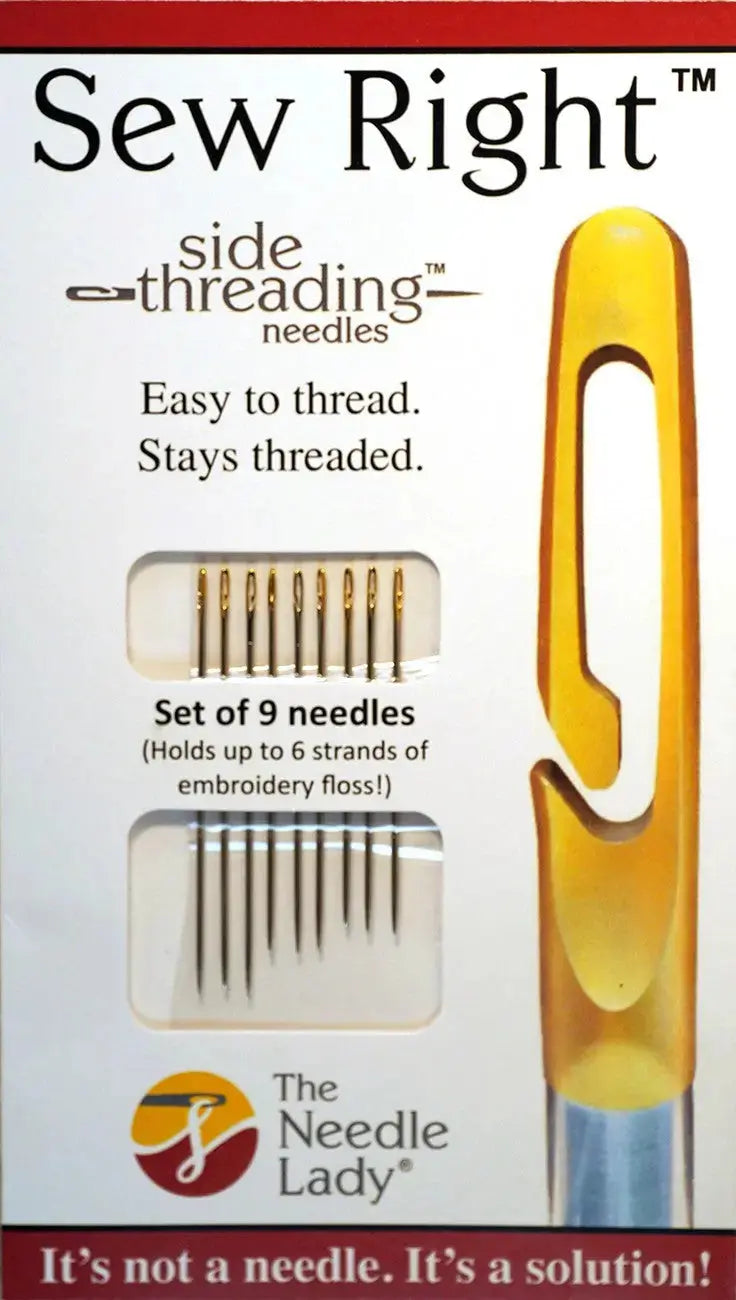
Threading a hand needle is a small step that can stop a project cold — especially when your eyes are tired, the light is poor, or the thread keeps fraying just as it reaches the eye. The Needle Lady's Side Threading Needles solve that frustration simply: instead of pushing thread through a tiny closed eye, you slip it in from the side. This package includes nine needles in assorted sizes, made of nickel and gold plated iron, intended for hand embroidery and general hand sewing crafts.
What Side-Threading Needles Are
A side-threading needle — sometimes called an easy-threading or self-threading needle — has an opening at the top of the eye that lets thread enter from the side rather than passing end-first through the eye. You lay the thread across the top of the needle and guide it down into the eye, where it seats and stays put while you stitch. Once threaded, it works like a conventional hand needle; the difference is how quickly you get there. With nine assorted sizes in one package, you can match the needle to your thread and fabric instead of struggling with one size for every job.
Why Quilters and Sewists Use Them
Hand finishing shows up everywhere in quilting: sewing down binding, burying thread tails, appliqué, mending, and hand embroidery. Those jobs involve rethreading again and again, often with short lengths of thread. A needle that threads in seconds keeps your momentum going and reduces eye strain. Side-threading needles are especially welcome for anyone with reduced vision, unsteady hands, or arthritis, and for anyone sewing in poor light at a retreat, in class, or on the couch in the evening. They also help beginners, keeping the focus on stitching, not frustration.
How to Use Them, Step by Step
- Choose your size. Pick from the assorted sizes in the pack: a finer needle for lightweight fabrics and standard sewing thread, a sturdier one for heavier fabric or thicker embroidery thread. The needle should slide through your fabric without forcing it or leaving an obvious hole.
- Cut a manageable length. About 18 inches of thread is a good working length — long enough to make progress, short enough to resist tangling and fraying.
- Lay the thread across the top. Hold the needle in one hand and drape the thread over the opening at the top of the eye.
- Slip the thread down into the eye. With a gentle downward pull on both sides of the thread, guide it into the eye until it seats, then give it a light tug to confirm it is captured.
- Stitch as usual. Secure your thread as your project requires, and sew with even, relaxed stitches, letting the needle do the work.
- Finish and unthread. When you are done, the thread slips back out the same way it went in — no cutting close to the eye required.
Practical Tips
Use steady, gentle pressure when pulling thread into the eye; forcing it can bend a fine needle. If a thread feels too bulky for the needle you picked, move up a size from the assorted set instead of fighting it — the variety in the pack is there for exactly that reason. For embroidery, test your needle and thread combination on a scrap of the same fabric before starting on the real piece.
Care and Storage
Needles are small, sharp, and easy to lose, so store this set together in a needle case, pincushion, or magnetic dish rather than loose in a sewing box. Keep them dry to protect the nickel and gold plated iron finish, and retire any needle that becomes bent or rough — a damaged needle snags thread and cloth.
Project Ideas
Reach for side-threading needles to hand-sew quilt binding, bury thread tails after machine quilting, add hand embroidery details to a finished top, appliqué shapes in place, mend a favorite garment, or tack down labels and hanging sleeves. Anywhere a quick, painless rethread keeps you stitching, these needles earn their place in your kit.
Shop the The Needle Lady's Side Threading Needles 9pc at Linda's Electric Quilters.


