
How to Sew the Travel Essentials 2.0 Organizer and Hot Tools Sleeve: Tips for Quilters
If you sew at retreats or take classes, keeping tools and toiletries organized on the move can be a challenge. Travel Essentials 2.0 is a pattern for a handy set that includes a fold-up organizer and a bonus hot tools sleeve, designed to keep your essentials organized at home or on the road.
What This Pattern Is
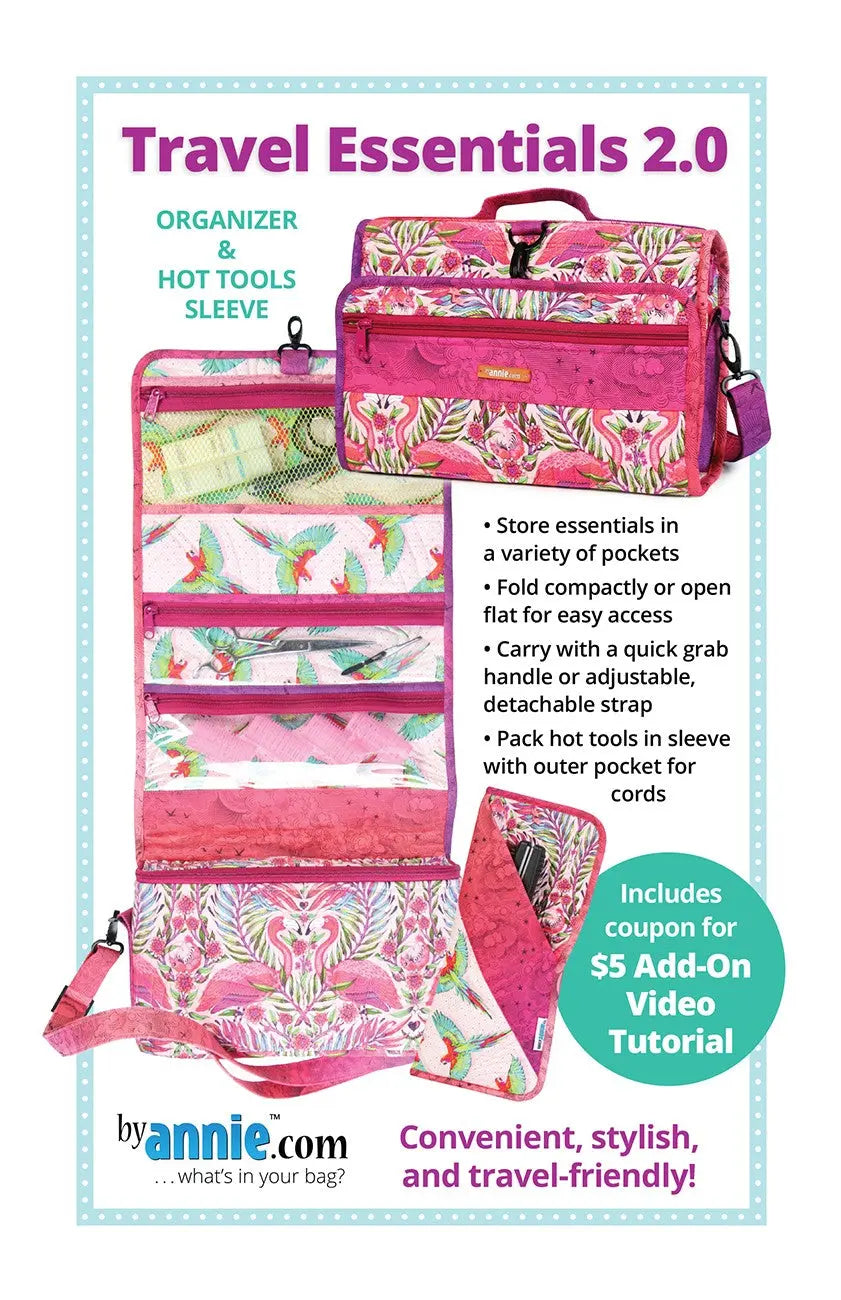
Travel Essentials 2.0 is an update of a popular Travel Essentials pattern first released in 2013. The new version greatly improves the illustrations and layout, adds a hanging strap and an exterior zippered pocket, and reduces the visible stitching lines on the outside for a cleaner finish. The finished organizer measures 27-1/2in H x 12in W when open and 9in H x 12in W x 3in D when closed. The coordinating Hot Tools Sleeve measures 13-1/2in H x 6in W. The pattern also includes a coupon to get the Add-on Video at no charge, so you can watch the project come together as you sew.
Why Quilters and Sewists Use It
The Organizer has mesh and vinyl pockets for visible storage, so you can see what you packed at a glance instead of digging through a dark bag. A deep zippered pocket on the bottom on the inside is perfect for larger items, and a zippered pocket on the outside conceals an attached Hanging Strap that enables the Organizer to be hung from a rod or hook — handy in a hotel bathroom, a retreat sewing room, or your own closet. The coordinating Hot Tools Sleeve has two compartments, including an outer pocket for cords, making it a practical companion for a travel iron or hair styling tools.
How to Use It: Step by Step
- Read the pattern through first. Study the improved illustrations and layout, note the finished sizes for both pieces, and gather the fabrics, zippers, mesh, and vinyl called for in the pattern before you cut anything.
- Cut and label every piece. With an organizer, pocket pieces can look similar. Label each cut piece as you go so the mesh, vinyl, and zippered pockets end up in the right order.
- Build the inside pockets. Construct the mesh and vinyl pockets for visible storage, then add the deep zippered pocket on the inside bottom for larger items.
- Add the outside details. Sew the exterior zippered pocket that conceals the attached Hanging Strap, following the pattern so the strap tucks away neatly when not in use and the outside stitching stays minimal.
- Assemble and fold. Join the sections, finish the edges as directed, and test the fold-up shape. Closed, the organizer should measure about 9in H x 12in W x 3in D.
- Make the Hot Tools Sleeve. Sew the sleeve with its two compartments, including the outer pocket for cords, to its finished size of 13-1/2in H x 6in W.
- Use the Add-on Video. Redeem the coupon included in the pattern and watch the video for any step you want to see demonstrated before you stitch it.
Practical Tips
Press seams as you go — flat seams help a fold-up organizer close evenly. Go slowly when stitching vinyl and mesh pockets, and test zippers before final assembly. Before a trip, hang the organizer by its strap and load it once at home to learn which pocket fits each item best.
Care and Storage
Empty pockets before storing, and fold the organizer closed to protect the mesh and vinyl inside. Store the Hot Tools Sleeve with cords tucked into its outer pocket so nothing tangles, and let any hot tool cool completely before sliding it in. Kept flat or hung by its strap, the set stays ready for the next trip.
Project Ideas
Make the organizer as a retreat kit for sewing notions, a travel toiletry organizer for the bathroom, or a hanging organizer for a guest room. Sew the Hot Tools Sleeve on its own as a quick gift, or make the full set in coordinating fabrics for a quilter who travels to classes and guild events.
Shop the Travel Essentials 2.0 at Linda's Electric Quilters.


