
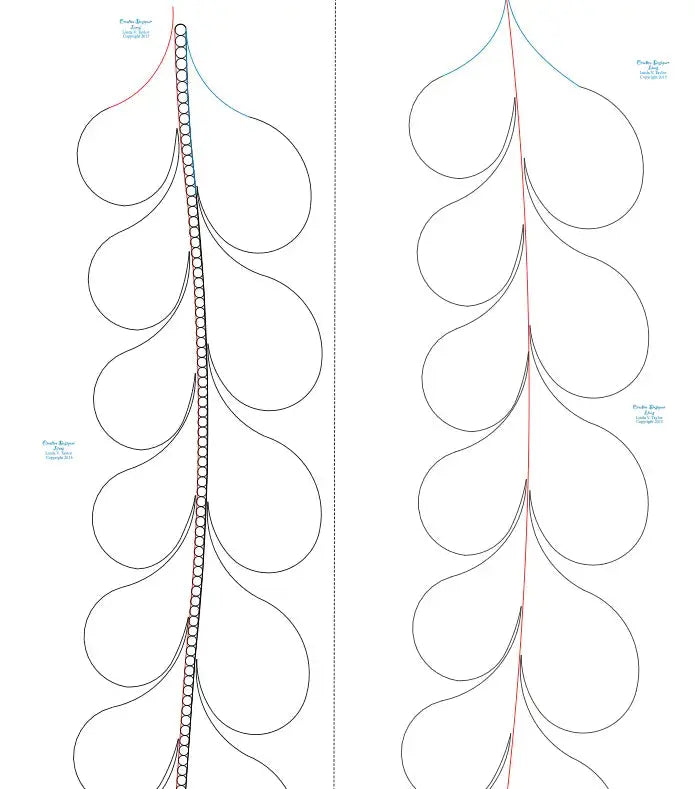
Border Base: Laying a Clean Foundation for Quilt Borders in 8- and 10-Inch Rows
The 273 Border Base Pantograph by Linda V. Taylor is a continuous-line paper pantograph designed to give quilt borders a clean, consistent foundation. It measures 121 inches long and comes in two row heights — 8 inches and 10 inches — so you can match the scale of the quilting to the width of the border you are finishing.
What the Design Is
A paper pantograph is a printed, continuous-line pattern used from the back of the quilting frame. You lay the paper flat on the pantograph table, follow the printed line with a laser light or a stylus, and the needle reproduces that same path on the quilt above. Because the line never breaks, you can stitch a full pass in one smooth run, then advance the quilt and repeat.
As its name suggests, Border Base is made to work as a base treatment for borders. Rather than leaving a wide border plain, or improvising a border design freehand, you get a repeatable printed row you can follow the full length of the quilt. Every repeat is the same size and spacing, so the border reads as one deliberate frame around the center.
What Quilts It Suits
This pattern suits any quilt with a border wide enough to show quilting. It is especially useful where the center already has plenty going on: busy piecing, appliqué, or a strong all-over in the field. A tidy, repeated border row separates the center from the edge before the binding.
It also helps plainer quilts. On tops built from large blocks, panels, or wide solid areas, a stitched border adds finish and structure without competing with the top. It works on everything from lap and throw quilts with narrower borders to bed quilts with generous outer borders.
Row-Height Choice: 8 Inches or 10 Inches?
The 8-inch row is the finer option. Choose it for narrower borders, smaller quilts, and anywhere you want closer texture and a smaller repeat. Measure your finished border width first: the row should sit comfortably inside the border with a little margin at the seams, not crowd the piecing or spill into the binding.
The 10-inch row is the bolder, faster option. Each repeat stitches larger, each pass covers more ground, and the finished quilt keeps a softer feel. Choose it for wide outer borders on larger quilts, where an 8-inch row might look lost.
Whichever size you pick, plan first: measure the border width at several points, confirm the row fits it all the way around, and decide how you will turn corners before you start.
How to Use It on a Longarm
Unroll the paper smoothly on the pantograph table and secure it so it cannot shift mid-pass. Position your laser or stylus, check that the pointer tracks the printed line accurately, and do a short dry run without stitching to confirm the row starts and ends where you expect.
Stitch at a steady, even speed, keeping your eyes on the pointer and the printed line. For a border treatment, work one side at a time and keep starting and stopping points consistent, so the repeats line up evenly along each edge. When a pass is finished, advance or reposition as your layout requires, re-align your pointer, and check spacing before you stitch.
Need the pattern to be longer than 121 inches? Find where the pattern repeats, mark that point on your pattern shield, and shift the pattern down to make it meet up. That lets you extend the pattern to accommodate larger quilts — useful on long bed-quilt borders.
Tips for a Clean Finish
Measure first and mark your border boundaries lightly so the row stays centered. Step back after the first side and check scale and spacing — catching a drift on one side is far easier than unpicking four. Keep thread close to the border fabric for a quiet, textured frame, or use a gentle contrast when you want the border quilting to be a feature.
Shop the 273 Border Base Pantograph by Linda V. Taylor at Linda's Electric Quilters.


