
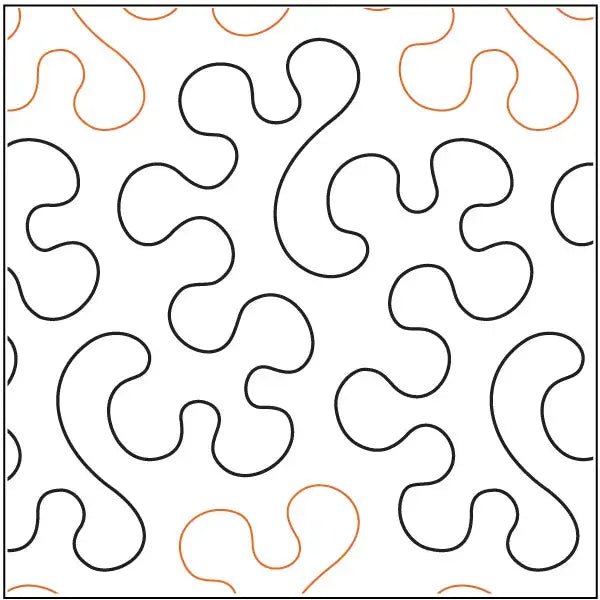
Bumpity Pantograph: A Bumpy, Rounded All-Over Texture in a 9-Inch Row
The Bumpity Pantograph from Urban Elementz is a paper pantograph built around texture rather than a picture. Instead of a flower, a feather, or a themed motif, this design gives the surface of a quilt a bumpy, rounded, all-over movement — the kind of quilting that supports the fabrics instead of competing with them. It is printed with one row, a single row is 9 inches, and the roll is 144 inches long, so you get one clear repeat you can follow from edge to edge.
What the Design Is
A paper pantograph is a printed pattern you use from the back of the quilting frame. You lay the paper flat on the pantograph table, follow the printed line with a laser light or a stylus, and the needle reproduces that same path on the quilt loaded above. The design repeats along the row, so one pass gives you a continuous band of quilting across the quilt, and each advance adds another band below it.
Bumpity uses that structure to spread a soft, bumpy texture evenly over the whole top. Because the row is printed singly, there is no second row to confuse your eye or your pointer: you follow one line, finish the pass, advance, and follow it again.
What Quilts It Suits
A rounded, all-over texture like this is one of the most versatile choices you can keep on hand. It suits quilts where the fabrics are the stars — busy prints, scrap quilts, and bold modern tops — because the quilting adds movement and softness without asking the eye to stop and read a motif.
It also works well on plainer tops. On quilts made from large blocks, panels, or broad solids, the bumpy path gives the surface life without demanding custom quilting block by block. For everyday quilts that will be washed, used, and loved, that even, forgiving texture is a practical advantage too.
Row-Height Choice: Working With the 9-Inch Row
This pattern comes in a single 9-inch row, so the choice is not between sizes — it is about how that scale fits your quilt. Nine inches is a versatile middle size: large enough for the bumps to read as a flowing texture, yet small enough that rows stack comfortably on throws and bed quilts alike.
Before you stitch, measure the usable quilting area and work out how the 9-inch rows will advance down the quilt. A quick plan lets you adjust your starting position so the spacing looks intentional all the way down.
How to Use It on a Longarm
Unroll the paper smoothly on the pantograph table and secure it so it cannot shift mid-pass. With 144 inches of length, the printed row covers a wide quilt in a single pass for most projects. Position your laser or stylus, check that the pointer tracks the printed line accurately, and make a short dry run without stitching to confirm the row starts and ends where you expect.
Stitch at a steady, even speed, keeping your eyes on the pointer and the printed line rather than on the needle. Rushing tends to flatten the bumps, while a steady hand keeps them rounded and even. When the pass is complete, advance the quilt by one row height, re-align your pointer, and check the spacing against the row above before stitching again.
Need the pattern to be longer than 144 inches? Find where the pattern repeats, mark that point on your pattern shield, and shift the pattern down to make it meet up. That lets you extend the pattern to accommodate larger quilts.
Tips for a Clean Finish
Mark a light reference for your first row so the design starts square, and check alignment after the first advance — small drifts are easy to correct early and hard to hide later. Step back after two or three rows: the bumps should feel evenly spread and relaxed, like a gentle ripple across the quilt.
Shop the Bumpity Pantograph at Linda's Electric Quilters.


