
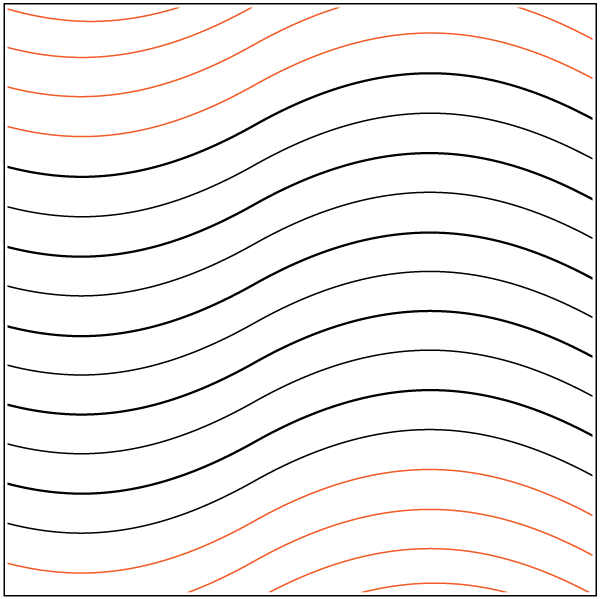
The Good Vibrations #1 Pantograph from Urban Elementz takes its name from rhythm you can feel — and that is what it does on a quilt. This continuous-line paper pantograph is built from closely spaced rows, so the stitching builds into a dense, even, rhythmic texture rather than a single bold motif on its own. If you want a finish that adds movement and texture without taking over the piecing, this is the design to reach for.
What the Design Is
A paper pantograph is a printed pattern you unroll on the table at the back of your longarm frame. You follow the printed line with a laser light or stylus, and the machine reproduces that line in thread on the quilt. Because the line is continuous, you can stitch a row in one pass, then advance the quilt and stitch the next.
Good Vibrations #1 is a small-scale design: a single row is 2 inches, with 10 rows spaced 3/4 of an inch apart, and the roll is 144 inches long. That close spacing is the heart of the pattern — the rows sit near each other, and together they create the finished texture.
What Quilts It Suits
This is a strong choice where even, all-over texture matters more than a large motif: modern quilts, graphic piecing, solids or near-solids, and everyday quilts that will be washed and used hard. The small scale also suits smaller piecing, because the quilting does not need large open areas to read well.
On busy prints, the stitching settles in as texture and unifies fabrics of different values. On plainer fabrics, the rows show more clearly and become part of the look. Choose thread accordingly — a close match gives supporting texture, while more contrast makes the rows a feature.
Working With a 2-Inch Row and 3/4-Inch Spacing
Two inches is at the small end of the pantograph row-height range, and it changes how you plan the job. Smaller rows mean more passes to cover the same quilt, so allow a little more time than you would for a tall, open design — the reward is a denser, more closely worked finish.
Because the rows are spaced only 3/4 of an inch apart, consistency matters more than usual. Advance by the same measured amount every time rather than eyeballing it — a row that creeps closer to its neighbour stands out, because the eye reads the spacing as a rhythm. Mark your advance point before moving the quilt, and check alignment at both ends.
Using It on a Longarm
Unroll the pattern flat on the pantograph table and secure it so it cannot creep. Load and baste your quilt, check tension on a scrap at the edge, and take a short test run before the first full row — with a dense design, confirm the stitch and thread effect early.
Stand at the back of the machine and keep your laser or stylus on the printed line, moving smoothly and steadily. Pantograph quilting rewards a relaxed pace — let your whole body move with the machine rather than steering with your wrists alone. When a row is finished, advance by your marked amount, line up the next row, and confirm it is straight at both edges before stitching.
Extending the Pattern
At 144 inches long, this roll goes further than many pantographs, but a very wide quilt can still ask for more. When you need extra length, find where the pattern repeats, mark that point on your pattern shield, and shift the pattern down to make it meet up. Done carefully at a repeat, the join disappears into the continuous line.
Tips for a Great Finish
Step back after the first few rows and check spacing, density, and thread effect against the whole quilt — that early check is where you catch a drifting advance before it runs the length of the quilt. Keep your movement even, re-check tension whenever you change bobbins, and resist rushing. Done well, Good Vibrations #1 gives a quilt a dense, rhythmic finish that feels as good as its name sounds.
Shop the Good Vibrations #1 Pantograph at Linda's Electric Quilters.


