
Sew Accurate Quarter-Inch Seams Without Marking: How to Use a Seam Guide for Half-Square Triangles, Flying Geese, and Snowballs
Ask a room of quilters what makes a block come together cleanly, and most will give the same answer: an accurate quarter-inch seam. When that seam drifts, points stop matching, blocks finish the wrong size, and rows refuse to line up. The Lori Holt Seam Guide in Color Jade is a small plastic tool designed to solve that problem at the machine. Part of Lori Holt's Seams Sew Easy line, this seam guide temporarily adheres to the bed of any sewing machine and gives you a visible, physical reference to sew against — no guessing where the quarter-inch line falls, and no stopping to mark lines on your fabric.
What This Seam Guide Is
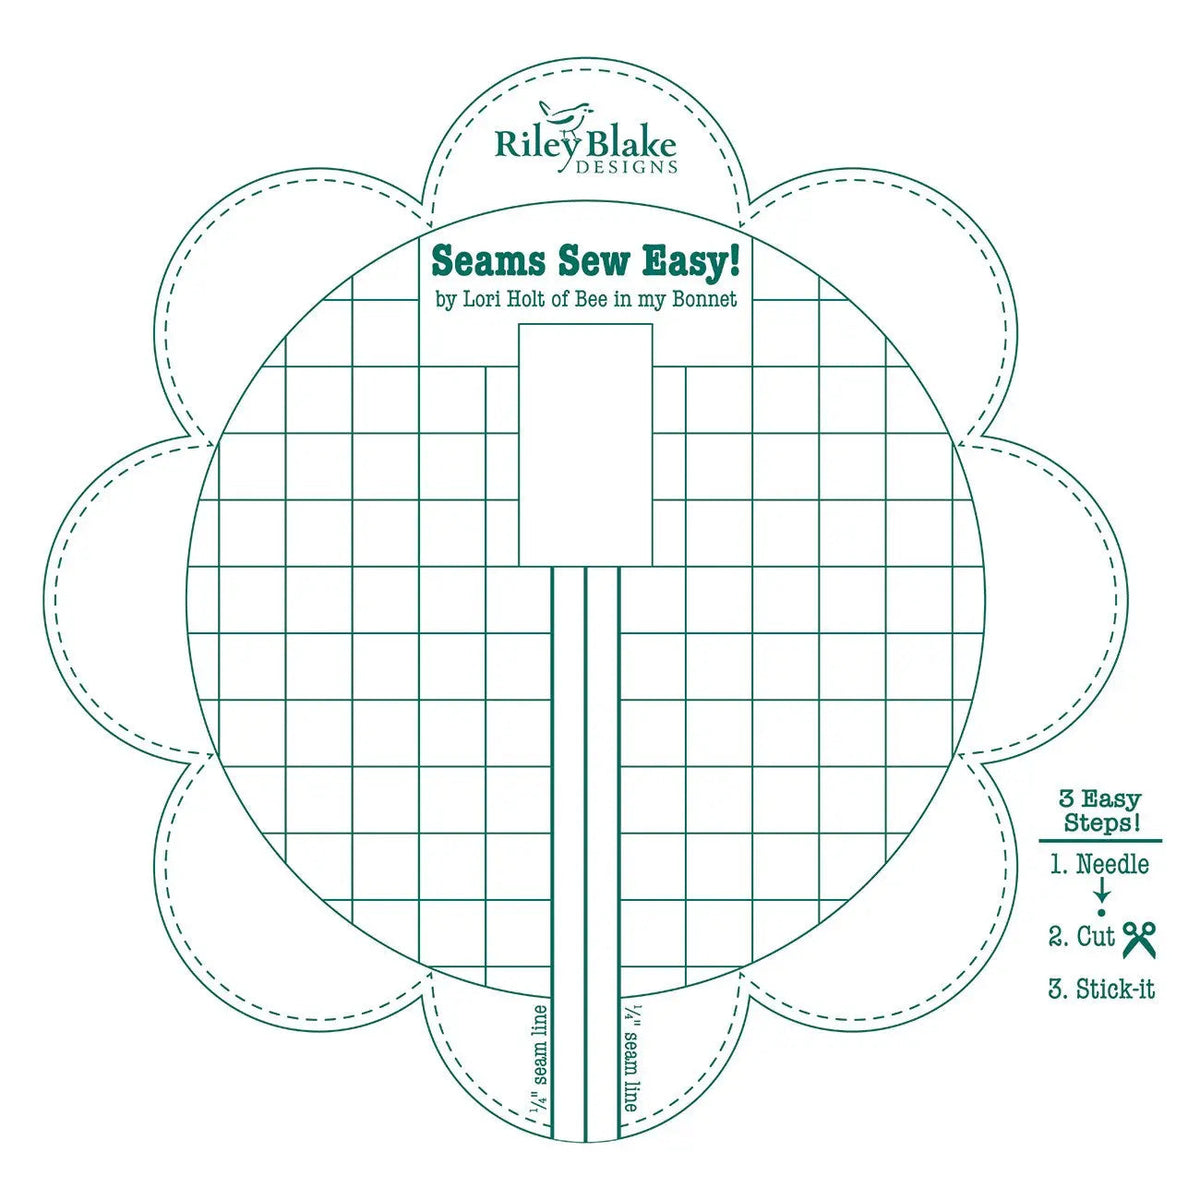
The guide is a flat plastic sheet that sticks temporarily to your machine bed, right where your fabric feeds through. Its center is precut to give you a smooth surface for sewing, so fabric glides over it instead of catching on an edge. Printed lines on the guide show you exactly where to align the edge of your fabric for an accurate 1/4-inch seam, and the center circle of the guide is also marked with 1/2-inch grid lines for projects that call for a wider seam allowance. Those same grid lines help you place the guide correctly on the machine bed in the first place, so the reference lines sit where they should in relation to your needle.
The jade color is more than a pretty touch. A clearly colored guide is easy to see under your fabric and your machine's lights, which matters when you are chain-piecing dozens of units. Because it adheres temporarily, you can lift it off when you need a clear machine bed, then put it back when you return to piecing.
Sew Corner Triangles Without Drawing a Single Line
The guide's second job is the one that saves the most time. Lori designed it for constructing easy corner triangles, and it eliminates the drawn diagonal line most methods require. When you sew half-square triangles, flying geese, or snowball corners, the traditional method has you draw a line from corner to corner on every small square, sew on or beside that line, then trim. With a seam guide on the machine bed, you use the printed guide lines as your sewing reference instead. Align the corners of your piece with the guide, sew straight, and the diagonal seam lands where it belongs — no pencil, no marker, and no marks to remove later.
That difference multiplies fast. A quilt with eighty snowball corners saves eighty drawn lines, plus the risk of a thick marker line shifting your seam. It also helps beginners, who can focus on feeding the fabric steadily rather than following a wobbly pencil line.
Setting It Up and Sewing With It
Start by cleaning the machine bed so the guide adheres smoothly, then use its grid lines to position it correctly before pressing it into place. Before piecing your real blocks, sew a quick test: stitch a measured seam, press, and measure the finished width of your sewn unit. If the unit measures true, your placement is right and you can sew with confidence. Feed each piece so its edge rides along the guide line, keep your eyes on the guide rather than the needle, and let the machine do the work at a steady pace.
For storage, peel the guide up and keep it flat so it stays smooth for the next session. Check its position if you bump it or move your machine, and re-test your seam after repositioning — a ten-second test strip protects an entire quilt top.
Who Will Love It
This is a notion for piecers at every level: beginners building consistent seams, Lori Holt fans working through her sew-alongs and block patterns, and experienced quilters who piece a lot of half-square triangles, flying geese, and snowballs and would happily skip the marking step forever.
Shop the Lori Holt Seam Guide In Color Jade at Linda's Electric Quilters.


