
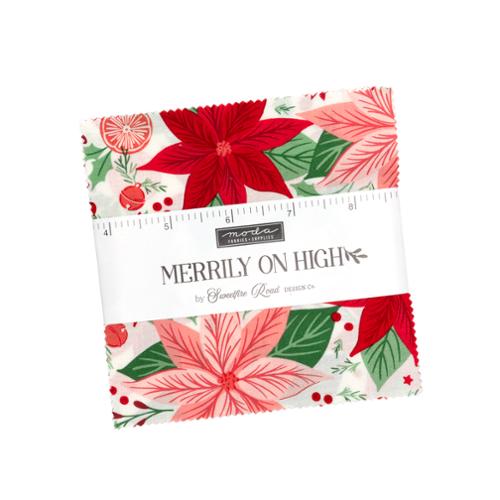
Hey everyone. Today we're sewing a square Christmas tree skirt from two charm packs. You'll learn the grid, quilting, and cutting the opening.
We are making a patchwork tree skirt, nominal finished size 40½ inches square, for a confident beginner. Its 5-inch-diameter center opening and slit slide around a trunk or pole.
What is the finished size, and what are the key numbers?
The pieced top measures 41 by 41 inches before quilting. After quilting, trim the sandwich to 40½ inches square; the bound skirt finishes about there. Seam allowances are ¼ inch throughout. The grid is 9 by 9, with 4½-inch interior spacing.
Why make a square skirt instead of a round one?
A square skirt is the honest charm pack shape: whole squares, flat grid, no waste, no curved piecing. Value does the design work: an even split alternates into a checkerboard; otherwise, go scrappy.
What do you need?
| Material or tool | What you need | Required or optional |
|---|---|---|
| Charm packs (5 in. squares) | 2 packs, 42 each; 81 used, 3 spare | Required |
| Backing fabric | 45 by 45 in.; piece if narrower | Required |
| Batting | 45 by 45 in. | Required |
| Binding fabric | ¾ yard of strips | Required |
| Sewing machine, needle, thread | 50-weight cotton | Required |
| Walking foot, basting safety pins | Quilting; basting | Required |
| Hand-sewing needle, seam ripper | Finishing; fixes | Required |
| Ribbon or fabric ties | At the slit | Optional |
What is the cutting list?
Charm squares are used whole; almost no cutting comes first. From the packs: 81 squares, sorted by value. From the ¾ yard of binding fabric, at 42 inches usable width: cut six straight 2½-inch strips across the width. From the rest, cut bias pieces and join them into a 2½-inch-wide bias strip about 24 inches long; for a larger opening, measure and add allowance. Backing and batting: 45-inch squares minimum. Save slit and circle cuts for after quilting.
How do you sew it, step by step?
- Sort all 84 squares by value. For a strict checkerboard, pick 41 squares from one value group, 40 from the other; lay out 9 rows of 9, alternating. Without that balance, go scrappy; spread the darkest prints out.
- Sew a test pair from two adjacent layout squares: 5 by 9½ inches is right. Adjust if needed; it stays in its row.
- Chain piece each row; clip the ends.
- Press row seams alternating directions, so cross-seams nest.
- Join rows, pinning every cross-seam. Each unjoined row measures 5 inches tall and 41 inches long; its nominal finished height is 4½ inches once the seams are taken up. Slow down.
- Press; measure: about 41 inches.
- Layer backing face down, batting, top face up. Pin baste every 4 to 5 inches.
- Quilt with the walking foot: stitch in the ditch, or diagonals.
- Square and trim the sandwich to 40½ inches, a little off each side — or to the largest fitting square if quilting shrank it. Do not cut the slit or hole yet — cutting first shifts layers and frays edges.
- Mark the slit from one edge's middle to the center, plus a 5-inch-diameter circle. Measure your post first.
- Cut the slit, then the circle, slowly, on the lines.
- Join the straight strips. Fold all binding lengthwise, wrong sides together, press; turn under the starting short end. Start at the circle end of one slit side, raw edges aligned on the front, sewing down that side with a ¼-inch seam. At each slit-mouth corner and each of the four outside corners, stop ¼ inch short, fold the binding up at 45 degrees, then back down along the next edge to form a miter. Continue up the far slit side to the circle. Leave an extra ½ inch of binding extending beyond the circle/slit junction, trim, and turn that extra ½ inch under so the finished end lies at the junction. Sew the straight binding in place up to the junction.
- Sew the bias strip around the circle, raw edges aligned on the front, ¼-inch seam, easing around the curve. Carry each end 1 inch past its junction onto the slit side, turn it under ½ inch, and hand-stitch the resulting ½-inch overlap over the straight binding's finished end, through all layers. Fold all binding to the back and slip-stitch it to the backing.
- Add ties; press flat. It doesn't have to be perfect, folks.
How do the charm packs behave in this make?
Two packs give 84 squares; the grid uses 81. All 3 spares stay free for repairs — the test pair comes from the layout and returns to its row. Interior squares finish at 4½ inches; edge squares keep a perimeter allowance the trim and binding take up. Do not trim off the pinked edges. Check squares against a ruler to identify the intended 5-inch outline, align consistently, and check your seam with a test pair. Sorting by value first shows whether a checkerboard is possible; cut biggest pieces first.
What can go wrong, and how do you fix it?
Check seam width, pressing direction, binding grain, and opening size first. The table below matches each problem with its likely cause and fix.
| Symptom | Possible cause | Fix |
|---|---|---|
| Cross-seams won't nest | Rows pressed the same direction | Re-press alternate rows; pin cross-seams |
| Top measures well under 41 in. | Seams wider than ¼ in. | Test a pair; re-sew scant |
| Binding puckers at the circle | Straight grain forced around a curve | Use bias; ease gradually |
| Skirt rucks around the stand | Circle smaller than the post | Widen the circle; re-bind |
Frequently asked questions
Can I make this with one charm pack?
Yes, a tabletop version: 6 by 6, 36 squares, 27½-inch top trimmed to 27 inches square; same slit.
Why cut the slit after quilting?
A quilted square is stable; layers stay aligned.
Do I have to alternate lights and darks?
No. Completely up to you. Scrappy works; spread dark prints evenly.
Can I make it round instead?
Yes. Mark the largest circle that fits; cut on that line. The whole edge needs bias binding — recalculate from edge length plus allowance; the square plan does not carry over.
How do you care for it, and what can you change?
Follow the care instructions for the fabrics, batting, and any ties. If all components allow machine washing, use a cold, gentle cycle and dry on low. For color help, our Christmas Red Bella Solids guide covers true red beside busy prints; Christmas Green Bella Solids covers its green partner. Adaptations: add ties, go round, or scale down.
Shop the Merrily On High Charm Pack at Linda's Electric Quilters.
Thanks, folks. We'll see you next time. Bye.


