
Hey everyone. Today we're turning leftover charm pack squares into a patchwork pillow. This pillow finishes 20 inches square, uses 16 squares total — leftovers first, solid fill-ins if you're short — plus a narrow solid border, and suits a confident beginner.
What is the finished size, and what are the key numbers?
Finished size: 20 by 20 inches, for a 20-inch pillow form. The patchwork centre finishes 18 inches square. The border finishes 1 inch wide. Seam allowances are ¼ inch throughout.
Why make this version?
Leftovers share a palette, so sorting is half done. The solid border pulls odd prints together and adds the inches a standard form needs.
What do you need?
| Material or tool | What you need | Required or optional |
|---|---|---|
| Leftover charm squares (5 in.) | 16 squares; fill any shortfall from the solid below | Required |
| Coordinating solid yardage | 1 yd, for border, back, and fill-in squares | Required |
| Pillow form | 20 by 20 in. | Required |
| Thread and hand needle | 50-weight cotton; matching thread for hand closing | Required |
| Quarter-inch foot, pins, marking pencil, seam ripper | Seams, layout marks, fixes | Required |
| Rotary cutter, mat, ruler, iron | Cutting and pressing | Required |
| Thin batting, about 21 in. square | For a lightly quilted front | Optional |
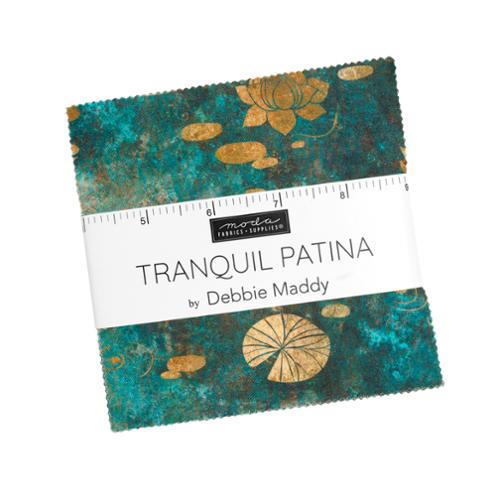
If you need more squares, a fresh charm pack is another option: my pick is the Tranquil Patina Charm Pack — 42 cotton squares by Debbie Maddy for Moda. For the frame, our reads on Etchings Stone Bella Solids and Natural Bella Solids cover two warm neutrals for scrappy mixes.
What gets cut, and from where?
From your leftovers: choose 16 squares as they come. If you hold 12 to 15, cut the missing squares at a full 5 inches from the solid.
From the solid, longest pieces first: cut one 20½-inch strip across the width and subcut the back square. Next cut two 1½-inch border strips; each yields one 18½-inch side piece and one 20½-inch top or bottom piece, so you need at least 39 inches of usable width. Last, only if needed, cut one 5-inch strip for fill-ins — one strip covers the one to four a 12-to-15 count needs. Base plan uses 23½ inches of the yard; fill-ins bring it to 28½.
How do you sew the pillow?
Grid first, border second, then a plain back with one turning opening and a hand-closed finish.
- Count your squares, then sort by value: lights, mediums, darks. Sixteen is the target.
- Lay out four rows of four, scattering the darks.
- Sew each row with a ¼-inch seam, chain piecing square to square. Each row should measure 18½ by 5 inches.
- Press row seams in opposite directions, row to row, so joins nest.
- Join the rows, pinning at every seam crossing first. The centre should measure 18½ inches square.
- Border: subcut two strips to 18½ inches, sew one to each side, and press toward the border. Subcut two to 20½ inches, sew them to the top and bottom, and press toward the border. The front should measure 20½ inches square.
- Optional quilting: layer the front over batting, quilt in the ditch along the grid, and trim to 20½ inches square.
- Place the back square on the front, right sides together, and pin. Mark an 8-inch opening centred on the bottom edge.
- Start at one opening mark, sew around the perimeter with a ¼-inch seam, and stop at the other mark, leaving the opening unsewn. Backstitch at both marks. Warning: sew the opening shut and the cover cannot turn.
- Clip each corner diagonally, close to but never through the stitching. Turn the cover right side out through the opening.
- Push corners out with a blunt point. Press flat, folding the opening edges in.
- Slip in the 20-inch form. Close the opening with small hand stitches hidden in the fold.
How does the leftover math work?
Count first, then let the count pick the size. A square grid is the layout for leftovers: 9 squares make a centre finishing 13½ inches, 16 make 18, and 25 make 22½. Each square finishes 4½ inches, because two ¼-inch seams take ½ inch off it. This build: 18 plus a 1-inch border each side equals 20.
A standard pack holds 42 squares, so a project that used 26 leaves exactly the 16 this pillow needs. If your leftovers have pinked edges, measure a few squares first and settle on one edge reference that reads a true 5 inches; then prove it with a test pair, pressed, at 9½ by 5 inches before you sew the grid.
What can go wrong, and how do you fix it?
Start with one test seam.
| Symptom | Likely cause | Fix |
|---|---|---|
| Centre measures under 18½ in. | Seams crept wider than ¼ in. | Test with two spare squares: joined, they should read 9½ by 5 in. Adjust, then resew |
| Cover looks smaller than the form | Border added before the centre was measured | Finished border width = (finished target − finished centre) ÷ 2; cut width = finished width + ½ inch |
| Opening gapes after closing | Stitches spaced too far apart | Use small, close hand stitches set just inside the fold |
Frequently asked questions
What if I only have nine squares?
Make the 3-by-3 centre, finishing 13½ inches. For a 20-inch target, each border finishes 3¼ inches wide, so cut the border strips 3¾ inches wide. These pieces replace the main border pieces: two side pieces at 3¾ by 14 inches and two top and bottom pieces at 3¾ by 20½ inches; each strip yields one of each from 34½ inches of width. Back plus borders uses 28 inches of the yard.
Do cut fill-in squares behave like precut squares?
Yes, once cut at a full 5 inches. Their straight edges make an easy ruler reference.
Can I skip the quilting?
Yes. Without it the cover is softer and drapes more. Completely up to you. It doesn't have to be perfect — you're your own worst critic. Take your time; it's not a race.
How do you care for it, and change it up?
Care follows the components: follow the gentlest label guidance among the fabrics and thread. To wash the cover, unpick the hand stitches, slip the form out, wash and dry, then resew the opening. To change it up, change the count, not the method — but treat the 25-square size as its own cutting job: it finishes 24½ inches and needs a 25-inch back, longer border pieces, and a form to match, none of which the list above covers.
Shop the Tranquil Patina Charm Pack at Linda's Electric Quilters.
Thanks, folks. We'll see you next time. Bye.


