
Table of Contents
- What You'll Need: Essential Quilting Tools for Beginners
- Choosing the Right Fabric and Materials for Small Projects
- How to Read a Quilt Pattern and Prepare Your Fabric
- Step-by-Step Beginner Quilting Tutorials for Small Projects
- Easy Quilting Patterns for Small Projects
- How to Bind a Small Quilt: Finishing Edges Like a Pro
- Troubleshooting Common Beginner Mistakes and Budget-Friendly Tips
- Conclusion
- Frequently Asked Questions
Last Updated: September 4, 2026
The biggest hurdle for new quilters isn't skill, it's scale. Diving straight into a king-sized bed quilt is a recipe for frustration, while beginner quilting tutorials for small projects let you master the fundamentals with a finish line that is only a weekend away. At Linda's Electric Quilters, we have found that the confidence gained from completing a table runner or wall hanging is the true catalyst for a lifelong passion.
Small projects are the perfect training ground. They force you to practice accurate cutting, consistent seam allowances, and precise pressing without the time commitment of a large quilt. This guide breaks down the exact process, from gathering your essential quilting tools for beginners to binding your finished edges. We will show you how to take a project from flat fabric to a finished piece you will be proud to display, and we will point out the common pitfalls that trip up most beginners so you can avoid them entirely. Fat Quarter Shop's educational blog has also documented that structured, step-by-step frameworks are the most effective way for newcomers to complete a first project successfully.
Below, we outline the six core steps that every beginner quilting tutorial for small projects should include. These steps have helped countless new quilters produce their first placemats, runners, and wall hangings with professional results.
What You'll Need: Essential Quilting Tools for Beginners
Before you cut a single piece of fabric, you need the right tools. Trying to quilt without them is the most common reason beginners quit. You don't need a studio full of gadgets, but a few specific items are non-negotiable for accuracy and safety.
Your essential quilting tools for beginners list starts with a rotary cutter, a quilting ruler, and a self-healing mat. This trio replaces scissors for straight cuts. You also need a quarter-inch foot for your sewing machine, which guarantees the precise seam allowance that quilt patterns assume. Pins, a seam ripper (you will use it), and a good iron round out the basics. A walking foot is essential later for quilting the layers together without shifting.
Choosing the Right Fabric and Materials for Small Projects
Fabric choice can make or break your first experience. For small projects, you should prioritize quilting cotton over cheaper craft fabrics. Quilting cotton has a tight weave that holds a crease well, resists fraying, and is easier to handle through the machine.
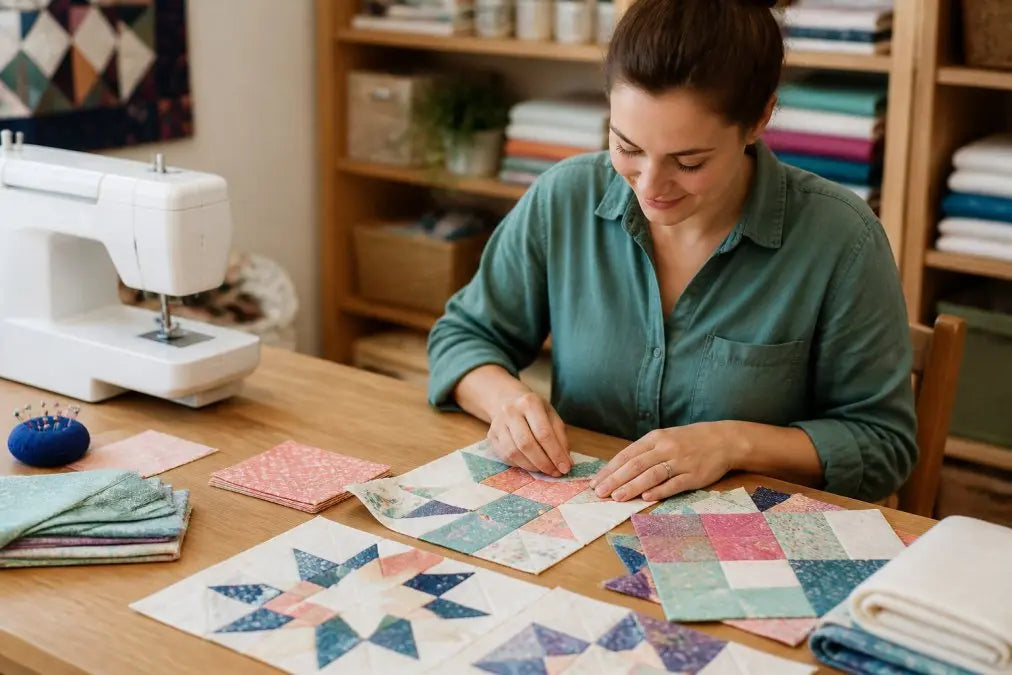
For your first project, look for fat quarters or fabric scraps from your stash. These pre-cut pieces are the perfect size for small projects like the Patchwork Star Runner Pattern, a smaller project that is perfect for beginners. Avoid slippery fabrics like silk or satin until you have mastered the basics of piecing. Also, pre-wash your fabric to prevent color bleeding later, but be aware this removes the crisp sizing that helps with accurate cutting. A beginner's guide to fabric selection often suggests that new quilters stick to a single fabric collection to ensure colors coordinate without the stress of matching.

When you are ready to finish, you will need batting and backing fabric. For a small wall hanging or runner, a low-loft cotton batting is easy to quilt through and gives a nice, flat finish.
How to Read a Quilt Pattern and Prepare Your Fabric
Reading a quilt pattern is a skill in itself. Most patterns begin with a materials list, but the critical part is the fabric cutting directions. You must understand the difference between selvage (the tightly woven edge) and the grainline (the direction of the threads). Cutting on the grain is essential for preventing stretching.
Start by reviewing the finished size and the block layout. Many beginners find sampler quilts, which use a different block in every square, overwhelming. A consistent, repetitive block-a-week format builds confidence much faster. MyHobbyIsQuilting Facebook group discussions show a clear preference for this repetitive structure over sampler-style projects for skill building.
Before you cut, square up your fabric. This means ensuring the cut edge is perfectly perpendicular to the selvage. Fold the fabric and align the selvages, then use your quilting ruler to trim the uneven edge. Only then should you start cutting your pieces according to the pattern. This preparation prevents the "wavy edge" distortion that leads to wonky blocks.
Step-by-Step Beginner Quilting Tutorials for Small Projects
This is where the magic happens. We will walk through a standard process that applies to nearly every small project, from a runner to a wall hanging. The key is to work slowly and accurately.
Step 1: Cut Your Fabric Pieces Accurately
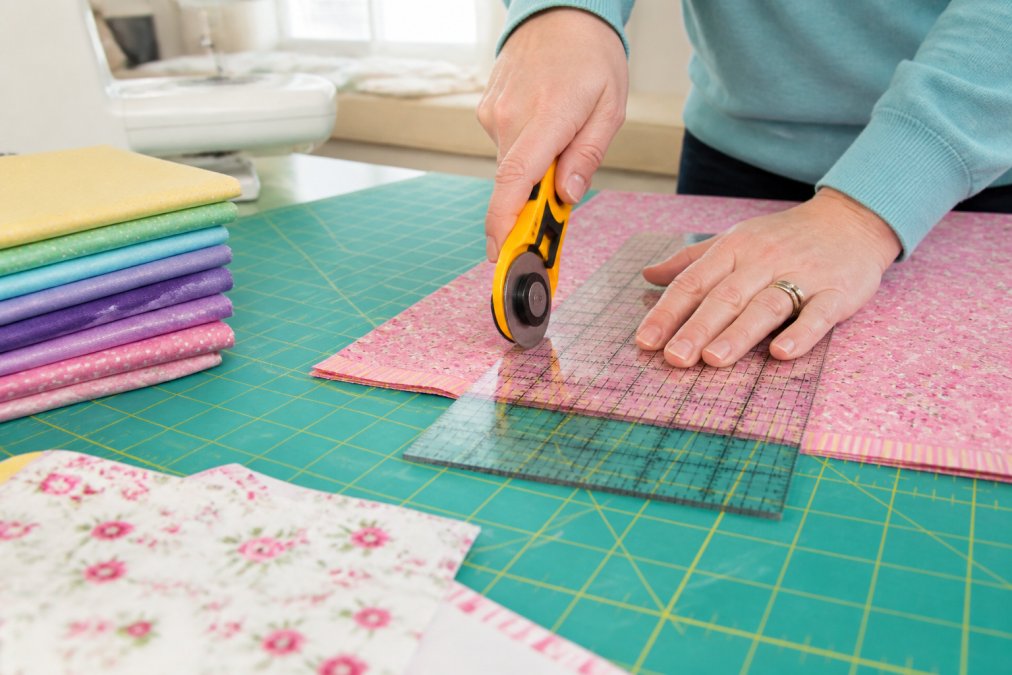
Place your fabric on the self-healing mat. Align the quilting ruler with the measurement line on the fabric. Hold the ruler firmly with your non-dominant hand, keeping your fingers away from the edge. Press the rotary cutter down and away from you, keeping it against the ruler's edge. Do not try to cut through the entire length in one pass; use a smooth, steady motion. Accurate cutting is the foundation of accurate piecing.
Step 2: Chain Piece Your Blocks Together
Chain piecing is a technique where you sew all your pairs of fabric pieces together in a continuous line without cutting the thread between them. This saves time and thread. Place two pieces right sides together, align the raw edges, and feed them under the presser foot with your quarter-inch foot attached. Sew a few stitches, then feed the next pair in without stopping. When you are done, you have a "chain" of sewn pairs that you snip apart.
Step 3: Press and Square Up Your Blocks
Pressing is not ironing. You should press the seam flat to set the stitches, then open the fabric and press the seam allowance to one side, usually toward the darker fabric. This sets the seam and prevents distortion. After pressing, use your ruler to square up the block, trimming any excess fabric to ensure it is the exact size required. This step prevents your quilt top from becoming wonky as you assemble it. easy sewing projects.
Step 4: Assemble Your Quilt Top
Lay out your finished blocks according to the pattern diagram. Once you are happy with the layout, sew the blocks together in rows. Press the seams in alternating directions (one row to the left, the next to the right) so they nest together neatly when you sew the rows to each other. This reduces bulk and ensures crisp intersections.
Step 5: Create the Quilt Sandwich
The "quilt sandwich" is the layers: the quilt top, the batting, and the backing fabric. Lay the backing fabric wrong side up, smooth the batting over it, and center the quilt top on top. Secure the layers with safety pins or basting spray. Starting from the center and working outward, smooth out any wrinkles. If you are worried about the batting shifting, a temporary adhesive spray is a reliable fix.
Step 6: Quilt and Finish Your Project
"Quilting" is the stitching that holds the layers together. For a small project, you can use a walking foot and sew straight lines or a simple grid. You can also stitch in the ditch, which means sewing directly into the seams of your blocks. This is the most forgiving method for beginners. Remember to adjust your stitch length slightly longer for quilting (around 3.0) and check your thread tension on a scrap piece first. Sewing machine maintenance is crucial here; a clean, oiled machine will produce even stitches.
Easy Quilting Patterns for Small Projects
Now that you know the process, you need a project. The best easy quilting patterns for small projects are those that use simple squares or rectangles. Look for patterns labeled "Confident Beginner" or "Beginner-Friendly."
A few excellent options to look for include the Patchwork Star Runner for a seasonal table decoration, or a simple rag quilt which uses exposed seams for a casual, shabby-chic look. For a more modern option, a mini quilt wall hanging like Rainbow Reach, finished at 31" x 31", offers a manageable size with a striking design. These projects are ideal for practicing piecing without the pressure of a large bed quilt. The trend toward "quick and easy" small-scale projects is growing, with tutorials for non-quilt items like coasters and potholders becoming increasingly popular for practicing skills. WeAllSew project roundups frequently feature these small-scale skill builders.

Here is a quick comparison of popular small project types to help you choose your first:
| Project Type | Typical Size | Best For | Time to Complete |
|---|---|---|---|
| Table Runner | 12" x 36" | Practicing straight piecing | 1 weekend |
| Wall Hanging | 18" x 18" | Learning to square up blocks | 2-3 days |
| Placemats (Set of 4) | 14" x 18" | Mastering consistent seam allowance | 1 weekend |
| Zipper Pouch | 9" x 6" | Trying new techniques like EPP | 2-3 days |
How to Bind a Small Quilt: Finishing Edges Like a Pro
Binding is the frame for your quilt. How to bind a small quilt is a critical skill, but it is easier than it looks. You will need to cut strips of fabric on the bias or straight grain, fold them in half, and sew them to the front edge of your quilt.
First, cut your binding strips 2.5 inches wide. Sew them together end-to-end to make one long strip. Fold the strip in half lengthwise, wrong sides together, and press. Starting in the middle of one side, align the raw edges of the binding with the raw edge of the quilt top and sew with a quarter-inch seam. When you reach a corner, stop a quarter-inch before the edge, pivot, and fold the binding up and then down to create a mitered corner. Continue sewing around the entire quilt. Finally, fold the binding over to the back and hand-stitch it down with a blind stitch. This finishing touch gives your project a professional, polished look.
Troubleshooting Common Beginner Mistakes and Budget-Friendly Tips
Every quilter makes mistakes, especially at the start. The most common issues are inaccurate seams, fabric puckering, and tension problems. If your blocks are not the right size, check your seam allowance first. Even a 1/16th of an inch error adds up over multiple seams.
For puckering, it is often caused by incorrect thread tension or using the wrong needle. Always test on a scrap of the same fabric and batting before you start on your actual project. If you see loops on the bottom of your fabric, your top tension is too loose.
Budget-friendly and sustainable quilting go hand in hand. Instead of buying new fabric for every project, embrace scrap-busting. Use your fabric scraps to create a patchwork backing or to make a scrappy binding. This reduces waste and saves money. Buying a bundle of fat quarters is often more economical than buying yardage, giving you a variety of colors for a single small project. For batting, look for rolls or packages that suit your project size to avoid waste.
Conclusion
Starting your quilting journey with small projects is the smartest strategy. You will build muscle memory for accurate cutting and piecing, learn how to read patterns, and gain the satisfaction of finishing a project, all without feeling overwhelmed. The process is straightforward: cut accurately, chain piece, press, assemble, sandwich, quilt, and bind.
The key is to start. Pick a simple pattern, gather your supplies, and give yourself permission to make mistakes. They are part of the learning process.
When you are ready to begin, Linda's Electric Quilters is here to support you. We stock over 50,000 products, including beginner-friendly patterns like the First Time Quiltmaking book, which breaks the process down into six easy lessons, and we offer an extensive library of over 700 educational videos to guide you through every technique. Our expert resources are designed to help you bring your creative projects to life with ease and precision.

Get started with Linda's Electric Quilters and make your first small quilt project a success.
Frequently Asked Questions
What are some easy small quilt projects for beginners?
Small quilts like table runners, pot holders, and mini wall hangings are ideal beginner projects. The Patchwork Star Runner ($8.79) is perfect for your first attempt, it uses simple piecing and teaches fundamental skills without overwhelming you. Baby quilts and lap quilts using charm packs or fat quarters also work well because they require fewer fabric decisions and less time to complete than larger projects.
What essential quilting tools do I need to start beginner quilting tutorials?
You need a rotary cutter, quilting ruler, self-healing mat, quarter-inch presser foot, and a sewing machine with adjustable stitch length. A walking foot helps with even feeding, and a seam ripper fixes mistakes. Linda's Electric Quilters carries all these essentials, plus the First Time Quiltmaking book ($20.79) walks you through setup and technique. Quality tools prevent frustration and help you maintain accurate seam allowances.
How long does it take to complete a beginner-level small quilt project?
Small beginner projects typically take 10-20 hours spread over 2-4 weeks, depending on complexity. A simple runner or coaster takes 5-8 hours; a baby quilt takes 15-25 hours. Time includes cutting, piecing, pressing, basting, quilting, and binding. Breaking projects into weekly blocks (quilt-along format) helps beginners build confidence without burnout and allows time for learning between steps.
What is the best way to finish the edges of a small quilt?
Binding is the standard finish, it wraps the raw edges and gives a polished look. You sew binding strips to the front using a quarter-inch seam, then hand-stitch or machine-stitch the back fold. Alternatively, rag quilts have a casual finish where you don't bind; instead, you trim seams and wash to fray them intentionally. For gift-quality work, binding is worth learning, it's a skill that applies to all future quilts.
This article was written using GrandRanker


