
Hey everyone! Today we're making cozy holiday pillow covers, and you'll learn how to sew a simple envelope back.
Here we go.
Meet the Fabric
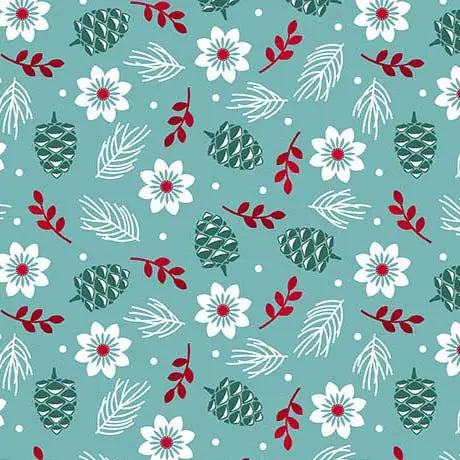
This is the 12 Days of Christmas Flowers & Pine Teal cotton fabric, from Quilting Treasures.
It comes from the 12 Days of Christmas collection by Julie Lynch for QT Fabrics.
It's 100% cotton, and it runs 44 to 45 inches wide. That's standard quilting cotton width, folks.
This print is the flowers and pine design on teal. Holiday florals and pine, set against that rich teal ground. It's festive and calm all at once.
The color story in this collection is really really pretty. Teal, jade, and dark turquoise. Joyful red and soft aqua. Charcoal and gray to ground it all. Plus little touches of lime green.
On this teal print, the flowers get to shine. The pine adds that wintry feel. And a pillow cover gives you a big, flat front to show it all off. That's exactly why I picked it.
The Project: Cozy Holiday Pillow Covers
Pillow covers are a fast room refresh, y'all. Swap the covers, and your couch feels ready for Christmas. No new pillows to store all year.
We're making envelope-style covers for 18-inch pillow inserts. Finished size is about 18 by 18 inches. Make one, or make a matching pair. Completely up to you.
Here's why this fabric suits it. Quilting cotton is smooth and easy to sew. It presses crisp, and it holds a neat edge. Plus this print needs no tiny piecing to chop it up.
Materials
- 1 1/4 yards of this Flowers & Pine Teal fabric for two pillow covers
- Two 18-inch pillow inserts
- Matching thread, 50-weight for construction
- A size 80/12 universal needle for quilting cotton
- Rotary cutter, ruler, and cutting mat
- Pins or clips, a point turner, and an iron
Brief Steps
Step 1: Cut your fronts. Press your fabric first. Cut two front pieces, each 19 by 19 inches. Center a nice flower or pine cluster on each front if you can. Take a minute here. It makes a real difference.
Step 2: Cut and hem the backs. For each cover, cut two back pieces, each 19 by 13 inches. On one long 19-inch edge of each piece, fold over 1/4 inch, press, then fold 1/4 inch again. Sew that hem down at about 10 stitches per inch. These hemmed edges will overlap.
Step 3: Layer it up. Lay one front right side up. Place the two back pieces right side down on top. Line up the outside edges. Let the hemmed edges overlap in the middle by about 4 inches. Pin all the way around.
Step 4: Sew around. Sew all four sides with a 1/2-inch seam. Go slow at the corners. Stop with your needle down, lift the foot, and pivot. Slow down here, folks. Rushed corners get wobbly corners.
Step 5: Trim, turn, and press. Clip each corner diagonally, close to the stitching but not through it. Turn the cover right side out through the envelope opening. Push the corners out gently with a point turner. Press flat, and slide in your insert. Just like that, you're done.
Practical Tips From My Table to Yours
Check your overlap before you sew. I once made a back with barely 2 inches of overlap. That insert kept peeking out all season. Oh my goodness, it drove me nuts. Four inches works much better.
Want a different closure? You could use buttons or a zipper instead. I prefer the envelope for a fast finish, but the other ways work fine too. Completely up to you.
Press every hem before you sew it. A crisp hem is easier to stitch straight. And if your stitching wanders a little, that's okay too.
Here's the permission part. It does not have to be perfect. If one motif sits a little off center, nobody on your couch is measuring it. You're your own worst critic. Take your time. It's not a race.
If I can do this, y'all can do this. These are super duper easy, and super duper cute on a couch or a guest bed.
Thanks so much for sewing along with me today. We'll see you next time. Bye.
Shop the 12 Days of Christmas Flowers & Pine Teal Cotton Fabric 44"/45" Fabric Per Yard at Linda's Electric Quilters.


