
Before you ever sit down at the sewing machine, your quilting journey really begins with gathering your supplies. Getting this first step right is the secret to making the whole learning process fun and avoiding a lot of early frustration. It all comes down to a few key things: a sewing machine you can count on, a sharp rotary cutter with a good mat, and quality cotton fabric. These are the tools that will make your first stitches smooth and your cuts clean, setting you up for a beautiful finished project.
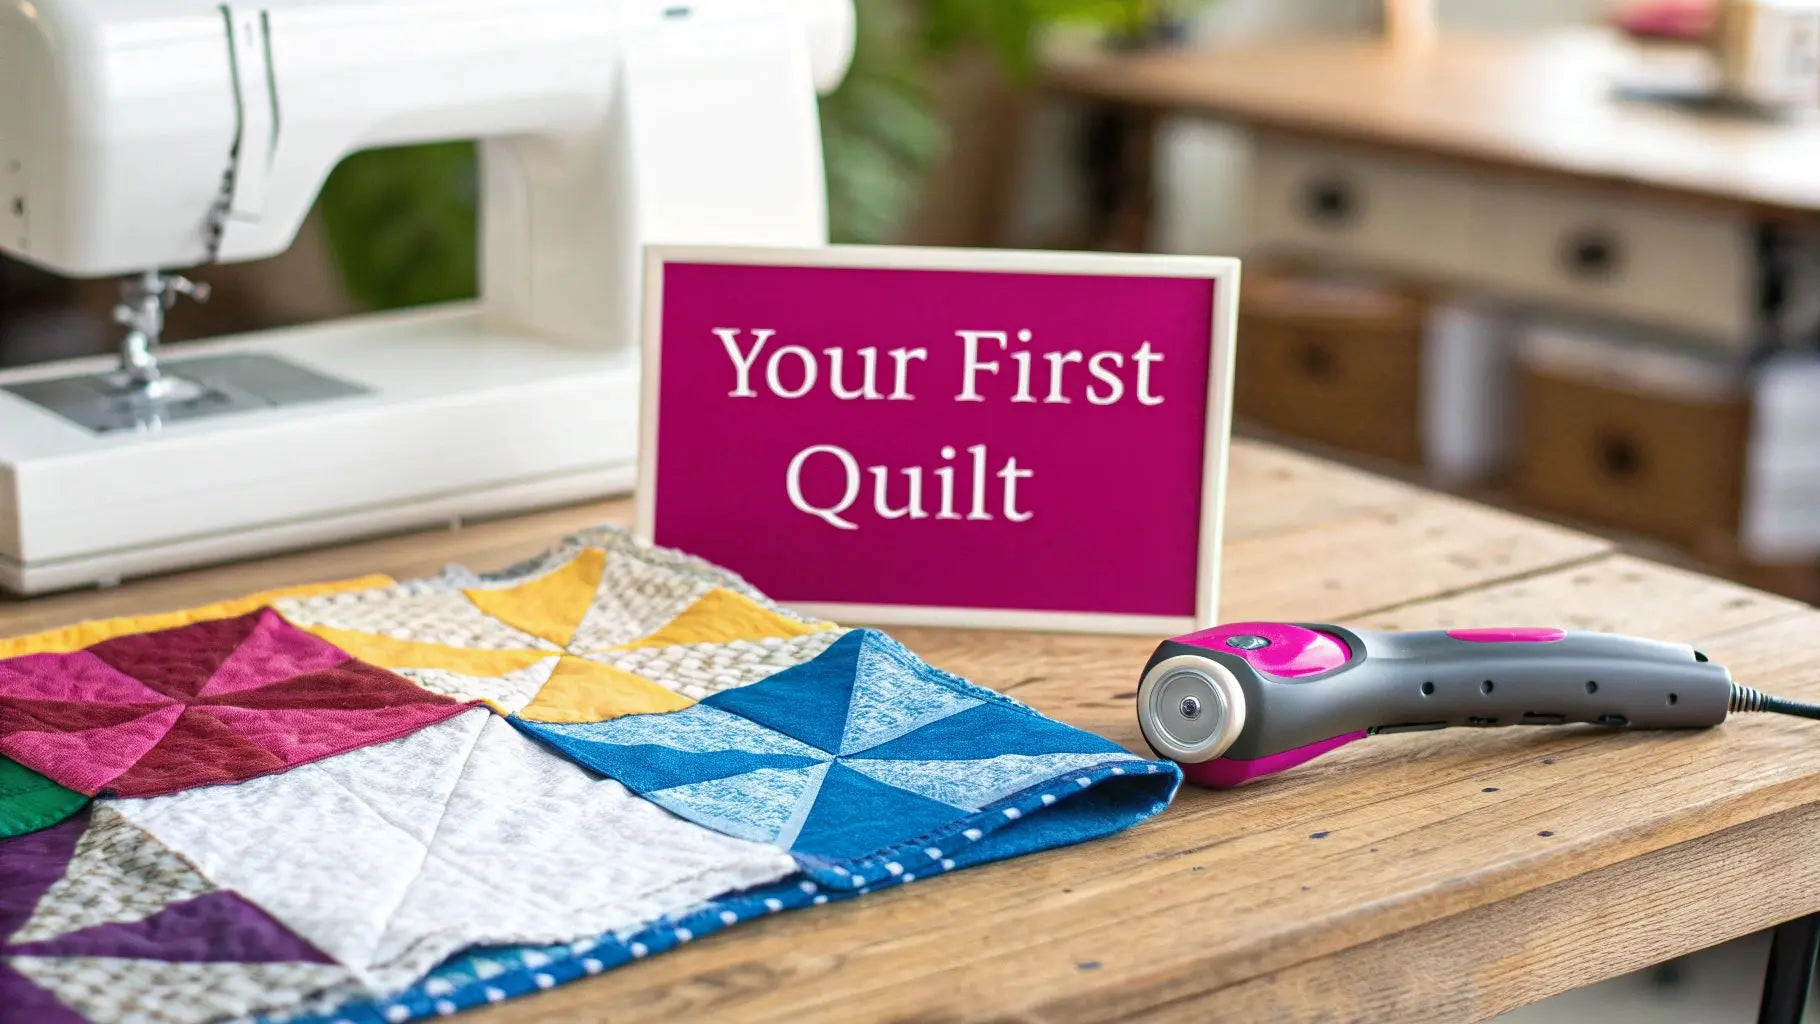
Starting Your Quilting Journey with Confidence
Welcome to the wonderful world of quilting! You're joining a huge, passionate community that just keeps growing. In fact, there are somewhere between 9 and 11 million active quilters across the US and Canada.
It's a craft that people truly love, contributing to an industry expected to hit $5 billion by 2027. It’s amazing to see how many people have fallen in love with this skill. You can actually see more of the data for yourself by checking out the 2024 survey results on CraftIndustryAlliance.org.
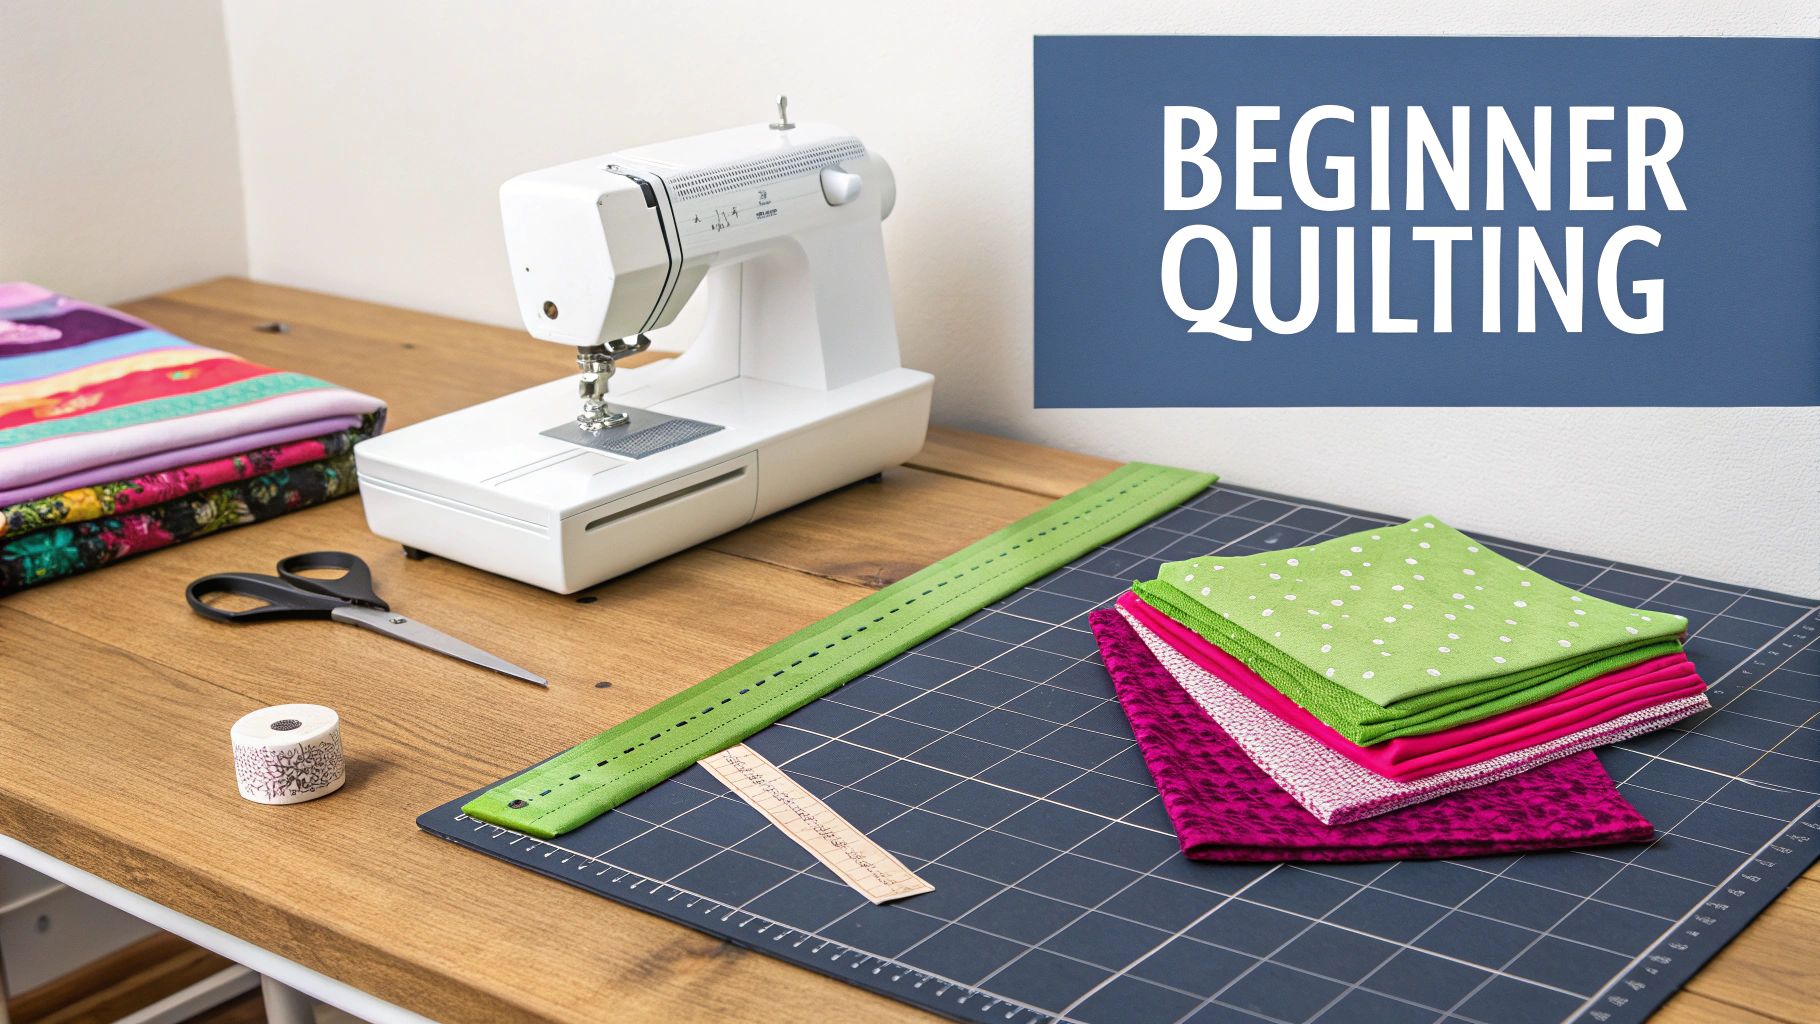
The best way to start is to set yourself up for success from the very beginning. That means ignoring the endless aisles of shiny gadgets and just focusing on the things you really need. Think of it as putting together a simple, powerful toolkit that will get you through your first few quilts without any headaches. At Linda's, we specialize in helping beginners find the perfect products to ensure their first project is a success.
The Absolute Must-Have Tools for Beginners
Let's cut through the noise. To start, you only need a handful of core tools that do two things perfectly: cut fabric accurately and sew it together reliably. My advice? Spend a little more on quality versions of these basics. It will save you so much trouble down the road and make the educational process much smoother.
Here’s what we recommend for every beginner's toolkit to build your first project:
- A Reliable Sewing Machine: You don't need a fancy, computerized model. What you do need is a machine that purrs along and gives you a nice, consistent straight stitch. If it can accommodate a walking foot, that's a massive bonus for when you get to the quilting stage.
- Rotary Cutter and Self-Healing Mat: This combo is an absolute game-changer. A standard 45mm rotary cutter is perfect for beginners. When you use it with a self-healing mat (a 18" x 24" mat is a great starter size), you’ll get crisp, perfectly straight cuts you just can’t get with scissors.
- Clear Acrylic Ruler: This is where precision begins. The most versatile ruler you can own is the 6" x 24" acrylic ruler. It’s long enough to cut strips of fabric right off the bolt and perfect for squaring up your finished quilt blocks.
- Quality Cotton Thread: Please, don't skimp on thread! A good, 50-weight cotton thread won't just look better; it will prevent annoying thread breaks and reduce the amount of lint that builds up in your machine.
When you're ready to build your essential kit, Linda's Electric Quilters offers a curated selection of beginner-friendly sewing machines and all the notions you need to start your first project with confidence.
Choosing Your First Fabrics with Success in Mind
Walking into the fabric store is both exciting and a little overwhelming. All those colors and prints! While it's tempting to reach for the most dazzling fabrics, your first project will go so much smoother if you stick to fabrics that are easy to handle.
For any beginner quilting lesson, 100% quilting cotton is always the best choice. There's no contest. It behaves beautifully—it's stable, it presses well, and it's forgiving if you have to rip out a seam or two. It won't stretch out of shape or fray like crazy.
A great educational tip for starting out is to use pre-cut fabric bundles, like charm packs (5" squares) or jelly rolls (2.5" strips). The cutting is already done for you, which means you can get right to the fun part: sewing! Here at Linda's, we have a huge variety of amazing pre-cuts in gorgeous color combinations that will get your project started without any of the initial stress.
Getting Down the Fundamental Quilting Skills
Alright, you've gathered your tools and picked out some gorgeous fabric. Now for the fun part—diving into the core skills that turn simple cloth into a quilt top you can be proud of.
This is where a little bit of precision and practice really starts to pay off. These fundamentals aren't complex, but getting them right is what separates a quilt that looks homemade from one that looks handmade. We're going to focus on three key techniques that are the foundation of pretty much every quilting project you'll ever make. Think of them as the building blocks for your new favorite hobby.
Making Precise Cuts with a Rotary Cutter
The journey to a perfect quilt block always starts with a perfect cut. While scissors definitely have their place, a rotary cutter is a quilter’s best friend for getting those dead-straight, accurate cuts quickly and easily. The trick is to let the tool do the heavy lifting for you.
Always, always use a sharp blade. A dull blade is your enemy—it will drag and pull the fabric, leaving you with distorted pieces and frayed edges. For the best control, stand up when you cut. This lets you apply firm, even pressure. Just lay your acrylic ruler over the fabric, line it up carefully, and hold it securely with your non-dominant hand. Then, glide that rotary cutter along the ruler's edge in one smooth, confident motion.
Keep these pointers in mind for perfect, safe cuts every time:
- Safety First: That blade guard is there for a reason! Get in the habit of engaging it the second you’re not actively cutting. Those blades are unbelievably sharp.
- Correct Posture: Always cut away from your body, never towards it. It gives you far better control and helps prevent any nasty slips.
- Ruler Grip: Spread your fingers out wide on the ruler to hold it steady, but keep those fingertips a safe distance from the edge.
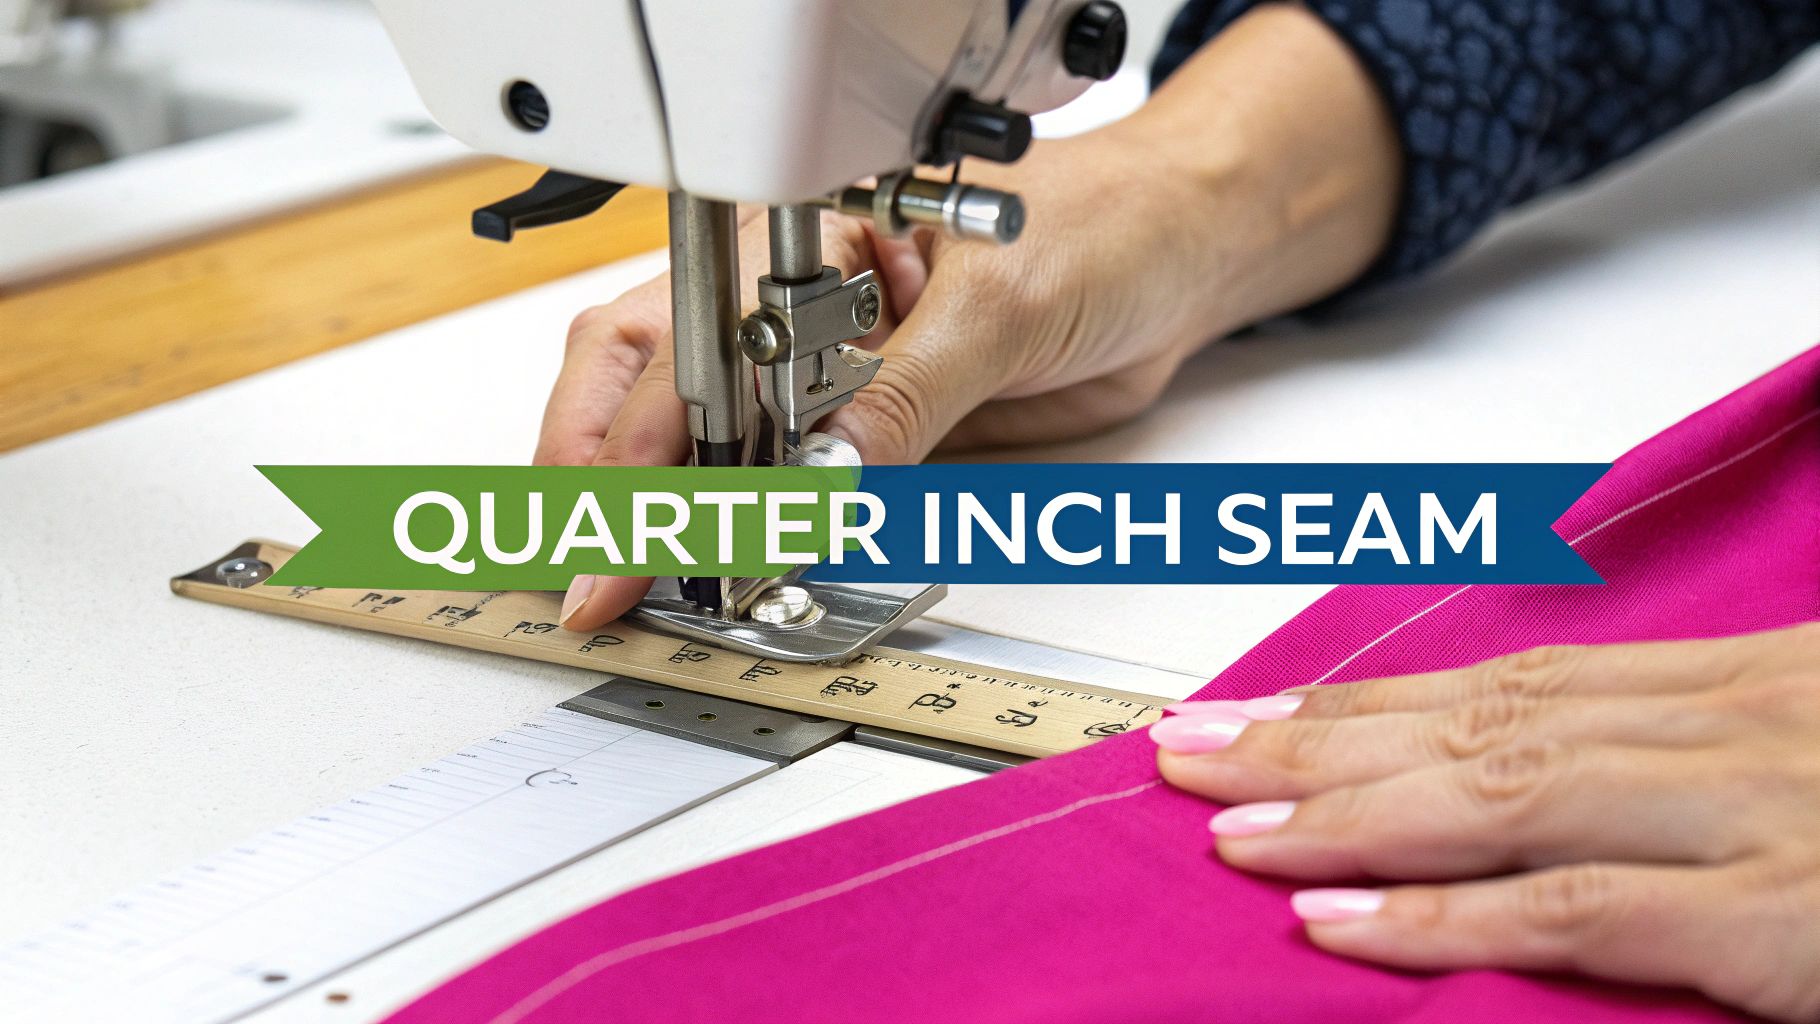
Mastering the Perfect Quarter-Inch Seam
If there's one golden rule in patchwork, it's the quarter-inch seam. This is the standard seam allowance in quilting, and being consistent is everything. I'm not kidding—even a tiny wobble, repeated over dozens of seams, can completely throw off the size of your quilt block and create a real headache later.
Most modern sewing machines come with a special "quarter-inch foot," which has a little guide on the side to make staying on track a breeze. A quality machine, like the ones we carry at Linda's, is built to give you those even stitches and strong seams you need for a professional-looking project.
No quarter-inch foot? No problem. A classic trick is to stack a few layers of painter's tape or washi tape on your machine's throat plate, exactly a quarter-inch from the needle. It creates a perfect visual guide to follow.
Getting this right is a huge milestone in any beginner quilting lesson. Before you even think about starting your main project, grab some scraps and just practice. Sew a few seams, measure them, and see how close you are to that magic quarter-inch mark.
The Art of Pressing Your Seams
Pressing might not seem as exciting as cutting and sewing, but trust me, it’s a game-changer for the final look of your quilt. The whole point is to make your quilt top lie perfectly flat, which makes the final quilting process a million times smoother. And please note the key distinction here: we are pressing, not ironing.
When you iron, you slide the iron back and forth, which is a surefire way to stretch and distort all your carefully pieced work. When you press, you simply lift the iron, place it down on the seam, hold it for a few seconds, and lift it straight up before moving on. This sets the seam without yanking the fabric out of shape.
For the best results:
- First, "set the seam." This just means pressing the stitches flat exactly as you sewed them, before you open the fabric up.
- Next, decide which way your seam allowance should go. A good rule of thumb is to press the seams toward the darker fabric. This stops the darker fabric from showing through the lighter side.
- Always try to do your final press from the front of your quilt block to get a beautifully crisp, flat finish.
With these three skills under your belt—cutting, piecing, and pressing—you have everything you need to get started. Ready to find the perfect machine to master that quarter-inch seam? Explore the selection of amazing beginner-friendly models at Linda's Electric Quilters and let's get you stitching!
Creating Your First Simple Patchwork Quilt
Okay, you've mastered the basics of cutting fabric, sewing a straight line, and pressing your seams. Now for the really fun part—putting it all together to create something you can be proud of. This is where all that practice pays off and you see how simple squares of fabric become a beautiful quilt top.
For your very first quilt, we're aiming for a win. The goal is to build your confidence with a project that’s both fun and totally achievable. That’s why we're going to make a classic patchwork quilt using pre-cut fabric squares. This educational shortcut takes the stress out of cutting, so you can just focus on the joy of sewing.
Why Start with Pre-Cuts?
Trust me on this: pre-cut fabric bundles are a beginner's best friend. These are curated collections of fabric, all from a single designer's line, that have been perfectly cut into standard sizes for you.
- Charm Packs: These are little bundles of 5" x 5" squares. They're just the right size for a baby quilt or a small lap quilt and give you a fantastic variety of coordinating prints to play with.
- Layer Cakes: A little bigger, these are bundles of 10" x 10" squares. Using Layer Cakes lets you make a generous throw-sized quilt much, much faster.
When you start with pre-cuts, you know every single one of your squares is perfectly uniform. That built-in accuracy is a huge help, ensuring your final quilt top lays flat and all your points line up nicely.
Think of a pre-cut bundle as having a professional designer pick out a flawless color palette just for you. Here at Linda's, we have a huge selection of beginner-friendly charm packs and layer cakes that take all the guesswork out of choosing fabric for your project.
Gathering Your Project Materials
For a simple patchwork quilt, you really don't need much. Let's stick to the absolute essentials to get your quilt top pieced. As any experienced quilter will tell you, working with quality materials just makes the whole process more enjoyable.
Here’s your short-and-sweet shopping list to finish your project:
- One Charm Pack or Layer Cake: This is the star of the show!
- Coordinating Cotton Thread: You can't go wrong with a neutral color like cream, light gray, or beige, as it will blend with almost any fabric collection. A 50-weight thread is the gold standard for piecing.
- Basic Sewing Notions: Grab your rotary cutter, a clear acrylic ruler, and a handful of fabric pins or sewing clips.
That's it! This simple approach is a big reason why quilting has seen such a revival. With online resources and a renewed interest in handmade crafts, memberships in some online sewing communities have jumped by 50% in recent years. It's a wonderful trend to be a part of, as explored in this piece on the modern sewing movement on HarpersBazaar.com.
Designing and Sewing Your Quilt Top
Now for my favorite part: arranging your squares! Before you sew a single stitch, find a big flat surface—a large table or even a clean spot on the floor—and lay out all your fabric squares. This is your design wall.
Have fun playing with the layout. How do you want the colors and patterns to flow?
- Arrange by Color: You could group similar colors to create a soft, gradient look, or alternate light and dark squares for that classic checkerboard pop.
- Go Totally Random: For a scrappy, eclectic vibe, just mix them all up! The wonderful thing about a curated bundle is that the designer already made sure all the prints work together, so you literally can't mess it up.
- Take a Picture: Once you land on a layout you love, snap a photo with your phone. This little trick is a lifesaver and will be your map as you start sewing.
With your design finalized, it's time to head to the machine. The process is wonderfully simple: you’ll sew squares together to make rows, and then you’ll sew the rows together to make your quilt top.
Remember that perfect quarter-inch seam you practiced? This is its time to shine. Go slow, focus on consistency, and press your seams after completing each row. Here's a pro tip: to get your points to match up perfectly, alternate the direction you press your seams for each row (row one to the right, row two to the left, and so on). This "nesting" technique is a game-changer.
With every row you add, you’ll see your first quilt come to life. It’s an incredibly rewarding feeling that makes all the learning worthwhile. Once your rows are all stitched together, give the entire quilt top one last, careful press. And that's it—you've officially pieced your first quilt top! You can find all the essential threads and amazing notions you need in our beginner section at Linda's Electric Quilters.
Here’s a quick checklist to help you stay on track from start to finish.
Beginner Patchwork Quilt Project Checklist
Follow these phases to complete your first quilt, with helpful product recommendations.
| Phase | Task | Estimated Time | Recommended Linda's Product |
|---|---|---|---|
| 1. Preparation | Gather all materials: pre-cut bundle, thread, notions. | 1 Hour | Beginner-Friendly Charm Packs |
| 2. Design | Lay out squares on a flat surface and arrange your design. | 1-2 Hours | Olfa Rotary Cutting Mat |
| 3. Piecing | Sew squares into rows, pressing seams after each row. | 3-4 Hours | Aurifil 50wt Cotton Thread |
| 4. Assembly | Sew rows together to complete the quilt top. | 2-3 Hours | Clover Wonder Clips |
| 5. Finishing | Give the completed quilt top a final, thorough press. | 30 Minutes | Oliso ProPlus Smart Iron |
This timeline is just a guide, of course. The most important thing is to enjoy the process and celebrate your accomplishment!
Assembling the Quilt Sandwich for Quilting
You’ve pieced your quilt top, and it looks amazing. Now for the magic trick: turning that flat piece of fabric into the cozy, three-layered quilt you’ve been picturing. This stage is all about creating the quilt sandwich—that perfect stack of your quilt top, the fluffy batting, and the backing fabric.
Trust me, getting this part right is the secret to avoiding frustrating wrinkles and puckers later on. It might seem like a small detail, but a smooth, well-made quilt sandwich makes the actual quilting a joy instead of a fight. This step is a crucial piece of your quilting education.
Layering Your Quilt Sandwich Like a Pro
To build a great quilt sandwich, you need a smooth, secure stack. Find a large, clean patch of floor or push a few tables together. The golden rule here is to cut your backing and batting bigger than your quilt top—I always aim for at least four inches extra on every side. This buffer zone is a lifesaver, giving you plenty of room to work and preventing the layers from shifting past each other.
First, lay your backing fabric down with the wrong side facing up. Use painter's tape to secure it to your work surface, pulling it taut but not stretching the fabric out of shape. Next, spread the batting over the backing, smoothing it out from the center. Finally, center your finished quilt top, right side up, on the batting. Your stack should be:
- Backing Fabric (wrong side up)
- Batting
- Quilt Top (right side up)
Take your time smoothing each layer from the middle outwards. Seriously, think of it like making a perfectly smooth bed. Getting rid of every single wrinkle now is your best defense against finding puckers in your finished quilt.
The Basting Process Explained
With your layers perfectly smooth, you've got to hold them all together for the quilting part. We call this basting. If you skip this, the layers will slip and slide under the needle, and you'll end up with a lumpy mess. For your first quilt, safety pins are the simplest and most foolproof method.
Start pinning from the center of the quilt and work your way to the edges. I like to place a curved basting pin every four to six inches—enough to keep it all stable, but not so many that they get in your way. Curved pins are a game-changer; they’re designed to pop through all those layers much more easily. We carry amazing, high-quality basting pins at Linda's Electric Quilters that make this job go so much faster.
Simple Straight-Line Quilting
Your quilt sandwich is basted and ready to go! For a first project, you can't go wrong with straight-line quilting. It’s clean, modern, and super approachable for beginners. The key tool for this is a walking foot for your sewing machine.
A walking foot has feed dogs on the top that work in tandem with your machine's feed dogs, pulling all three layers through at the exact same pace. This little gadget is absolutely essential for preventing the top layer from shifting and bunching up.
Map out your quilting lines before you touch the pedal. You could "stitch in the ditch" (sewing in the seams), or create a simple grid across the whole quilt. Use a guide bar on your walking foot or a Hera marker to press temporary creases to follow. Just remember to sew slowly and let the walking foot do its job.
This little graphic really helps visualize how we break down the process into three simple stages: Arrange, Sew, and Finish.

Seeing a big project broken down into clear educational steps like this makes it feel so much more manageable, especially when you're just starting out.
An Alternative: The Magic of Long-Arm Quilting
While finishing a quilt on your home machine is an incredible feeling, sometimes you want a truly professional finish without the learning curve. That's where long-arm quilting services come in. If you've poured your heart into a quilt top and want the final stitching to be absolutely flawless, sending it to a pro is a fantastic option.
Here at Linda's Electric Quilters, we offer professional long-arm quilting that can add stunning, complex designs with perfect tension and precision. It’s a wonderful way to finish your masterpiece, saving you time while guaranteeing an heirloom-quality quilt.
Finishing with a Clean and Professional Binding
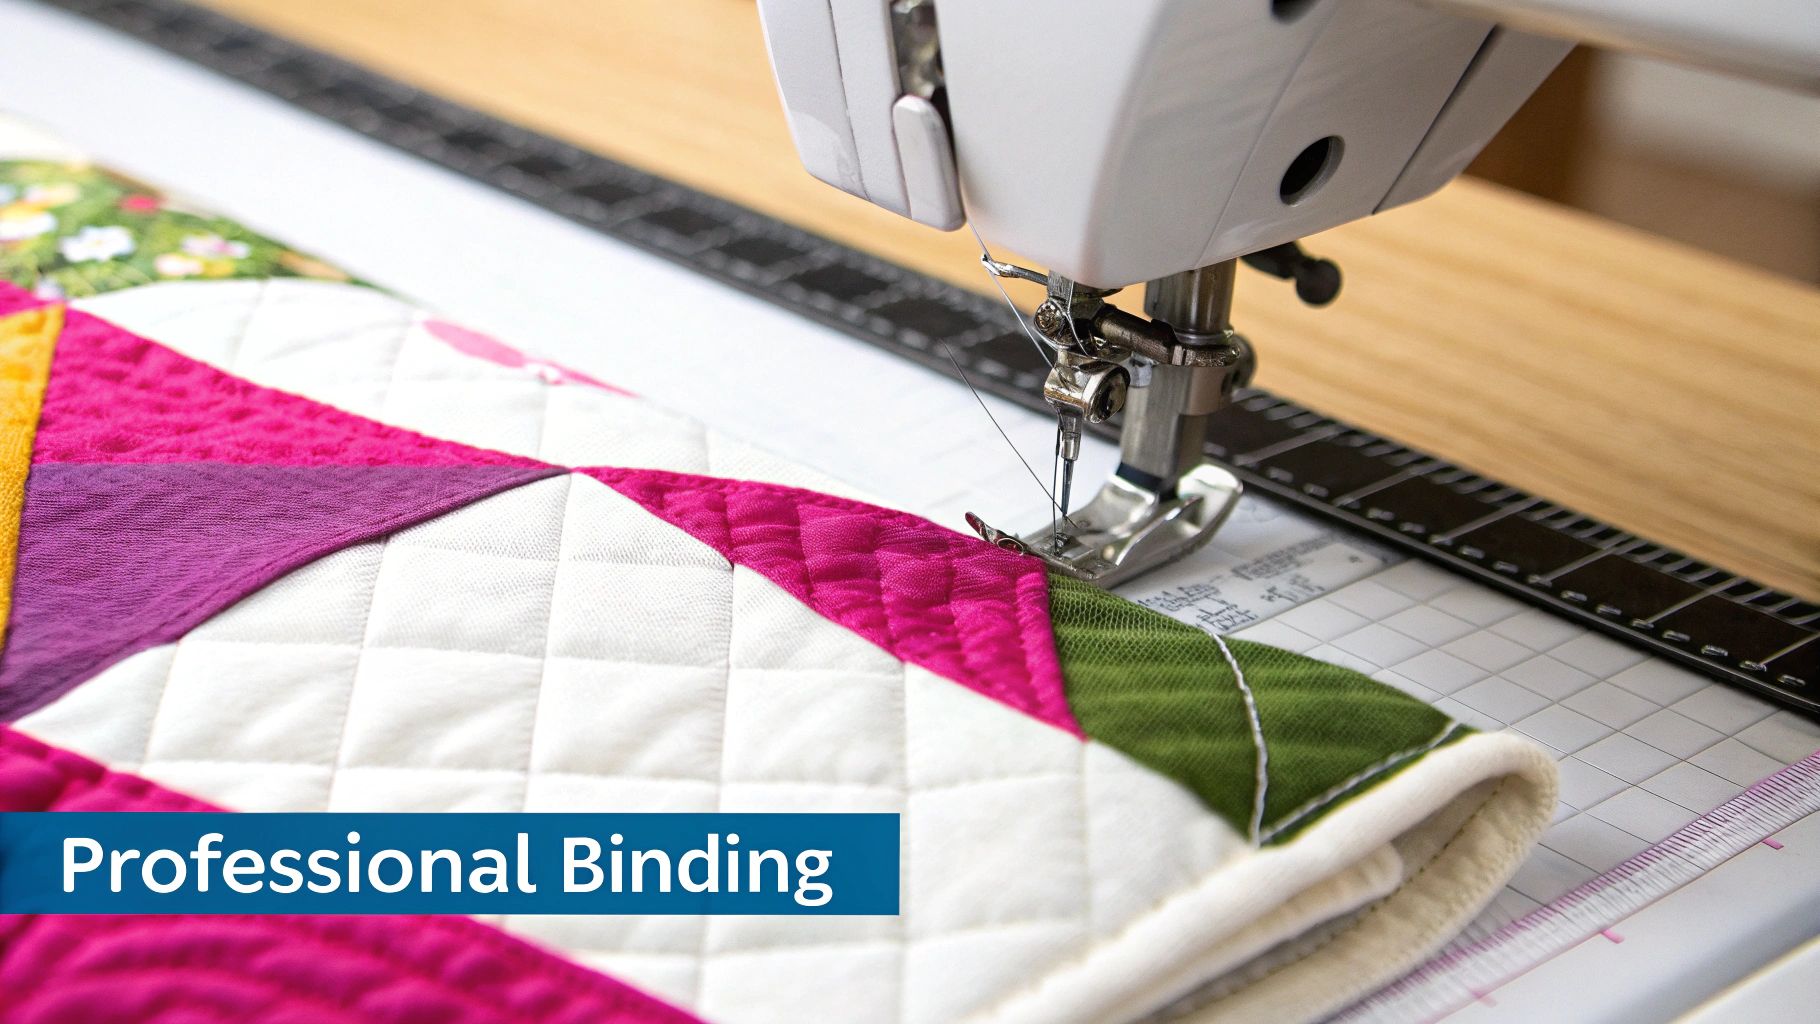
Alright, you're at the final step! Adding the binding is what truly finishes your quilt. I always think of it as the frame for a piece of art; it neatly encloses all those raw edges and gives your project a polished, sturdy feel.
A lot of new quilters get a little nervous at this stage, but trust me, it's one of the most satisfying parts of the process. This is where you turn all your hard work into a beautiful, lasting keepsake. We'll go through making and attaching your binding entirely by machine, using techniques that will give you a fantastic result every time.
Preparing Your Binding Strips
First things first, you need to actually make the binding. This just means cutting long fabric strips and sewing them together into one continuous piece that's long enough to wrap around your entire quilt.
The go-to width for binding is 2.5 inches. It’s the perfect size for most quilts. You'll cut these strips across the width of your fabric (WOF), from one selvage edge to the other. To connect them, place two strips right sides together at a right angle, and then stitch diagonally from corner to corner. Joining them this way, on a diagonal, makes the seam much less bulky.
Once you have one long strip, press those diagonal seams open. Then, press the entire strip in half lengthwise with the wrong sides together. And just like that, you have a gorgeous, custom binding ready to go for your project.
Attaching the Binding by Machine
Using your sewing machine to attach the binding is quick and creates a really durable finish, which is perfect when you're just starting out. The trick is to go slow and steady, keeping your stitches straight and everything lined up.
Start by laying the raw edge of your folded binding strip along the raw edge of your quilt top. Be sure to leave about an 8 to 10-inch "tail" of binding loose at the beginning—you'll need this later to join the ends neatly. Now, start sewing the binding to the quilt with a standard quarter-inch seam allowance.
A walking foot is an absolute game-changer here. It grabs and pulls all the layers—top, batting, and backing—through the machine at the same speed, preventing any weird puckering and making sure your binding lays perfectly flat. Find the perfect walking foot for your machine at Linda's!
Keep sewing until you're about a quarter-inch away from the first corner. Stop, backstitch, and take the quilt out of the machine. It’s time to make a perfect mitered corner.
Achieving Perfect Mitered Corners
Those sharp, professional-looking corners are so much easier to create than you'd think. It all comes down to a simple fold.
Once you’ve stopped a quarter-inch from the corner, fold the binding strip straight up and away from the quilt. This should create a clean 45-degree angle. Now, fold the strip back down so it lines up perfectly with the next edge of the quilt. I like to use a clip to hold this little fold in place.
Begin sewing again right from the top edge of this new side, which will lock that mitered fold in place. Do this for all four corners. When you get back around to where you started, you’ll join the two binding tails, trim any excess fabric, and stitch the last little bit down.
Finally, wrap the folded edge of the binding around to the back of the quilt and stitch it down. You can do this by machine for speed or by hand for a nearly invisible finish. Mastering techniques like this is easier than ever, with almost half of all quilters using online videos daily to learn new skills. For more on how the craft is evolving, check out the latest Craft Industry Alliance survey.
And for all the amazing products you need to make binding a breeze—from specialty feet to those handy clips I mentioned—you have to see the great selection over at Linda's Electric Quilters.
Answering Your Top Beginner Quilting Questions
When you're just starting out, the questions can pile up fast. Trust me, we've all been there! Every single quilter, no matter how long they've been at it, once wondered the exact same things you're asking now. Let's clear up some of those common hurdles so you can get back to stitching with confidence.
What Tools Do I Really Need to Start?
It's so easy to walk into a quilt shop and feel completely overwhelmed by the sheer number of gadgets. But here's the truth: you only need a handful of core tools to get started on your first project. My advice? Focus on getting good quality basics, because they'll make your life easier and your quilts more accurate from day one.
You can get your first quilt done with just these four essentials:
- A solid sewing machine with a reliable straight stitch. Forget all the fancy decorative stitches for now; you just need one that's consistent and strong.
- A rotary cutter with a fresh, sharp blade. The 45mm size is the go-to for most quilters and it'll make cutting your fabric feel like slicing through butter.
- A self-healing cutting mat. An 18x24 inch mat is a great starting size—plenty of room to work but not so big it takes over your entire table.
- A clear acrylic ruler. If you only get one, make it the 6x24 inch ruler. It’s the workhorse of the quilting world, perfect for cutting long strips and squaring up your blocks.
Once you've got those, just add some good cotton fabric, thread, and a handful of clips, and you're ready to go.
Think of these as your core quilting kit. You can always add specialty rulers and fun notions down the road as you figure out what kind of quilting you love most. Find all these amazing products at Linda's.
How Can I Sew Perfectly Straight and Consistent Seams?
This is it—the golden rule of patchwork. The secret to getting all your points to match and your blocks to lie flat is the quarter-inch seam. It might not sound like a big deal, but tiny little inconsistencies add up over a whole quilt and can throw everything off.
The easiest way to nail this is by using a quarter-inch presser foot, which comes standard with most modern machines. It has a little guide on the side that you just line your fabric up against. It does all the work for you! No quarter-inch foot? No problem. Just stack a few layers of painter's tape on your machine's throat plate, exactly a quarter of an inch from the needle, to create your own guide.
Before you start any project, always stitch a few test seams on some scrap fabric and measure them. It’s a small educational step that saves major headaches later.
Help! My Quilt Block Is the Wrong Size!
First off, take a deep breath. This happens to absolutely everyone, from first-timers to seasoned pros. When a block doesn't measure up, it's almost always one of three culprits.
Check your seam allowance. Is it truly a quarter-inch? If your seams are a little too wide, your block will shrink. If they're too narrow, your block will grow.
Next, look at how you're pressing. If you're sliding the iron back and forth like you're ironing a shirt, you're likely stretching the fabric out of shape. Remember to press, which means lifting the iron and placing it down firmly, not iron.
Finally, go back to the very beginning: your cuts. Was your ruler slipping? Is your rotary blade getting dull? Inaccurate cuts will throw off your block size before you even sew a single stitch.
What's the Difference Between Patchwork and Quilting?
This is a great question because it gets to the heart of the whole process. People often use the terms interchangeably, but they're actually two different stages of making a quilt.
Patchwork, which is also called piecing, is the part where you sew small pieces of fabric together to create your blocks and assemble the quilt top. This is the fun, creative part where your design comes to life.
Quilting is what you do after the top is pieced. It's the act of stitching through all three layers of the "quilt sandwich"—the patchwork top, the batting in the middle, and the backing fabric. Those stitches are what hold it all together and create that beautiful, classic quilted texture. Simply put, you do the patchwork first, then you do the quilting!
Feeling a little more prepared? Every question is a sign you're learning and growing as a quilter. To make sure you're set up for success, check out the fantastic beginner-friendly tools and fabrics at Linda's Electric Quilters. We've got everything from high-quality sewing machines to gorgeous pre-cut fabric bundles that make that first project a joy. Head over to https://lindas.com and find everything you need to finish your amazing project


