
You press a clean applique shape in place, head to the machine, and by the time the stitching is done the edge has rippled, the point has drifted, or the whole block feels stiff. Those problems usually trace back to one decision. The fusible layer was the wrong product, or it was applied the wrong way.
Good fusible interfacing for applique does more than hold a shape still. It affects how the edge stitches out, how much the background fabric distorts, and how the project feels after repeated washing. That last part gets overlooked all the time. A sample can look fine on the ironing board and still fail after laundering if the adhesive is too heavy, the fabric is too delicate, or the stabilizer does not match the job.
The practical goal is simple. Choose a fusible and support method that gives you clean placement now and lasting durability later, without turning the quilt top stiff or bulky.
That balance is what makes applique reliable instead of frustrating.
Your Foundation for Flawless Applique
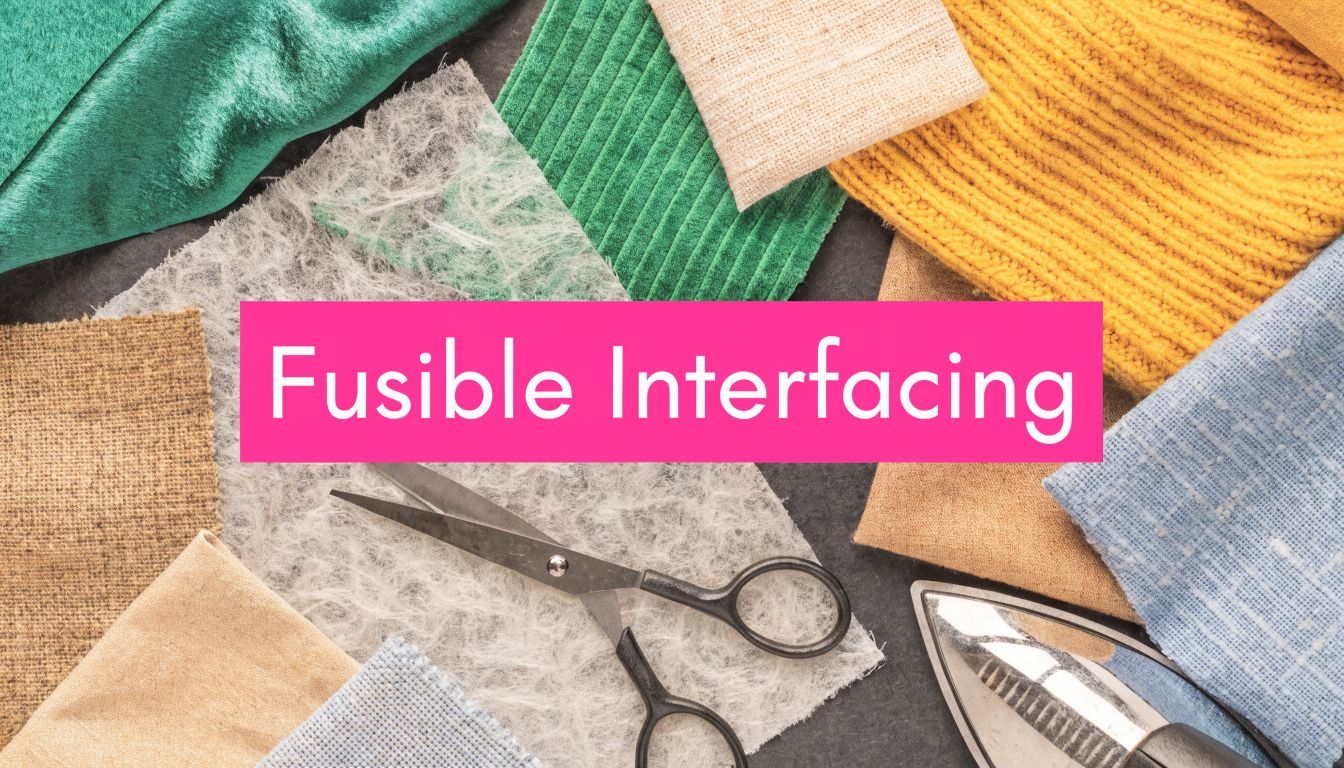
A lot of quilters use the words fusible interfacing and fusible web interchangeably. In the workroom, that causes confusion fast. Fusible interfacing is a fabric-like layer with adhesive on one side. It adds support and stays in the project. Fusible web acts more like a bonding layer between fabrics and is the product many applique patterns call for.
For applique, both can matter. If you're stitching onto quilting cotton, wool felt, denim, or a knit, the right fusible choice keeps the motif in place long enough for clean finishing. That matters most on curves, points, and narrow stems where pinning alone rarely behaves.

What fusible interfacing is doing for you
When applique looks polished, the fusible layer has done three jobs:
- Positioning the shape so it doesn't crawl while you stitch
- Supporting the fabric hand so soft fabrics don't tunnel or buckle
- Controlling the raw edge so finishing stitches have something stable to bite into
In machine applique, support matters as much as adhesive. Contemporary applique resources note that proper interfacing selection reduces fraying incidents by 75% in machine applique projects, and that fusible interfacing prevents fabric distortion in 90% of stretchy materials like knits according to Utah State University Extension machine applique guidance.
Practical rule: If your applique shape feels secure before stitching, your stitch quality usually improves. If the shape is already lifting, stretching, or bubbling at the pressing board, the sewing machine won't fix it.
The supply side matters too. If you're gathering materials for a project, it helps to shop from a broad notions collection at Linda's so you can match the fusible, needle, marking tool, and press cloth instead of improvising halfway through.
Where most projects go off track
The common mistake isn't just choosing the wrong brand. It's choosing the wrong weight or using too much adhesive coverage for the job. Delicate quilts need drape. Totes and structured decor need body. Dense adhesive across the whole shape can make even a pretty block feel dead in the hand.
That's why experienced applique work starts with a simple question. Do you need a soft finish, or do you need structure?
How to Choose the Right Fusible Interfacing
You can spot a poor fusible choice before the first stitch. The applique feels boardy in your hand, the edges refuse to lie flat, or the shape shifts the minute it meets the ironing board. That usually starts with a mismatch between the fusible, the fabric, and the way the finished piece will be used.
For applique, I judge fusibles by four things. How well they bond, how the fabric feels after fusing, how easy they are to trace and cut, and how they hold up after repeated washing. A wall hanging and a baby quilt do not need the same product, even if both are made from quilting cotton.
If you're working with layered motifs, names you'll hear often include Heat-N-Bond Lite, Steam-A-Seam 2, and Pellon Wonder-Under. Each behaves a little differently at the pressing board, and those differences matter once you start adding detail, laundering the quilt, or stitching through several layers.

Fusible Web Product Comparison
| Product | Type | Best For | Special Feature |
|---|---|---|---|
| Heat-N-Bond Lite | Lightweight fusible web | Quilts, garments, lighter applique shapes | Medium bond with a softer finish |
| Steam-A-Seam 2 | Fusible web with positioning convenience | Shapes that need careful placement before final pressing | Tacky surface helps hold pieces in place before final fuse |
| Pellon Wonder-Under | Paper-backed fusible web | General applique and traced motifs | Easy to trace, reverse, and cut accurately |
What works for soft quilts
For bed quilts, garments, and anything that needs to bend and wash well, a lightweight fusible web is usually the safer choice. It gives the raw edge enough support for stitching without turning the block stiff. That softer hand matters over time. Quilts that start out too rigid often crease hard, wear unevenly, and feel unpleasant after a few trips through the washer.
Heat-N-Bond Lite is popular for that reason. It holds reliably for standard applique and still lets the fabric act like fabric.
A good applique block should feel supported, not coated.
When more structure helps
Heavier fusibles do have a place. Wall quilts, table toppers, banners, and some home decor projects often benefit from extra body, especially if the design has sharp points or stacked layers that need to stay crisp.
The trade-off is hand and needle penetration. A firmer product can make dense areas harder to stitch cleanly, and it can fight you if the project is meant to drape. On standard quilting cotton, heavy duty products are easy to overuse. If the finished piece will be folded, cuddled, or washed often, I stay lighter unless the fabric itself needs more control.
Match the product to the fabric and stitching plan
Choose the fusible with the whole project in mind, not just the shape on the pattern sheet.
- For quilting cotton, use a lightweight web for most quilt blocks and wearable applique.
- For batiks, test first. The tighter weave often takes adhesive well, but a heavy web can make batik feel overly crisp.
- For knits or stretchy fabrics, pair the fusible with stabilizing support so the applique does not ripple or grow during stitching.
- For intricate shapes, paper-backed webs are easier to reverse, trace, trim, and keep organized.
- For projects that will be washed often, plan for stitched edges and choose a fusible that does not leave the fabric stiff.
- For machine embroidery applique, decide on the full combination first: top fabric, fusible, stabilizer, and stitch density all affect the result.
That last point is where many projects fail. Quilters sometimes choose a fusible in isolation, then add whatever stabilizer is nearby. A soft fusible with a dense embroidery design can tunnel or pucker. A sticky positioning product may help with placement but still needs the right stabilizer under the background. Long-term durability comes from the stack working together, not from any single product doing all the work.
If you're unsure, test one small shape on scraps from the actual project fabrics. Fuse it, stitch it, and wash it. Ten minutes of testing tells you more than the package front ever will.
The Perfect Fusing Process Step by Step
A lot of applique problems start long before the first stitch. The shape looks flat and secure on the ironing board, then one edge lifts after sewing or the block puckers after its first wash. Good fusing prevents both problems, but only if the steps are done in the right order and with the right amount of heat.

Start with fabric that is ready to bond
Press the background fabric first so you are not trapping wrinkles under the applique. If the applique fabric is likely to shrink, bleed, or soften after laundering, prewash and press it before you fuse anything. That extra prep matters on quilts that will be washed often.
Set out the tools before you begin so you are not reaching across a hot iron with a half-fused shape in your hand:
- Iron set to the fusible manufacturer's directions
- Pencil or fine-point marker for tracing on the paper side
- Sharp scissors for rough cuts and detail trimming
- Press cloth if the product calls for one
- Scraps of the actual fabrics for a bond and stitch test
Use the actual project scraps, not random leftovers. A fusible that behaves nicely on quilting cotton can react very differently on batik, linen blends, or a background with stabilizer underneath.
Trace first, then rough-cut, then fuse
Trace the shape onto the paper backing in reverse if the design has a direction. Letters, numbers, and any motif with a clear left and right side need that step.
Rough-cut around the traced line before fusing to the applique fabric. Leave a small margin so the piece is easy to handle during the first press. After that first fuse, cut the shape cleanly on the line.
Press the fusible onto the wrong side of the applique fabric by lowering the iron straight down, holding it in place, then lifting it. Do not slide the iron. Sliding can stretch bias edges, distort points, and shift the adhesive before it has a chance to bond evenly.
Heat and time depend on the product, so follow the package directions instead of guessing. If a fusible needs a dry iron, turn the steam off. If it calls for a press cloth, use one. Too little heat leaves a weak bond. Too much heat can overmelt the adhesive and make it less reliable after handling and washing.
Trim for a softer finish
For many applique shapes, especially larger ones, trim some of the fusible away from the interior before the final fuse. Leave adhesive close enough to support the edges, but do not feel obligated to keep a solid layer under the whole motif if stiffness is a concern.
That small adjustment improves drape and reduces the cardboard feel that shows up in finished blocks, wall hangings, and garment applique. It also helps when dense stitching will be added later, because thread plus adhesive plus tightly woven fabric can build unnecessary bulk fast.
Place carefully and make the final bond count
Peel off the paper backing, place the applique on the background, and check the position before pressing. Once the shape is fused down well, pulling it back up can stretch the background or leave adhesive where you do not want it.
Use a controlled final press. Lower the iron, hold it still for the full time the manufacturer recommends, then lift and move to the next area. On larger motifs, work section by section so the entire shape gets even contact.
Let the piece cool before you test an edge.
That cooling step is easy to skip, but it matters. Adhesive sets as it cools. Testing while it is still warm can make a sound bond look weak.
Test the real stack before you commit
Before you sew on the actual block, make a sample using the same background fabric, applique fabric, fusible, and any stabilizer you plan to use. Fuse it, stitch it, and handle it the way the finished project will be handled.
This is the fastest way to catch the two failures quilters see most often. One is poor edge security after laundering. The other is puckering caused by a bad combination of fusible, fabric, stabilizer, and stitch density.
If the sample feels stiff, reduce the fusible coverage or choose a lighter product. If the edge lifts, increase pressing accuracy or plan on a stitch that secures the perimeter more firmly. If the background tunnels or ripples, the problem usually is not the applique shape alone. The full fabric and stabilizer stack needs adjustment.
A quick visual walkthrough helps if you're more of a watch-it-once learner:
Expert Stitching Techniques for Fusible Applique
A block can look perfect at the machine and still fail after a few trips through the wash. The usual reason is not the fusible alone. It is the match between stitch choice, fabric, and support underneath.
Stitching does two jobs at once. It finishes the edge you see, and it keeps the applique attached after the adhesive starts to age from handling, laundering, and wear.

Satin stitch for full edge coverage
Satin stitch gives the most protection because it wraps the raw edge completely. I recommend it for kids' quilts, table runners, tote bags, and any piece that will be washed often or handled hard.
Density matters here. A satin stitch that is too tight can cut into the background fabric, especially on lighter cottons or fabrics softened by prewashing. A stitch that is too wide makes points bulky and rounds off sharp corners. On small shapes, shorten the width before you shorten the length. That usually keeps the motif cleaner.
Slow down at curves. On inside corners, stop with the needle down on the outside swing of the zigzag so the turn stays crisp.
Blanket stitch for a balanced finish
Blanket stitch gives a visible outline without the heavy thread buildup of satin stitch. It is a practical middle ground for quilts that need decent durability but do not need the edge fully covered.
This stitch also hides minor wobble better than satin stitch, which is why many quilters gain confidence with it faster. On folk-art shapes, leaves, and petals, that slightly open edge often looks better than a dense border.
Keep the bite of the stitch consistent. If one swing lands too far from the edge and the next lands too close, the applique starts to look uneven even when the shape itself was cut well.
Straight stitch for raw-edge applique
Straight stitch works for contemporary quilts, art pieces, and projects where a softer, sketch-like edge is part of the design. It adds very little bulk, so the block stays flexible.
It does leave the raw edge more exposed. That trade-off matters. On tightly woven quilting cotton, a straight stitch can hold up well enough for a wall quilt or a quilt that gets gentle use. On loose weaves, flannels, or fabrics that ravel quickly, straight stitch alone usually is not the long-term choice if repeated washing is expected.
A simple way to decide:
- Choose satin stitch for the best edge security
- Choose blanket stitch for a lighter look with solid hold
- Choose straight stitch for style-driven raw-edge work and lower-wear projects
The best stitch is the one that fits the fabric, the use of the quilt, and how often it will be washed.
Thread and needle choice affect the result more than many quilters expect. Polyester thread is a strong option for machine applique because it stands up well to abrasion. Cotton thread blends in nicely on traditional work but can show wear sooner on heavily used pieces. Match the needle to the thread and fabric. A fresh 80/12 is a reliable starting point for quilting cotton, while a ballpoint or stretch needle is often the better choice for knits.
Stabilization still matters once the ironing is done. If the stitch line waves, the background ripples, or the motif shifts under the foot, the machine may not be the actual problem. The fabric and fusible combination may need more support, or a different stabilizer under the block during stitching. I see this often with soft backgrounds, bias-cut shapes, and layered applique where one area carries a lot more adhesive and thread than the rest of the block.
Test the exact stitch on a sample first. A pretty stitch on the ironing board is one thing. A stitch that still looks good after washing is the standard that counts.
Troubleshooting Common Fusible Applique Problems
A block can look fine on the ironing board and still fail after the first wash. That usually shows up in three ways: a block that feels hard, edges that start to lift, or a needle that drags through sticky adhesive. Each problem points back to the same practical question. Was the fusible, fabric, and support matched well enough for the way the project will be used?
I teach students to diagnose the clue before they try to fix the symptom. Stiff fabric usually means too much adhesive, too much buildup, or a fusible that is too heavy for the base fabric. Lifting edges often trace back to incomplete bonding, poor stitch coverage, or both. A gummy needle means adhesive has moved beyond the applique shape, usually from excess heat, pressure, or pressing time.
The applique feels stiff and heavy
This is one of the easiest problems to prevent and one of the hardest to hide later. If the applique area already feels board-like before quilting, it will usually stay that way.
Common causes include:
- A fusible web that is too heavy for quilting cotton, lawn, or other lighter fabrics
- Full-coverage adhesive on large motifs when only edge support was really needed
- Too many fused layers in one area, especially with overlapping shapes
The fix is usually mechanical, not magical. Use a lighter fusible for softer fabrics. Cut away the center of large applique pieces before final fusing so the bond stays at the perimeter instead of turning the whole motif into a patch of glue. If several shapes stack in one spot, reconsider the order or reduce the overlap.
Durability matters here too. A quilt that is meant to be washed often needs enough bond and stitching to hold up, but more adhesive is not automatically better. Too much glue can make the block stiff, resist smooth quilting, and create uneven wear over time.
The edges lift after stitching or washing
This is the problem quilters worry about most, and they should. Repeated laundering is where weak bonds and skimpy edge stitching show up fast. As noted in Quiltish Corner's discussion of fusible applique durability, fused applique bonds do not last forever on their own. Washing and use put stress on the edges first.
Check where the failure starts. If the edge peels away cleanly, the adhesive probably never bonded fully. If the edge stays down but threads and fabric start fraying under the stitches, the stitch choice or stitch width was too light for the fabric and the amount of washing the piece receives.
Work through this checklist:
- Confirm the iron setting for that exact fusible and fabric
- Hold the press long enough to activate the adhesive fully, but not so long that glue spreads
- Press every part of the motif evenly, especially points and narrow stems
- Let the piece cool flat before moving it
- Restitch weak areas with better edge coverage if the quilt will be washed regularly
In class, I see this a lot on projects that used a light decorative stitch on a high-use quilt. The stitch looked pretty at first, but the edge was never protected well enough for repeated laundering.
The needle gets sticky
A sticky needle causes more than annoyance. It can lead to skipped stitches, thread shredding, and uneven tension that makes the applique edge look rough.
The usual cause is migrated adhesive. That happens when the iron is too hot, the pressing time is too long, or the fusible extends beyond the applique shape. It also shows up on dense layered motifs where glue has nowhere to go but up onto the needle.
A few habits help:
- Trim fusible cleanly to the shape so no adhesive extends past the edge
- Use the minimum heat and time that gives a full bond
- Wipe the needle during long stitching sessions if buildup starts
- Test a different needle type if your machine resists adhesive-heavy work
If the needle keeps gumming up, the issue is often the fusible choice or pressing method, not the machine.
The adhesive bleeds through the fabric
Bleed-through leaves shiny spots, dark patches, or a plasticky look that no amount of stitching will disguise. Lightweight fabrics show it first, but any fabric can develop it if the adhesive is too aggressive or the pressing is too hot.
Test scraps before cutting into your final fabric, especially with batiks, hand dyes, linen blends, and other fabrics that react differently from standard quilting cotton. If bleed-through appears, switch to a lighter product, reduce pressure, and follow the pressing directions more carefully. A press cloth can help protect the fabric surface, but it will not fix a poor fusible match.
This is one of those trade-offs every quilter learns. The strongest bond on the ironing board is not always the best choice for the finished quilt. The better choice is the combination that stays soft enough to quilt, clean enough to stitch, and secure enough to survive real washing.
Finishing and Care FAQ
You finish the quilt, press it flat, and everything looks crisp. Then it goes through the wash a few times, and weak edges start lifting or the applique turns stiff and tired. That usually traces back to two things. The bond was asked to do more than it could, or the fabric, fusible, and stitching were never a good match in the first place.
Good finishing protects the work you already did. Good care helps that bond last as long as possible, especially on quilts that will be washed and used instead of folded on a shelf.
How should I wash a quilt with fusible applique to ensure it lasts
Wash on a gentle cycle or by hand if the quilt is delicate. Use cool to lukewarm water and a mild detergent. High heat, heavy agitation, and rough drying shorten the life of the adhesive.
For quilts that see regular use, edge stitching matters more than careful washing alone. Fusible holds the shape in place. Stitching keeps the edge secure after repeated laundering, which is why I treat it as standard practice on bed quilts, kids' quilts, and anything that will be washed often.
Air drying is easiest on applique. If you use the dryer, keep it on low.
What is the difference between fusible interfacing and fusible web
Fusible interfacing is a support layer. It adds body or stability to the fabric and stays in the project. Fusible web is an adhesive layer used to bond one fabric to another.
That difference affects durability. If a fabric is stretching, sinking, or fraying under the applique, web alone will not solve the problem. A light stabilizing layer may be what keeps the shape smooth after quilting and washing. If the base fabric is already stable and you only need to attach the motif, fusible web is often enough.
Can I use fusible applique for a no-sew project
Yes, for wall pieces, seasonal decorations, and other items that will not be washed much or handled hard.
For quilts, garments, tote bags, and children's projects, I would not stop at the fuse. Adhesive gives placement and short-term hold. Stitching adds the mechanical strength that keeps edges from loosening over time.
What causes the fusible to not stick properly
Poor bonding usually comes from one of four problems. The iron is too cool, the pressing time is too short, the iron is moved instead of held in place, or the piece is handled before it cools.
Sometimes the problem is the combination itself. A heavy fusible on a loosely woven fabric can bond unevenly. A fabric finish can also interfere with adhesion. If a fuse keeps failing on test scraps, change one variable at a time: fabric prep, fusible weight, heat setting, or added stabilizer.
Why did fusible applique become so popular
It shortened prep time and made shape placement much more consistent, especially for machine applique and classroom sewing. Quilters could cut accurate motifs, fuse them in place, and move to stitching without the hand-turn preparation that traditional methods require.
That convenience came with a trade-off. Faster prep does not guarantee a longer-lasting result. The projects that hold up best are the ones where the fusible matches the fabric, the base is stable enough for the design, and the edges are finished with the intended use in mind.
FAQ schema
<script type="application/ld+json">
{
  "@context":"https://schema.org",
  "@type":"FAQPage",
  "mainEntity":[
    {
      "@type":"Question",
      "name":"How should I wash a quilt with fusible applique to ensure it lasts?",
      "acceptedAnswer":{
        "@type":"Answer",
        "text":"Wash gently and rely on proper edge stitching for long-term durability. Repeated use and washing can wear away fusible web over time, so stitched edges help protect the applique."
      }
    },
    {
      "@type":"Question",
      "name":"What is the difference between fusible interfacing and fusible web?",
      "acceptedAnswer":{
        "@type":"Answer",
        "text":"Fusible interfacing is a support layer with adhesive on one side that remains in the project. Fusible web is mainly a bonding layer used to attach one fabric to another during applique."
      }
    },
    {
      "@type":"Question",
      "name":"Can I use fusible applique for a no-sew project?",
      "acceptedAnswer":{
        "@type":"Answer",
        "text":"Yes, for decorative projects with light handling. For quilts, garments, or items that will be washed or used often, edge stitching is the safer choice."
      }
    },
    {
      "@type":"Question",
      "name":"What causes the fusible to not stick properly?",
      "acceptedAnswer":{
        "@type":"Answer",
        "text":"Common causes include incorrect temperature, insufficient or excessive pressing time, sliding the iron instead of pressing, and handling the piece before it cools."
      }
    }
  ]
}
</script>
If you're ready to start your next applique project, browse Linda's Electric Quilters for fabrics, fusibles, needles, thread, and project tools that fit the way you sew.


