
How to Create a Simple Lap Quilt for Beginners
How to Create a Simple Lap Quilt for Beginners:
Introduction: Welcome to Day 1 of our 30-day crafting journey! Today, we're diving into quilting with an easy, beginner-friendly lap quilt. This project will introduce you to basic quilting techniques while allowing you to create a beautiful, functional piece. Whether you're looking to add warmth to your home or give a thoughtful handmade gift, this lap quilt will make a stunning addition to any space.
Materials You’ll Need:
-
Fabric (Choose 3-4 different fabrics to create an interesting pattern)
-
1 yard each of your main fabric (for the quilt top)
-
1 yard of solid fabric (for the quilt backing)
-
-
Batting (Approximately 1 yard, depending on the size of your quilt)
-
Quilt binding (For finishing the edges)
-
Quilting thread (In a color that complements your fabric)
-
Rotary cutter, mat, and ruler (For precise cutting)
-
Pins (To hold fabric pieces in place)
-
Sewing machine
Step-by-Step Instructions:
-
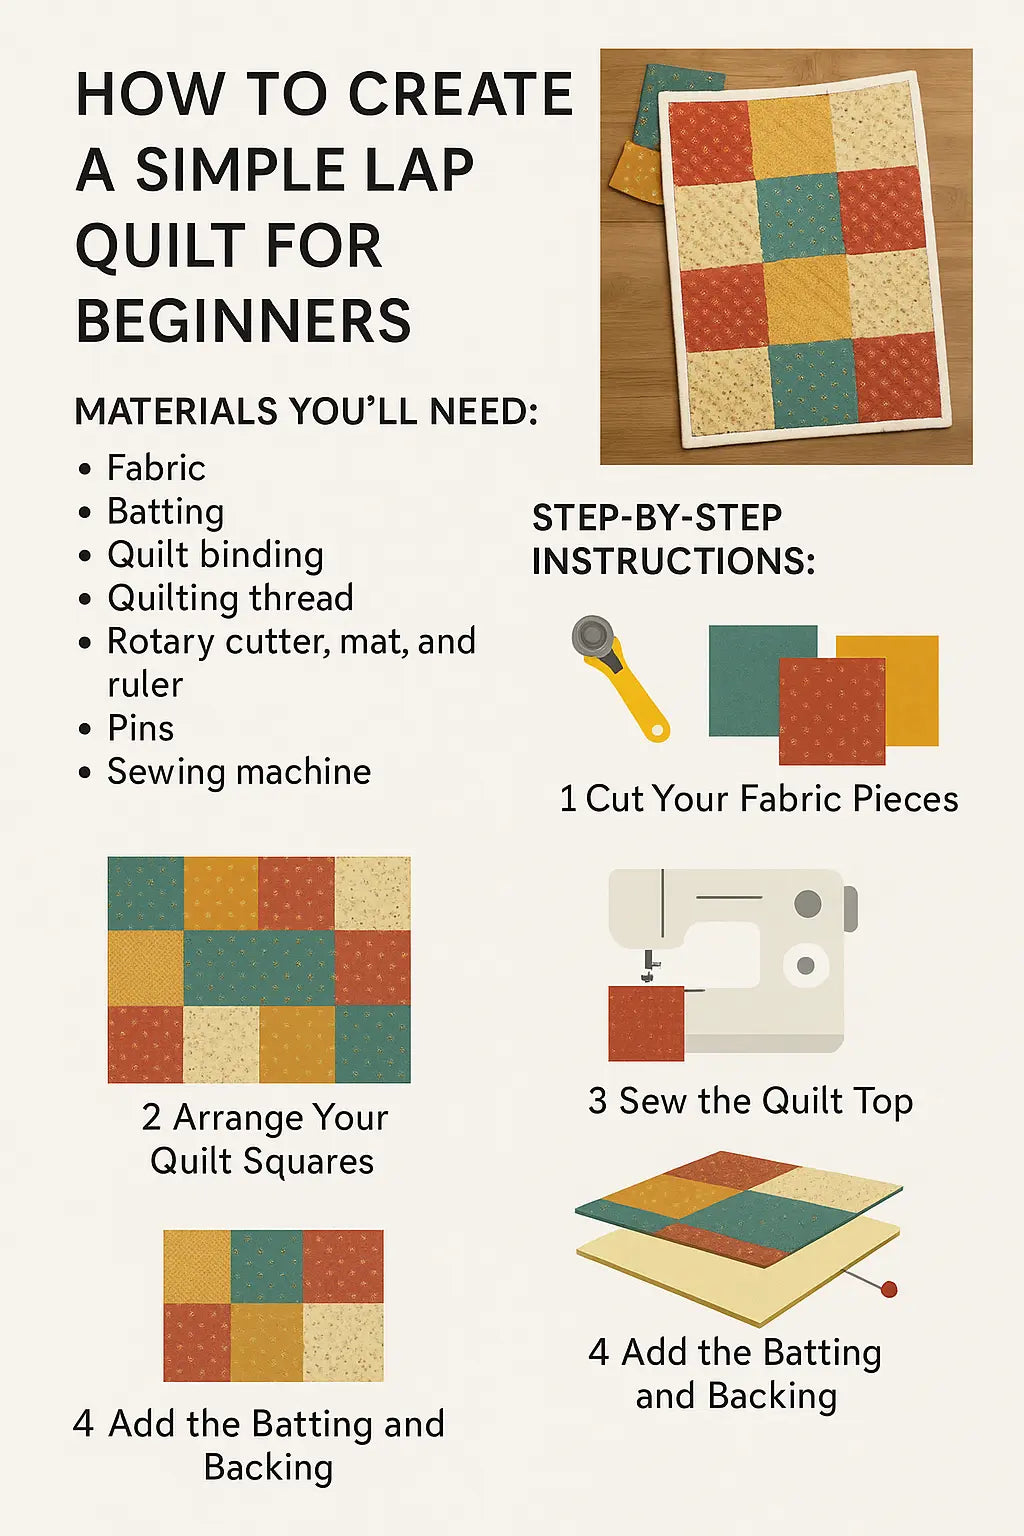
Cut Your Fabric Pieces:
-
Start by cutting your fabric into squares or rectangles. For a simple lap quilt, cut 10-inch squares. You'll need 12-16 squares depending on your desired quilt size. You can mix and match fabrics for variety.
-
-
Arrange Your Quilt Squares:
-
Lay out your fabric squares in a grid pattern. Arrange them in rows, alternating fabrics to create an interesting design. Feel free to switch up the order until you're happy with the layout.
-
-
Sew the Quilt Top:
-
Begin by sewing the squares together in rows. Use a ¼-inch seam allowance for a precise fit. Once all rows are sewn together, join the rows to form the quilt top.
-
-
Add the Batting and Backing:
-
Cut your batting and backing fabric to match the size of your quilt top. Lay the backing fabric down first, followed by the batting, and finally, the quilt top. Pin the layers together to hold them in place.
-
-
Quilt the Layers Together:
-
Use a sewing machine to quilt the three layers together. You can choose to quilt in straight lines or use a fun, decorative stitch for added texture. Remember, this is where the creativity comes in!
-
-
Trim the Edges:
-
Once your quilt is quilted, trim any excess batting and backing fabric to match the quilt top.
-
-
Bind the Edges:
-
Cut strips of fabric (about 2.5 inches wide) to create your quilt binding. Attach the binding to the edges of the quilt, folding it over and sewing it down to finish the edges neatly.
-
Finished Product:
Once you’ve completed all the steps, you’ll have a beautiful lap quilt! This quilt is the perfect size for a cozy afternoon on the couch or as a decorative piece in your home.
Tips for Success:
-
Use a walking foot for your sewing machine to prevent shifting while quilting.
-
Press seams as you go to keep everything neat and aligned.
-
If you don’t have access to a rotary cutter and mat, you can use fabric scissors, but the rotary cutter gives more precise cuts.


