
Think of quilt batting as the unsung hero of your project. It's that soft, fluffy middle layer that gives your quilt its warmth, its drape, and that oh-so-cozy feel. But picking the right quilt batting sizes can sometimes feel like a bit of a mystery. The number one rule is simple, but absolutely critical: your batting must always be bigger than your quilt top. Understanding this fundamental step is key to transforming your quilt top into a finished masterpiece.
Why Batting Size Is Your Quilt's Foundation
Let's imagine you're framing a beautiful painting you just finished. You wouldn't hunt for a frame that’s the exact same size as the canvas, right? You need a little extra room—a margin—to get everything situated perfectly. Quilt batting works exactly the same way. That extra fluff around the edges, often called 'overage,' is basically your quilting insurance policy.
This buffer zone is what makes the whole quilting process go smoothly. As you stitch the three layers of your quilt sandwich together (the top, batting, and backing), everything naturally shifts and pulls a little. Without that extra batting, your quilt top can get sucked in, leading to frustrating puckers and a wonky, misshapen quilt.
The Importance of Overage
I've learned this the hard way: you need a batting that is 2-4 inches larger on all four sides than your quilt top. This little bit of extra material gives you some serious advantages:
- Room for Shifting: It gives the fabric space to move and settle as you're machine or longarm quilting, without distorting your design.
- Secure Clamping: If you send your quilt to a longarmer, they need this extra fabric to load it correctly onto their big machine frames.
- Perfectly Square Edges: It’s your ticket to a professional finish. This overage allows you to trim everything down cleanly after quilting, guaranteeing sharp corners and perfectly straight edges.
Think of it this way: The extra batting is your safety net. It forgives any minor inconsistencies in your piecing and ensures the quilting process itself doesn't pull apart the beautiful top you worked so hard on.
Getting this concept down from the very beginning is the key to avoiding a lot of common headaches. It sets every single project up for success, whether you're tackling a tiny wall hanging or a massive king-sized masterpiece. Just like picking the right fabric is a big deal, choosing the correct batting size is a foundational step you just can't skip. For a deeper dive into materials, check out our guide on the best material for quilts.
Ready to find the perfect foundation for your next creation? Explore Linda's curated collection of high-quality batting to finish your project with confidence.
Matching Batting Sizes to Your Quilt Project
Alright, so you know why you need that extra batting hanging off the edges. Now, let's connect that to your actual project. Picking the right quilt batting size shouldn't be a guessing game, and thankfully, it isn't! The quilting world has made this incredibly simple by offering pre-cut batting packages that line up perfectly with standard bed dimensions, from a tiny crib quilt all the way up to a sprawling California King.
Think of these pre-cut packages as your quilting shortcut. They already have the necessary overage built right in. That means no frantic math—just match your quilt type (like "Queen") to the right batting package, and you’ll have that perfect safety buffer ready to go.
The Logic Behind Batting Overage
So why do you need that extra material, and how much is enough? The answer often comes down to how you plan on quilting your project.
- For Home Machine Quilting: If you're quilting on your domestic machine, a buffer of 2-3 inches on all four sides is usually plenty. This gives you just enough fabric to hold onto and guide the quilt sandwich under your needle without the edges getting sucked in or distorted.
- For Longarm Quilting: Longarmers need a bit more real estate to work with. They require a much bigger buffer, typically at least 4 inches on all sides. This extra space is crucial for them to securely attach the quilt backing and batting to the rollers on their machine frames.
This handy infographic gives you a great visual of how your batting should always be larger than your quilt top, creating that all-important buffer zone.
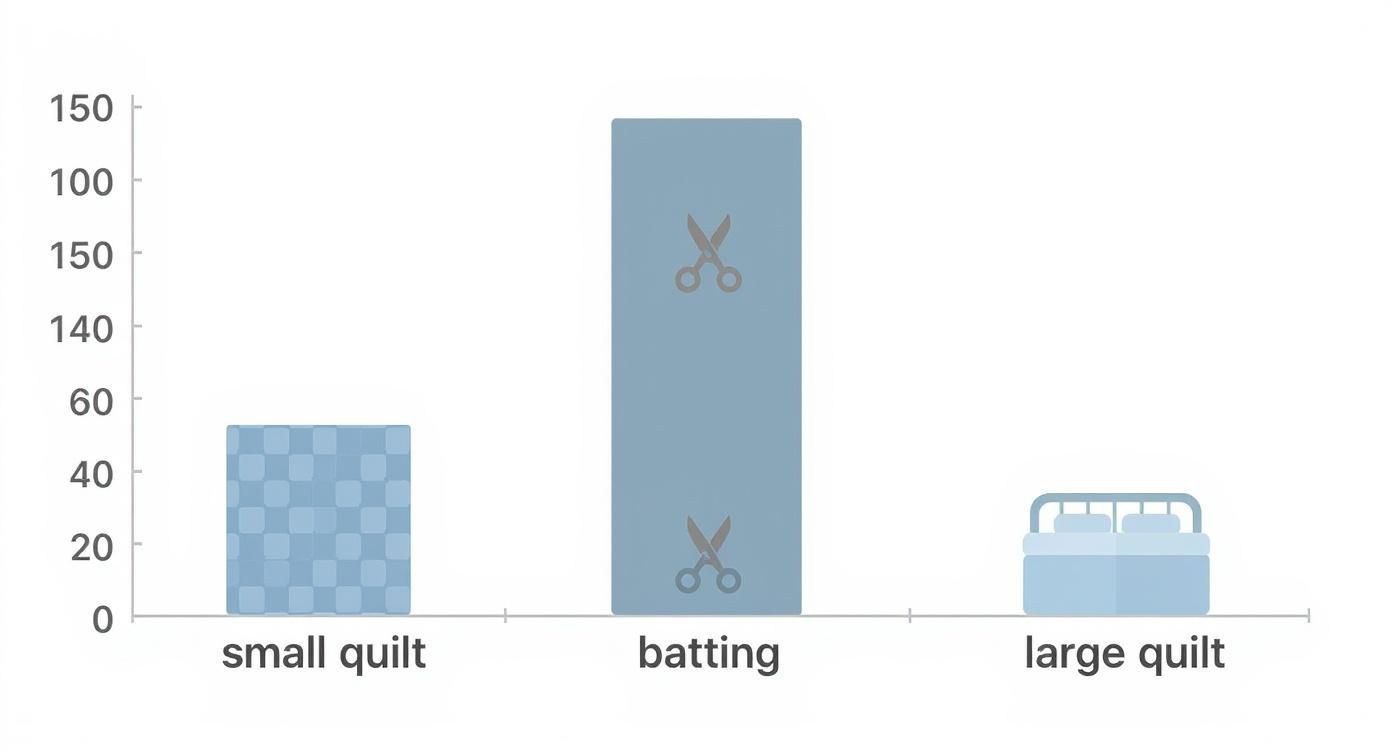
As you can see, the batting acts as the generous middle layer, extending past the quilt top to make sure the whole quilting process is smooth and even. Consider that extra space your project’s safety net against puckering, shifting, and frustration.
Quilt Batting Size Recommendation Chart
To make things even easier, here’s a quick-reference chart that matches standard quilt mattress sizes with their recommended pre-cut batting. This is your go-to cheat sheet for grabbing the right package off the shelf every time.
| Quilt Size Name | Approx. Mattress Dimensions (inches) | Recommended Batting Size (inches) |
|---|---|---|
| Crib / Baby | 28" x 52" | 45" x 60" |
| Throw / Lap | N/A (Varies) | 60" x 60" |
| Twin | 38" x 75" | 72" x 90" |
| Full / Double | 54" x 75" | 90" x 96" |
| Queen | 60" x 80" | 90" x 108" |
| King | 76" x 80" | 120" x 120" |
This simple guide helps take the guesswork out of shopping. Now, if you're working on something with unique dimensions, like a t-shirt quilt, you might need a more custom approach. If that's the case, you can learn more by checking out our guide on how to quilt a t-shirt quilt.
The quilting industry has really grown to accommodate us, with the global quilt batting market valued at around USD 1.8 billion in a single year! This means we have more options than ever. Batting now comes in jumbo rolls measuring 90 to 120 inches wide to handle large quilts without seams, while widths of 45 to 60 inches are still the standard for smaller projects.
Now that you can confidently match a batting size to your project, you're one step closer to a beautifully finished quilt. Find the perfect pre-cut batting for your next standard-sized project at Linda's today.
How to Measure Your Quilt for a Perfect Fit
Getting an accurate measurement is the absolute first step toward a beautifully finished quilt. I can’t stress this enough! Just like a baker needs precise measurements for a perfect cake, a quilter needs to know the true size of their quilt top to make sure everything lays flat and looks professional.
And trust me, just measuring once across the top and once down the side won't cut it. Fabric has a sneaky way of stretching and shifting as you piece it together.
There’s a simple trick to account for any of that stretching or those tiny inconsistencies, and it gives you a much more reliable number to work with. Think of it as triple-checking your work before you commit.
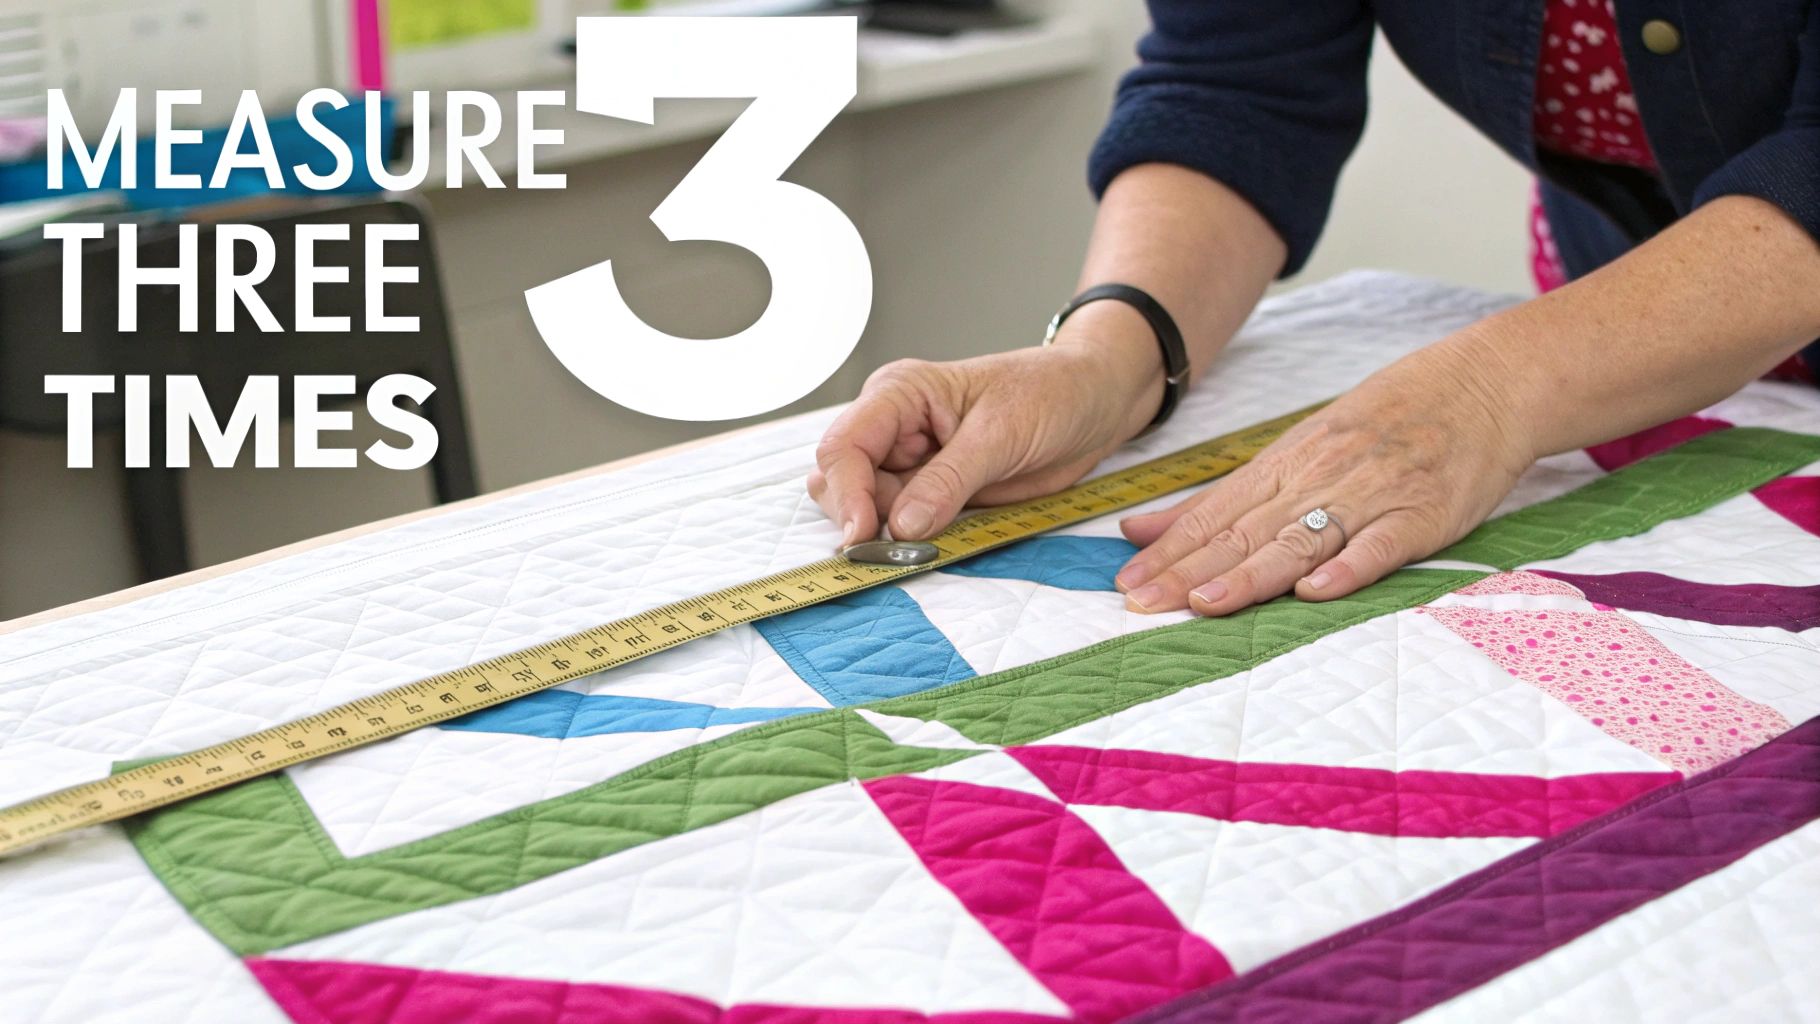
The Three-Point Measurement Method
To get the real-deal dimensions for your project, you'll want to use this tried-and-true method. It guarantees you’ll have an average that reflects the actual size of your quilt top, not just one potentially wonky side.
- Measure the Width: Lay your quilt top on a flat surface—the floor is usually best. Measure the width across the top edge, then again in the middle, and finally one more time across the bottom edge.
- Calculate the Average Width: Add those three numbers together and divide the total by three. That's your official quilt top width.
- Measure the Length: Now, do the same thing for the length. Measure along the left side, right down the center, and then along the right side.
- Calculate the Average Length: Add those three measurements up and divide by three. Bam! You have your official quilt top length.
Let's say your width measurements were 60", 61", and 59". Your average width would be 60 inches (60 + 61 + 59 = 180, and 180 / 3 = 60). This is the number you'll use to figure out your batting size.
Calculating Your Batting Overage
Once you've got your average measurements, it’s time to add a little extra—what we call the "overage." This buffer is your quilting insurance policy. It gives you (or your longarmer!) the extra room needed to work their magic without the fabric pulling in and causing puckers as it's stitched.
As a rule of thumb, you'll want to add 4 to 8 inches to both your final width and length. This gives you at least 2-4 inches of extra batting on all four sides of your quilt top.
Let's stick with our example:
- Quilt Top Size: 60" x 75"
- Add 8 inches: (60 + 8) x (75 + 8)
- Required Batting Size: 68" x 83"
This simple math gives you the power to figure out your batting needs for any quilt, whether you're following a pattern or designing something totally custom. If you're working on a unique project, it can be helpful to look at a typical size chart to see how different dimensions are usually named. Getting the math right is a core quilting skill, and you can learn even more in our guide on how to calculate fabric yardage.
Now that you have your precise numbers, you’re ready to pick out the perfect batting from Linda's amazing collection and get that project finished.
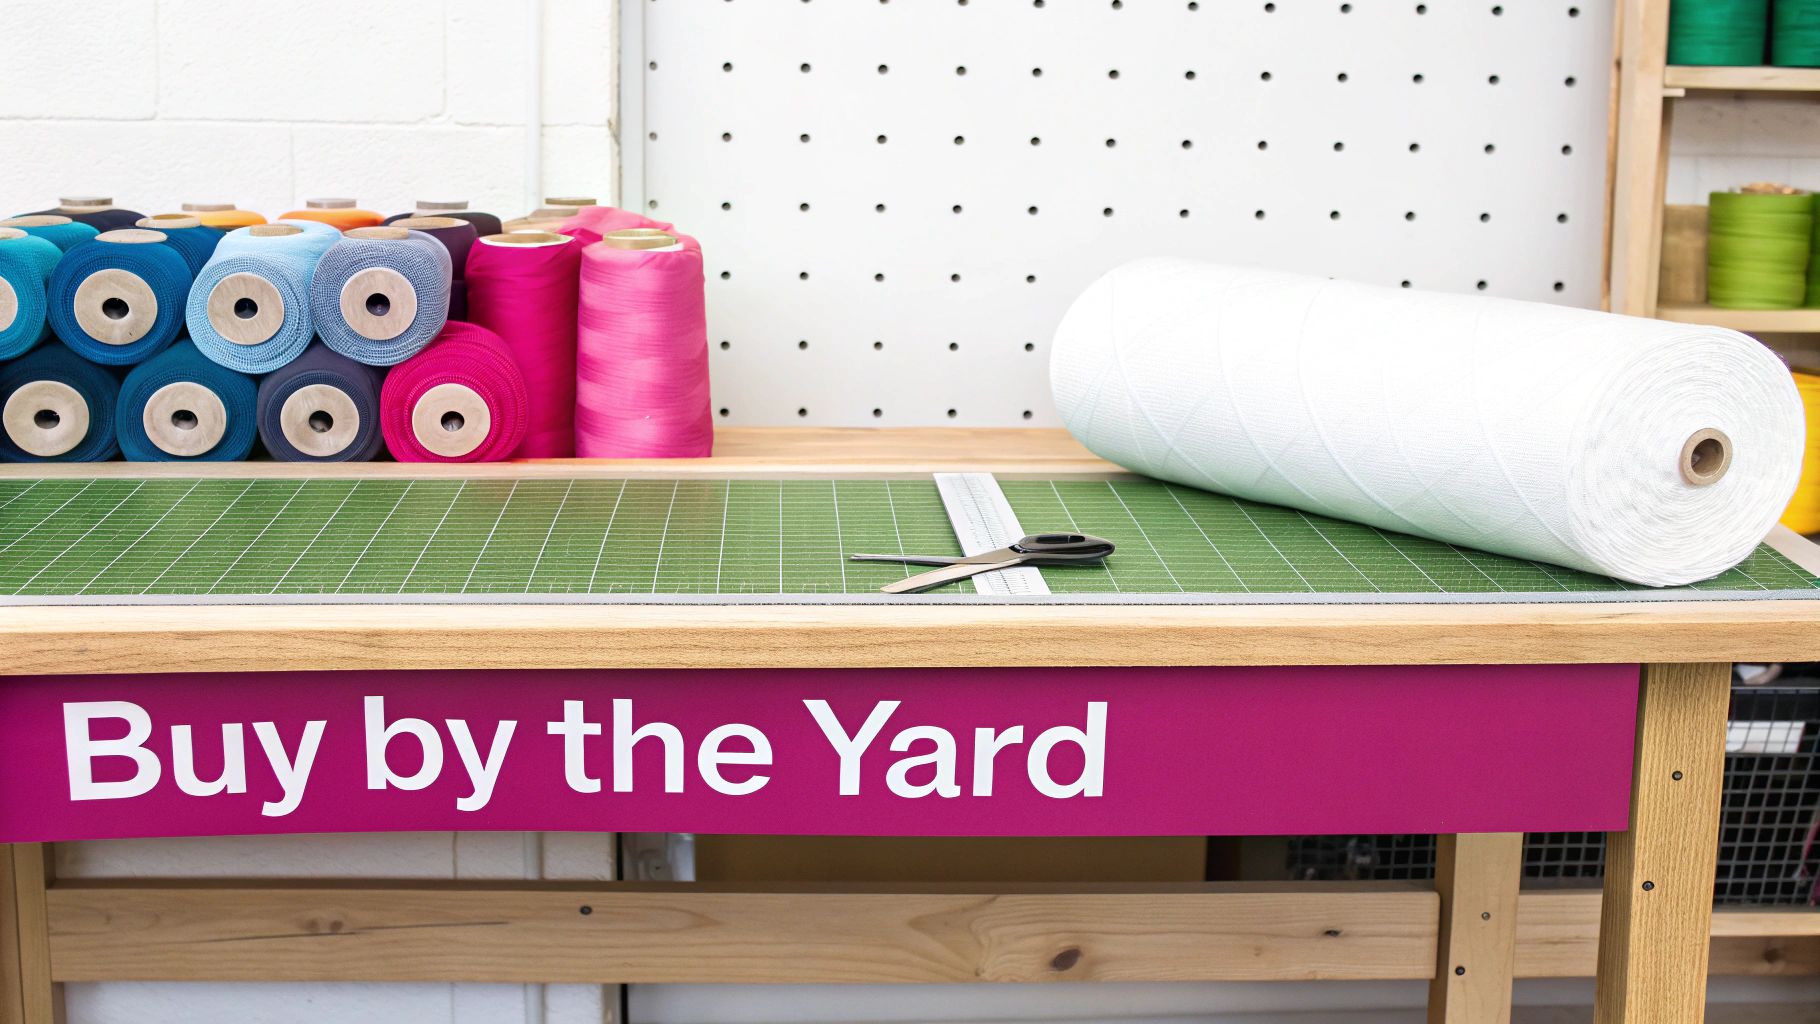
Going Beyond Pre-Cuts with Batting by the Yard
Pre-cut batting packages are fantastic for standard-sized projects, but let's be honest—our creativity doesn't always fit into a neat little box. Sometimes you’re working on a massive custom quilt, an extra-long table runner, or a whole batch of smaller items. For times like those, buying batting by the yard from a roll gives you total freedom.
Think about it like buying fabric for your quilt top. You wouldn't be happy with just a few pre-cut options, right? You calculate exactly what you need for your vision. Batting by the yard is the exact same concept, putting you in the driver's seat and often saving you money in the long run.
Understanding Batting Rolls
When you buy "by the yard," you're getting a specific length cut from a huge roll that has a fixed width. These widths aren't random; they're designed to handle most quilting projects, so you can cover even a huge quilt without having to piece your batting together.
- Common Widths: The most common widths you'll find are 90 or 120 inches.
- Seamless Backings: That super-wide 120-inch roll is a quilter’s dream for king-sized quilts, giving you a perfectly smooth, seamless middle layer.
- Versatility: A 90-inch roll is a true workhorse, perfect for anything from a generously sized throw right up to a queen quilt.
These sizes have deep roots in quilting history. In North America and Europe, roll widths have long been in that 90- to 120-inch range to accommodate larger bed sizes. It's interesting to note that in the Asia-Pacific region, batting often comes in smaller widths, like 45 to 60 inches, reflecting a tradition of smaller, more decorative quilts.
How to Calculate Your Yardage
Figuring out how much batting to get from a roll is easier than it sounds. First, take your finished quilt top measurements and add a good 4-8 inches of overage all the way around. Once you have those numbers, the math is simple.
(Your Required Batting Length in Inches) ÷ 36 = Yards Needed
Let's say your quilt top is 80" x 95". With the overage, you'll want batting that’s at least 88" x 103". You'd grab the 120-inch wide roll and ask for a cut of 103 inches (which is about 2.9 yards). This way, you get a custom fit and dramatically cut down on waste, especially if you plan your projects carefully.
Buying by the yard really opens up a world of possibilities for any project, no matter the size. For a deeper dive into some of the best brands available on a roll, check out how Linda's welcomes The Warm Company batting. When you're ready to start that next custom project, we have premium batting on the roll at Linda's, ready to be cut to your exact specs.
How Batting Fiber and Loft Affect Your Quilt
So you've figured out the perfect quilt batting sizes for your project. Great! Now comes the really fun part: deciding on the feel of your quilt. The material (the fiber) and the thickness (the loft) are going to completely change the final look, drape, and warmth of your quilt.
Think of it like choosing between a lightweight summer dress and a big, cozy winter coat. Both are wonderful, but they have totally different vibes and purposes. Batting is the hidden soul of your quilt, transforming a pretty top into a treasured heirloom with its own unique personality.
Understanding Batting Loft
When quilters talk about loft, we're just talking about the thickness and puffiness of the batting. It’s what determines how much your quilting stitches will pop and how heavy the finished quilt will feel in your hands.
You'll generally find three categories of loft:
- Low Loft: This is your go-to for thin, flat, traditional-style quilts. It’s a dream for machine quilting and gives you a beautiful drape without any bulk. It's also the secret behind that classic, crinkly look that appears after the first wash.
- Medium Loft: The perfect middle ground. Medium loft gives you a bit more puff and warmth than low loft, but it’s still manageable and not overly bulky. It offers great stitch definition, making it a super popular choice for all sorts of projects.
- High Loft: Think fluffy, puffy, and cloud-like. High-loft batting is thick and creates a warm, comforter-style quilt. The extra thickness makes quilting stitches stand out dramatically, creating deep, beautiful texture. You’ll often see this used for quilts that are tied rather than intricately stitched.
Choosing Your Batting Fiber
Beyond how puffy it is, the actual fiber your batting is made from is a huge deal. Every material brings something different to the table, affecting the quilt's final feel and function. While we’re focused on quilts, it can be helpful to see how different blanket material types like fleece or sherpa behave to get a better sense of fabrics in general.
For special projects, think about how the quilt will be used. If it's a show quilt where you want every stitch to be a star, wool is an incredible choice. For a quilt that's going to be snuggled on the couch for years, a bamboo blend gives you a softness that’s just unmatched.
Here’s a quick rundown of the most popular fibers you'll find:
- 100% Cotton: The tried-and-true classic. Cotton batting is breathable and creates that beloved flat, vintage look. It does shrink just a little (up to 5%) after the first wash, which is what gives you that gentle, crinkly texture so many of us adore.
- Polyester: This one is lightweight, tough, and won't shrink on you. It's a fantastic option when you want warmth without a lot of weight. A high-loft poly is perfect for those really puffy comforters, but just be aware it can sometimes "beard," where tiny fibers poke through the fabric.
- Wool: Wool gives you incredible warmth but is surprisingly lightweight. It naturally resists creases and makes your quilting stitches look absolutely amazing. It's a premium fiber, perfect for show quilts or extra-special throws.
- Blends (80/20 Cotton-Poly): The best of both worlds! These blends give you the softness and feel of cotton but with the stability and lower shrinkage of polyester. It’s a reliable, go-to choice for countless machine quilters for a reason.
Getting the size, fiber, and loft just right is how you turn a good project into a masterpiece. To dive even deeper, check out our guide on quilting and batting choices for the passionate quilter.
Explore Linda's amazing collection of batting materials to find the perfect heart for your next quilt project.
Common Questions About Quilt Batting
No matter how many quilts you've made, a few questions about batting always seem to come up. I get asked these all the time! Let's clear up some of the most common head-scratchers quilters face when picking and using their batting.
Think of this as your go-to FAQ for getting things right. We'll cover the practical stuff so you can solve problems on the fly and feel more confident with every stitch.
Can I Piece Together Scraps of Batting?
Yes, absolutely! Piecing together leftover batting is a brilliant way to be less wasteful and stretch your quilting budget. It's one of my favorite money-saving tricks.
The key is to only use scraps of the same material and loft. This ensures your quilt has a nice, even feel without any unexpected lumps or thin spots. To join them, it's pretty simple:
- First, trim the edges of your batting scraps so they’re perfectly straight.
- Next, butt the clean edges right up against each other. Don't overlap them—that’s how you get a bulky ridge in your finished quilt.
- Use a wide zig-zag stitch on your sewing machine to sew the two pieces together. You’ll get a seam that lies flat and stays flexible.
You can also grab some fusible batting tape. It lets you iron the pieces together for a bond that's practically invisible.
What Happens If My Batting Is Too Small?
Cutting your batting too small is a mistake you only make once! It’s a fast track to a whole lot of frustration. Without that extra buffer around the edges, a few things can go wrong.
For starters, a longarm quilter won't have enough material to properly load your quilt onto their machine frames. Even if you're quilting on your home machine, you won’t have anything to grip and guide the quilt sandwich as you work.
As you quilt, the layers naturally shift and pull. If your batting is too small, there’s no "insurance" against that movement. The edges of your quilt top get pulled inward, causing puckers, tucks, and a wonky final shape.
Trust me, it's always better to have too much batting than too little. You can easily trim the excess after quilting, but you can't magically add more once you've started.
Does Batting Fiber Type Change the Size I Need?
Nope! The fiber type doesn't change the golden rule: you still need that 4- to 8-inch buffer around your quilt top. What it does change is how your quilt behaves after it’s been washed.
For instance, 100% cotton batting can shrink up to 5%. That’s what gives a quilt that wonderful, crinkly, vintage look that we all love. On the other hand, polyester and wool battings have very little shrinkage, which keeps the quilt looking smoother and newer.
While it’s good to know how the fiber will affect the final texture, it doesn't change your initial quilt batting sizes. Always start with batting that’s generously larger than your quilt top, no matter what it’s made of.
With these tips in your back pocket, you're ready to tackle any batting challenge with confidence. For all the high-quality batting, fabrics, and notions you need to bring your vision to life, visit Linda's Electric Quilters. Explore our amazing collection at https://lindas.com and get everything you need for your next masterpiece.


