
Welcome to the vibrant world of quilting! This craft combines artistry, precision, and comfort, and getting started is easier than you might imagine. This guide is specifically designed to transform you from a curious novice into a confident quilter by introducing seven manageable yet rewarding quilting projects for beginners. Each project is a stepping stone, intentionally chosen to teach you fundamental skills like accurate fabric cutting, precise piecing, and the complete quilt-making process from the first stitch to the final binding.
We'll break down each project in detail, explaining the core techniques you'll master and offering practical, actionable tips for a successful outcome. The journey to creating beautiful, handmade heirlooms starts with a single, simple project, and this list provides the perfect entry point. For every pattern, from vibrant baby quilts to elegant table runners, Linda's Electric Quilters has the high-quality fabric, thread, and essential tools you'll need to bring your vision to life. Let's dive into these exciting projects and unleash the quilter within you.
1. Log Cabin Quilt Blocks
The Log Cabin block is one of the most iconic and accessible quilting projects for beginners. Its construction is wonderfully simple: fabric strips, or "logs," are sewn sequentially around a central square. This technique systematically builds the block outward, teaching you the fundamentals of straight-line sewing, accurate seam allowances, and pressing, all within one repetitive and satisfying process. The design traditionally contrasts a light side with a dark side, creating a dynamic visual effect when multiple blocks are combined.
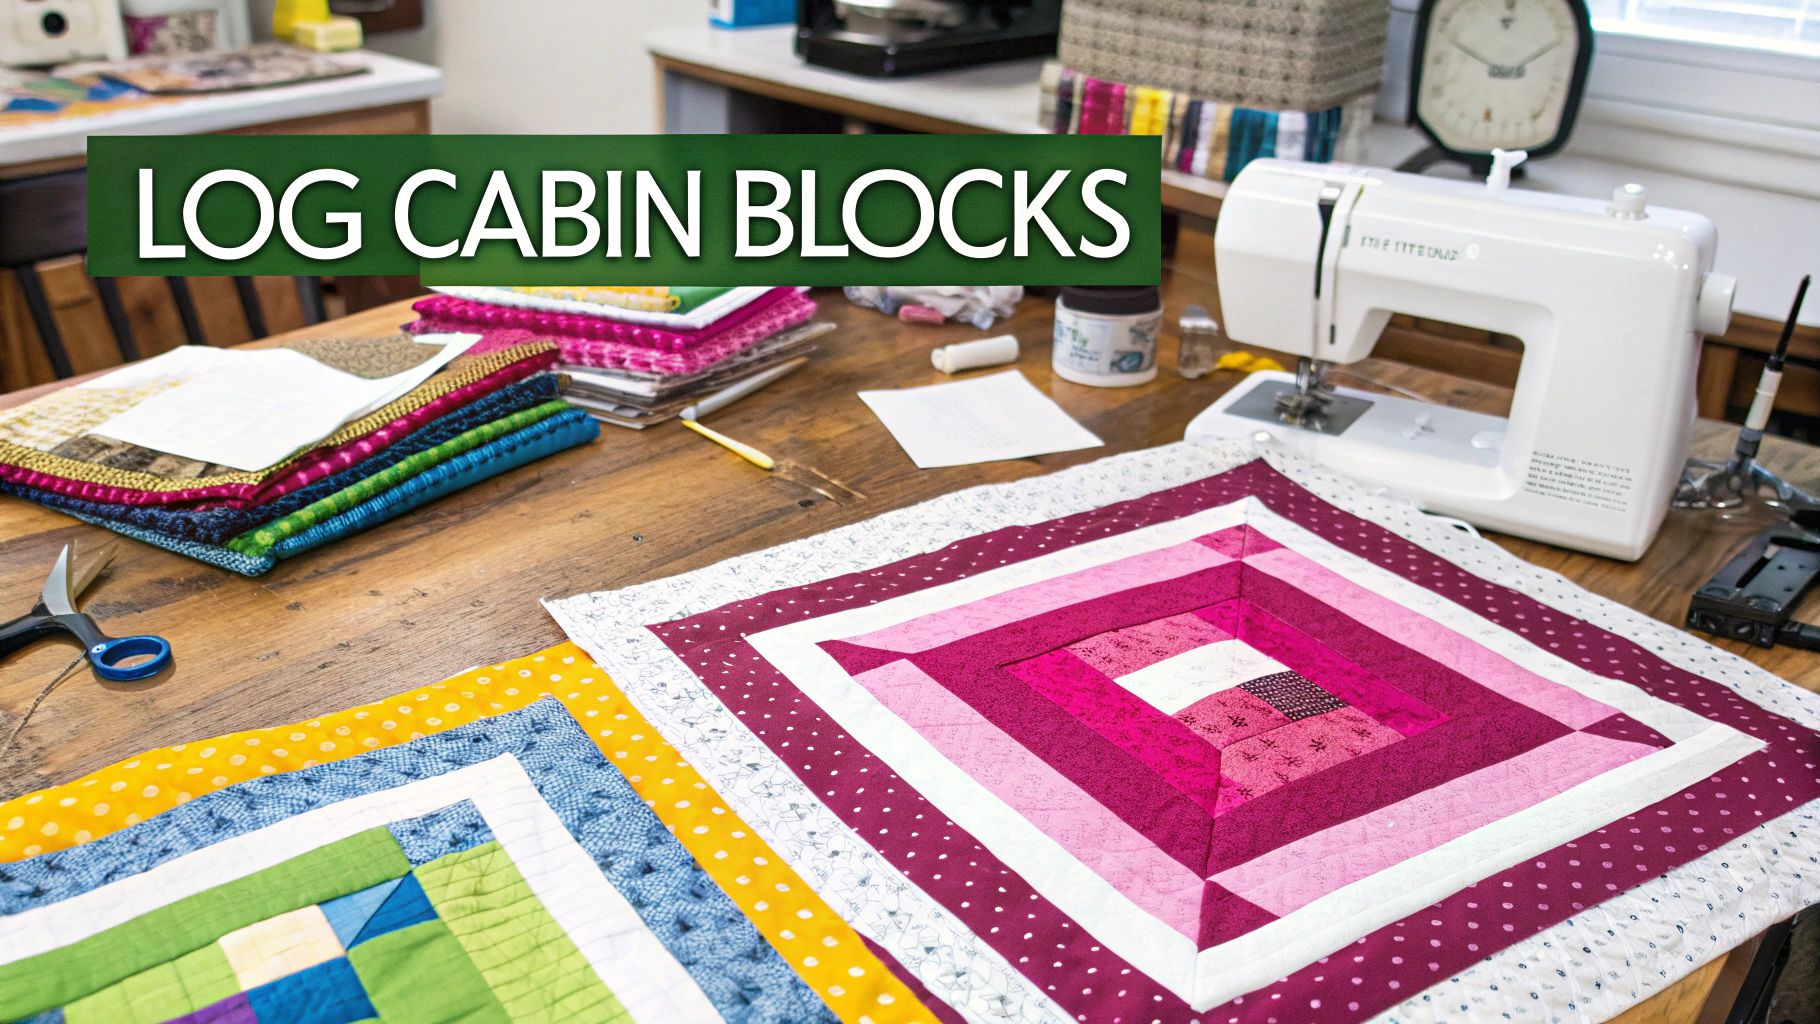
This block is a perfect entry point because it’s a "sew-and-flip" method, meaning you don't need complex templates or intricate cutting. The magic happens when you arrange the finished blocks, creating secondary patterns like the famous "Barn Raising" or "Courthouse Steps" designs.
Why It's Great for Beginners
Log Cabin blocks are incredibly forgiving and build confidence quickly. The straightforward, step-by-step construction makes it easy to master the core skills needed for more complex quilting projects for beginners. You get immediate visual feedback as the block grows, which is highly motivating. Furthermore, it’s an excellent way to use pre-cut fabric strips, like Jelly Rolls, which saves time and ensures cutting accuracy.
Actionable Tips for Success
- Start with a Generous Size: Aim for a 12-inch finished block. Larger pieces are easier to handle and require fewer blocks to complete a project like a lap quilt or baby blanket.
- Press Consistently: To keep your blocks flat and your points sharp, always press your seams toward the newly added strip (away from the center).
- Master Chain Piecing: When making multiple blocks, "chain piece" by sewing the same log to each block center without cutting the threads in between. This assembly-line method is a huge time-saver.
- Utilize a Design Wall: Before sewing your blocks together, arrange them on a design wall (or even the floor) to experiment with layouts and see how the light and dark fabrics interact to form larger patterns.
This timeless block provides a solid foundation for any new quilter. Once you're ready to start, ensure your project's success with high-quality quilting cotton and precision tools. Find the perfect pre-cut fabric strips and rotary cutters at Linda's to begin your Log Cabin quilt today.
2. Simple Patchwork Baby Quilt
Creating a simple patchwork baby quilt is a quintessential first project for any aspiring quilter. The process involves sewing basic fabric squares or rectangles together in a grid-like pattern, which serves as a perfect introduction to the core skills of quilting. From precise cutting and accurate piecing to the final steps of layering and binding, this manageable project covers the entire quilting journey. The smaller size, often around 36x48 inches, ensures you can complete it without feeling overwhelmed.
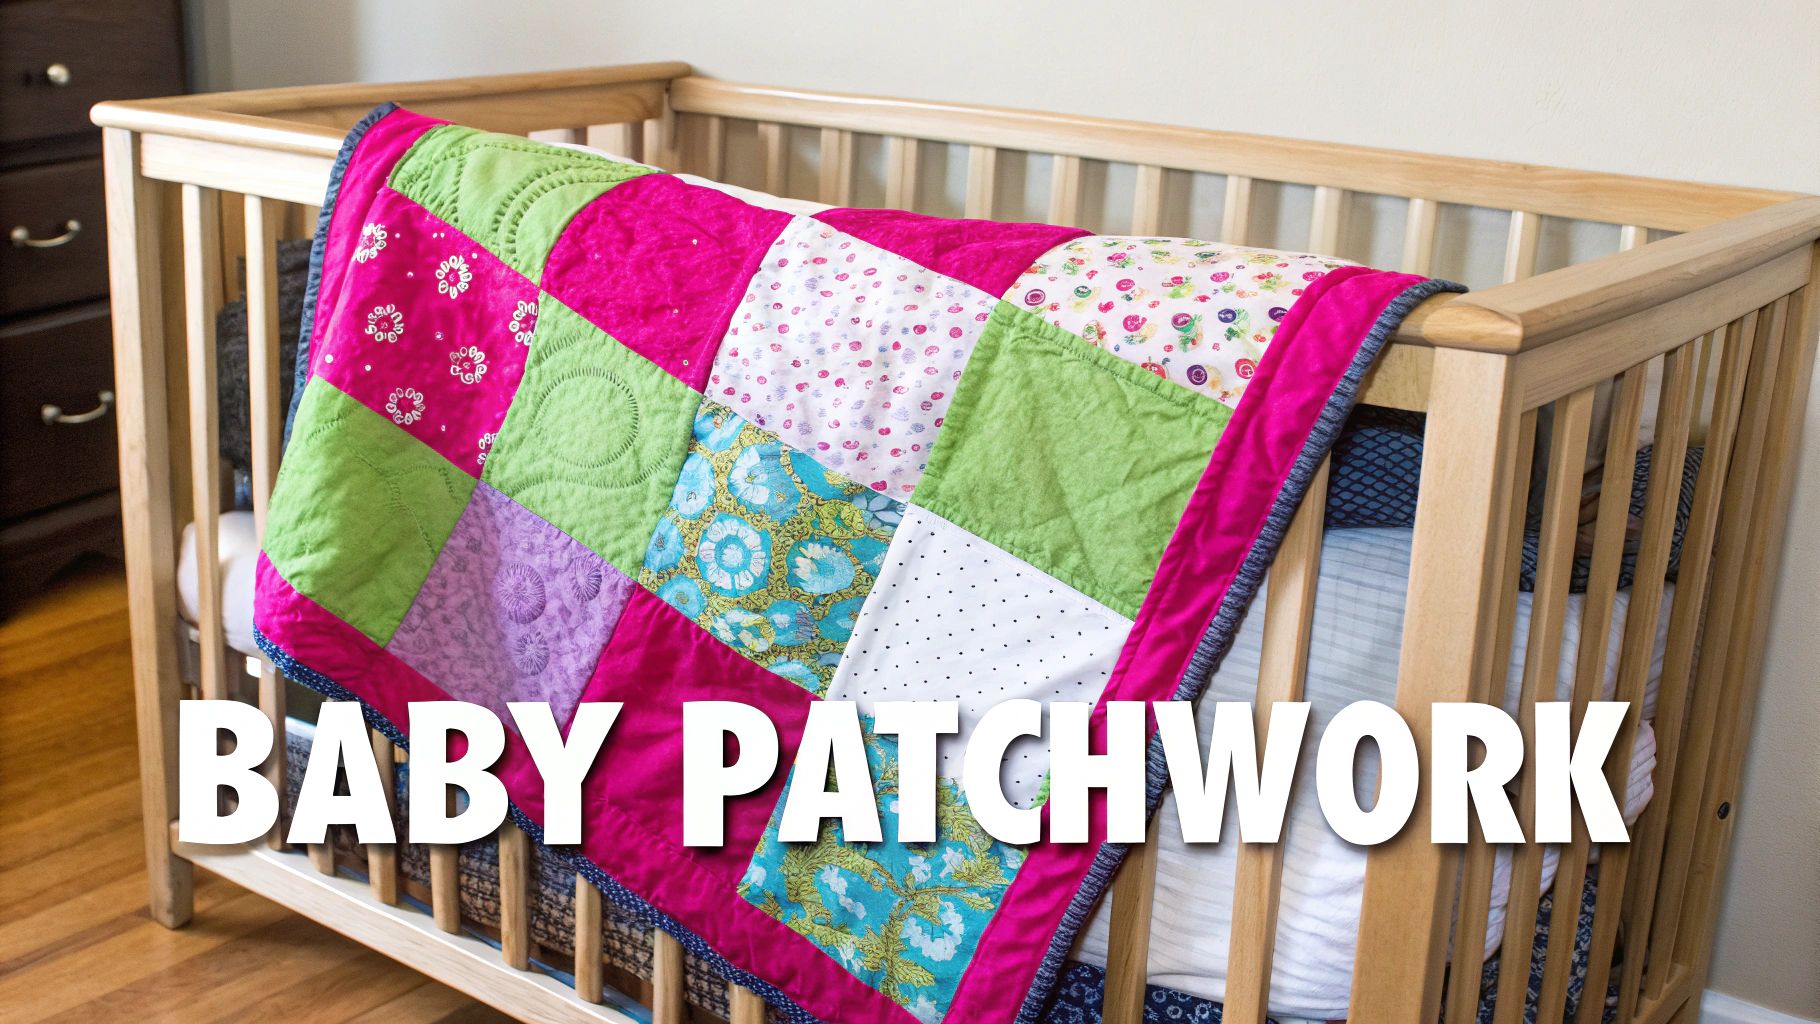
This project’s beauty lies in its simplicity and the creative freedom it allows. By arranging simple squares, you learn about color theory, contrast, and pattern creation on a small scale. It's a fantastic way to turn a collection of beautiful fabrics into a cherished and practical gift, making it one of the most rewarding quilting projects for beginners.
Why It's Great for Beginners
A patchwork baby quilt is the ideal learning ground because it's a complete, start-to-finish experience in a condensed format. You'll master the fundamentals of seam allowances and pressing while seeing your creation come together quickly. The repetitive nature of sewing squares builds muscle memory and confidence, and the smaller scale makes the quilting and binding stages far less intimidating than a full-size bed quilt. This immediate success is incredibly motivating for new quilters.
Actionable Tips for Success
- Use Pre-Cuts: Start with a pre-cut fabric bundle like a "charm pack" (5-inch squares) or a "layer cake" (10-inch squares). This eliminates most of the initial cutting, guaranteeing accuracy and letting you focus on sewing.
- Press Seams Open: For basic patchwork grids, pressing your seams open can help reduce bulk and ensure your quilt top lies perfectly flat, making the quilting process much smoother.
- Go for High Contrast: Choose fabrics with a distinct contrast between light and dark values. This makes your simple grid pattern pop and gives the finished quilt a more dynamic and visually interesting look.
- Try Simple Straight-Line Quilting: When it's time to quilt the layers together, start with simple straight lines stitched on either side of your seam lines. This "stitching in the ditch" is forgiving and adds beautiful texture.
This project provides a perfect foundation, building skills that will carry you into more complex designs. To get started on a beautiful and cozy baby quilt, you need the right materials. Explore our vibrant charm packs and soft flannel backing at Linda's to create your first patchwork masterpiece.
3. Rail Fence Quilt Pattern
The Rail Fence quilt pattern is a quintessential starting point for anyone new to quilting, celebrated for its simplicity and striking visual impact. The technique involves sewing long fabric strips together into "strip sets," which are then cross-cut into blocks. By rotating every other block 90 degrees, a dynamic zigzag or stair-step pattern emerges, creating an impressive design from the most basic of shapes. This method is a masterclass in strip piecing, a fundamental skill in quilt making.

This pattern's charm lies in its versatility. It can look elegantly traditional with just two contrasting solid colors, reminiscent of classic Amish designs, or it can be vibrant and modern when made with a scrappy assortment of prints. The construction is entirely based on straight seams, making it one of the most approachable quilting projects for beginners.
Why It's Great for Beginners
The Rail Fence pattern is exceptionally beginner-friendly because it minimizes complex cutting and piecing. Your primary tasks are cutting straight strips and sewing straight seams, which builds core skills and confidence. It's a fantastic way to understand how fabric color and value create movement and pattern within a quilt top. Since the piecing is straightforward, you can complete a quilt top relatively quickly, providing a gratifying sense of accomplishment.
Actionable Tips for Success
- Precise Cutting is Key: Use a rotary cutter, ruler, and mat to ensure your initial fabric strips are perfectly straight and of a consistent width. This accuracy is crucial for blocks that line up correctly.
- Press for Success: As you sew your strips together, press the seams in alternating directions for each strip set. This will help the seams "nest" together when you join the blocks, resulting in flatter, more accurate intersections.
- Play with Layout: Before sewing your blocks into rows, lay them all out on a large surface. Experiment with rotating the blocks to see the different patterns emerge, ensuring you are happy with the visual flow.
- Consider Color Gradients: For a stunning, modern look, choose fabrics in a gradient or ombre effect. Arranging the strips from light to dark will create a beautiful sense of depth and movement across the quilt.
The Rail Fence is a perfect project for mastering the basics with a visually rewarding outcome. To get started on this classic design, you'll need perfectly cut strips and reliable tools. Explore the beautiful fabric collections and precision cutting supplies at Linda's to create your stunning Rail Fence quilt today.
4. Simple Table Runner
A quilted table runner is an excellent project that guides a beginner through the entire quilting process from start to finish on a small, manageable scale. Typically ranging from 12 to 16 inches wide, this project allows you to practice piecing, quilting, and binding techniques without the commitment of a large quilt. It’s the perfect way to create a beautiful, functional piece of home décor while mastering fundamental skills.
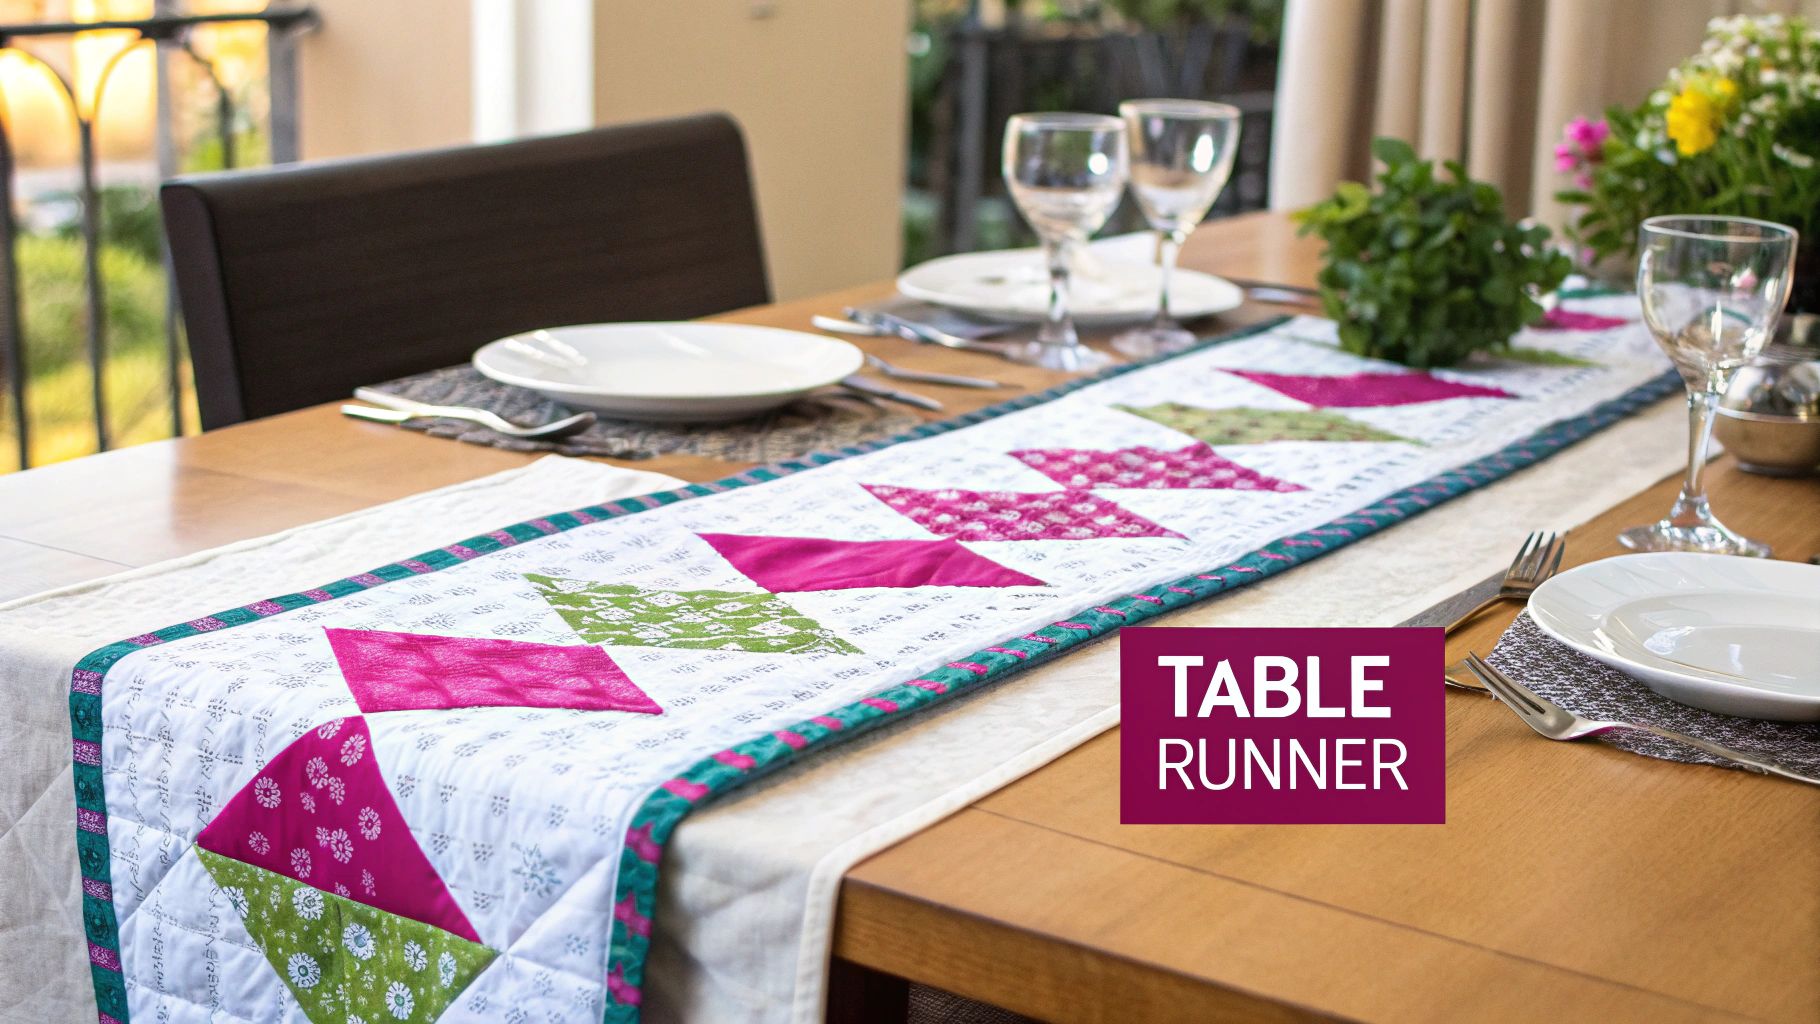
The narrow format is far less intimidating than a full-size quilt, yet it offers endless creative possibilities. You can explore different block designs, create seasonal themes, or try modern geometric patterns. The finished product is a quick and satisfying reward for your efforts, making it an ideal educational project.
Why It's Great for Beginners
A table runner is one of the best quilting projects for beginners because it provides a complete "quilt sandwich" experience (top, batting, and backing) on a small canvas. This allows you to practice machine quilting, whether straight-line or free-motion, without having to maneuver a bulky project. You’ll build confidence in every step, from cutting to the final binding stitch, making the leap to larger quilts feel much less daunting.
Actionable Tips for Success
- Mind Your Measurements: Before you start, measure your table to determine the ideal length for your runner. A good rule of thumb is to have it hang approximately 6 inches over each end.
- Use Coordinating Fabrics: For a cohesive and visually balanced design, choose an odd number of coordinating fabrics, such as three or five. This simple design principle creates instant harmony.
- Practice Your Quilting: The open spaces in a table runner design are perfect for practicing your machine quilting skills. Try simple straight lines, gentle waves, or even your first attempt at free-motion stippling.
- Add a Hanging Sleeve: Sew a simple fabric tube, or hanging sleeve, onto the back of your runner. This allows you to easily display it on a wall as a mini quilt when it's not on the table.
This project delivers a functional and beautiful item quickly, providing a major confidence boost. To create a stunning table runner, you need fabric that inspires you and tools that deliver precision. Explore the beautiful coordinating fabric collections and essential quilting notions at Linda's to get started.
5. Four Patch and Nine Patch Blocks
Four Patch and Nine Patch blocks are the absolute cornerstones of patchwork quilting, making them one of the most essential quilting projects for beginners. Their construction is as simple as it sounds: a Four Patch is made of four squares arranged in a 2x2 grid, while a Nine Patch uses nine squares in a 3x3 grid. This simple grid-based approach provides the perfect training ground for mastering the most crucial quilting skills: precise cutting, maintaining a scant quarter-inch seam allowance, and pressing seams effectively.
Despite their simplicity, these blocks are incredibly versatile. They form the basis of countless traditional and modern quilt designs, from the classic Irish Chain to dynamic, scrappy layouts. The magic lies in how color and fabric placement can completely transform the final look, offering an early lesson in quilt design theory.
Why It's Great for Beginners
These blocks offer a low-stress entry point into quilting. The repetition involved in creating multiple Four Patch or Nine Patch units builds muscle memory for accurate sewing and pressing. Since they are constructed from simple squares, there are no complicated angles or templates to worry about, allowing you to focus purely on your fundamental technique. They are also an ideal way to use up small scraps or get acquainted with a new fabric collection.
Actionable Tips for Success
- Press Seams to "Nest": To get perfectly matched intersections, press the seams of your rows in alternating directions. For a Four Patch, press the top row's seam to the right and the bottom row's seam to the left. This allows the seams to lock together snugly when you sew the rows.
- Embrace Chain Piecing: When making multiple blocks, don't cut your threads after sewing each pair of squares. Feed the next pair through your machine, creating a long chain of units. This technique dramatically speeds up the piecing process.
- Check Your Block Size: After sewing and pressing each block, use a square quilting ruler to check that it is the correct size. Trim it down if necessary. This step, known as "squaring up," is vital for ensuring all your blocks fit together perfectly in the final quilt top.
- Play with Layouts: Arrange your finished blocks on a design wall or the floor. Try alternating them with solid squares of fabric to create secondary patterns or experiment with different color arrangements before sewing them together.
The Four Patch and Nine Patch are foundational blocks that provide a satisfying and educational start to your quilting journey. To get started with precision and style, explore the vibrant pre-cut charm packs and accurate cutting mats at Linda's. Find the perfect tools and fabrics at Linda's to create your first beautiful patchwork quilt today.
6. Straight Line Quilted Throw
Finishing a quilt top is only half the journey; the quilting itself is what transforms layers of fabric into a cohesive, durable piece. A Straight Line Quilted Throw is one of the best quilting projects for beginners because it demystifies the machine quilting process. Instead of intricate free-motion designs, this project uses simple, straight lines to secure the quilt layers, creating a clean, modern aesthetic that adds beautiful texture and dimension.
This project focuses on building confidence at the quilting machine. By quilting evenly spaced lines, you learn essential skills like managing a large project under the needle, maintaining consistent speed, and preventing fabric puckering. The result is a highly functional and visually appealing lap quilt that looks professionally finished.
Why It's Great for Beginners
Straight line quilting is the perfect introduction to machine quilting. It removes the pressure of drawing complex patterns with the needle and allows you to focus on the fundamentals. This technique is incredibly versatile, working well with both simple patchwork and more elaborate quilt tops. You will master the feel of your machine and learn how the layers of a quilt interact, all while creating a beautiful and achievable finish.
Actionable Tips for Success
- Use a Walking Foot: This is the most crucial tool for success. A walking foot has feed dogs that work with your machine's feed dogs to pull all three layers of the quilt (top, batting, and backing) through at the same rate, preventing shifting and puckering.
- Mark Your Lines: Use a Hera marker or a removable fabric pen and a long quilting ruler to draw your first line. After that, you can use a guide bar attached to your walking foot to create perfectly parallel lines without marking the entire quilt.
- Start in the Center: Always begin quilting in the middle of your quilt and work your way out to the edges. This helps push any excess fabric or fullness outward, ensuring a smooth, flat finish.
- Choose Your Thread Wisely: A thread that matches your quilt top will hide any slight wobbles in your stitches, making it very forgiving. Alternatively, a contrasting thread can make the quilting a bold design element.
This project builds a foundational quilting skill that you will use throughout your quilting journey. To ensure your lines are crisp and your fabric feeds smoothly, a high-quality walking foot is a must-have. Explore the collection of walking feet and quilting rulers at Linda's to get started on your beautifully quilted throw.
7. Jelly Roll Race Quilt
The Jelly Roll Race Quilt is a lightning-fast project that has become a rite of passage for new quilters. This method uses a pre-cut "Jelly Roll" (a bundle of forty 2.5-inch fabric strips) to create an entire quilt top in just a few hours. The process is thrillingly simple: you sew all the strips together end-to-end to create one super-long strip, then repeatedly fold it, cut it, and sew the long edges together to build a scrappy, dynamic quilt top.
This technique is one of the most exciting quilting projects for beginners because it eliminates the most intimidating step: precise cutting. The random, stripy appearance is modern and cheerful, and the speed of completion provides an incredible sense of accomplishment.
Why It's Great for Beginners
A Jelly Roll Race Quilt offers instant gratification, which is a powerful motivator when you're just starting out. There's no complex pattern matching or precise block construction, allowing you to focus purely on mastering a consistent quarter-inch seam allowance over long, straight stretches. It’s an ideal way to familiarize yourself with how your sewing machine handles large amounts of fabric and builds confidence for bigger projects.
Actionable Tips for Success
- Choose a Varied Roll: Select a Jelly Roll with a good mix of colors, values (lights and darks), and print scales. This variety is what gives the finished quilt its visual interest and "scrappy" charm.
- Press Seams Open: As you sew the long seams, pressing them open rather than to one side will significantly reduce bulk. This makes the quilt top lie flatter and makes the final quilting process much smoother.
- Don't Stretch the Fabric: When sewing the long strip, guide the fabric gently through your machine without pulling or stretching it. Stretching can lead to a wavy, distorted quilt top that is difficult to square up.
- Add Borders for Size: If your finished quilt top isn't quite the size you want, adding one or more borders is an easy way to increase its dimensions and frame the energetic design.
This project is a fantastic way to turn a beautiful bundle of fabric into a finished quilt top in a single afternoon. Explore our vibrant selection of Jelly Rolls at Linda's to find the perfect collection for your first race quilt.
7 Beginner Quilting Projects Comparison
| Quilt Project | Implementation Complexity 🔄 | Resource Requirements ⚡ | Expected Outcomes 📊 | Ideal Use Cases 💡 | Key Advantages ⭐ |
|---|---|---|---|---|---|
| Log Cabin Quilt Blocks | Moderate – Straight-line sewing, careful pressing | Moderate – Fabric strips, more yardage | Strong geometric contrast patterns, versatile designs | Beginners learning strip piecing, scrap usage | Forgiving construction, hides mistakes, versatile patterns |
| Simple Patchwork Baby Quilt | Low – Basic squares, simple piecing | Low – Minimal fabric (2-3 yards) | Manageable small quilt, complete quilting experience | First quilts, baby gifts, basic technique practice | Quick, affordable, confidence-building, great for color experimentation |
| Rail Fence Quilt Pattern | Low to Moderate – Strip piecing, precise cutting | Low – Minimal fabric waste | Dramatic zigzag/diamond secondary patterns | Beginners practicing strip piecing & cutting accuracy | Fast construction, impressive visual impact, scrap friendly |
| Simple Table Runner | Low – Small scale, simple piecing | Very low – Minimal fabric and supplies | Functional décor piece, quick completion | Beginner small project, gift making, technique experimentation | Quick finish, low cost, good for practicing quilting/binding |
| Four Patch and Nine Patch Blocks | Low – Basic grids, simple squares | Low – Uses scraps and pre-cuts | Fundamental block building, endless arrangement options | Beginners learning accurate seams, basic piecing | Quick blocks, great for confidence, foundational patterns |
| Straight Line Quilted Throw | Moderate – Emphasis on machine quilting | Moderate – Fabric for lap size, quilting supplies | Beautiful textured lap quilt, professional finish | Beginners building quilting skills, textured quilt practice | Builds machine quilting confidence, forgiving design, professional look |
| Jelly Roll Race Quilt | Low – Minimal cutting, sewing long strips | Moderate – Pre-cut jelly rolls required | Full-size quilt top created very quickly | Speed quilting, beginner-friendly large quilt tops | Extremely fast, efficient, minimal cutting, coordinated fabric |
Start Your Quilting Journey with Linda's Today
You've just explored seven fantastic quilting projects for beginners, each one a perfect entry point into this rewarding craft. We've walked through the foundational skills needed for everything from classic Log Cabin blocks to the impressively fast Jelly Roll Race quilt. The journey from a stack of fabric to a finished piece is filled with learning, and these projects are your road map.
Remember, the goal isn't immediate perfection; it's progress. Each project is designed to teach you a core quilting principle. The Simple Patchwork Baby Quilt hones your seam allowance accuracy, while the Rail Fence pattern introduces the power of color value and strip piecing. Mastering these foundational techniques is what separates a frustrating experience from a joyful one.
Key Takeaways for Your First Quilt
As you embark on your creative journey, keep these essential insights in mind. They are the building blocks that will support you as you move from simple squares to more complex and artistic designs.
- Accuracy is Your Best Friend: Consistent cutting and precise quarter-inch seams are non-negotiable. Projects like the Four Patch and Nine Patch blocks are excellent for practicing this skill until it becomes second nature.
- Fabric Preparation Matters: Pre-washing and pressing your fabrics prevent future shrinkage and distortion. Taking this extra step ensures your finished quilt looks as beautiful as the day you completed it.
- The "Quilt Sandwich" is Crucial: The process of layering your quilt top, batting, and backing is a critical step. Our guide to the Straight Line Quilted Throw shows you how to baste these layers securely to avoid puckering and achieve a smooth, professional finish.
Embracing these fundamentals will transform your experience. Instead of fighting with your fabric, you'll find a rhythm and a sense of accomplishment with every stitch. These skills are transferable, meaning the confidence you gain from making a simple table runner will directly apply to your first full-sized quilt.
Your Next Actionable Steps
Feeling inspired and ready to start? Don't let that creative energy fade. Here’s a simple plan to move from reading to doing:
- Choose Your Project: Re-read the list and pick the one project that excites you the most. Is it the simple geometry of a Log Cabin or the vibrant speed of a Jelly Roll Race?
- Gather Your Supplies: Use the materials list from your chosen project as a shopping list. This is where the real fun begins, as you get to select the colors and patterns that speak to you.
- Start Small: Cut just a few pieces and sew one or two blocks. This low-pressure approach helps you test your seam allowance and get comfortable with your machine before committing to the full project.
The most important step is simply beginning. Each of these quilting projects for beginners offers a unique lesson and a beautiful result. You are now equipped with the knowledge to create functional art for your home or a heartfelt gift for someone you love.
Ready to bring your first quilting project to life? Find all the high-quality fabrics, essential tools, and supportive resources you need at Linda's Electric Quilters. Our extensive collection is curated to help beginners succeed, ensuring you start your creative journey with the best materials in hand. Shop Now at Linda's Electric Quilters and turn your inspiration into a beautiful finished quilt.


