
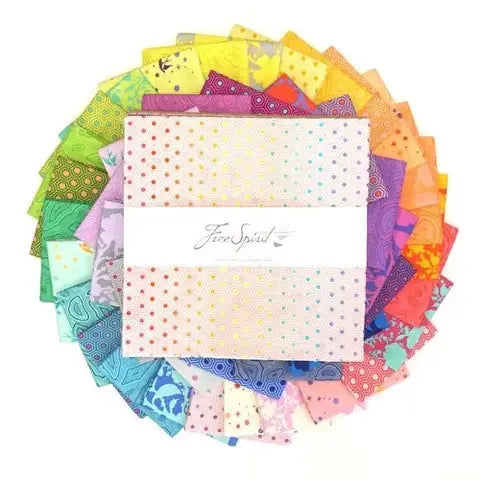
Some of the best gifts come out of your scrap bin. A set of quilted coasters turns a handful of 5-inch charm squares into something genuinely useful — they protect the coffee table, dress up a holiday place setting, and stack into a tidy little bundle tied with twine that looks like it came from a boutique. Best of all, a set of four takes about an afternoon, and the method is forgiving enough for a confident beginner.
What You'll Make
Four quilted coasters, each about 4½ inches square, made from charm squares with a soft batting center. They're absorbent, washable, and sturdy enough for hot mugs and cold glasses alike. Make a matching set from one charm pack, or mix prints for a scrappy look — every coaster in the stack can be different.
Materials
Six of the eight items below (75%) come straight from Linda's — links included so you can grab exactly what we used.
- Tula Pink's True Colors 5" Charm Pack — you'll use 8 squares for a set of four coasters (2 per coaster), and the rest of the pack makes more sets
- Hobbs Heirloom Bleached 80/20 Batting Package — cut four 5-inch squares; leftover batting keeps for your next project
- 900 Sinai King Tut Cotton Thread — a warm neutral that blends across prints for piecing and topstitching
- Olfa Deluxe 45mm Rotary Cutter — for clean, accurate cuts on squares and batting
- Quilting Corsage Pins — to hold your layers together while you sew
- Sewline Glue Pen — a dab holds layers in place for the final topstitch, no shifting
- A self-healing cutting mat — available at most craft stores if you don't already own one
- Twine or ribbon for tying your finished set — available at most craft stores or your local quilt shop
Steps
- Choose your squares. For each coaster, pick two charm squares: one for the top, one for the backing. Press them flat.
- Cut the batting. Using your rotary cutter and mat, cut one 5-inch batting square per coaster.
- Layer the sandwich. Place the backing square right side down, the batting centered on top of it, and the top square right side up. Smooth everything flat and pin through all three layers.
- Quilt the top. Sew straight lines across the coaster — diagonal lines corner to corner are easiest — or stitch a simple grid. Backstitch at the start and end of each line. Trim the finished square neatly to 4½ inches if any edges wandered.
- Bind, the easy way. Fold is not required here: instead, finish the raw edges with a wide zigzag or satin stitch all the way around the coaster, stitching slowly and pivoting at the corners. Go around twice for a polished, sturdy edge. A dab of glue pen under any loose spot before the second pass keeps it tidy.
- Repeat and stack. Make three more the same way, press the set flat, stack them, and tie with twine or ribbon for gifting.
Tips
- Use 100% cotton throughout — fabric, batting, and thread — if your coasters will sit under hot mugs fresh from the microwave area or hold steaming drinks; cotton handles heat gracefully and won't melt.
- Prewash if they'll be used daily. Coasters catch drips; cotton coasters can go right in the wash and come out ready for the next cup.
- Batch them. Chain-quilt several coasters in one sitting — cutting ten batting squares takes barely longer than four, and you'll have hostess gifts handled for the season.
- Play with the quilting. A spiral, a simple crosshatch, or stitching in the ditch between two half-square triangles all give the same little square a completely different personality.
Where to Get Everything
The charm pack, batting, thread, rotary cutter, pins, and glue pen are all at lindas.com — the links in the materials list take you right to each one. For the cutting mat and twine, check most craft stores or your local quilt shop; if you already sew, you likely have both in the drawer. One charm pack makes many sets, so this is a project that keeps on giving — make the first set for a friend, and we won't tell if the second set stays on your own coffee table.


