
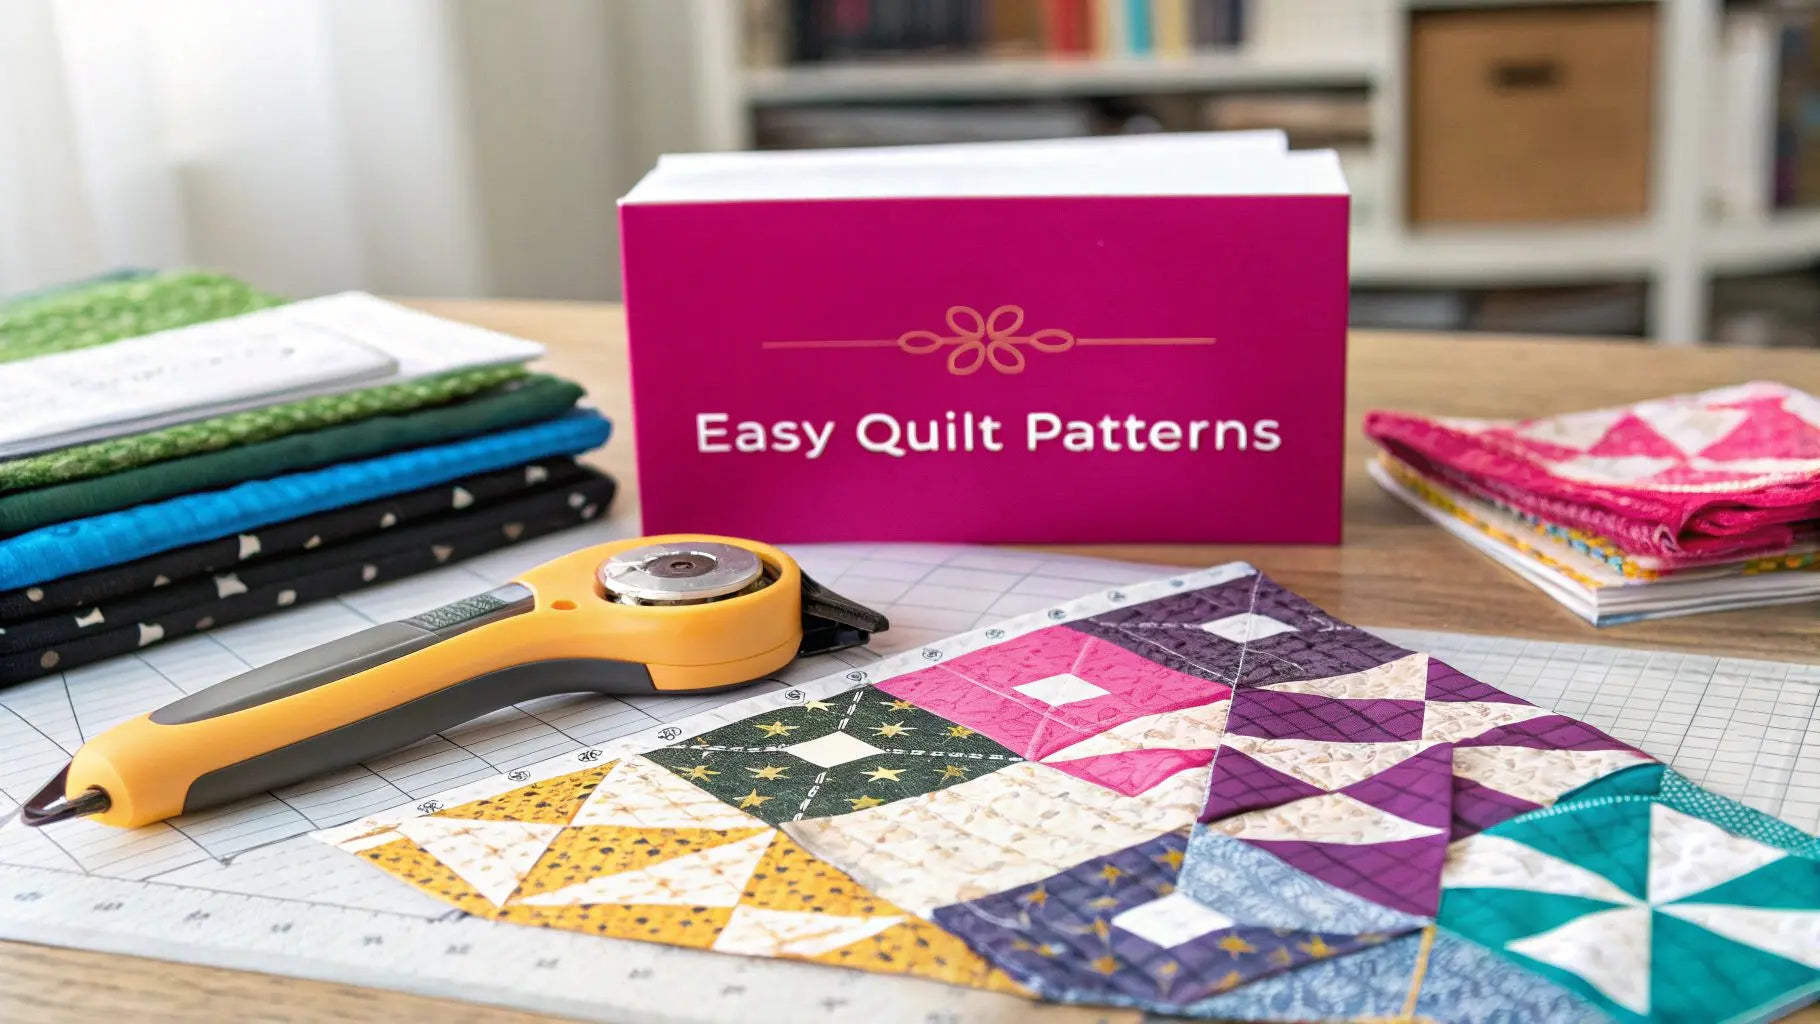
Welcome to the wonderful world of quilting! If you've ever admired a beautiful, intricate quilt and thought, "I could never do that," we're here to show you that you absolutely can. Quilting is a rewarding craft that combines creativity with precision to create stunning, functional art. Getting started can feel overwhelming with so many patterns and techniques available. That’s why we’ve curated this ultimate guide to the best easy quilt patterns for beginners free of charge, designed to serve as your first hands-on educational course.
These projects are specifically chosen to build your confidence and teach you fundamental quilting skills. You'll learn essential techniques like accurate fabric cutting, sewing a consistent ¼-inch seam allowance, and pressing seams for a perfectly flat finish. This listicle provides a clear roadmap, guiding you from simple fabric strips to an impressive finished quilt. At Linda's, we believe the best way to learn is by doing, and these free patterns are the perfect starting point. So, grab your rotary cutter, choose your favorite fabrics from our vast collection, and let's start stitching your very first masterpiece today.
1. Rail Fence Quilt Pattern
The Rail Fence quilt pattern is a quintessential starting point for any new quilter. It is beloved for its simplicity, as it relies on cutting fabric strips and sewing them together in straight lines. This pattern is one of the most forgiving and visually rewarding easy quilt patterns for beginners free of complicated techniques. It consists of rectangular blocks, each made from several fabric strips sewn together. When you arrange these blocks, alternating their orientation (horizontal and vertical), they create a captivating zigzag or woven effect that looks far more complex than it is to create.
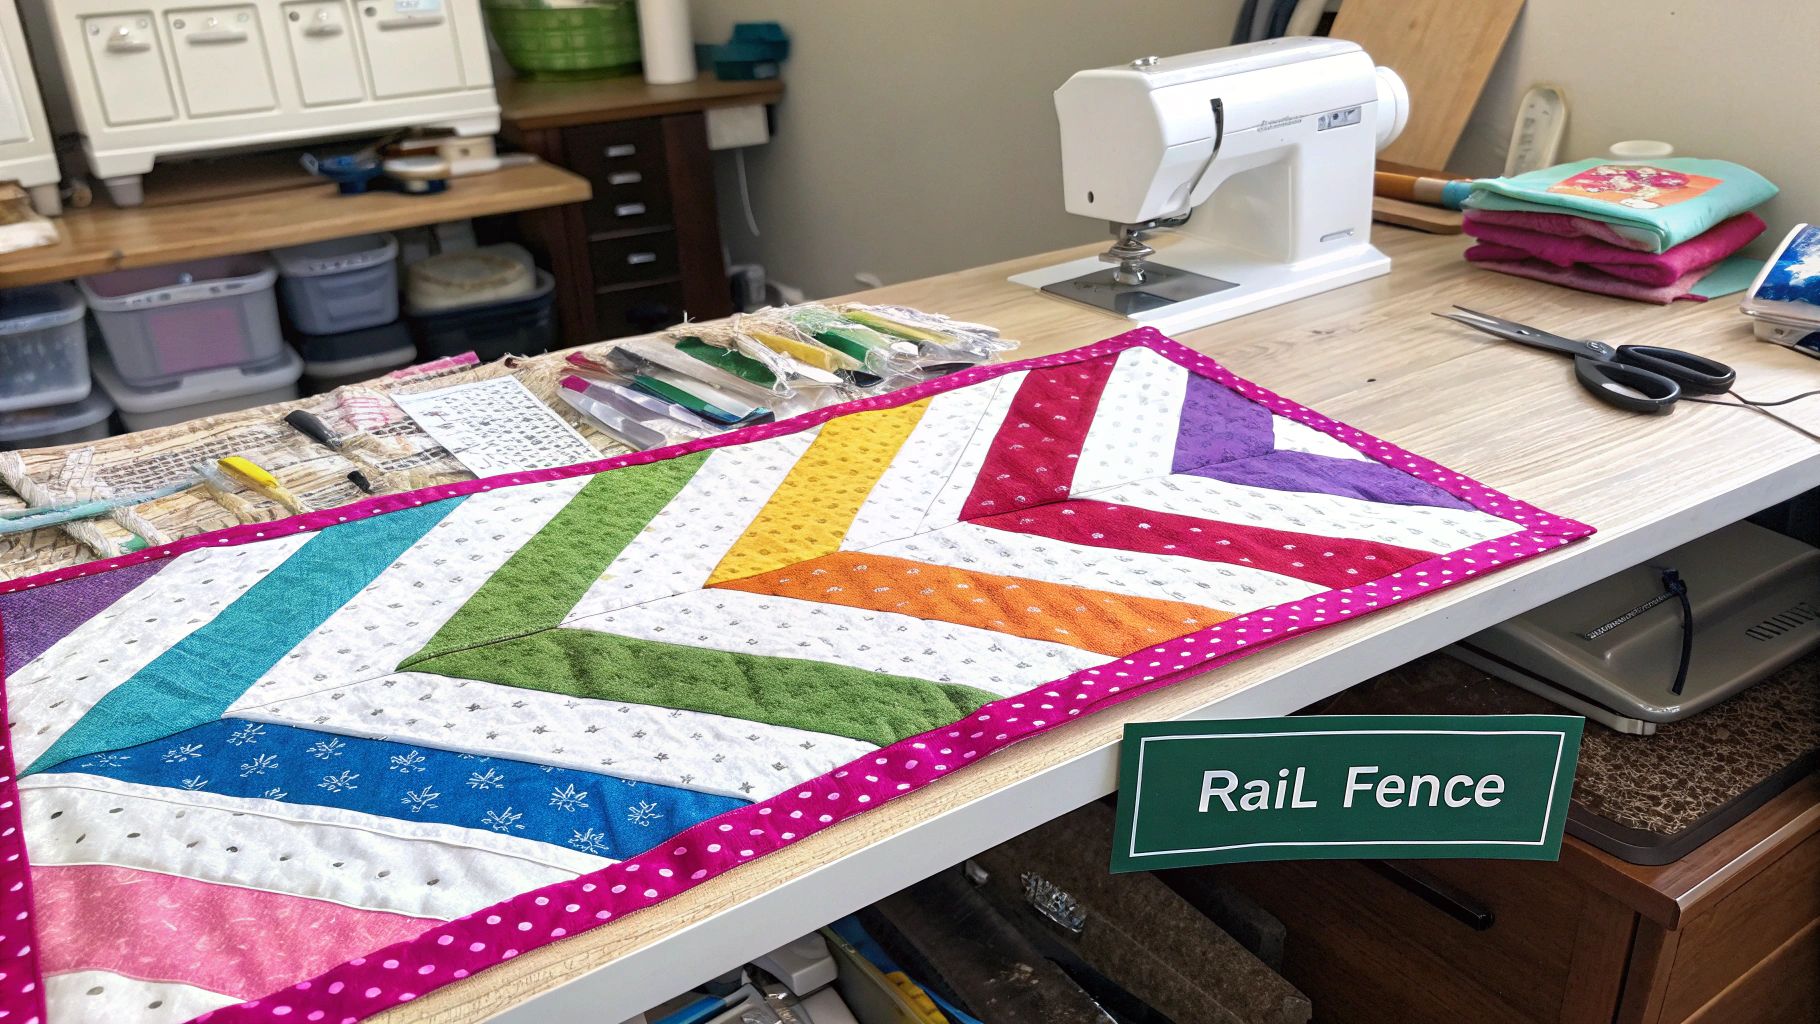
This pattern is incredibly versatile, making it perfect for various projects and a great way to use up fabric scraps. It’s an ideal project for learning fundamental quilting skills like rotary cutting, maintaining a consistent seam allowance, and pressing seams. As a foundational pattern, the Rail Fence quilt is an excellent first step in your quilting journey. You can explore how it fits into the broader spectrum of quilting projects and see how it helps you progress from beginner to expert in our guide to essential quilt projects for every skill level.
Why It's Great for Beginners
The Rail Fence is an excellent choice because it minimizes complexity while maximizing visual impact. There are no triangles, curves, or intricate piecing required. This focus on straight lines allows you to perfect your cutting and sewing accuracy without feeling overwhelmed. It’s a fantastic confidence-builder that results in a beautiful finished quilt.
Actionable Tips for a Perfect Rail Fence Quilt
To ensure your first Rail Fence quilt is a success, follow these specific tips:
- Consistent Seams are Key: Use a 1/4-inch seam allowance for all your seams. A specialty 1/4-inch presser foot for your sewing machine can make this effortless.
- Press for Success: When pressing your blocks, press the seams in alternating directions. This allows the seams to "nest" together when you join the blocks, resulting in perfectly aligned points and a flatter quilt top.
- Play with Contrast: To make the "fence" pattern pop, choose fabrics with high contrast. Pairing a light fabric with a medium and dark fabric within each strip set will create a stunning visual effect.
- Vary Your Strips: For a more modern or scrappy look, try cutting your fabric strips in varying widths. This adds another layer of visual interest to the classic design.
For this project, you'll achieve the best results with high-quality quilting cotton. Ensure your toolkit is ready with a sharp rotary cutter, a new blade, and a reliable self-healing mat to make cutting those strips a breeze. You can find all the essential notions and supplies at Linda's to complete your project with professional-quality tools.
2. Nine Patch Quilt Pattern
The Nine Patch is a cornerstone of traditional quilting and one of the most recognizable blocks for a reason. Its straightforward construction, based on a simple 3x3 grid of squares, makes it one of the best easy quilt patterns for beginners free of complex techniques. This fundamental block consists of nine same-sized fabric squares sewn together. Typically, the pattern alternates between two contrasting colors or fabrics, creating a simple checkerboard effect that is both classic and visually appealing.
This pattern is a perfect introduction to the concept of "piecing," which is the process of sewing smaller fabric shapes together to form a larger design. The Nine Patch is the building block for countless other, more complex quilt designs, making it an essential skill to master early on. Its simple grid structure serves as a foundation for patterns like the Irish Chain and even more intricate designs. You can see how this basic grid concept evolves in other patterns by exploring the Card Trick Quilt Pattern, which also relies on precise square arrangements.
Why It's Great for Beginners
The Nine Patch pattern is fantastic for beginners because it hones the two most critical skills in quilting: accurate cutting and consistent seam allowances. Since the block is made of only squares, there are no intimidating angles or curves to tackle. This simplicity allows new quilters to focus on mastering the basics, building a strong foundation and the confidence needed to move on to more challenging projects.
Actionable Tips for a Perfect Nine Patch Quilt
To create a beautiful and precise Nine Patch quilt, keep these key tips in mind:
- Master Strip Piecing: To save time and improve accuracy, sew long strips of fabric together first, then cross-cut them into 3-square segments. This method is much faster and more accurate than cutting and sewing 9 individual squares for each block.
- Press Seams Open or to the Side: For perfectly matched corners, press the seams of your rows in opposite directions. When you join the rows, the seams will "nest" together, creating crisp, flat intersections.
- Accurate Cutting is Non-Negotiable: The success of a Nine Patch block depends entirely on all nine squares being exactly the same size. Use a sharp rotary cutter and a clear quilting ruler to ensure every cut is precise.
- Play with Scale and Sashing: Don't be afraid to experiment. You can make your blocks large for a quick, modern quilt or tiny for a more intricate look. Adding "sashing" (strips of fabric between blocks) can also create a beautiful secondary pattern.
For this project, crisp quilting cottons are ideal. A dependable cutting mat and a sharp rotary cutter are your best friends for creating the perfect squares needed for this pattern. You can find all the essential notions and supplies at Linda's to ensure your first Nine Patch quilt is a success.
3. Disappearing Nine Patch Pattern
The Disappearing Nine Patch pattern is a magical trick of quilting that yields surprisingly intricate results from very simple beginnings. It starts with a basic nine patch block, which is a simple 3x3 grid of fabric squares. The "disappearing" magic happens when you slice this completed block into four equal quarters and then rearrange them. This simple act of cutting and turning the pieces creates a completely new, more complex block design that looks like it required advanced piecing skills.
This pattern is a fantastic choice when you want a quilt with a lot of visual movement and interest without tedious, complicated steps. It's one of the most popular easy quilt patterns for beginners free of tricky techniques, yet it produces a "wow" effect that impresses even seasoned quilters. The pattern works wonderfully for everything from modern baby quilts to scrappy holiday-themed throws, making it an excellent way to use pre-cut charm packs or fabric scraps. Popularized by quilting instructors like Jenny Doan, it has become a modern classic for new and experienced quilters alike.
Why It's Great for Beginners
The Disappearing Nine Patch is perfect for beginners because it builds directly on the foundational skill of making a simple nine patch block. It introduces the concept of secondary patterns without requiring you to learn complex piecing. This process demystifies how intricate quilt designs are constructed and gives you a major confidence boost by producing a quilt top that looks far more advanced than it truly is.
The following infographic illustrates the simple three-step workflow that transforms a basic nine-patch into this stunning design.
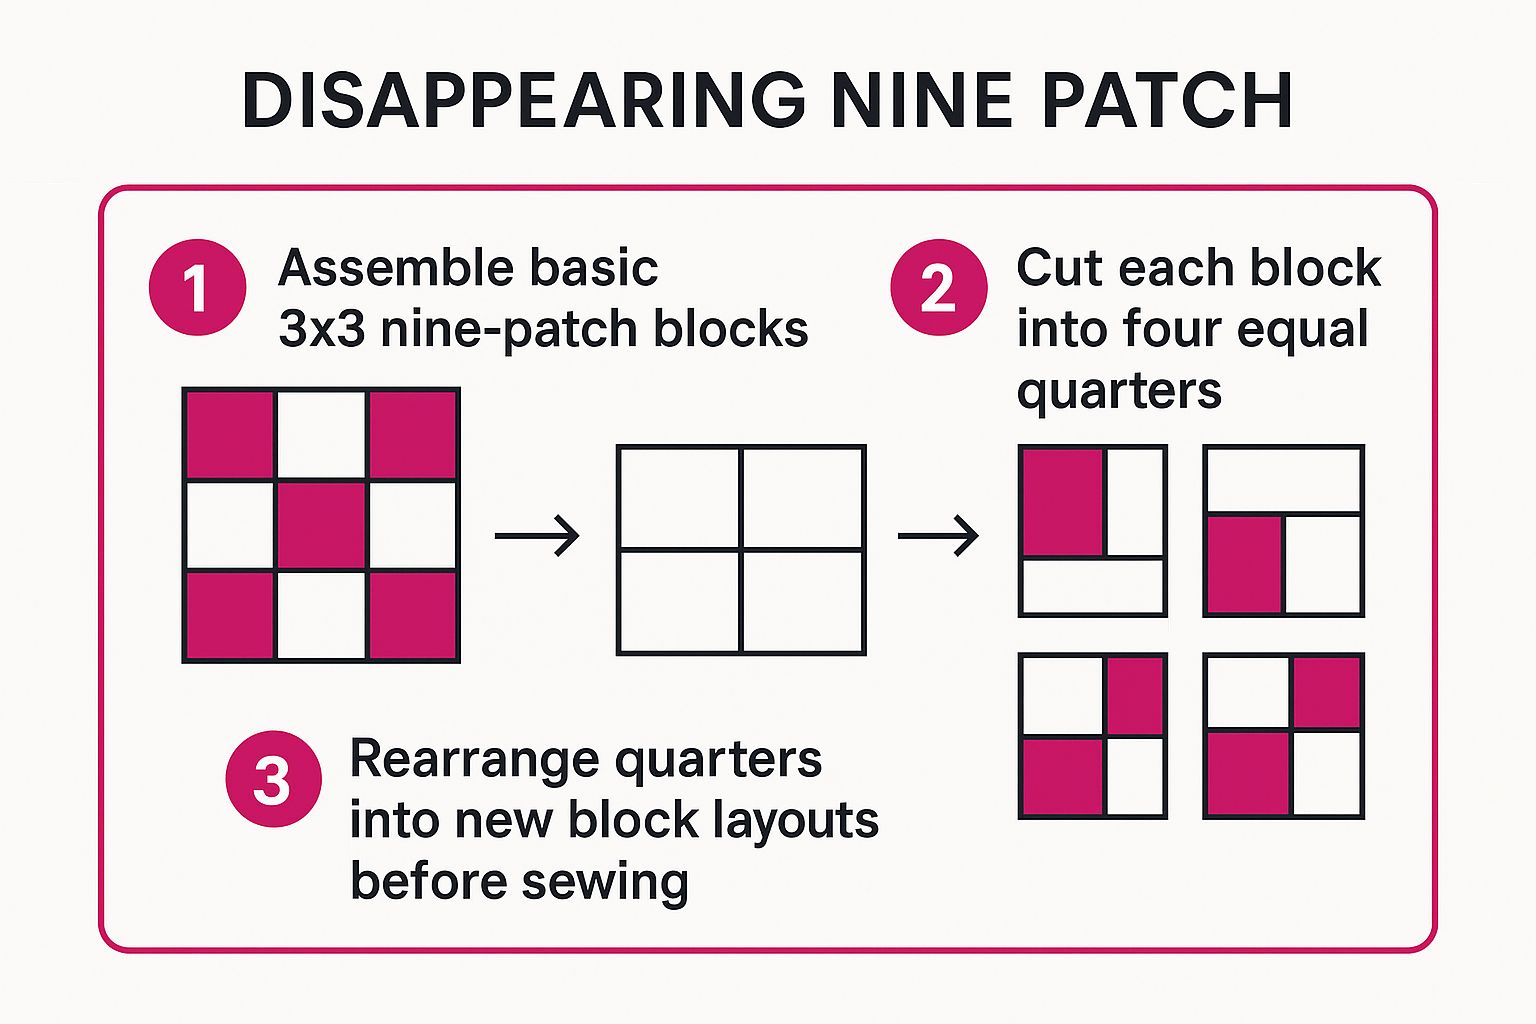
As the diagram shows, the process is as straightforward as assembling, cutting, and rearranging, making it an achievable and rewarding project for any beginner.
Actionable Tips for a Perfect Disappearing Nine Patch Quilt
To make your Disappearing Nine Patch a success, focus on precision and fabric placement:
- Start with High Contrast: To make the secondary pattern pop, use fabrics with strong contrast in your initial nine patch block. Pairing very light and very dark fabrics will make the "disappearing" effect much more dramatic.
- Accurate Cutting is Crucial: After sewing your nine patch, use a large cutting mat and a sharp rotary cutter to slice it precisely in half horizontally and vertically. Accurate cuts ensure your new blocks will fit together perfectly.
- Photograph Your Layout: Before sewing the rearranged quarters back together, lay them out on a design wall or the floor. Take a photo to ensure you love the arrangement and to keep track of the layout as you sew.
- Press Seams Open: When pressing your initial nine patch and the final rearranged blocks, pressing the seams open can help reduce bulk where multiple seams intersect, resulting in a flatter, more professional-looking quilt top.
For a project that relies so heavily on accurate cutting, having the right tools is essential. A fresh blade in your rotary cutter and a reliable ruler will make all the difference. You can find all the high-quality notions and supplies at Linda's to set yourself up for success.
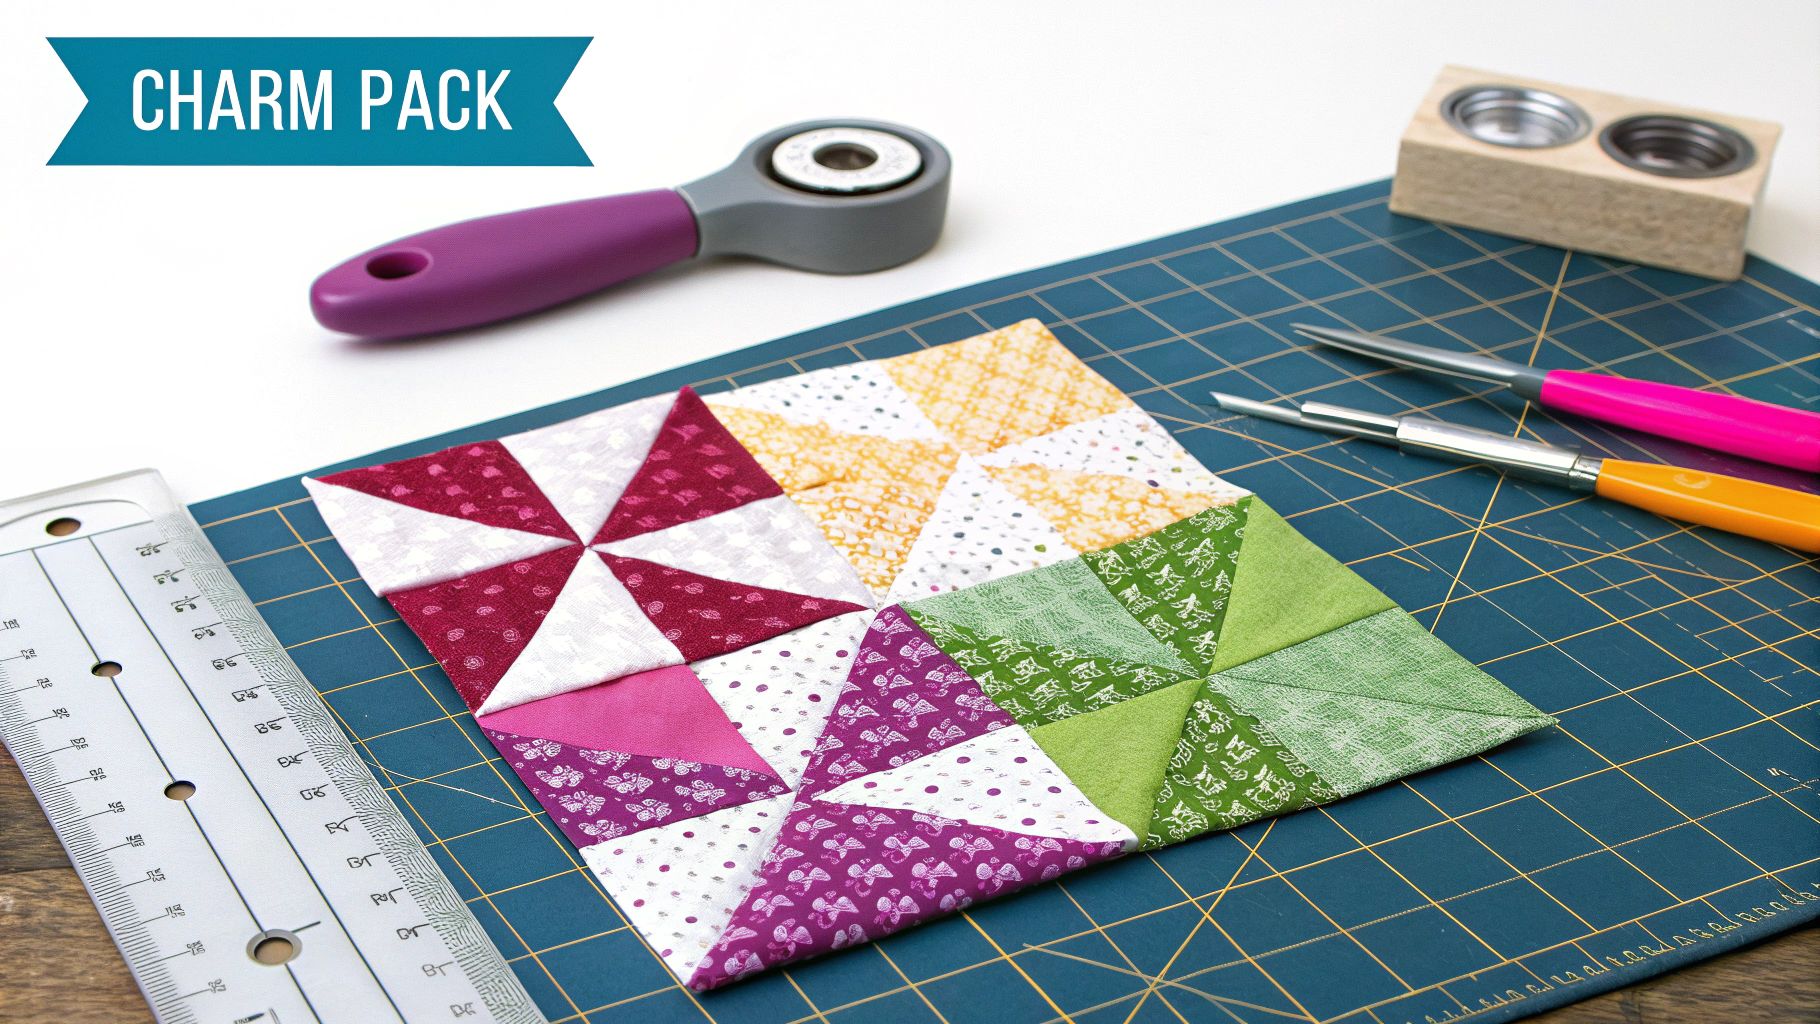
4. Charm Pack Quilt Pattern
A Charm Pack quilt is a fantastic choice for beginners looking to dive into quilting without the initial hurdle of extensive fabric cutting. These patterns utilize pre-cut 5-inch fabric squares, known as "charm packs," which are often sold in curated, coordinating collections. This approach simplifies the process immensely, making it one of the most accessible easy quilt patterns for beginners free of complicated prep work. The pattern typically involves arranging these squares in a pleasing layout and sewing them together, sometimes with sashing (strips of fabric) in between to frame the squares.
The beauty of a charm pack quilt lies in its efficiency and guaranteed coordination. Since the fabrics are pre-selected by designers, you get a beautiful, cohesive look with minimal effort. This makes it an ideal project for creating stunning baby quilts, seasonal table runners, or lap quilts quickly. Once your quilt top is assembled, choosing the right interior is crucial. You can find detailed information in our guide to batting choices for the passionate quilter to ensure your finished project has the perfect warmth and drape.
Why It's Great for Beginners
Charm Pack quilts are perfect for new quilters because they remove the most intimidating step: cutting. With the squares already perfectly sized, you can focus entirely on developing your sewing skills, like maintaining a straight line and consistent seam allowance. It's a project that delivers instant gratification and a high-end look, building confidence for more complex patterns.
Actionable Tips for a Perfect Charm Pack Quilt
To make your Charm Pack quilt a standout piece, follow these specific tips:
- Plan Your Layout: Before sewing a single stitch, arrange your squares on a flat surface or a design wall. This allows you to play with color and print placement to create a balanced and visually appealing design.
- Add Sashing and Borders: Incorporating sashing between your charm squares can make your prints pop and increase the overall size of your quilt. Adding a coordinating border is another simple way to frame your work and give it a polished, professional finish.
- Press Seams Thoughtfully: For a flat and neat quilt top, press your seams consistently. If you're using sashing, press the seams toward the sashing strips. This helps the blocks lie flat and makes assembly much easier.
- Starch Your Squares: Pre-cut squares can sometimes have stretchy bias edges. A light press with spray starch before sewing can stabilize the fabric, preventing distortion and making your seams more accurate.
With the fabric cutting already done for you, you're halfway there! All you need are the essential notions like thread, pins, and a reliable rotary cutter for trimming. Explore the notions collection at Linda's to find everything you need to turn that beautiful charm pack into a finished quilt.
5. Strip Quilt Pattern
The Strip Quilt, often called a "strip-pieced" quilt, is a wonderfully straightforward and visually striking design perfect for newcomers. This method involves sewing long fabric strips together to create a "strip set," which is then either used as a complete quilt top or cut into smaller segments to form more intricate blocks. This technique is one of the most accessible easy quilt patterns for beginners free of complex piecing, allowing you to create beautiful quilts with only straight seams. From modern, minimalist designs to vibrant, scrappy creations, the possibilities are nearly endless.
This pattern is a fantastic way to experiment with color theory and fabric combinations. It's especially popular for using pre-cut fabric bundles like Jelly Rolls (2.5-inch strips), which saves cutting time and ensures coordinating fabrics. Learning to manage long strips of fabric is a core skill that builds a strong foundation for more advanced quilting. Careful sewing and pressing are essential to keep the strips from bowing, a common challenge for beginners. For a deeper dive into handling potential issues like this, you can learn what to do if your quilt top is not square.
Why It's Great for Beginners
The strip quilt is an excellent entry point because it relies entirely on straight-line sewing. This allows you to focus on mastering a consistent seam allowance and proper pressing techniques without the added difficulty of matching points or sewing curves. It's a quick and gratifying project that often looks more complex than it is, providing a significant confidence boost.
Actionable Tips for a Perfect Strip Quilt
To guarantee your strip quilt comes together beautifully, keep these tips in mind:
- Vary Strip Widths: For a dynamic and modern look, don't be afraid to mix strips of different widths. This adds visual texture and is a great way to use up various-sized scraps from your stash.
- Use a Walking Foot: When sewing long strips together, the fabric can sometimes stretch or shift. A walking foot helps feed the top and bottom layers of fabric through your machine evenly, preventing wavy seams.
- Alternate Sewing Direction: To keep your strip set from curving, alternate the direction you sew each new strip on. For example, sew the first seam from top to bottom, and the next seam from bottom to top.
- Plan Your Color Placement: Arrange your strips on a design wall or the floor before sewing to ensure a balanced and pleasing color distribution throughout the quilt top.
For this project, you'll want high-quality quilting cotton to prevent stretching and ensure durability. Having the right tools makes all the difference, so ensure your toolkit includes a long quilting ruler and a sharp rotary cutter for precise cuts. You can find all the essential notions and supplies at Linda's to set yourself up for success.
6. Baby Blocks (Tumbling Blocks) Pattern
The Baby Blocks pattern, often called Tumbling Blocks, creates a stunning three-dimensional illusion that looks incredibly advanced. Despite its complex appearance, the pattern is surprisingly straightforward, relying on a single diamond-shaped template. This makes it one of the most visually impressive easy quilt patterns for beginners free from complicated piecing techniques. The magic of this pattern lies in the strategic placement of fabric colors, specifically light, medium, and dark values, to create the illusion of stacked cubes.
This pattern is a fantastic educational tool for new quilters, teaching the critical concept of color value and its role in creating depth and movement. It has a rich history, found in traditional Amish quilts with solid colors and beloved by English paper piecing enthusiasts. Modern interpretations use vibrant prints to give the classic design a fresh, contemporary feel. It’s an ideal project for a baby quilt or a striking wall hanging.
Why It's Great for Beginners
Baby Blocks is an excellent choice for beginners who want to tackle a project with a high "wow" factor. It introduces quilters to working with angles beyond simple squares and rectangles without requiring advanced skills. The repetitive nature of cutting and arranging the diamond shapes helps build precision and an understanding of how fabric placement dramatically impacts the final design.
Actionable Tips for a Perfect Baby Blocks Quilt
To achieve a flawless 3D effect with your Baby Blocks quilt, follow these specific tips:
- Master Your Values: The illusion depends entirely on the consistent placement of light, medium, and dark fabrics. Always arrange your diamonds so the light fabric forms the top of the "cube," the medium is on one side, and the dark is on the other.
- Create Accurate Templates: For precise diamond shapes, use freezer paper templates. You can iron the template onto your fabric for stability, trace around it, and then cut for perfect accuracy every time.
- Make a Test Block: Before cutting all your fabric, sew a single "cube" or block. This helps you verify that your chosen light, medium, and dark fabrics have enough contrast to create the desired 3D effect.
- Control Your Seams: This pattern involves sewing on a bias, which can cause stretching. Handle your fabric pieces gently and consider using a little spray starch before cutting to stabilize them.
To get started on this visually dynamic project, you will need a clear acrylic ruler with angle markings and a quality rotary cutter. Find all the precision tools you need to master this pattern in the extensive notions and supplies collection at Linda's.
7. Log Cabin Quilt Pattern
The Log Cabin quilt pattern is one of the most iconic and recognizable designs in quilting history. Its construction is both methodical and deeply satisfying, making it an excellent skill-builder for new quilters. The pattern is built by sewing fabric strips, or "logs," around a central square, typically in a spiral. This progressive piecing technique is a fantastic way to practice precision without tackling complex shapes. Traditionally, blocks are made with light-colored fabrics on two adjacent sides and dark fabrics on the other two, creating a dynamic interplay of light and shadow when the blocks are assembled.
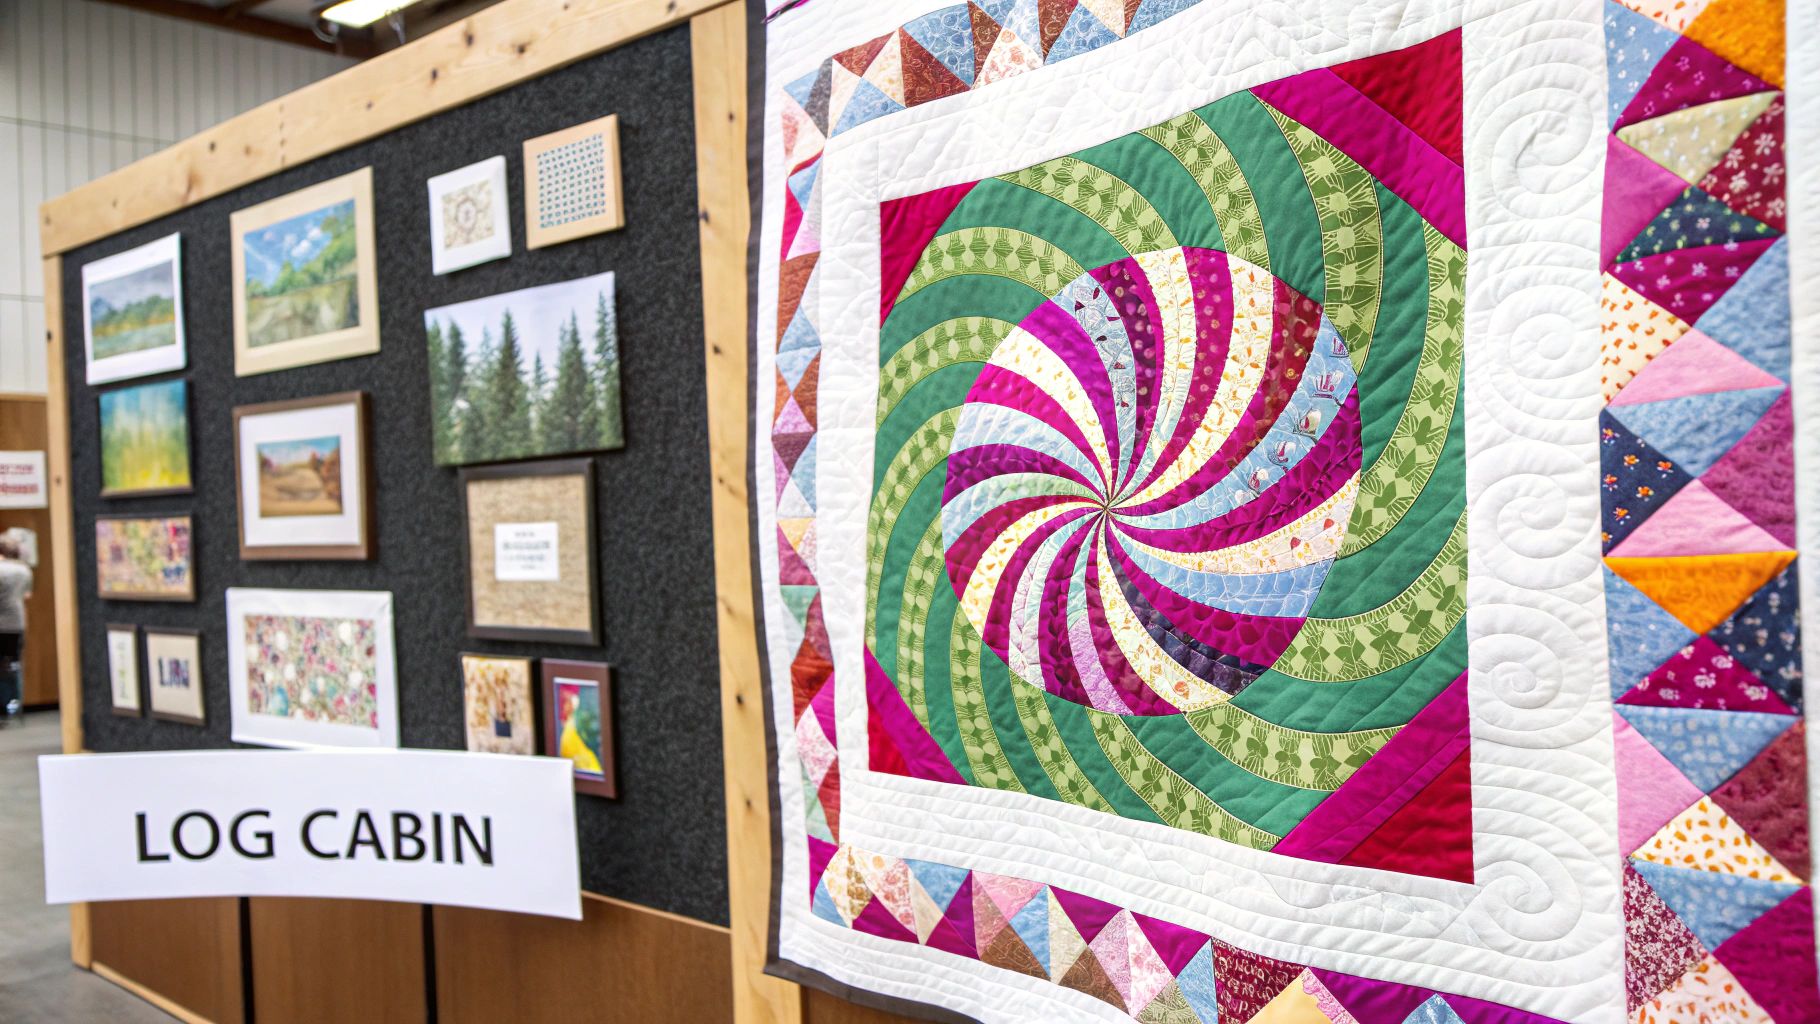
This pattern is a perfect example of how simple blocks can create stunning, complex-looking designs like the traditional "barn raising" layout. The Log Cabin is one of the most versatile and easy quilt patterns for beginners free from the need for advanced techniques, yet it offers endless design possibilities. It teaches accuracy in cutting and seam allowances while producing a timeless and beautiful quilt.
Why It's Great for Beginners
The Log Cabin pattern is ideal for beginners because it introduces the concept of block construction in a systematic, repetitive way. There are no triangles or Y-seams to manage. Each added "log" gives you a chance to practice and perfect your 1/4-inch seam, and the straight-line sewing helps build a steady hand and rhythm on your machine. The sense of accomplishment grows with each strip added, making it a very encouraging project.
Actionable Tips for a Perfect Log Cabin Quilt
To create a beautiful Log Cabin quilt with crisp, clean lines, follow these essential tips:
- Press As You Go: Press the seam toward the newest strip you've added. This simple step ensures your block lies flat and your seams are properly nested, which is crucial for a smooth quilt top.
- Maintain Strip Consistency: Cut all your strips to the exact same width before you start sewing. Even a small variation can cause your blocks to become skewed and uneven.
- Start with the Center: The center square is the heart of your block. Traditionally, a red center symbolized the hearth of the home, while a yellow center represented a welcoming light in the window.
- Use a Design Wall: The magic of a Log Cabin quilt happens when you arrange the blocks. A design wall or even a large piece of flannel on a wall allows you to play with layouts like "barn raising" or "straight furrows" before committing to sewing them together.
A reliable sewing machine is your best friend for this project, ensuring consistent stitches from the first to the last log. If you're looking for the right machine to start your quilting journey, you can see our recommendations for deciding on a sewing machine to find the perfect fit.
7 Easy Quilt Patterns Comparison Guide
| Pattern | Implementation Complexity 🔄 | Resource Requirements ⚡ | Expected Outcomes 📊 | Ideal Use Cases 💡 | Key Advantages ⭐ |
|---|---|---|---|---|---|
| Rail Fence Quilt Pattern | Low 🔄 | Low ⚡ (simple strips, scraps) | Simple, dynamic zigzag patterns 📊 | Beginners, scrap use, fast projects | Beginner-friendly, quick, forgiving ⭐ |
| Nine Patch Quilt Pattern | Low to Moderate 🔄 | Low to Moderate ⚡ (basic squares) | Classic, timeless quilt blocks 📊 | Beginners wanting fundamental skills | Teaches basics, versatile, fast ⭐ |
| Disappearing Nine Patch | Moderate 🔄 | Moderate ⚡ (accurate cutting) | Complex-looking secondary patterns 📊 | Advanced beginners seeking challenge | Advanced look with simple skills ⭐ |
| Charm Pack Quilt Pattern | Low 🔄 | Moderate to High ⚡ (pre-cut packs) | Coordinated, cohesive quilts 📊 | Beginners preferring less cutting | No cutting, fabric coordination, fast ⭐ |
| Strip Quilt Pattern | Low 🔄 | Low ⚡ (fabric strips, scraps) | Modern, contemporary quilts 📊 | Scrap utilization, creative freedom | Quick, minimal precision, scrap-friendly ⭐ |
| Baby Blocks Pattern | High 🔄 | Moderate ⚡ (diamond shapes, value selection) | 3D visual illusion quilts 📊 | Intermediate quilters focusing on color/value | Spectacular 3D effect, color theory taught ⭐ |
| Log Cabin Quilt Pattern | Moderate to High 🔄 | Moderate ⚡ (many small pieces) | Versatile geometric, secondary patterns 📊 | Intermediate quilters, scrap use | Highly versatile, rich history, impressive effects ⭐ |
From First Stitch to Final Masterpiece: Get the Tools You Need
You have just navigated a curated collection of seven fantastic easy quilt patterns for beginners free of charge, each one a stepping stone into the vibrant world of quilting. From the straightforward geometry of the Rail Fence to the delightful complexity of the Disappearing Nine Patch, these patterns are your entry point into a rewarding and creative craft. The journey from a stack of fabric to a finished quilt is a process of learning, patience, and incredible satisfaction.
The patterns we've explored serve as a foundational education in quilting. The Nine Patch teaches precision in piecing, while the Strip Quilt hones your skills with a rotary cutter. Similarly, the Log Cabin pattern introduces the concept of building blocks around a central point, a technique used in countless advanced designs. Mastering these simple projects doesn't just result in a beautiful blanket; it equips you with a core set of skills that will serve you throughout your quilting life.
Key Takeaways for Your Quilting Journey
As you embark on your first project, remember these crucial takeaways from the patterns discussed:
- Accuracy is Paramount: Even in the simplest designs like a Charm Pack quilt, consistent ¼-inch seam allowances are non-negotiable. This single habit is the most significant factor in ensuring your blocks fit together perfectly.
- Pressing Matters: How you press your seams (to one side or open) dramatically affects how your points meet and how flat your final quilt top will lie. Don't treat it as an afterthought; it's an integral step in construction.
- Fabric Selection Sets the Tone: The "magic" of a Disappearing Nine Patch or the charm of a Baby Blocks quilt comes alive through your choice of colors and prints. Understanding value (light, medium, dark) is a powerful tool for making any simple pattern visually stunning.
Your Actionable Next Steps
Feeling inspired? It's time to move from reading to doing. Select the one pattern that excited you the most and commit to starting it. Your next move isn't to tackle the entire quilt at once but to focus on creating a single, perfect block. This small, achievable goal builds momentum and confidence.
Gather your materials with intention. While these easy quilt patterns for beginners are free, the quality of your tools and fabric will directly impact your enjoyment and the final result. A sharp rotary cutter, a quality cutting mat, and beautiful, 100% cotton fabric are not luxuries; they are investments in your success. Having the right supplies on hand prevents frustration and allows your creativity to flow uninterrupted. This preparation phase is just as important as the sewing itself, setting the stage for a smooth and enjoyable creative process.
You've now seen that starting this craft doesn't require complex, expensive patterns. It requires a willingness to learn and the right support system. The community of quilting is built on sharing knowledge and encouragement, and we are thrilled for you to join it. Embrace the learning process, celebrate your progress, and remember that every expert was once a beginner. Happy quilting!
Ready to bring your chosen pattern to life? Linda's Electric Quilters has everything you need, from vibrant fabric bundles perfect for a charm pack quilt to high-quality longarm quilting services to professionally finish your masterpiece. Visit Linda's Electric Quilters to explore our vast selection and find the perfect supplies to ensure your first project is a stunning success.


