
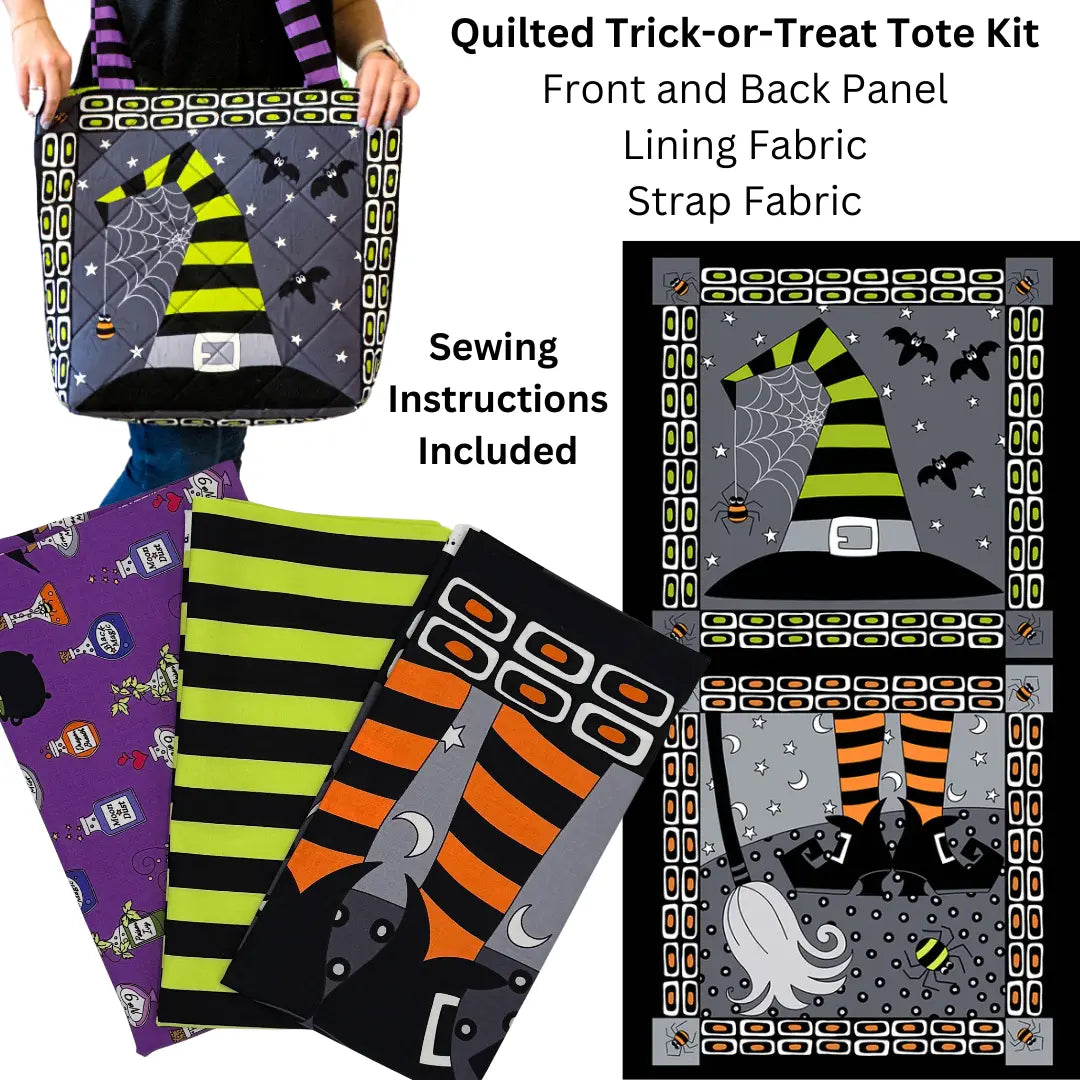
A First Bag That Actually Teaches You Something
Many beginner projects are beginner in name only — they assume skills you have not learned yet. The Quilted Trick or Treat Tote Kit (Gray Panel) from The Fabric Company is different: it is a beginner-friendly Halloween bag project designed to teach four real construction skills in one small, satisfying make — tote construction, quilting on foam, strap making, and boxed bottoms. Finish it, and you do not just have a candy tote. You have the core techniques you will reuse on shopping bags, gift bags, and larger totes for years.
What You Make: A Sturdy Quilted Halloween Tote
The finished project is a quilted trick-or-treat tote in the gray panel colorway — a structured, reusable bag for Halloween night instead of a flimsy store-bought sack. Because the body is quilted onto foam, the tote holds its shape, stands up on its own, and can carry a serious haul of candy without sagging.
The product listing does not publish finished tote dimensions, so plan around the panels themselves rather than an assumed size. What the listing does promise is the outcome: a fun first quilting project that finishes as a sturdy candy tote for Halloween night — one that can come back out every October.
What Is Included — and What You Supply
Included in the kit are the front and back cotton panels in the gray colorway, the lining fabric, the strap fabric, and step-by-step instructions. All of the fabrics are 100% cotton, and having the panels, lining, and straps pre-matched for you removes the hardest decision for a first bag: choosing fabrics that work together.
You will also need a few things that are not included. The key supply is 1 yard of one-sided fusible foam — this is what gives the tote its structure and what you will quilt through. You will also need 40-weight black all-purpose thread, an 80/12 universal needle, a rotary cutter and mat, a ruler, a fabric pen, a point turner, quilting clips, an iron, and a safety pin. Most of these are standard sewing-room tools, and the foam is the only special purchase most beginners will need to make.
Skill Level and Time
The skill level is beginner, and the project earns that label because each step builds on the last: fuse and quilt the foam panels first, make the straps, assemble the tote, then box the bottom corners to create depth. None of the steps requires advanced technique, and the instructions walk you through them in order.
Plan on a relaxed afternoon of sewing rather than a rushed evening. The quilting on foam and the fusing take a little patience, but the pieces are small, so seams are short and manageable — a genuine advantage over wrestling a full quilt through your machine as a first project.
Tips for Success With Foam and Panels
Take the fusing seriously. One-sided fusible foam only works if it is properly bonded. Press carefully with your iron, following the foam manufacturer's heat guidance, and let panels cool flat before quilting so nothing shifts mid-seam.
Quilt with the right needle and clips. Foam adds thickness, which is why the kit calls for an 80/12 universal needle. Use quilting clips instead of pins where layers are thick — pins bend and distort foam, while clips hold edges evenly without leaving holes.
Mark before you sew. Use your fabric pen and ruler to mark quilting lines and boxed-bottom corners before stitching. Boxed bottoms are simple, but their accuracy decides whether your tote sits flat.
Turn corners cleanly. A point turner will give you crisp, professional corners on the straps and bag body, and a safety pin is the classic, reliable way to turn and thread narrow strap pieces.
Start with this tote in October, and by the holidays you will be boxing bottoms and making straps without thinking twice.
Shop the Quilted Trick or Treat Tote - Quilt Kit (Gray Panel) at Linda's Electric Quilters.


