
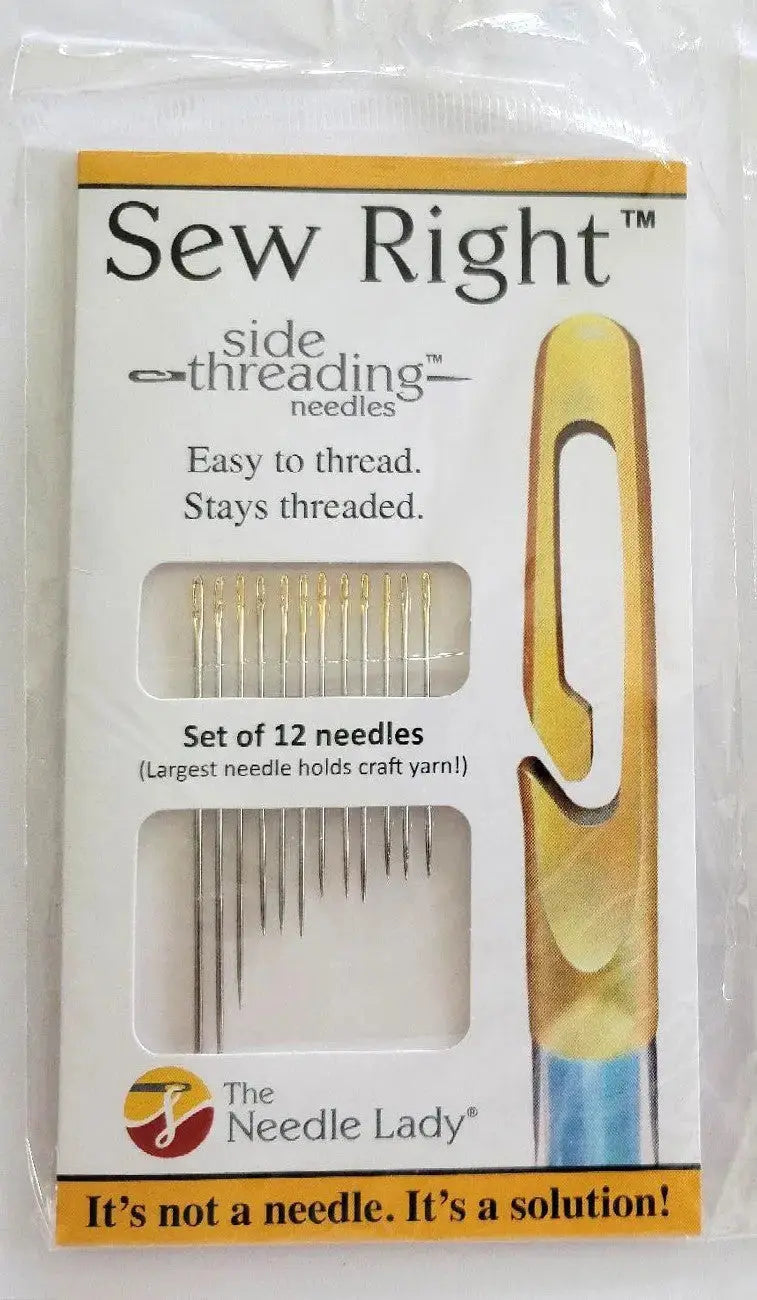
How to Choose Side-Threading Needles: A Guide to the 12-Piece Assorted Set for Hand Embroidery
If you love hand embroidery but dread threading the needle, a side-threading design can change your stitching sessions. The Needle Lady's Side Threading Needles 12pc gives you twelve assorted sizes in one package, so you can pick the needle that fits your thread and fabric instead of making one size work for everything. Made of nickel and gold plated iron and listed for hand embroidery, this set is described as great for all crafts.
What Side-Threading Needles Are
A side-threading needle, also called an easy-threading or self-threading needle, is designed so thread enters the eye from the side, through an opening at the top of the eye, rather than being pushed straight through a tiny closed eye end-first. You lay the thread over the top of the needle and draw it down into the eye, where it sits ready to stitch. Once threaded, you sew with it much as you would with a conventional hand needle. The advantage is at the start of every length of thread, and at every rethread after that.
Why Quilters and Sewists Keep an Assorted Set
Quilts are finished by hand as much as they are pieced by machine. Binding is sewn down by hand, labels are attached by hand, thread tails are buried by hand, and many quilters add embroidery or appliqué details by hand. Having twelve assorted sizes matters because those jobs do not all want the same needle. A finer needle suits lighter fabric and thinner thread, while a larger needle from the same set better matches heavier fabric or thicker thread. The right needle should pass through your fabric smoothly, without being forced and without leaving a hole larger than your stitching needs.
How to Use Them, Step by Step
- Select a size. Compare a few needles from the assorted twelve against your fabric and thread. Start in the middle, then go finer or sturdier depending on how easily it moves through a scrap of the same fabric.
- Cut a comfortable length. Cut only as much thread as you can stitch with comfortably. Shorter lengths tangle less, and rethreading is quick, so there is no penalty for working shorter.
- Lay the thread across the top. Hold the needle steady and drape the thread across the opening at the top of the eye.
- Guide the thread into the eye. Pull gently downward on both ends so the thread slips in from the side and seats in the eye. Tug lightly to check it is held before you begin.
- Secure and stitch. Knot or anchor your thread as your pattern requires, then stitch with relaxed, even movements, letting the needle glide rather than pushing hard through the layers.
- Remove the thread when finished. Lift the thread back out the way it entered when you change colors or end the length.
Practical Tips for Best Results
Test the needle-and-thread pairing on a scrap first, especially for hand embroidery, where thread thickness changes the look of the stitch. If the thread will not seat easily, do not force it — try the next size up in the set. That range is the point of an assorted package. If a needle begins to drag or snag, swap it for a fresh one from the pack instead of persevering with a rough or bent needle.
Care and Storage
Store all twelve needles together in a needle case, pincushion, or small magnetic dish so none are lost loose in a project bag. Keep them dry when not in use to help preserve the nickel and gold plated iron, and check each needle before a session. Retire any that are bent or rough, since a damaged needle can shred thread and mark fabric.
Project Ideas
Use this set for hand embroidery on quilt blocks and garments, sewing down binding, attaching labels and hanging sleeves, hand appliqué, mending, and other crafts where you change thread often. Keep a set in a travel kit and at your stitching chair.
Shop the The Needle Lady's Side Threading Needles 12pc at Linda's Electric Quilters.


