
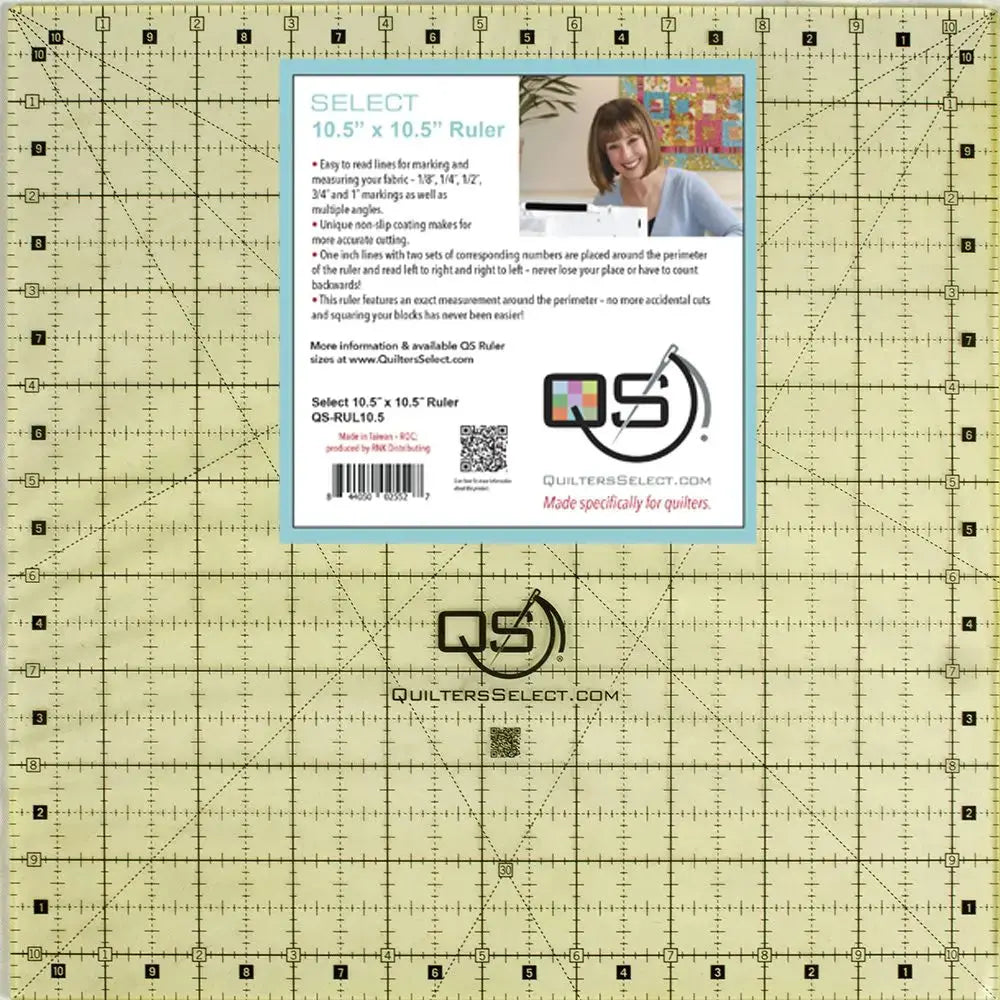
What Is a 10.5-Inch Square Non-Slip Ruler?
The Quilters Select 10.5" x 10.5" Non-Slip Ruler is a square cutting ruler sized for one of the most common jobs in quilting: squaring up finished blocks. Its lines are easy to read for marking and measuring fabric, with 1/8-inch, 1/4-inch, 1/2-inch, 3/4-inch, and 1-inch markings, as well as multiple angles. What sets it apart is its unique non-slip coating, designed to make cutting more accurate — no more accidental cuts from a ruler that shifts at the last second.
One-inch lines, with two sets of corresponding numbers, are placed around the perimeter and read left to right and right to left, so you never lose your place or have to count backwards.
Why Quilters and Sewists Use It
Blocks rarely come off the machine perfectly square. Seams ease in, fabric stretches a little on the bias, and pressing can nudge things out of shape. If those differences go into the finished quilt, rows stop lining up and sashing goes wavy. A square ruler lets you trim each block to exactly the same dimensions before you join it to its neighbors.
The 10.5-inch square covers many common unfinished block sizes in one tool, while still being easy to handle on a cutting mat. The non-slip coating matters here, too: squaring usually means shaving off only a sliver, and a ruler that grips instead of skating helps you take off that sliver — and only that sliver. The numbers reading in both directions are a quiet time-saver, too: whichever way you turn the ruler, they read the right way.
How to Use It, Step by Step
- Press first. Press the finished block flat, with seams pressed as your pattern directs. Squaring a wrinkled block gives you a tidy trim and a distorted block.
- Find the finished size. Decide the exact unfinished size you need, including seam allowances.
- Position the ruler. Lay the ruler over the block, centering any design, points, or seams you want to feature. Use the printed lines and angles to line up the ruler with the block's seams and edges, and check the perimeter measurements on all sides.
- Trim the first two sides. Hold the ruler firmly and trim the right edge and the top edge with your rotary cutter, cutting away from your body and keeping the blade against the ruler's edge.
- Turn and finish. Rotate the block 180 degrees, align the ruler's lines with the two freshly cut edges and the size you need, then trim the remaining two sides. The numbers reading in both directions make this second alignment much easier to check.
- Measure again. Confirm the block measures the same in both directions, then repeat for every block in the set.
Practical Tips
Trim in good light and read the markings at eye level — a line that looks aligned from an angle may not be. If you are only removing a thread's width, consider whether the block needs trimming at all; over-trimming can clip points and eat into seam allowances. Use the angle markings to check diagonal seams on blocks such as half-square triangle units. Work through a stack of blocks in one session, using the same ruler lines each time, so they all match.
Care and Storage
Store the ruler flat, in a ruler rack, or hanging where it will not warp or get knocked onto the floor. Keep it away from prolonged heat and direct sunlight, and wipe it with a soft, dry or slightly damp cloth if lint and spray starch build up — a clean ruler reads more clearly and grips better. Avoid nicks along the cutting edge, which can steer a rotary blade off course.
Project Ideas
Reach for this ruler when squaring blocks for a sampler quilt, trimming churn dash, star, or nine-patch blocks to a uniform size, or tidying pieced panels for pillows, tote fronts, or table runners. It is also useful for cutting accurate patchwork squares and checking that a small wall hanging is square before binding. Once squaring becomes a habit, seams nest, rows join smoothly, and the finished top lies flat.
Shop the Quilters Select 10.5" x 10.5" Non-Slip Ruler at Linda's Electric Quilters.


