
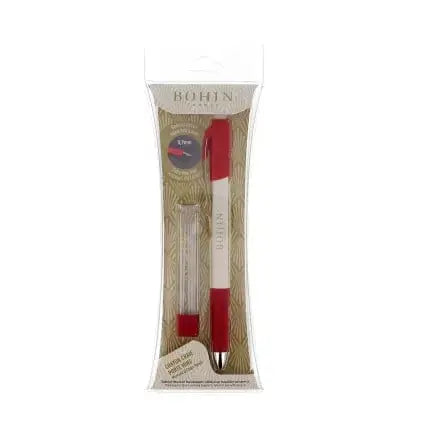
How to Use the Bohin Mechanical Chalk Pencil for Precise Fabric Marking
Every accurate quilt starts with an accurate mark. Cutting lines, quilting lines, appliqué placement, and dart positions all need to be visible while you work, and then disappear when you are done. The White - Bohin Mechanical Chalk Pencil - With Refill, from Bohin France, is designed for exactly that job. It is a mechanical pencil holding a 0.9mm ceramic chalk lead in Ceramic White, giving you a fine, consistent line without the constant sharpening of a traditional chalk pencil.
What It Is and Why Quilters Use It
A mechanical pencil advances fresh lead as you need it, so your line stays extra fine from the first mark to the last. That matters in patchwork, where a thick, fuzzy line can throw off a seam allowance or make a quilting design look imprecise.
The lead is ceramic and strong, and its colorants cannot penetrate into the fabric. That helps avoid the shadowing some markers leave when they soak into fibers. The marks are water soluble, so they can be washed out, and they can also be erased with any fabric eraser. White shows up especially well on medium and dark fabrics, where other pencils can disappear. The pencil has a twist eraser, is long lasting, and comes with a refill. It is made for patchwork, quilting, garment making, clothing, and general sewing.
How to Use It: Step by Step
- Test first. On a scrap of your project fabric, draw a line, check that the white is visible, then erase and, if needed, wash the scrap to confirm it removes cleanly.
- Prepare your fabric. Press it flat and lay it on a firm, smooth surface. Marking on wrinkled or soft fabric makes lines skip.
- Advance the lead sparingly. Use only a small amount of the 0.9mm lead at a time. A short lead is stronger, less likely to snap, and easier to control.
- Mark with light pressure. Draw along a ruler, template, or stencil edge, or freehand your quilting line. Let the fine tip do the work — pressing hard is unnecessary and can break the lead.
- Work in sections. Mark only what you will sew or quilt next. Chalk can brush off with handling, so marking a whole large quilt at once can mean re-marking later.
- Remove the marks. Use the twist eraser for small corrections, a fabric eraser for larger areas, or wash the marks out with water.
Practical Tips
Use a ruler or template whenever precision counts — for seam guides, diagonal lines on half-square triangles, crosshatching, and borders, a straight edge keeps the fine line truly straight. For curves and appliqué, trace in short strokes rather than one long drag. Avoid resting your hand heavily on fresh marks so they do not smudge, and keep a scrap handy to check lead length and pressure without testing on the quilt itself. When you need more leads, note the 0.9mm size so replacements match the barrel.
Care and Storage
Retract the tip when you finish so the lead does not snap in a notions pouch. Store the pencil dry, with your other marking tools, away from fabric stacks where chalk could transfer. Keep the twist eraser clean, because a dirty eraser can smear rather than lift a mark, and store refills in their container so the fine leads stay unbroken. As with any marker, re-test on new or delicate fabrics before marking a finished piece.
Project Ideas
Use this pencil to mark quilting lines on dark fabrics, draw diagonal sewing lines for half-square triangles and snowball corners, place appliqué on a dark background, and mark darts, buttonholes, and placement lines on garments. It is also handy for labelling blocks during layout, tracing hand-quilting motifs, and marking alterations — anywhere you need a clear white guide line that is meant to help you sew, not stay in the finished work.
Good marking is invisible in the finished quilt, but it makes everything that follows easier and more accurate.
Shop the White - Bohin Mechanical Chalk Pencil - With Refill at Linda's Electric Quilters.


