
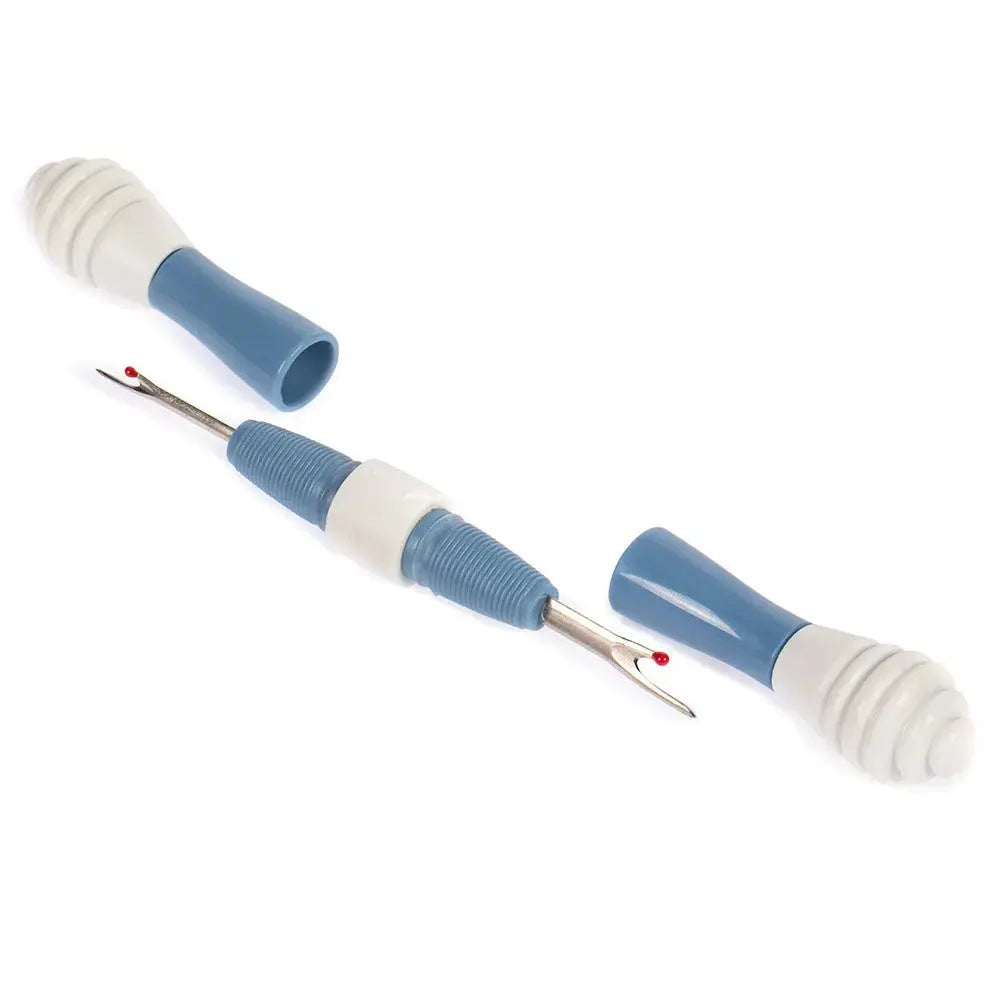
What Is the Dual Seam Fix Thread Remover Seam Ripper?
Every sewist needs to rip out seams sometimes — a wobbly seam line, a block sewn in the wrong direction, or a seam allowance that needs adjusting. The Dual Seam Fix Thread Remover Seam Ripper is a clever 2-in-1 notion designed to make that unpicking faster and cleaner.
It features a seam ripper on each end of the tool: one small blade and one large blade, with a protective cap on each end. The second half of the design is just as useful. The specially designed lid works the thread tail ends free from your fabric after you cut the stitches, so those short, stubborn ends pull free instead of staying embedded in the seam. Note that the color may vary.
Why Quilters and Sewists Use It
Cutting stitches is only half the job. After a seam is opened, dozens of tiny thread tails are usually left clinging to the fabric, and picking them out one by one with tweezers or fingernails is slow and frustrating. This tool tackles both steps: rip the seam with the blade, then use the lid to work the thread ends free.
Having two blade sizes in one tool helps, too. Reach for the smaller blade for finer, tighter stitching and more delicate work, and the larger blade when you need to open a longer seam more quickly. With caps on both ends, neither blade has to sit exposed in your sewing kit between uses.
How to Use It: Step by Step
- Choose your blade. Remove the cap from the end that suits the job — the small blade for precision work, the large blade for longer seams.
- Pick apart the seam. Slide the seam ripper under a stitch and cut it, then continue along the seam, cutting stitches at intervals and gently separating the fabric pieces as you go.
- Work in short sections. Open a few inches at a time rather than forcing the whole seam at once, and keep the fabric supported so the blade moves through thread, not fabric.
- Clear the thread tails. Once the seam is open, use the specially designed lid to work the remaining thread tail ends free from the fabric assembly. The ends pull free without digging at them with tweezers or fingernails.
- Check both pieces. Run your hand and eyes over both fabric pieces and repeat the lid step wherever short ends remain, so loose threads do not end up trapped in your next seam.
- Cap it again. Replace the protective cap on the blade you used as soon as you finish.
Practical Tips for Best Results
Cut stitches, not fabric: keep the blade flat against the seam line and let it do the work instead of pulling hard on the fabric. Ripping every few stitches, then gently pulling the pieces apart, is safer than trying to slice every stitch. Work in good light so you can see the thread against the fabric, and slow down around intersections and bulky seam allowances where several layers meet. If you are correcting a quilt block, remove only the seam you need — it is much easier to re-sew one accurate seam than to rebuild a whole unit.
Care and Storage
Always store the tool with both protective caps in place. The caps protect the blades, and they protect your hands, project bag, and fabric from the exposed points. Keep it in a notions pouch or sewing kit rather than loose in the bottom of a tote, wipe it clean of lint before capping it, and keep it out of reach of children, as you would any sharp sewing tool.
Project Ideas and Everyday Uses
Keep the Dual Seam Fix within reach whenever you piece quilt blocks, join rows, sew garment seams, or attach binding. It is invaluable for fixing a flipped block before quilting, opening a seam to adjust fit, removing basting or stay stitching, and rescuing a project where the seam allowance drifted. Any time a seam needs a second chance, this is the tool that makes the do-over quick and tidy.
Shop the Dual Seam Fix Thread Remover Seam Ripper at Linda's Electric Quilters.


