
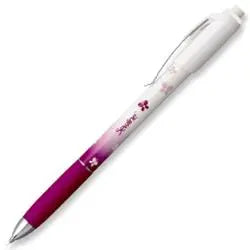
How to Use the Sewline Fabric Mechanical Pencil in White: Precise Marks for Quilting and Sewing
Good quilting starts before the first stitch — with a clear, accurate mark. Whether you are laying out a block, tracing an appliqué shape, or marking a seam guide, a wandering line can throw off everything that follows. The Sewline Fabric Mechanical Pencil in White helps quilters and sewists draw clean, consistent guidelines with the control of a pencil.
What Is the Sewline Fabric Mechanical Pencil?
The Sewline Fabric Mechanical Pencil (White) is a mechanical pencil made specifically for use on fabric. It is a marking tool for quilting and sewing — prepping patterns, piecing, appliqué, and general sewing — described as a must-have for clean, accurate lines. As a mechanical pencil, it helps you mark guidelines and details with control and consistency. This one is white, stock number FAB50037, from Sewline.
Why Quilters and Sewists Use It
Marking is how you transfer a plan onto fabric: where to cut, where to sew, and where pieces should meet. A pencil built for fabric lets you make quick layout marks in the studio or on the go, and it pairs with the rulers, templates, batting, and thread already in your kit. Quilters reach for it during everyday stitching and block preparation, longarm quilters use it in prep work, and sewists and crafters use it for pattern details, repairs, and project planning. When the mark is precise, the stitching that follows is easier to keep precise, too.
How to Use It, Step by Step
- Start with a plan. Decide what needs marking before you touch the fabric — a seam guide, a cutting line, an appliqué placement, or a quilting guideline.
- Settle the fabric. Lay the fabric flat and smooth on a firm surface so it cannot shift while you draw. Hold a ruler or template firmly in place if you are marking a straight or shaped line.
- Mark with a light, steady hand. Draw along the edge of your ruler or template, or freehand your guideline, using even pressure so the line stays clean and consistent from start to finish.
- Check before you cut or sew. Step back and confirm the marks line up with your pattern measurements — matching points, seam allowances, and placement — while a correction is still easy.
- Stitch to the line. Use your marks as the guide for piecing, appliqué placement, or quilting, and work at a pace that lets you follow them accurately.
Practical Tips
- Test first on a scrap. Before marking a finished piece, try the pencil on a scrap of the same fabric to check how the white line reads and how it behaves on that material.
- Let contrast work for you. A white mark is easiest to follow where it contrasts clearly with the fabric underneath, so check your line in your normal sewing light before you begin stitching.
- Mark only what you need. A few clear guidelines are easier to follow than a fabric covered in extra lines. Mark the seam, placement, or quilting path that matters for the next step.
- Keep it with your rulers. Storing the pencil alongside your rulers and templates means it is in hand at layout time — the moment you are most likely to reach for it.
Care and Storage
Treat this pencil like the precision tool it is. Keep it in your notions kit, pencil cup, or project bag where it will not roll away between steps, and store it with your other marking tools so you can find it quickly for layout marks wherever you are sewing.
Project Ideas
Use the Sewline Fabric Mechanical Pencil for marking quilt blocks before piecing, tracing and placing appliqué shapes, laying out seam guides on garment sewing, and planning quilting lines during longarm prep. It is equally handy for craft work, small repairs where placement matters, and any project where writing the plan directly on the fabric keeps you organized from the first mark to the final stitch.
Shop the Sewline Fabric Mechanical Pencil - White for Quilting & Sewing at Linda's Electric Quilters.


