
How to Use Easy Grasp Pins: Easier Pinning for Quilters and Sewists
Every quilter knows the moment: your layers are lined up perfectly, you reach for a pin, and the tiny flat head slips through your fingers. Standard straight pins work, but their small heads can be hard to pick up, hard to hold, and easy to lose in a seam allowance. Easy Grasp Pins by Dritz fix exactly that frustration, with a head shape that gives your fingers more to hold on to.
What Are Easy Grasp Pins?
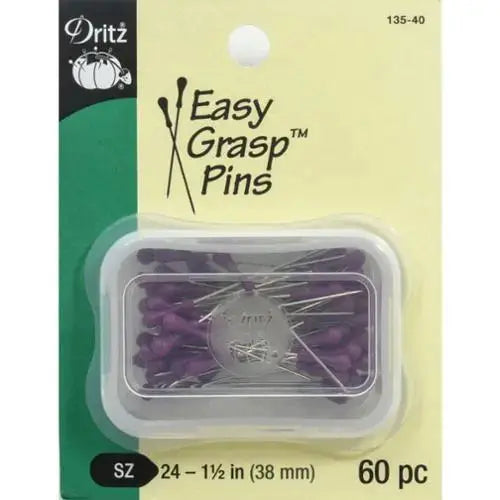
Easy Grasp Pins by Dritz are straight pins for sewing, quilting, and crafts. Each pin measures 1.5 inches (38 mm) long, and a package contains 60 pins. What sets them apart is the head: instead of a small round ball, these pins feature an elongated ball head in purple, with an indented base. That elongated shape and indented base provide more area to grasp and grip the pin, so picking one up, pushing it through fabric, and pulling it back out all take less fumbling.
Why Quilters and Sewists Use Them
Pinning is not glamorous, but it decides whether seams meet, layers stay put, and points stay sharp. A pin you can grip confidently makes that step faster and more accurate. The elongated head is easier to see and catch between your fingertips than a tiny flat head, which helps when pinning long seams, matching intersections, or removing pins smoothly as you sew. The purple color stands out against most fabrics, making pins easier to spot — and account for — before you press or sew.
How to Use Them, Step by Step
- Align your layers first. Place your fabrics right sides together (for seams) or layer your quilt sandwich, smoothing from the center outward so there are no wrinkles before a single pin goes in.
- Grasp the pin by its elongated head. Pinch the indented base between your thumb and fingertip — that extra surface is what the design is for — rather than gripping the shaft.
- Pin perpendicular to the seam line. Insert the pin at a right angle to where you will stitch, with the head facing toward you. This lets you pull each pin out easily just before the needle reaches it.
- Space pins for the job. Use closer spacing on curves or spots where seams must match exactly, and wider spacing on long, straight, stable seams.
- Check the back before sewing. Confirm layers have not shifted and no points are folded over, then sew, removing pins as you go — never sew over a pin.
Practical Tips
- Pin match points first. Place a pin exactly through seam intersections before filling in between them, so the important spots cannot drift.
- Keep the purple heads visible. Angle pins so the heads sit on top of your work where you can see them; a head-down pin is one you might forget.
- Count in, count out. Glance over your project and pressing area before moving on — dropped pins and floors (and feet) do not mix.
- Retire bent pins. A bent pin or one with a rough point can snag fabric. Throw it away rather than returning it to the cushion.
Care and Storage
Store your Easy Grasp Pins in a pincushion, magnetic dish, or small lidded container so the points stay protected and the pins stay together between projects. Keep them dry with the rest of your notions, and wipe a pin clean if it picks up lint or fusible residue. A shallow dish or cushion by your machine makes it easy to grab one without looking — the grip design does the rest.
Project Ideas
Reach for these pins for quilt piecing where blocks need careful alignment, for pinning binding before the final stitch, for garment seams and hems, and for crafts like tote bags, pillow covers, and table runners where layers love to shift at the last second. Anywhere a standard pin works, an easier-to-grasp one makes the prep more pleasant — especially if sore fingers have ever made pinning your least favorite step.
Shop the Easy Grasp Pins by Dritz at Linda's Electric Quilters.


