
How to Use a Tailor's Clapper for Flatter Quilt Seams: A Pressing Step That Pays Off
Pressing is where good piecing becomes great piecing. You can cut accurately and sew a careful quarter-inch seam, and still end up with blocks that ripple and points that will not nest. One of the oldest tools in the tailor's kit solves a surprising amount of that: the clapper. It adds no heat and no technology — just weight, a smooth hardwood surface, and a few patient seconds right after the iron does its work.
What the Hardwood Quilters Clapper Is
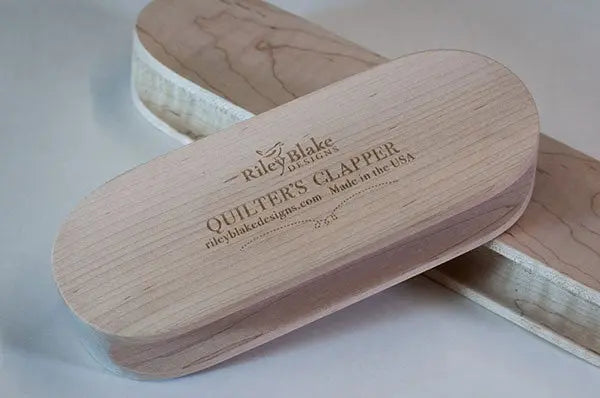
The Hardwood Quilters Clapper from Riley Blake Notions is a classic tailor's clapper made of hardwood, measuring 8 inches long by 3 inches wide, and made in the USA. It is used with a steam iron to set a seam. There are no settings, cords, or parts — one solid piece of wood, sized to sit comfortably in your hand and to cover a useful stretch of seam at a time.
The idea behind it is simple. A steam iron heats the fibers and adds moisture, which makes cotton temporarily pliable. If the seam is left alone at that moment, it cools slowly and can spring back toward its old shape. Pressing the still-warm seam under the flat weight of the clapper holds it exactly where you put it while it cools and dries — and a seam that cools flat tends to stay flat.
How to Use a Clapper, Step by Step
Press first, clap second. Set your seam with the iron as you normally would — press it to one side or open, according to your pattern. Give it a moment of steam if your fabric can take it.
Immediately set the clapper on the seam. While the fabric is still hot and steamy, place the clapper flat over the seam and leave it there for several seconds. Resist the urge to slide it around; its job is still, even pressure.
Lift, move, repeat. Work your way along a long seam in sections, ironing and clapping as you go. On quilt blocks, one placement often covers the whole block — press the block, center the clapper on it, and let it cool under weight before you move it to the design wall or stack it.
Do not touch the seam until it has cooled. Moving a warm, freshly pressed seam is how pressed-flat work creeps back. The few seconds under the clapper are what lock in the result, so let each section cool before handling it.
Where a Clapper Earns Its Keep
Bulky seam junctions. Where several seams meet — pinwheel centers, eight-point intersections, joined rows — the extra bulk loves to puff up. Iron, clap, and hold, and those junctions sit noticeably flatter, which also makes quilting over them easier.
Seams pressed open. Open seams distribute bulk, but they can drift back toward closed. The clapper's firm, flat hold helps them stay open and even.
Crisp garment and home-dec details. Tailors have used clappers for generations on hems, pleats, and pressed edges, and the same technique sharpens the folds on tote bags, table runners, and pillow covers made from quilting cotton.
Final block pressing. Before trimming or squaring up, a press-and-clap pass gives you a truly flat block to measure against your ruler, so your trimming is based on the block's real shape, not a puffy approximation.
Care and Common Mistakes
A hardwood clapper asks for almost nothing: keep it dry, wipe it clean if it picks up starch or spray residue, and store it flat near your pressing station so it is within reach. Avoid leaving it in standing water or against a hot iron plate, and do not use it as a hammer; it is a weight, not a mallet.
The two mistakes to skip: clapping a seam that was never properly ironed first (the clapper sets what the iron does; it does not replace it), and rushing. Give each placement a few unhurried seconds, and your points will nest better and your finished quilts will quilt noticeably smoother.
Shop the Hardwood Quilters Clapper 8in at Linda's Electric Quilters.


