
Last Updated: November 3, 2026
Quick Summary
To organize quilting fabric scraps, decide before you store: sort each piece into keep, cut down, or donate, then choose one sorting method, color, size, or shape, that matches how you actually quilt. Store scraps in labeled, visible containers sized to your shelf, and do a ten-minute reset after each finished project.
- Keep scraps 5 inches and larger whole for backgrounds, borders, and large blocks.
- Neutrals deserve their own bin because they anchor busy blocks and keep them from turning muddy.
- Measure your shelf, drawer, or closet floor before you buy any containers.
- Store bins out of direct sunlight and off concrete floors to prevent fading and moisture.
- Cut keepable pieces into standard sizes like 2.5-inch or 5-inch squares at the end of a session.
Table of Contents
- Start With a Keep, Cut, or Discard Decision System
- What Size Fabric Scraps to Keep (and What to Let Go)
- Sort Quilting Fabric Scraps by Color, Size, or Shape
- Build a Fabric Scrap Management System That Fits Your Habits
- Fabric Scrap Storage: Match Containers to Your Space and Projects
- Label, Track, and Keep Scraps Visible
- Preserve Fabric Quality and Manage Scraps From Cutting to Cleanup
- Turn Your Scrap Pile Into Your Next Quilt Project
- Frequently Asked Questions
Start With a Keep, Cut, or Discard Decision System
Most scrap piles grow because nobody ever made a decision. Every leftover piece went into a bag "just in case," and now the bag is a mountain.
The fix is a three-way sort that takes seconds per piece.
Pick up each scrap and ask three questions in order:
- Is it big enough for a planned project? If yes, keep it whole.
- Is it smaller than your smallest usable shape? If yes, cut it down or let it go.
- Would you actually use this color or print again? If no, donate it.
The third question matters more than most guides admit. A scrap you dislike will sit in a bin for years.
Keep a small basket beside your cutting mat so every trimming goes straight in during a project.
What Size Fabric Scraps to Keep (and What to Let Go)
The right minimum size depends on how you quilt, not on someone else's chart. Strip quilters often keep narrow pieces, while crumb quilters keep very small bits.
Here is a practical starting point most quilters can adjust:
| Scrap Size | Keep It? | Best Use |
|---|---|---|
| 5 inches and larger | Yes, whole | Backgrounds, borders, large blocks |
| 2.5 to 5 inches | Yes | Squares, half-square triangles, appliqué |
| 1 to 2.5 inches | Only if you piece small | Strips, crumbs, string quilts |
| Under 1 inch | Usually no | Too fiddly for most projects |
If you are unsure about small pieces, ask: will you really sew with something this small? If you would rather start from ready-cut pieces, browse fabric packs to supplement or compare against your scrap stash.
One insider tip: sort by what you sew, not by what sounds tidy. A quilter who loves string piecing should keep every long, thin strip. Someone who makes appliqué blocks has no use for them.
Sort Quilting Fabric Scraps by Color, Size, or Shape
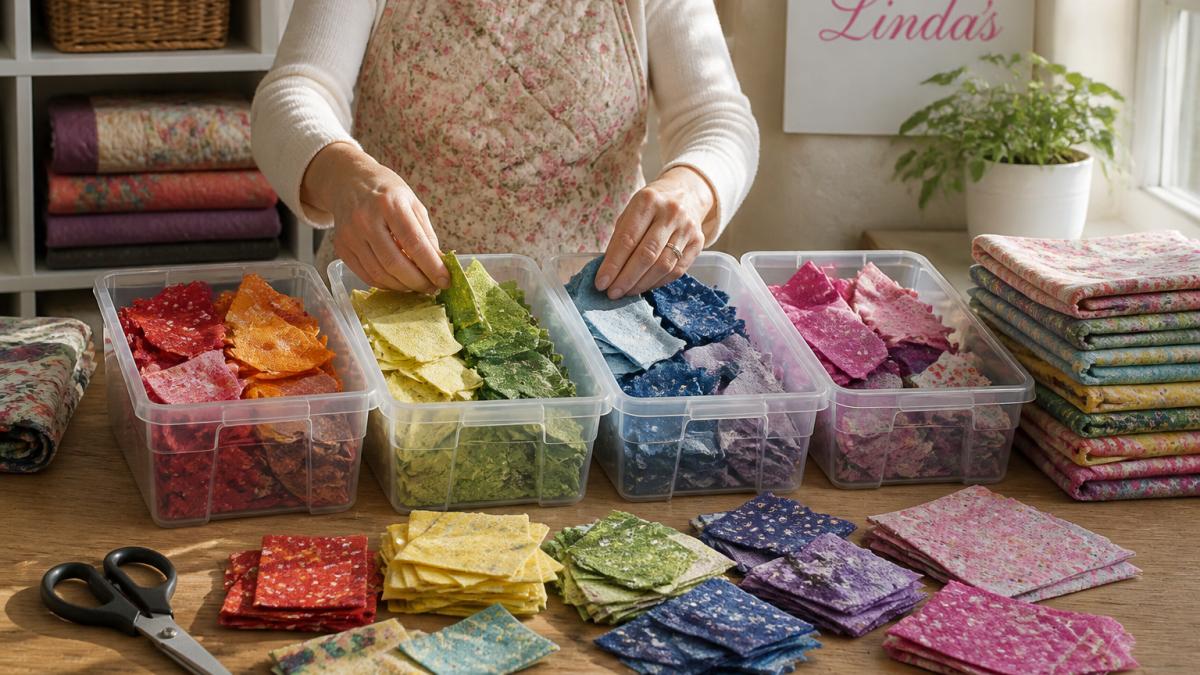
Three sorting methods work, each suiting a different quilting style: color speeds up fabric pulls for scrappy quilts, size keeps cutting options open, and shape fits quilters who piece specific units again and again.
You do not need all three. Pick the one that matches how you choose fabric when you start a project.
Color Groups and Neutrals
Color sorting is the most common approach, and it works well for most quilters. Group scraps into broad families: reds, blues, greens, yellows, oranges, purples, and browns.
Neutrals deserve their own bin because they anchor busy blocks and keep them from turning muddy.
Within each color group, split warm from cool only if your collection is large; for most quilters, one bin per color family is plenty.
Size and Shape Categories
Size sorting organizes scraps by what they can become. Common categories include:
- Strips: anything long and narrow, sorted by width
- Squares: cut to standard sizes like 2.5, 5, or 10 inches
- Triangles and odd shapes: pieces with angled edges
Shape sorting rewards preparation. A precut guide clarifies standard sizes like fat quarters and jelly rolls, helping you categorize scraps by size. Cutting scraps into standard sizes as you sort turns them into ready-to-use units, a pile of 2.5-inch squares becomes a quilt top fast.
Build a Fabric Scrap Management System That Fits Your Habits
A fabric scrap management system only works if it matches your real sewing routine. A system built for a dedicated sewing room fails in a corner of a dining room.
Start with three questions:
- How often do you sew? Weekly sewists can handle a multi-bin system. Occasional quilters need fewer, bigger containers.
- How much space do you have? Measure your shelf before you buy anything.
- What do you make most? Let your projects set your categories.
Then set a maintenance rhythm: many quilters do a ten-minute sort after each finished project, others a longer session once a season.
The system also needs a home for overflow.
Fabric Scrap Storage: Match Containers to Your Space and Projects
Fabric scrap storage should follow your sorting method, not the other way around. Buy containers after you decide how you sort, and buy them to fit the shelf you actually have.
Most quilters choose among four storage formats, each trading visibility against capacity and access. Match the format to your workspace rather than to a photo of someone else's sewing room.
| Format | Visibility | Capacity | Ease of Access | Best For |
|---|---|---|---|---|
| Clear stackable bins | High | Medium | Medium, unstack to reach lower bins | Color or size groups on open shelving |
| Open baskets | High | Low to medium | High, grab and go | Scraps used every session |
| Drawer dividers | Low until opened | Medium | High if the drawer is at waist height | Small crumbs and pre-cut squares |
| Vertical hanging pockets or shoe organizers | High | Low | High | Long strips and narrow overflow |
Match Storage to Your Workspace
A dedicated sewing room can carry a multi-bin system on open shelves. A corner of a dining room cannot. If your sewing space folds away between sessions, favor one lidded bin with internal dividers over six separate containers, because setup and teardown time is what kills a system.
Measure the shelf, drawer, or closet floor before you buy. A common pattern is buying bins that fit the scraps but not the shelf, then stacking them on the floor where they collect dust.
Bins, Baskets, and Clear Containers
Small clear plastic bins work well for color groups, open baskets suit scraps you use constantly, and larger lidded bins fit bulkier pieces and long strips. Drawer dividers, often sold as cutlery trays, keep pre-cut squares from sliding into a jumble.
A few practical rules:
- Match bin size to scrap size. Tiny bins for crumbs, larger bins for yardage leftovers.
- Stack only what stays stable. Heavy fabric on the bottom, light bins on top.
- Label every bin. A strip of tape and a marker is enough.
Watch out: storing scraps in sealed plastic in a humid space can trap moisture and cause musty smells or mildew. Use breathable baskets or keep lids slightly loose in damp rooms.
Rolling, Folding, and Elastic Bands
Rolling fabric keeps pieces compact and reduces creases. Fold larger scraps into neat rectangles, then roll strips around your hand or a cardboard tube.
Elastic bands hold rolls together, but use them loosely, a tight band left for months can leave a permanent dent. Fabric-safe clips or cotton ties are gentler options.
Folding works better for big pieces: fold them to a consistent width so they stack flat and stay visible in a bin. The same upright, easy-to-scan approach can help organize craft beads by keeping small pieces visible and separated.
Storage That Follows Your Sewing Habits
A system that matches your habits survives; a system that matches a magazine photo usually does not.
Label, Track, and Keep Scraps Visible
Scraps you cannot see are scraps you will not use. Visibility is the biggest factor in whether a storage system survives.
Label bins by color, size, or shape, matching your sorting method.
Keep a "current projects" basket in the open, filled with scraps pulled for the quilt you're working on now.
A common mistake is storing everything behind closed cabinet doors.
Preserve Fabric Quality and Manage Scraps From Cutting to Cleanup
Fabric quality fades with poor storage, and scraps are especially vulnerable. Small pieces dry out, fade, and collect dust faster than yardage because they have more exposed surface area per ounce. Protecting them means controlling light, moisture, pests, and compression.
Long-Term Storage That Protects Fabric
- Light. Ultraviolet light fades dye, and small scraps fade faster than yardage. Keep bins out of direct sunlight and away from windows with strong afternoon sun.
- Moisture. Cotton and most quilting fabrics need to breathe. A lidded bin with a loose seal beats vacuum sealing or airtight bags, which trap dampness and encourage mildew. Keep bins off concrete floors and away from exterior walls that sweat.
- Pests. Wool, silk, and blends are the usual targets, but pests will nest in any quiet, dark bin. Check bins twice a year, and keep a cedar block or lavender sachet in bins holding animal fibers, replacing sachets when the scent fades.
Wash and press scraps before storing if they came from unwashed fabric. Unwashed fabric can bleed dye onto neighbors in the same bin, and prewashing also removes sizing that attracts dust.
A Cutting-to-Cleanup Routine
Managing scraps from cutting through cleanup keeps the whole system running. The goal is to never let a project's trimmings become an unsorted backlog.
- Set up before you cut. Place a shallow tray or small basket under the cutting mat so trimmings fall into it instead of onto the floor.
- Sort as you trim. Keep two small containers at the mat: one for pieces big enough to keep, one for true waste. Deciding at the mat takes seconds; deciding later takes an evening.
- Cut to standard sizes at the end of the session. Turn keepable pieces into 2.5-inch squares, 5-inch squares, or strips while the ruler and rotary cutter are already out.
- Empty the tray into the right bin before you leave the room. Match the bin to your sorting method, not to whatever is closest.
- Sweep the floor. Small pieces migrate into carpet and under furniture, and a quick sweep prevents a second cleanup later.
- Do a ten-minute reset after each finished project. Return pulled scraps to their labeled bins, refold anything that unfolded, and check the overflow bin.
Watch out: leaving trimmings in the tray overnight is how a sorted system turns back into a pile. The tray is temporary holding, not storage.
A Simple Maintenance Rhythm
Most quilters find a ten-minute sort after each finished project keeps the pile under control, with a longer seasonal session to check for pests, moisture, and fading. If a bin's lid will not close, cut its contents into standard sizes or move extras to a donation bag rather than buy another bin.
Turn Your Scrap Pile Into Your Next Quilt Project
An organized scrap pile is only useful if it turns into quilts. The final step is putting your sorted scraps to work.
Start with a pattern that suits your smallest kept pieces. Our crumb quilt book walks through the technique from start to finish.

For quilters who want a broader range of ideas, our scrap quilt pattern collection offers patterns built specifically around scrap fabric. And if you want inspiration for mixing your sorted stash into finished tops, Addicted to Scraps pairs 12 scrap quilt patterns with a storage system of its own.

A simple planning habit helps too. Before starting a project, pull scraps by color into a project basket.
Frequently Asked Questions
How do you decide which quilting fabric scraps are worth keeping?
Use a simple size threshold. Keep pieces large enough for your smallest planned unit, such as a 2.5-inch square or a 1.5-inch strip. Anything smaller can go into a crumb bin for zero-waste patchwork, like the projects in Crumb Quilts. If a piece is too small for your current projects and you do not sew crumbs, discard it. This keeps your scrap pile manageable and focused on fabric you will actually use.
Should I organize my fabric scraps by color or by size?
It depends on how you sew. If you design scrap quilts by palette, sort by color groups first, then keep neutrals separate. If you follow patterns that call for specific sizes, sort by size or shape instead. Many quilters use a two-tier system: broad color bins for large pieces and labeled bins for pre-cut squares and strips. Choose the method that matches your next three projects, and adjust as your habits change.
What is the best way to store small fabric scraps?
Clear plastic bins, baskets, and containers work well because you can see what is inside. For small pieces, use shallow bins or drawer dividers sorted by size. Roll or fold strips and secure them with elastic bands to prevent tangling. Keep the most-used bins within arm's reach of your cutting table. Store bins away from direct sunlight and dampness to protect fabric colors and fibers. Label each container so you can find the right scrap without emptying the whole shelf.
How do I build a fabric scrap management system that I will actually maintain?
Start small. Set up one cutting-session routine: as you trim, sort scraps into keep, crumb, and discard piles. Cut keepers into standard sizes, then place them in labeled bins. Schedule a 15-minute monthly reset to refile stray pieces and remove anything you have not used. Pair the system with project planning by pulling scraps for your next quilt before buying new fabric. Books like Addicted to Scraps and Scrappiness Is Happiness offer scrap-collection methods you can adapt to your space.
Your scrap pile does not have to be a source of guilt. With a decision system, the right containers, and a little upkeep, it becomes a working fabric library. Linda's Electric Quilters carries more than 50,000 quilting, sewing, and embroidery products, including books that teach scrap-friendly methods, plus a library of 700+ educational videos to guide your next project. Get started with Linda's Electric Quilters and turn your organized scraps into your next finished quilt.



