
Table of Contents
- Essential Quilting Tools for Beginners
- Quilting Terminology for Beginners
- How to Start Quilting: Fabric Selection and Preparation
- Beginner Quilting Patterns: Choosing Your First Design
- How to Start Quilting: Cutting, Piecing, and Assembly
- How Long Does It Take to Make a Quilt?
- Ergonomics, Planning, and Keeping the Hobby Enjoyable
- Frequently Asked Questions
Last Updated: September 1, 2026
Quilting looks complicated from the outside but becomes learnable once broken down clearly. At Linda's Electric Quilters, we work with new quilters daily, and the most common question is: where do I start? This guide walks you through every stage, from buying your first tools to finishing a bound quilt. We cover the exact steps, terminology that trips beginners up, and angles most guides skip: ergonomics, sustainability, and project planning.

Essential Quilting Tools for Beginners
The biggest mistake new quilters make is buying too much before understanding what they actually need. A focused starter kit beats a cart full of gadgets.
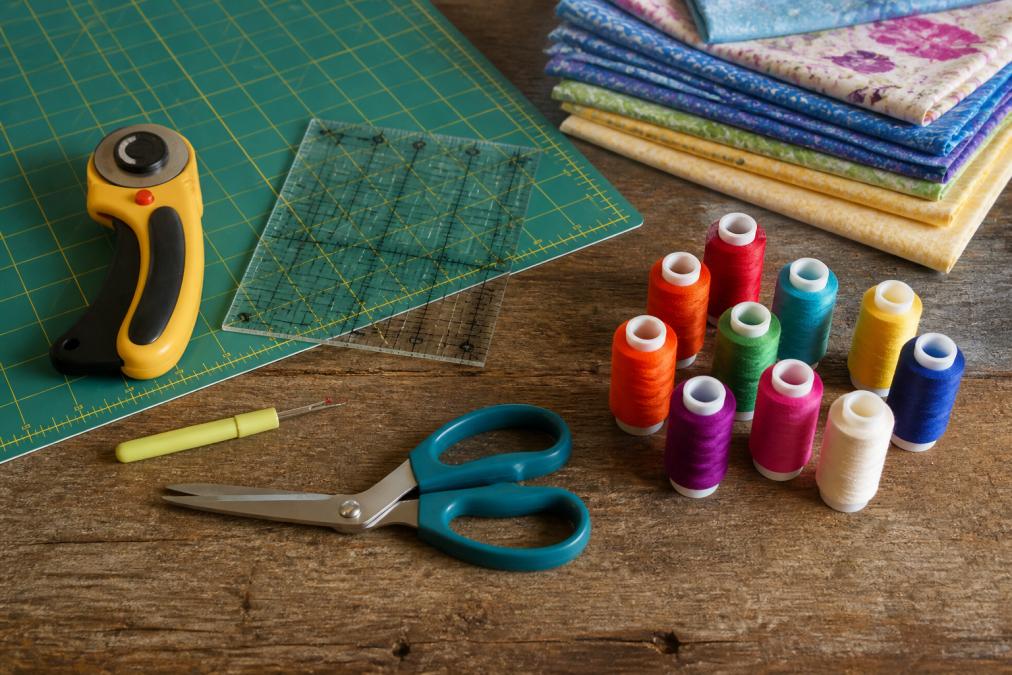
The non-negotiable essentials are:
- Rotary cutter: A 45mm rotary cutter handles most fabric types cleanly and accurately.
- Self-healing mat: Protects your table and keeps the rotary cutter sharp. A 24" x 36" mat gives you adequate working room.
- Acrylic ruler: A 6" x 24" acrylic ruler is the workhorse for cutting. Clear markings let you see fabric grain and align cuts precisely.
- Seam ripper: Every quilter uses this. A sharp one saves hours of frustration.
- Fabric scissors: Dedicated fabric scissors, never used on paper, stay sharp long enough to matter.
- Sewing machine with a quarter-inch foot: This keeps your seam allowance consistent across every block.
The Sew Square 10 Ruler from Linda's Electric Quilters at $29.99 is a practical addition once you're squaring up blocks. Its easy-to-read lines and permanent-marker compatibility make it adaptable for multiple patterns.
Budget-Friendly Starter Kits and What to Skip
A sensible starter kit runs between $60 and $120 if you shop carefully. The rotary cutter, mat, and acrylic ruler are worth spending on because cheap versions wear out fast and produce inaccurate cuts. Skip the quilting frame, specialty presser feet beyond the quarter-inch foot, and the walking foot until you're ready to machine quilt.
Jelly rolls and fat quarters are pre-cut fabric bundles that save cutting time and pair beautifully with beginner patterns. According to the Craft Industry Alliance's resource guides, pre-cut fabric bundles are among the most popular entry points for new quilters because they remove one of the most intimidating early steps.
Quilting Terminology for Beginners
Quilting terminology sounds technical, but most terms describe simple physical things.
Quilt top is the decorative front layer made from pieced fabric. Batting is the middle layer that provides warmth and loft. Backing fabric is the single piece forming the quilt's back. Together, these three layers are called the quilt sandwich.
Piecing means sewing fabric pieces together to form quilt blocks. Pressing means using an iron to set seams flat by lifting and placing rather than sliding. Basting holds the three layers together before quilting begins.
Seam allowance is the distance between your stitching line and the fabric edge. In quilting, a precise quarter-inch seam allowance is standard and affects whether blocks fit correctly. Fabric grain refers to thread direction in woven fabric. Cutting on grain prevents stretching.
Other key terms: binding finishes the quilt's raw edges; stitching in the ditch means quilting directly in an existing seam line; patchwork describes any design made from sewn-together pieces; and appliqué involves attaching shaped fabric pieces to a background.
How to Start Quilting: Fabric Selection and Preparation
Quilting cotton is the standard starting material for good reason: it's stable, presses crisply, and holds a seam allowance reliably. Avoid stretch fabrics, home decor fabrics, and anything with a loose weave until you have experience.
Fat quarters measure 18" x 22" and give you enough material to cut multiple shapes without buying a full yard. Most beginner patterns specify fabric in fat quarters or yards of quilting cotton.
Before cutting, prewash your fabric. Quilting cotton shrinks, and skipping this step causes finished quilts to pucker or warp after washing. Press the prewashed fabric before cutting to remove wrinkles.
For thread, quality matters more than most beginners expect. The Dream Seam #314 thread from Linda's Electric Quilters at $9.99 is a 50-weight cotton thread made from extra-long staple Egyptian cotton, designed specifically for piecing and quilting with consistent tension and minimal lint buildup.
Sustainable and Upcycled Fabric Options
Quilting has a long tradition of using what's available, mapping directly onto modern sustainable practices. Upcycled quilting means cutting fabric from worn clothing, vintage linens, or fabric remnants rather than buying new yardage. Denim, flannel shirts, and cotton bedsheets are all workable sources.
The practical consideration is consistency: upcycled fabrics vary in weight and weave. Limit upcycled fabric to one category per project, all denim or all cotton shirting, rather than mixing types. According to the Sustainable Apparel Coalition's material guides, cotton fabric reuse significantly reduces the environmental footprint of textile projects compared to purchasing new material.
Beginner Quilting Patterns: Choosing Your First Design
The right first pattern teaches accurate piecing without requiring complex geometry. Most experienced quilters recommend the nine-patch block: nine squares sewn together in a three-by-three grid. It teaches you to cut accurately, maintain a quarter-inch seam allowance, and press seams correctly.
After the nine-patch, a natural progression looks like this:
- Nine-patch block - straight cuts, simple piecing
- Rail fence block - strips sewn together, introduces fabric grain awareness
- Half-square triangles - introduces diagonal cuts and points
- Log cabin block - introduces strip piecing and building around a center
- Flying geese - introduces more precise triangle piecing
For modern beginner patterns with visual interest, the Metro Hoops pattern available at Linda's Electric Quilters measures 60" x 75" and uses interlocking shapes in a contemporary palette. It's a good second or third project once basic piecing is solid.
The American Quilter's Society pattern resources offer many vetted beginner patterns with clear instructions.
| Pattern | Core Skill | Difficulty | Recommended For |
|---|---|---|---|
| Nine-patch | Straight piecing | Beginner | First project |
| Rail fence | Strip piecing | Beginner | Second project |
| Half-square triangle | Diagonal cuts | Beginner-intermediate | Third project |
| Log cabin | Strip building | Beginner-intermediate | Third or fourth project |
| Flying geese | Precision triangles | Intermediate | Fifth project |
How to Start Quilting: Cutting, Piecing, and Assembly
Accurate cutting is the foundation of everything else. If your cuts are off by even a small amount, that error compounds across every seam in a block. Cut slowly, hold the acrylic ruler firmly with your non-dominant hand, and roll the rotary cutter away from your body in one smooth pass.
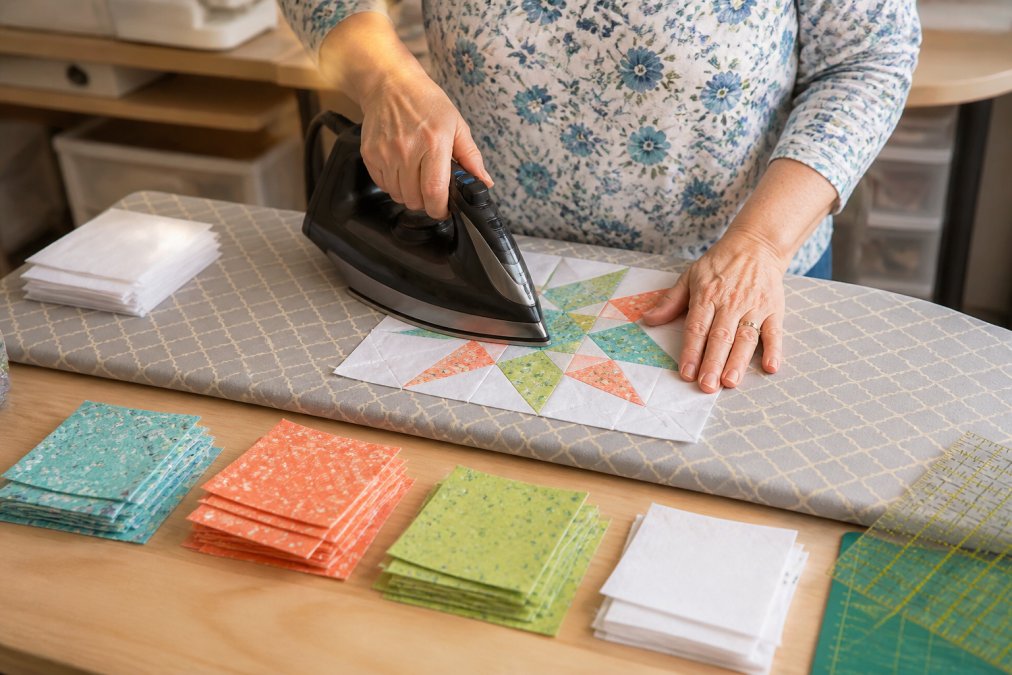
Piecing follows a consistent rhythm: sew, press, sew, press. Chain piecing, where you feed pairs of fabric pieces through the machine one after another without cutting thread between them, speeds up the process. Press seams to one side rather than open for most beginner patterns, as this creates stronger seam intersections.
Assembling the quilt top means sewing blocks into rows, then sewing rows together. Match seam intersections precisely by nesting seams, pressing adjacent seams in opposite directions so they lock together at the intersection rather than creating bulk.
Basting the Layers Together
Basting holds the quilt top, batting, and backing fabric together before quilting begins. The most common beginner method is safety-pin basting: spread the backing fabric face-down on a flat surface, layer the batting on top, then center the quilt top face-up. Smooth each layer from the center outward, then pin through all three layers every 4 to 6 inches.
Thread basting, using large hand stitches in a grid pattern, is the alternative. It's slower but preferred for hand quilting because safety pins can snag thread.
The quilt sandwich should extend at least 2 to 3 inches beyond the quilt top on all sides to accommodate shifting during quilting.
Binding and Finishing Your Quilt
Binding is the final step that gives a quilt its finished, professional look. Cut binding strips on the straight grain at 2.5" wide. Sew the strips end-to-end to create one long strip, press in half lengthwise, and attach to the quilt front by machine. Fold the binding to the back and hand-stitch it down with a blind stitch.
Binding clips hold the folded binding in place as you stitch. Bias tape binding, cut at a 45-degree angle to the fabric grain, is more flexible and better suited to quilts with curved edges.
How Long Does It Take to Make a Quilt?
A beginner's first quilt typically takes between 20 and 40 hours of actual working time, spread across several weeks or months. This estimate covers a simple throw-size quilt using a nine-patch or similar block pattern.
The timeline breaks down roughly like this:
- Fabric selection and preparation: 2-4 hours
- Cutting: 3-5 hours
- Piecing blocks: 5-8 hours
- Assembling the quilt top: 2-4 hours
- Basting: 1-2 hours
- Quilting: 5-10 hours (machine quilting is faster than hand quilting)
- Binding: 3-5 hours
Hand quilting a full-size quilt can take hundreds of hours. Machine quilting with straight-line quilting or stitching in the ditch is far faster and completely appropriate for beginners. A walking foot attachment makes machine quilting much easier because it feeds all three layers through the machine evenly.
Ergonomics, Planning, and Keeping the Hobby Enjoyable
Physical ergonomics matter more in quilting than most guides acknowledge. A cutting table at hip height, roughly 36 to 38 inches for most people, lets you apply downward pressure on the ruler without hunching. If working at a standard dining table, a thick cutting mat and a raised ironing surface can compensate.
Repetitive pressing motions can strain the shoulder and wrist. Take breaks every 30 to 45 minutes during long pressing sessions. A lightweight iron with a comfortable grip reduces fatigue.
For planning, digital vs. analog comes down to personal preference. Digital tools like quilt design software let you preview color combinations before cutting fabric. Many quilters use both: digital for color planning, paper for note-taking during construction.
The Crafters Roundtable podcast from Linda's Electric Quilters features conversations with working quilters, sewists, and industry experts. It's a practical resource for picking up workflow habits and project planning strategies.

Keeping the hobby enjoyable long-term comes down to finishing projects. A completed quilt, even an imperfect one, builds confidence for the next project. The Quilt Alliance's community resources highlight how community connection through guilds, online groups, or local classes significantly improves retention for new quilters.
For free-motion quilting once you're ready to move beyond straight-line work, the Free-Motion Quilting Idea Book at $19.19 offers 155 design ideas organized by quilt space, with tips for both domestic and longarm machines.

Starting quilting is genuinely accessible, but the learning curve is steeper when working from scattered sources without clear guidance. Linda's Electric Quilters offers over 50,000 quilting and sewing products, a library of 700+ educational videos, and free shipping on all batting rolls, making it a practical home base whether you're buying your first rotary cutter or sourcing batting for a large-scale project. Shop Linda's Electric Quilters and start your first quilt with the right tools and the resources to use them well.
Frequently Asked Questions
What essential tools do I need to start quilting?
The core tools for starting quilting are a rotary cutter, a self-healing mat, an acrylic ruler, fabric scissors, a seam ripper, and a sewing machine with a quarter-inch presser foot. You'll also need quilting cotton fabric, batting, backing fabric, and thread. A 10-inch square ruler like the Sew Square 10 Ruler is especially useful for squaring up blocks accurately. Most beginners can assemble a functional starter kit for $75-$150 depending on the brands they choose.
How long does it take to make a quilt?
A simple beginner quilt, like a basic patchwork throw, typically takes 10-20 hours spread across several sessions. That includes cutting fabric, piecing quilt blocks, assembling the quilt top, basting the layers, quilting, and binding. More complex patterns with appliqués or intricate quilting designs can take 40-80 hours or more. Working in focused two-hour sessions helps avoid fatigue and keeps seam allowances consistent throughout the project.
What is the difference between piecing and quilting?
Piecing refers to sewing individual fabric pieces together to form quilt blocks and then assembling those blocks into a finished quilt top. Quilting is the process of stitching through all three layers, the quilt top, batting, and backing fabric, to hold them together and add texture. Both are separate stages of making a finished quilt. Beginners often start quilting by machine using straight-line quilting or stitching in the ditch before attempting free-motion techniques.
How much does it cost to start quilting as a hobby?
Starting quilting costs vary widely. A basic setup with a rotary cutter, self-healing mat, acrylic ruler, and a few yards of quilting cotton typically runs $100-$200. A reliable entry-level sewing machine adds $150-$300. Fat quarters and jelly rolls are cost-effective ways to build a fabric stash without large yardage commitments. Choosing a simple beginner pattern and quality thread like a 50-weight cotton keeps early project costs manageable while you develop your skills.
This article was written using GrandRanker


