
Hey everyone. Today we're sewing an envelope-back pillow cover from charm squares, and you'll learn how a four-by-four grid becomes an 18-inch cover with no zipper.
The short version: sew 16 charm squares into a front, add two overlapping back panels, and the cover finishes at 18 by 18 inches for an 18-inch pillow form. It suits a confident beginner who can sew a straight ¼-inch seam.
The finished cover, up front
Finished size: 18 by 18 inches. Each square finishes at 4½ inches; four across by four down gives 18 inches both ways. Seam allowances are ¼ inch throughout, except the hems below. You will use 16 of 42 squares in one pack. Skill level: confident beginner — straight seams, pressing, and hemming.
Why this version?
A pillow cover is the fastest room refresh I know. New cover, same couch, whole new mood. The envelope back is why this works: no zipper to buy, no zipper to fear. Two hemmed panels overlap in back, hold the form, and let you slip the cover off for washing. The plain grid lets prints talk, and sorting by value keeps it balanced. Calmer or bolder? Up to you.
What you need
| Material or tool | What you need | Required or optional |
|---|---|---|
| One charm pack (42 squares, 5 × 5 in.) | 16 squares for the front; 26 left over | Required |
| Backing fabric for envelope panels | ½ yd quilting cotton; cut two panels below | Required |
| Pillow form | 18 × 18 in. form | Required |
| Thread | 50-weight cotton for piecing and seams | Required |
| Rotary cutter, mat, ruler, pins or clips, iron | Cutting, holding layers, pressing | Required |
| Light batting and backing, each about 19 × 19 in. | For a lightly quilted front | Optional |
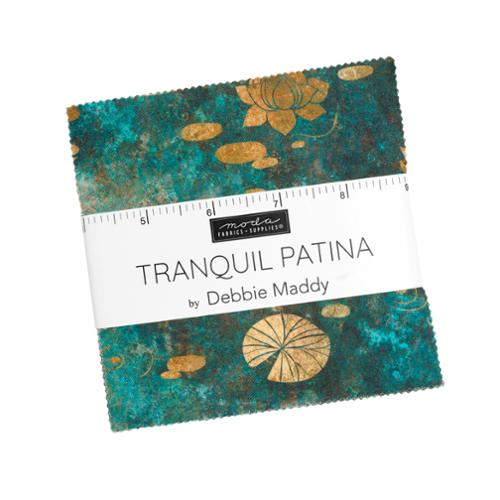
The pack I reach for is the Tranquil Patina Charm Pack. The prints arrive coordinated, so sorting by value is the only planning you owe. For the back, a quiet solid keeps the focus up front — see our read on Natural Bella Solids.
Cutting list
From the pack: choose 16 squares; set 26 aside uncut. From backing fabric: cut two rectangles, each 18½ inches wide by 13 inches tall. After hemming, each measures 18½ by 12½ inches. Optional quilted front: cut batting and backing at about 19 by 19 inches, then trim after quilting. Cut biggest pieces first, so a slip never costs a large cut.
How to sew the pillow cover
- Sort the 16 squares into lights, mediums, and darks. Lay out four rows of four, scattering the darks.
- Step back and squint, or snap a photo. Move any squares that clash.
- Sew each row with a ¼-inch seam. Chain piece — pairs, then fours, then the full row.
- Press row one seams right and row two seams left, alternating down the front, so seams nest.
- Pin rows right sides together at each crossing and sew. Warning: if seams do not nest, stop and re-press — forcing them shifts the row.
- Join the rows, press flat, and check: the front should measure 18½ inches square. For a quilted front, layer, quilt simply, and trim to that size now.
- Hem each back panel: fold one long edge ¼ inch to the wrong side twice, press, and stitch. Each panel now measures 18½ by 12½ inches.
- Lay the front right side up. Place one panel right side down at the top, the second right side down at the bottom, hemmed edges overlapping in the middle. Warning: check the overlap now — if panels only just meet, the form will peek out later.
- Pin around all four sides and sew with a ¼-inch seam, backstitching at both ends. Go slowly where the panels cross; that spot is thicker.
- Clip the corners close to, not through, the stitching. Turn right side out through the envelope opening, poke corners out gently, and press.
- Slip in the form, working it into the corners, and smooth the overlap flat. Just like that.
How does the precut math work?
A charm square starts at 5 inches. A ¼-inch seam on both sides takes away ½ inch, so each finishes at 4½ inches. Four across: 4 times 4½ equals 18 inches. Four down gives the same.
Yield matters too. One pack holds 42 squares; this cover takes 16. The 26 leftovers are not waste — 16 more make a second front, with 10 spare. Back math: two hemmed panels at 12½ inches total 25, minus a 6½-inch overlap, equals the 18½-inch height you need. Pinked edges need no trimming: measure from the body of the square, not the zigzag tips. Sort by value first, chain piece second, press alternating third — that order makes a simple grid look crisp.
Troubleshooting
| Symptom | Likely cause | Fix |
|---|---|---|
| Front smaller than 18½ in. | Seam allowance crept too wide | Test your ¼-inch seam on scrap; adjust your guide |
| Form peeks out the back | Panels do not overlap enough | Re-pin with at least 4 in. of overlap |
| Corners look soft inside | Corners not clipped, or form not settled | Clip closer and work the form into each corner |
| Rows will not nest | Both rows pressed the same direction | Re-press one row the other way |
Questions folks ask
Can I make a different size?
Yes. Re-run the math first: squares across times 4½ inches gives the finished width, and back panels must match the unfinished front.
Do I have to quilt the front?
No. An unquilted front is softer; a lightly quilted front feels firmer and shows stitch texture. Completely up to you.
What if my squares measure a little uneven?
Pinked edges vary a touch. Align the square bodies, ease tiny differences into the seam, and do not stretch.
Can I use a print for the back panels?
Yes. A blender adds texture without fighting the front — see our read on Grunge Basics Green Aqua in Charmed.
Care and easy adaptations
Care follows the components: quilting-cotton prints and backing wash cold, gentle cycle, and dry on low or laid flat. Remove the form first, and follow its maker's label for the form itself. Press warm, not hot. For adaptations, change the mood, not the method: all lights with a few darks reads calm; even thirds of light, medium, and dark reads bold. Or sew a second front from leftovers and rotate covers by season. And hear me: it doesn't have to be perfect. You're your own worst critic. Take your time — it's not a race. If I can do this, y'all can do it.
Shop the Tranquil Patina Charm Pack at Linda's Electric Quilters.
Thanks for sewing along. We'll see you next time. Bye.


