
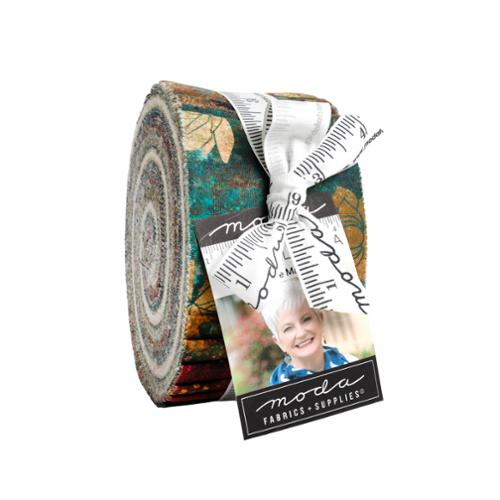
Hey everyone. Today we're sewing a market tote from jelly roll strips, and you'll learn how strip panels, a simple lining, and folded handles become an everyday carry.
The short version: sew two panels of eight strips each, add a lining and two strip handles, and the tote finishes at 16 by 16 inches, flat. It suits a confident beginner who can sew a straight ¼-inch seam.
The finished tote, up front
Finished size: 16 by 16 inches, flat with no boxed bottom. Each strip finishes 2 inches tall; eight stacked strips make the height. Seam allowances are ¼ inch throughout. You will use 10 of 40 strips. Skill level: confident beginner.
Why this version?
A market tote earns its keep everywhere — fabric shop, library, farmers market. This version uses horizontal strips because the roll does the color planning for you. Sort once, sew long straight seams, and the panels look planned. A lining hides every seam allowance inside. No zipper, no hardware, nothing to fear.
What you need
| Material or tool | What you need | Required or optional |
|---|---|---|
| One jelly roll (40 strips, 2½ × about 42 in.) | 10 strips: 8 for panels, 2 for handles | Required |
| Lining fabric | ½ yd quilting cotton; cut two squares below | Required |
| Thread | 50-weight cotton for seams and topstitching | Required |
| Rotary cutter, mat, ruler, pins or clips, iron | Cutting, holding layers, pressing | Required |
| Fusible interfacing, two 16½-in. squares | Extra body for the panels | Optional |
The roll I reach for is the Tranquil Patina Jelly Roll. Its prints arrive coordinated, so a light-to-dark sort is all the planning you owe. For lining, a calm solid rests the eye — see Natural Bella Solids.
Cutting list
From 8 strips: cut two pieces from each, each 16½ inches long — 16 panel pieces, plus a short leftover from every strip. From 2 more strips: cut one 26-inch piece each for the handles. From lining: cut two 16½-inch squares. Cut longest pieces first.
How to sew the market tote
- Sort strips into lights, mediums, and darks. Line up eight for the front and eight for the back — completely up to you.
- Cut the panel and handle pieces from the cutting list. Set the short leftovers aside; three become a pocket later.
- Sew the eight front pieces together along their long edges with a ¼-inch seam. Chain piece — pairs, then fours, then the full panel.
- Repeat for the back panel. Press seams in one panel up and in the other down. Warning: press, don't drag the iron sideways — long strips stretch and bow if you push them.
- Check each panel: 16½ inches square. If you use interfacing, fuse it to the wrong side of each panel now, per its maker's directions.
- Make the handles: fold each 26-inch strip in half lengthwise, wrong sides together, and press. Open it, fold both long edges to the center crease, fold closed, and stitch both long edges. Warning: go slowly — four layers shift.
- Pin one handle to the right side of the front panel, ends down, each end 4 inches in from a side edge, loop toward the panel's center. Baste at the top edge. Repeat on the back.
- Sew the panels right sides together along both sides and the bottom, ¼-inch seam, backstitching at both ends. Leave the top open.
- Sew the lining squares right sides together the same way, but leave a 4-inch gap in the bottom seam. Warning: that gap is your turning opening — close it now and the tote cannot turn.
- Optional pocket: join three leftover pieces along their long edges, hem one long side, then stitch the other three sides to one lining panel before step 9.
- Slip the tote, right side out, inside the lining, right sides together. Match side seams, pin around the top, and sew the full circle with a ¼-inch seam.
- Turn the tote right side out through the lining gap. Stitch the gap closed, tuck the lining inside, press the top edge flat, and topstitch around it about ⅛ inch from the edge. Just like that.
How does the precut math work?
Each strip starts 2½ inches wide. A ¼-inch seam on both long sides takes away ½ inch, so each adds exactly 2 finished inches. Eight strips times 2 inches equals the 16-inch finished height. Width runs the other way: pieces cut at 16½ inches, minus side seams on both sides, finish at 16 inches.
Yield is friendly here. Each strip, about 42 inches long, gives two 16½-inch panel pieces — 33 inches used, with a short piece left over. Eight strips fill both panels, two more make handles, so 10 of 40 strips build the tote and 30 stay rolled for next time. Pinked edges need no trimming: measure from the strip's body, not the pinking tips. Sort by value first, chain piece second, cut longest first.
Troubleshooting
| Symptom | Likely cause | Fix |
|---|---|---|
| Panel measures under 16½ in. | Seam allowance crept too wide | Test your ¼-inch seam on scrap; adjust your guide |
| Panels bow like a banana | Iron dragged sideways, or strips pushed | Press up and down; let the machine feed |
| Handle looks twisted at the top | One end flipped before basting | Unpick the basting, lay the loop flat, re-pin |
Questions folks ask
Can I box the bottom?
Yes, but do the math first: boxing takes height and width from the flat size, so cut panels bigger to keep 16 inches finished.
Do I have to add interfacing?
No. Without it the tote folds soft and small for storage; with it the tote holds more body. Completely up to you.
What if my strips measure a little short?
Trim every panel piece to the shortest length, then recheck the finished width with the seam math above.
Can I use a darker lining?
Yes. A deeper solid adds contrast — see our read on Black Bella Solids.
Care and easy adaptations
Care follows the components: quilting-cotton strips and lining wash cold, gentle cycle, and dry on low or laid flat. Press warm, not hot. For adaptations, change the sort, not the method: group color families in bands for a bolder tote, or run one dark strip at each panel's base. Add the leftover pocket, or skip it. And hear me: it doesn't have to be perfect. You're your own worst critic. Take your time — it's not a race. If I can do this, y'all can do it.
Shop the Tranquil Patina Jelly Roll at Linda's Electric Quilters.
Thanks for sewing along. We'll see you next time. Bye.


