
Hey everyone. Today we're cutting fat quarters into 5-inch squares and sewing an envelope-back pillow cover.
The short version: cut 24 squares from two fat quarters: 16 for the front, two for a seam check. Back panels: cut two at 18½ by 13 inches; double-fold one long edge of each ¼ inch twice, and each then measures 18½ by 12½ inches, giving a 6½-inch overlap. The cover finishes at 18 by 18 inches for an 18-inch form and suits a confident beginner.
What is the finished size, and what are the key numbers?
The pieced front measures 18½ inches square. Finished size: 18 by 18 inches. Each square finishes at 4½ inches; seams are ¼ inch. You cut 24 squares, use 16; two spares are your test pair. Skill level: confident beginner. Honest note: this is a paper-planned project, not sewn or tested.
Why make this version from fat quarters?
Fat quarters let you cut your own squares and pick the prints. Each shows at 4½ inches finished. The envelope back needs no zipper: two hemmed panels overlap and hold the form.
What do you need?
| Material or tool | What you need | Required or optional |
|---|---|---|
| Fat quarters, 18 by 21 in. | 2 for the front; 24 squares cut, 16 used | Required |
| Backing fabric | ½ yd quilting cotton; two panels below | Required |
| Pillow form | 18 × 18 in. form | Required |
| Thread | 50-weight cotton piecing thread | Required |
| Rotary cutter, mat, ruler, iron | Cutting, pressing | Required |
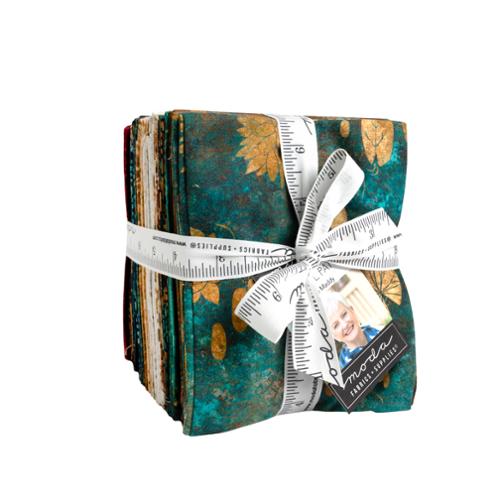
My bundle pick is the Tranquil Patina AB 30 Fat Quarter — a 30-piece 100% cotton bundle, fat quarters 18 by 21 inches, by Debbie Maddy for Moda. A quiet solid suits the back — see our read on Natural Bella Solids.
What gets cut, and from where?
Press and square each fat quarter first: bundle pieces are 18 by 21 inches, and this layout needs at least 15 by 20 inches usable per piece. From a full piece, cut three strips 5 by 21 inches across the 18-inch side, leaving a 3-by-21-inch strip. Sub-cut each strip into four 5-inch squares, each leaving a small offcut. Twelve squares per fat quarter, 24 in all. Cut longest pieces first: strips before sub-cuts. From backing fabric, cut two rectangles 18½ inches wide by 13 inches tall, side by side — at least 37 usable inches across the width. Hemmed, each measures 18½ by 12½ inches.
How do you sew the pillow cover, step by step?
- Sort all 24 squares by value. Choose 16; set two spares aside as your test pair.
- Lay out four rows of four, darks scattered.
- Test your seam on the spare pair: sew, press, measure: 9½ by 5 inches. Adjust now, not later.
- Sew each row, ¼-inch seam. Chain piece in pairs, then join pairs.
- Check every row: 18½ inches long, 5 inches tall. Check here, not later: seam drift across three joins steals real width, so fix short rows now.
- Press row one seams right, row two left. Alternate down the front, so seams nest.
- Pin rows at every crossing and sew. If seams will not nest, re-press; forcing shifts the row.
- Join the rows and press; the front should measure 18½ inches square.
- Hem each back panel: fold one long edge ¼ inch to the wrong side twice, press, stitch: now 18½ by 12½ inches.
- Lay the front right side up. Place panels right side down, one at top, one at bottom, hemmed edges overlapping in the middle. Check the overlap as you pin: about 6½ inches — if panels only just meet, the form will peek out.
- Pin all four sides; sew a ¼-inch seam, backstitching at both ends. Go slowly where panels cross.
- Clip corners close to, not through, stitching. Turn right side out, press, and slip in the form.
How does the fat quarter math work?
Each square starts at 5 inches. A ¼-inch seam on both sides takes away ½ inch, so each finishes at 4½ inches. Four across makes 18 inches; four down makes the same.
One fat quarter gives twelve squares; two give 24, and the front takes 16. The eight spares cover your test pair and a cutting slip. Swapping in leftover charm squares? Check the maker's measuring guidance, confirm 5 inches at the specified edge, and sew a test pair first. Back math: two hemmed panels at 12½ inches total 25, minus 18½, leaves a 6½-inch overlap.
What can go wrong, and how do you fix it?
| Symptom | Likely cause | Fix |
|---|---|---|
| Rows end at different lengths | Seam drift across three joins | Re-run the test pair; fix short rows first |
| Form peeks out the back | Panels do not overlap enough | Re-pin for about 6½ in. of overlap |
| Corners will not nest | Both rows pressed the same direction | Re-press one row the other way |
What do people ask before making this cover?
How many covers does one bundle make?
Following this two-fat-quarter layout, the 30-piece bundle supplies fabric for 15 fronts, assuming each piece has enough usable fabric. Envelope backing, forms, and thread are extra.
Can I make a smaller cover?
Yes. A three-by-three grid finishes at 13½ inches (14 unfinished). For the same 6½-inch overlap, cut two panels 14 by 10¾ inches; hemmed, each is 14 by 10¼.
Can I swap in charm squares?
Yes. Check the maker's measuring guidance, confirm 5 inches at the specified edge, and sew a test pair first. Completely up to you.
Can I use a print for the back panels?
Yes. A blender adds texture without fighting the front — see our read on Grunge Basics Green Aqua in Charmed.
How do you care for it, and what can you change?
Care follows the components: remove the form before washing, and follow each maker's care instructions for its part. Adapt by mood: all lights reads calm; scattered darks read bold. It doesn't have to be perfect. You're your own worst critic. Take your time — it's not a race.
Shop the Tranquil Patina AB 30 Fat Quarter at Linda's Electric Quilters.
Thanks for spending a little quilting time with us. We'll see you next time. Bye.


