
Hey everyone. Today we're turning leftover charm pack squares into a six-block scrap sampler. You'll learn three simple block designs and join them together.
We are making a sashed sampler finishing 21 by 30 inches, for a confident beginner with a steady ¼-inch seam.
Leftover charm pack sampler: finished size and block count
Finished size: 21 by 30 inches. Six blocks, each finishing 8 inches square. Sashing finishes 1 inch wide. The border finishes 2 inches wide. Seam allowances are ¼ inch throughout. Before binding, the top measures 21½ by 30½ inches.
Why this version?
Leftover squares tend to sit in a drawer. Repeating three designs keeps them calm. One solid ties mixed prints together.
What you need
| Material or tool | What you need | Required or optional |
|---|---|---|
| Leftover charm squares (5 in.) | 24 squares: 12 light, 12 medium or dark | Required |
| Coordinating solid yardage | ¾ yd for sashing, border, and binding | Required |
| Backing cotton | 1 yd, cut as one 25 by 34 in. piece | Required |
| Low-loft batting | One 25 by 34 in. piece | Required |
| Thread | 50-weight cotton | Required |
| Rotary cutter, mat, ruler, pins, iron | Cutting, trimming, pressing, basting | Required |
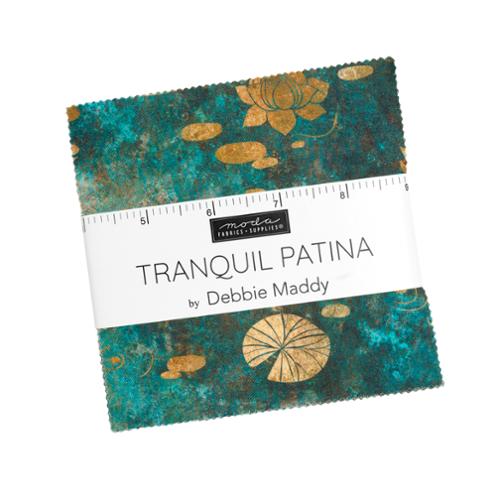
Short on leftovers? The Tranquil Patina Charm Pack holds 42 cotton squares, 5 inches, by Debbie Maddy for Moda. This sampler uses 24 squares: 12 light and 12 medium or dark, — check the value balance first. For more on choosing neutrals and sashing, read our Natural Bella Solids and Etchings Stone Bella Solids guides.
Cutting list
From 4 light and 4 dark squares, cut each into four 2½-inch squares for the checkers: 32 small squares. Keep the other 16 whole.
From the solid, longest pieces first. The plan assumes at least 40 inches of usable width. Cut three 2½-inch strips across the width for borders: cut two to 30½ inches for the sides, and subcut one into two 17½-inch end pieces. Cut two 1½-inch strips for sashing: subcut one into two 17½-inch pieces, the other into three 8½-inch pieces. Last, cut three 2½-inch strips for binding. Total: 18 inches of your ¾ yard.
How to sew the sampler
- Sort all 24 squares by value. Pick 12 lights and 12 mediums or darks.
- Checker blocks, make 2: sew small squares into four rows of four, alternating light and dark. Press rows in opposite directions.
- Join the rows, nesting seams. Pin at every join — small squares drift fast. Check: 8½ inches square.
- Triangle blocks, make 2: use four light and four dark whole squares. Pair each light with a dark, right sides together. Draw a diagonal on the light square's back.
- Sew ¼ inch on both sides of that line, then cut on the line: two units per pair, eight in all. Go gentle — those cut edges are bias and stretch if you pull.
- Press each unit toward the darker fabric. Then trim to 4½ inches square, diagonal seam corner to corner on your ruler.
- Lay four units in a 2-by-2 grid, dark triangles pointing to the centre. Sew into a block, 8½ inches square.
- Four-square blocks, make 2: for each block, trim two light and two dark whole squares to 4½ inches each, evenly. Sew 2-by-2, lights diagonal. Check 8½ inches.
- Lay out six blocks in three rows of two. Sew a short 8½-inch sashing piece between the blocks in each row.
- Join rows with the two long 17½-inch sashing pieces. Pin ends and middle — never pull sashing to fit. Centre: 17½ by 26½ inches.
- Add the 17½-inch border pieces to the top and bottom, then the long side pieces. Press toward the border. The top should measure 21½ by 30½ inches.
- Layer: backing wrong side up, batting, top right side up. Smooth outwards and baste well. That gives 1¾ inches of overhang on every side — check it suits your setup.
- Quilt simply: stitch in the ditch along the sashing, or use gentle diagonal lines. Completely up to you. Trim to the top's size.
- Bind it. Join the binding strips end to end with diagonal seams — check for at least 114 inches first. Fold in half lengthwise, sew to the front, mitre the corners, and stitch down at the back.
How does the precut math work?
Every assembled block measures 8½ inches unfinished and finishes 8 inches. A 5-inch square cut in four gives 2½-inch squares; sixteen sewn four across lose three seams: 10 minus 1½ equals 8½. A trimmed 4½-inch unit sewn two across: 9 minus ½ equals 8½.
Yield: 24 squares used — 8 cut into quarters, 8 sewn as triangle pairs, 8 trimmed whole. Using 24 squares from a 42-square pack leaves 18 unused. Sort by value before cutting. Measure charm squares from the body, never the pinked tips. Chain piecing suits the checker rows: feed pairs in order and nothing gets shuffled. Pressing alternate rows opposite ways lets seams nest.
Troubleshooting
| Symptom | Likely cause | Fix |
|---|---|---|
| Blocks are different sizes | Seams crept, or triangle units were not trimmed | Trim units to 4½ in.; check every block at 8½ in. before sashing |
| Triangle points get cut off | The seam crossed the point when joining units | Align the diagonal when trimming; sew a true ¼ in. |
| Checker corners do not alternate | A row was flipped while joining | Lay rows out first; unpick only that row seam and turn it |
| Sashed centre ripples | Sashing was stretched while sewing | Pin ends and middle, then ease — never pull |
Questions folks ask
How many leftover squares do I really need?
Twenty-four: 12 light and 12 medium or dark. Fewer squares still work — make fewer blocks.
Must all the squares come from one collection?
No. Value sorting unifies mixed prints, and solid sashing frames every block alike.
My charm squares do not measure exactly 5 inches. Help?
Measure from the body, not the pinked tips. For checker blocks, each square must yield four full 2½-inch squares. For the other designs, confirm units reach the stated trimming size.
Can I repeat one design for all six blocks?
Yes. Each design uses four squares per block — a checker block's four squares are cut into quarters — so six blocks still use 24 squares: 12 light, 12 medium or dark. It doesn't have to be perfect. Take your time — it's not a race.
Care and easy adaptations
Care follows the components: use the gentlest guidance among your cotton squares, solid, backing, batting, and thread. For adaptations, keep blocks separate, or swap the border solid for a print.
Shop the Tranquil Patina Charm Pack at Linda's Electric Quilters.
Thanks, folks. We'll see you next time. Bye.


