
Hey everyone. Today we're sewing a patchwork waist apron with divided pockets from one charm pack. The body finishes at 27 by 18 inches below its waistband. It suits confident beginners with a straight ¼-inch seam. You'll learn how 5-inch squares become a body and two pockets.
The short version: sew 24 squares into a 6-by-4 grid, eight more into two lined pockets. Back the body, then catch its top inside a folded waistband with ties.
The finished apron, up front
Finished body: 27 inches wide by 18 inches tall, below the waistband. Each pocket finishes 9 by 9 inches, split into two compartments. Seam allowances are ¼ inch throughout. Before backing, the body measures 27½ by 18½ inches. With the waistband, overall height is about 20¼ inches. The strap finishes about 77 inches — roughly 25 inches of tie per side.
Why this version?
A waist apron keeps tools close. Divided pockets hold a phone, a pen, and a notebook. One solid for back, band, and linings calms the patchwork.
What you need
| Material or tool | What you need | Required or optional |
|---|---|---|
| One charm pack (42 squares, 5 in.) | 32 squares used, 10 left over | Required |
| Coordinating solid yardage | 1¼ yd for back, pocket linings, and waistband ties | Required |
| Thread | 50-weight cotton for piecing and topstitching | Required |
| Rotary cutter, mat, ruler, pins, and iron | Cutting, pressing, and turning | Required |
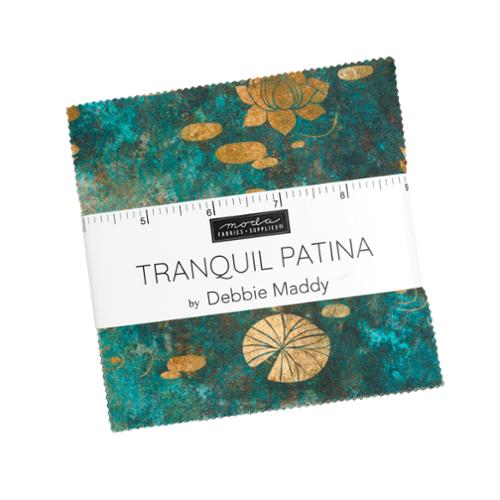
This project features the Tranquil Patina Charm Pack — a 42-piece pack of 5-inch cotton squares by Debbie Maddy for Moda. A warm neutral solid lets prints lead — see Natural Bella Solids.
Cutting list
From the pack: 24 squares for the body, 8 for the pockets. From the yardage, longest pieces first: cut three 5-inch strips across the width for band and ties. Next cut the backing at 27½ by 18½ inches. Last, cut one 9½-inch strip and subcut two lining squares at 9½ inches each. Length used: 43 inches of your 1¼ yards. Usable width needed: at least 27½ inches.
How to sew the apron
- Choose 32 squares from the pack. Keep 10 back as spares.
- Lay out the body: four rows of six. Spread lights, mediums, and darks evenly.
- Sew each row with a ¼-inch seam, chain piecing to keep your order. Press alternate rows in opposite directions so seams nest.
- Join the four rows. Pin at every corner so the seams nest. The body should measure 27½ by 18½ inches.
- Make each pocket front: sew four squares into a 2-by-2 unit, press flat — 9½ inches square.
- Line each pocket: sew a unit and a lining square right sides together on all four sides, leaving a 3-inch gap in the bottom. Clip corners, turn right side out, press.
- Set the pockets side by side in the body's center: each sits 4¾ inches in from its nearest side and 4¾ inches up from the bottom, raw edges as reference, so the two meet in the middle.
- Edgestitch each pocket's sides and bottom — that closes the turning gap too. Stitch down each pocket's center, backstitching at the top, to make two compartments.
- Back it: body and backing right sides together; sew sides and bottom, leave the top open. Clip bottom corners clear of your stitches.
- Turn right side out through the top. Press, then topstitch sides and bottom.
- Build the strap: join the three 5-inch strips end to end, press the joins open, and trim to 78 inches. Fold each short end in ½ inch and press. Turn both long edges under ¼ inch and press. Fold in half lengthwise, wrong sides together, and press. The strap is now 2¼ inches wide, long edges folded in.
- Finish: mark both centers — strap and apron top. Slip the apron top inside the folded strap so its raw edge sits ¼ inch above the strap's lower folded edges. That leaves 18 inches of patchwork showing below the strap. Pin through all layers, ties equal on both sides. Topstitch the strap's lower folded edge full length, and across both short ends. Go slow — corners are thick, and a slipped raw edge will show.
How does the precut math work?
A charm square starts at 5 inches and finishes 4½ inches wide once sewn on two sides. Six across give 27 finished inches; four rows give 18. A pocket front is a 2-by-2 unit: 9½ inches before lining, 9 inches after.
Yield: one pack holds 42 squares; this apron uses 32, so 10 stay back as spares. Sort by value first. Check several squares against your ruler to see where the 5-inch measurement falls on the pinked edges. Use that reference consistently for your ¼-inch seams; two joined squares should measure 9½ by 5 inches after pressing. Chain piecing keeps rows in order; alternating press directions let seams nest. Cut longest yardage pieces first, smallest last — cutting economy at work.
Troubleshooting
| Symptom | Likely cause | Fix |
|---|---|---|
| Body rows do not line up | Seams crept wider or narrower than ¼ in. | Sew two spare squares together and press: the pair should read 9½ by 5 in. |
| Pocket corners look bulky | Corner allowance was not clipped before turning | Trim corner allowances diagonally, close to — not through — the stitching; press |
| Waistband puckers along the top | Apron edge sits unevenly inside the strap | Pin at center, ends, and every few inches; ease, never pull |
Questions folks ask
Can I make the ties longer or shorter?
Yes. Trim the joined strap to your length before folding, apron centered.
What if my charm pack has fewer than 42 squares?
This layout needs 32 squares. With fewer, make one pocket instead of two — the need drops to 28.
Can I skip the backing and hem the patchwork instead?
You can, but the backing covers every seam allowance and adds weight — the cleaner finish here. Completely up to you.
Do the pockets have to sit in the center?
No. One pocket on your working side works fine, at least 4½ finished inches from the side seam.
Care and easy adaptations
Care follows the components: use the gentlest guidance among your cotton squares, yardage, and thread. For adaptations, change value placement, not the math: dark pockets on a light body read bold; matching pockets nearly disappear. And hear me: it doesn't have to be perfect. A pocket a hair off center still holds your pen. Take your time — it's not a race.
Shop the Tranquil Patina Charm Pack at Linda's Electric Quilters.
Thanks for sewing along. We'll see you next time. Bye.


