
You may not know it. But your closet’s a treasure trove of potential quilting materials.
To be specific, we’re talking about those old T-shirts.
We bet you own forgotten favorites such as that epic concert tee from years ago. The high school championship jersey gathering dust. Or the vacation shirt that screams “I survived that wild hike.”
While these shirts are nice to have, they’re just taking up precious space.
And yes, they could become a cozy and nostalgic custom quilt that wraps you or a loved one every night.
Enter the T-shirt quilt. Consider this the ultimate glow-up for your classic threads.
This quilting project is perfect for beginners with a stack of shirts and big ideas. Even experienced quilters may enjoy creating this craft as gifts for friends and family members.
In any case, people love shirt quilts because they turn “should I toss this?” into “holy cow, this is my favorite blanket ever!”
In this guide, we teach you how to select shirts for quilting. We also share sizing charts, step-by-step instructions, and layout ideas. Whether you're creating a simple lap quilt or a king-size masterpiece, we’ve got you covered. By the end, you'll have the confidence to create a memory keepsake that tells your story.
So, read on and learn valuable quilting tips to get you started.
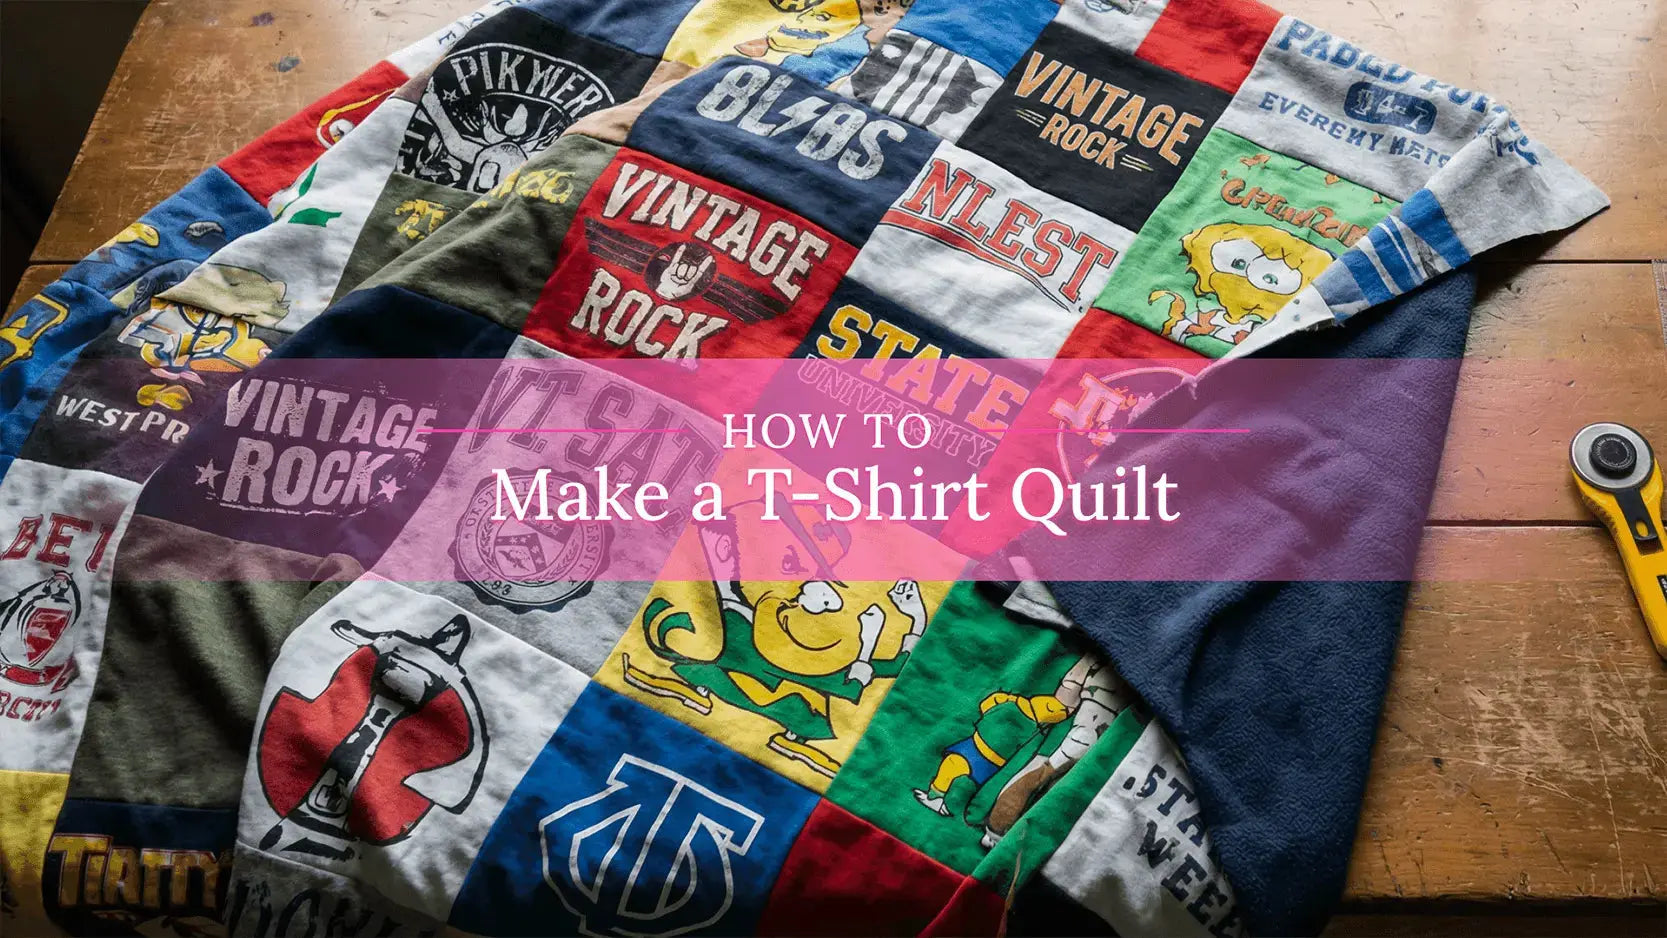
What Is a T-Shirt Quilt?
A T-shirt quilt is a quilt pieced together from the fronts (or backs) of printed shirts. These shirts are turned into a snuggly memory blanket. These quilts are often described as scrapbooking in fabric, but in a giant, huggable, and enduring form.
People make these quilts from high school or college shirts that recall fond memories as students. Sports team tees from youth leagues to adult teams evoke shared victories. Concert shirts bring back the thrills of witnessing live acts. Travel souvenirs from trips preserve past adventures. Even baby onesies or milestone shirts make adorable family heirlooms.
The emotional value shines through. Each block tells a story. When done right, a T-shirt quilt offers comfort with reminders of triumphs, laughs, and shared times. More than that, they are passed down as cherished keepsakes. They bring quiet joy at family gatherings and similar intimate gatherings.
Materials and Tools Needed
Let’s begin by stocking your sewing station like a pro. And no, you don’t have to buy high-end gear. You just need to have reliable essentials that get the job done.
T-Shirts
Have at least 9 to 30 shirts, depending on your quilt size (more on that topic soon). Choose ones that have the most meaning to you. Also, use shirts with big, bold graphics that won't fade after washing. You can even mix sizes if you want. But you only need to make sure to stabilize them later.
Fabric & Materials
These essentials each serve a specific purpose in handling the stretchy nature of knits:
• Fusible interfacing.
This is non-negotiable for stabilizing stretchy T-shirt fabric. It prevents block distortion during sewing and assembly. Choose lightweight options like Pellon P44F or 906F. Or you can use knit-specific brands such as Stabili-TEE or Heat'n Bond. Cut slightly larger than your blocks for full coverage. Apply it to the wrong side with a hot iron (no steam) using a pressing sheet to protect designs. It transforms floppy knits into crisp, sewable pieces without adding bulk.
• Quilt batting.
The middle layer that provides warmth and loft. It also provides that inviting squishiness for snuggling. Cotton or cotton-blend battings (like Warm & Natural or Hobbs 80/20) are beginner-friendly. They're breathable, quilt well without bearding, and maintain shape after washing. Select low to mid loft (1/8 to 1/4-inch thick) based on your quilt size. For T-shirt quilts, avoid super-high-loft polyester unless you’re going for a puffier look.
• Backing fabric.
This creates a smooth, durable bottom layer that protects the batting. In addition, it also gives your quilt a finished feel. Opt for wide, soft options like 108-inch-wide flannel or cotton muslin. These materials drape nicely and complement your chosen T-shirt theme. Your backing should measure at least 2 to 4 inches larger on all sides than your quilt top. This allows for quilting shrinkage and trimming.
• Binding fabric.
This forms the edge treatment that encases raw edges for a clean finish. You'll need about 1/2 yard of 100% cotton (quilter's weight preferred) in a solid or subtle print that coordinates with your shirts. Cut into 2 1/2-inch strips for double-fold binding. Pre-wash it to prevent puckering. Consider matching threads for invisible hand-stitching on the back.
Tools
These basic tools make precision cutting, stable sewing, and smooth assembly, even for quilting newbies. Invest in quality where possible for longevity.
• Rotary cutter, cutting mat, and quilting ruler.
This trio delivers straight, accurate cuts far superior to scissors. These must-haves are essential for uniform 12.5-inch T-shirt blocks. Use a 45mm rotary cutter with a fresh blade, a self-healing mat (at least 24x36 inches), and clear acrylic rulers (6 1/2-inch square for centering designs, 12 1/2-inch for final cuts). Always cut away from yourself on a protected surface to avoid slips.
• Iron and ironing board.
Critical for pressing seams flat and removing wrinkles from shirts. They’re also useful for fusing interfacing securely. Set to cotton/no-steam for interfacing. Use up-and-down presses (rather than gliding) to avoid stretching knits. Additionally, you can use pressing cloth or appliqué sheet to protect screen prints from scorching.
• Sewing machine.
Any reliable model with a straight stitch works. 1/4-inch foot ensures accurate seams. A walking foot (or even-feed foot) is invaluable for quilting thick layers evenly without puckering. Test your 1/4-inch seam allowance on scraps. Also, use polyester all-purpose thread for durability.
• Pins, clips, or basting spray.
Keeps blocks, rows, and layers from shifting during sewing and quilting. Fine quilting pins or Wonder Clips work best on knits (less poking holes). Spray basting (like Odif 505) temporarily holds the quilt sandwich without pins. Space them 4 to 6 inches apart for control without bulk.
How Many T-Shirts Do You Need?
Block size and preferred dimensions determine the number of shirts you’ll need. Larger blocks mean fewer shirts and a faster project. Most beginners start with 12-inch finished blocks (cut at 12.5 inches to account for seams).
Here's a handy chart for popular shirt quilt sizes:
|
Quilt Size |
Block Size (Finished) |
Shirts Needed (3x3 Grid) |
Shirts Needed (4x4 Grid) |
Shirts Needed (5x5 Grid) |
Total Dimensions (Approx.) |
|
Twin (lap-sized) |
12 inches |
9 |
16 |
25 |
36x48 inches |
|
Full |
14 inches |
12 |
20 |
30 |
56x74 inches |
|
Queen |
12 inches |
16 |
25 |
36 |
48x72 inches |
|
King |
14 inches |
20 |
30 |
N/A |
70x90 inches |
To get this right, here’s the formula for a grid layout: shirts = rows x columns. As needed, add extras for backups or patchwork.
Step 1: Choose and Prepare Your T-Shirts
Begin by selecting shirts with meaningful designs. Ideally, the graphics should be at least 8 to 10 inches in size.
Wash everything in cold water and tumble dry low. This preshrinks knits and reveals if colors bleed (ditch the bleeders). Iron out wrinkles so designs lay flat. Sleeves and backs make fun accents, like patchwork borders. Also, decide early on whether to use front or back shirt designs.
Pro Tip: Snap photos of each shirt's story before cutting. It will make labeling blocks a breeze.
Step 2: Cut the T-Shirts Into Quilt Blocks

Lay the shirt flat, right side up. Then remove sleeves and side seams to make a rectangle. Center the design under your ruler. Cut 12.5-inch squares for 12-inch finished blocks after 1/4-inch seams.
Organize as you cut to streamline planning.
Step 3: Apply Stabilizer (Critical Step)

Because shirts are made from knit fabric, working with them can be tricky. They easily stretch under tension and cause warping without stabilizer. This leads to uneven seams and puckering.
Fix: Before cutting blocks (or right after rough cuts), iron fusible interfacing to the back. Follow package directions (heat, no steam, and let cool) for best results.
Step 4: Plan Your Quilt Layout

Next, arrange the blocks on the floor or design wall.
Here are some good layout methods:
-
Grid layout: Straight rows and columns. Classic and easy.
-
Asymmetrical layout: Creative, off-kilter placement for artsy vibes.
-
Sashing layout: Strips between blocks.
-
Patchwork layout: Mix blocks with solid scraps.
Pro Tip: Alternate busy graphics with solids for breathing room. Balance colors. Don't clump all the reds in one section. Keep logos upright. Switch the blocks around until it feels right. Then snap a quick phone pic to remember your favorite arrangement.
Step 5: Sew Quilt Blocks Into Rows
Now it’s time to start sewing!
Place blocks on the right sides together. Sew with at least 1/4-inch seam allowance. Press seams open to reduce bulk. Join rows by pinning or nesting seams. Make sure to match seams precisely before sewing. Repeat till you've got a flat quilt top.
Step 6: Add Sashing or Borders (Optional)
Next, add sashing (strips of fabric 2 to 4 inches wide) between blocks or rows. This stabilizes wiggly knits, evens spacing, and pops contrast. For borders, frame the whole top. This is completely optional but having it gives your quilt a pro-level polish.
Step 7: Create the Quilt Sandwich
Layer up your quilt sandwich with the quilt top right side up, batting in the middle, and backing fabric right side down. Trim the backing and batting to be 2 to 4 inches oversized all around. Pin every 6 inches or use spray-baste to secure the layers together.
Step 8: Quilt the Layers Together
Stitch it all secure. For beginners, use straight lines horizontally/vertically through seams or stitch in the ditch to hide lines in seam lines. For experienced quilters, use free-motion for swirls. Trim excess batting after.
Step 9: Bind the Edges
Binding seals the deal. Cut 2.5-inch strips and join into one long loop. Sew to the front with 1/4-inch allowance. Fold over and blind-stitch to the back. Machine-finish if you're speedy.
Common Mistakes to Avoid
To save time and avoid frustration, watch out for these shirt quilting errors:
Skipping Stabilizer
T-shirt knits are notoriously stretchy. Without fusible interfacing, your carefully cut blocks will warp during sewing. This leads to rippled seams and uneven rows. Your quilt top will refuse to lay flat no matter how much you press. Always apply stabilizer before assembling. It’s the one step that transforms finicky fabric into something reliable.
Cutting Uneven Blocks
Inconsistent square sizes mean your rows won’t align. In fact, it will create jagged edges and mismatched seams. Measure twice (or thrice!) using a rotary cutter, mat, and acrylic ruler for precision. Uniform 12.5-inch cuts ensure 12-inch finished blocks that fit together seamlessly.
Forgetting Seam Allowance
Quilt blocks are designed around a standard 1/4-inch seam. Skipping or eyeballing it causes blocks to finish smaller or larger than planned. This will throw your entire layout off. Always set your machine to exactly 1/4-inch and test on scraps first. This simple habit keeps dimensions predictable from start to finish.
Poor Planning
Jumping straight into sewing without arranging your blocks can be a nightmare. It can lead to color clashes or upside-down logos. Take time to lay out everything. Thoughtful planning balances busy graphics with negative space for a polished, intentional result.
Stretching Fabric While Sewing
Knits love to pull and distort under tension, especially when pinning too tightly or feeding fabric unevenly through the machine. Use plenty of pins or clips but don’t tug. Let the machine’s feed dogs do the work. Consider a walking foot for even pulling. Steady handling preserves your block shapes through every seam.
Creative T-Shirt Quilt Design Ideas
Here are some design ideas to try on your T-shirt quilts:
Graduation Quilts
Gather class tees, club shirts, and extracurricular logos to create a cap-and-gown centerpiece block. Arrange chronologically from freshman year to commencement for a narrative arc. Add sashing in school colors to unify the memories and celebrate academic triumphs.
Sports Team Quilts
Feature jersey numbers and team logos in a stadium-style layout. Include coaches' shirts or championship tees as highlight blocks in the center. This design works beautifully for youth leagues through adult teams.
Concert Shirt Quilts
Arrange a band’s logos chronologically, like a tour timeline across rows. Or you could also feature different band concerts you’ve seen through the years to capture your past live music experiences.
Travel Memory Quilts
Map souvenir shirts by continent or route. Use pins, flags, or embroidered lines to connect destinations across the quilt. Center a world map block made from contrasting fabric, with each shirt marking a trip highlight.
Baby Milestone Shirts
Transform onesies and “My First” tees into a growth chart quilt. Use blocks sized by age from newborn to toddler. Add embroidered dates or photos transferred to fabric for extra sentiment.
Work/Career Quilts
Collect company shirts and promotion shirts then layout to symbolize career progression. This can be ideal as a retirement or career-change gift.
Hobby Quilts
Whether you’re into cycling or gaming, quilting is an excellent way to preserve your old hobby shirts. Feature your past cycle events or favorite video games. Great for enthusiasts wanting a functional trophy wall.
Pet Quilts
Vet clinic tees, adoption walk shirts, and breed-specific merch in paw-print sashing paths. This can be a cozy and heartfelt present for families who love their pets.
Tips From Experienced Quilters
These practical pointers come from years of turning stacks of T-shirts into polished quilts.
Here’s how you elevate your finished outputs from good to professional.
Start With Large Graphics
Choose shirts with bold designs at least 8 to 10 inches tall. They center easily and forgive minor cutting imperfections. Smaller logos get lost in seams or require fussy trimming. Large graphics also make blocks more visually impactful in the final layout.
Use Sashing if Shirt Sizes Vary
When graphics or shirt cuts don't match perfectly, add 2- to 4-inch sashing strips between blocks to hide inconsistencies and add stability. This technique creates uniform spacing while letting each design breathe. It's especially helpful for mixed shirt sizes. Case in point, they turn potential chaos into intentional design.
Save Scraps for Borders or Extra Blocks
Don't toss sleeve pieces, side scraps, or leftovers. They make perfect patchwork borders, pillow accents, or filler blocks. Cut them into strips for piano-key borders or save for future mini quilts. This maximizes your shirts and adds cohesive texture around the edges.
Label Blocks for Stories
Use sticky notes or fabric pens to mark each block's memory (like “2005 Family Reunion”) before sewing. This preserves the narrative during layout changes and adds sentiment when gifting. Refer back to photos if needed. This can be a simple step that deepens the quilt's emotional value.
Frequently Asked Questions about T-Shirt Quilting
Can beginners make a T-shirt quilt?
Yes, it’s possible for beginners to create a beautiful T-shirt quilt. The key is to take it step-by-step. For instance, they need to stabilize the knit fabric with fusible interfacing to prevent stretching. This guide and other similar instructionals online can help beginners gain confidence quickly.
Do you need interfacing?
Yes, interfacing is essential for T-shirt quilts. This is mainly because the knit fabric stretches easily during sewing. Warped blocks and uneven seams can be a problem. Apply it to the back of each block before sewing to make the material behave like stable cotton. Skipping it often results in frustration and unpicking.
How long does it take?
T-shirt quilting typically takes 6 to 12 hours to finish. Of course, it depends on the project’s complexity. Simpler grids are easier while complex designs with sashing or free-motion quilting add time. Factor in prep time like washing shirts, layouts, and other tasks.
Can you make one without a sewing machine?
Technically, yes. You can hand-sew a T-shirt quilt using sturdy stitches like whipstitch for seams and quilting. However, expect it to be a much slower and more labor-intensive process. Plus, this method is only ideal for small lap quilts. A sewing machine speeds things up dramatically. More importantly, they ensure even seams.
What is the best batting for a T-shirt quilt?
Cotton or cotton-blend batting is ideal for T-shirt quilts. It's breathable, drapes well, and provides just the right loft without overheating. It also washes nicely, which is crucial for memory quilts that get lots of use. Avoid very low-loft synthetics unless you want a flatter look.

Final Thoughts
Now that you've got the full roadmap from shirt selection to final binding, it's time to dig out those old tees and give them new life. This isn't just a sewing project. It's a meaningful act of preservation, turning drawer-bound relics into a warm memory keepsake. Imagine the quiet power of wrapping up in that quilt during a chilly evening. Each block whispers stories of concerts, triumphs, and family adventures that might otherwise fade away.
Picture gifting it to a recent graduate whose college tees now form a timeline of independence. Or draping it across a child's bed made from milestone onesies that mark those fleeting early years. These quilts become family heirlooms, passed down with tales attached. “This block was from Grandma's marathon, that one from your first family vacation.”
The beauty lies in their resilience. They’re durable enough for weekly use yet rich with sentiment that deepens over time. What starts as “I can't throw these away” becomes a tangible legacy that connects past, present, and future.
You don't need to be a quilting expert to make this magic happen. Whether you're threading a needle for the first time or perfecting your free-motion stitches, every finished quilt carries that same emotional weight. Start small if the stack feels overwhelming. Maybe a lap quilt from just 12 favorites. Celebrate each straight seam and pressed row. Then watch how the process itself becomes therapy.
Those old T-shirts aren't waiting to be forgotten. They're ready for their second act as something profoundly purposeful. Pull them out today, and create a story worth wrapping up in.


