
DIY Fabric Face Masks
DIY Fabric Face Masks: Introduction:
Welcome to Day 3 of your crafting adventure! Today, we’ll be making DIY fabric face masks. This project is perfect for beginners and offers a practical solution while allowing you to get creative with fabric choices. These masks are not only functional but can also be personalized to suit your style.
Materials You’ll Need:
-
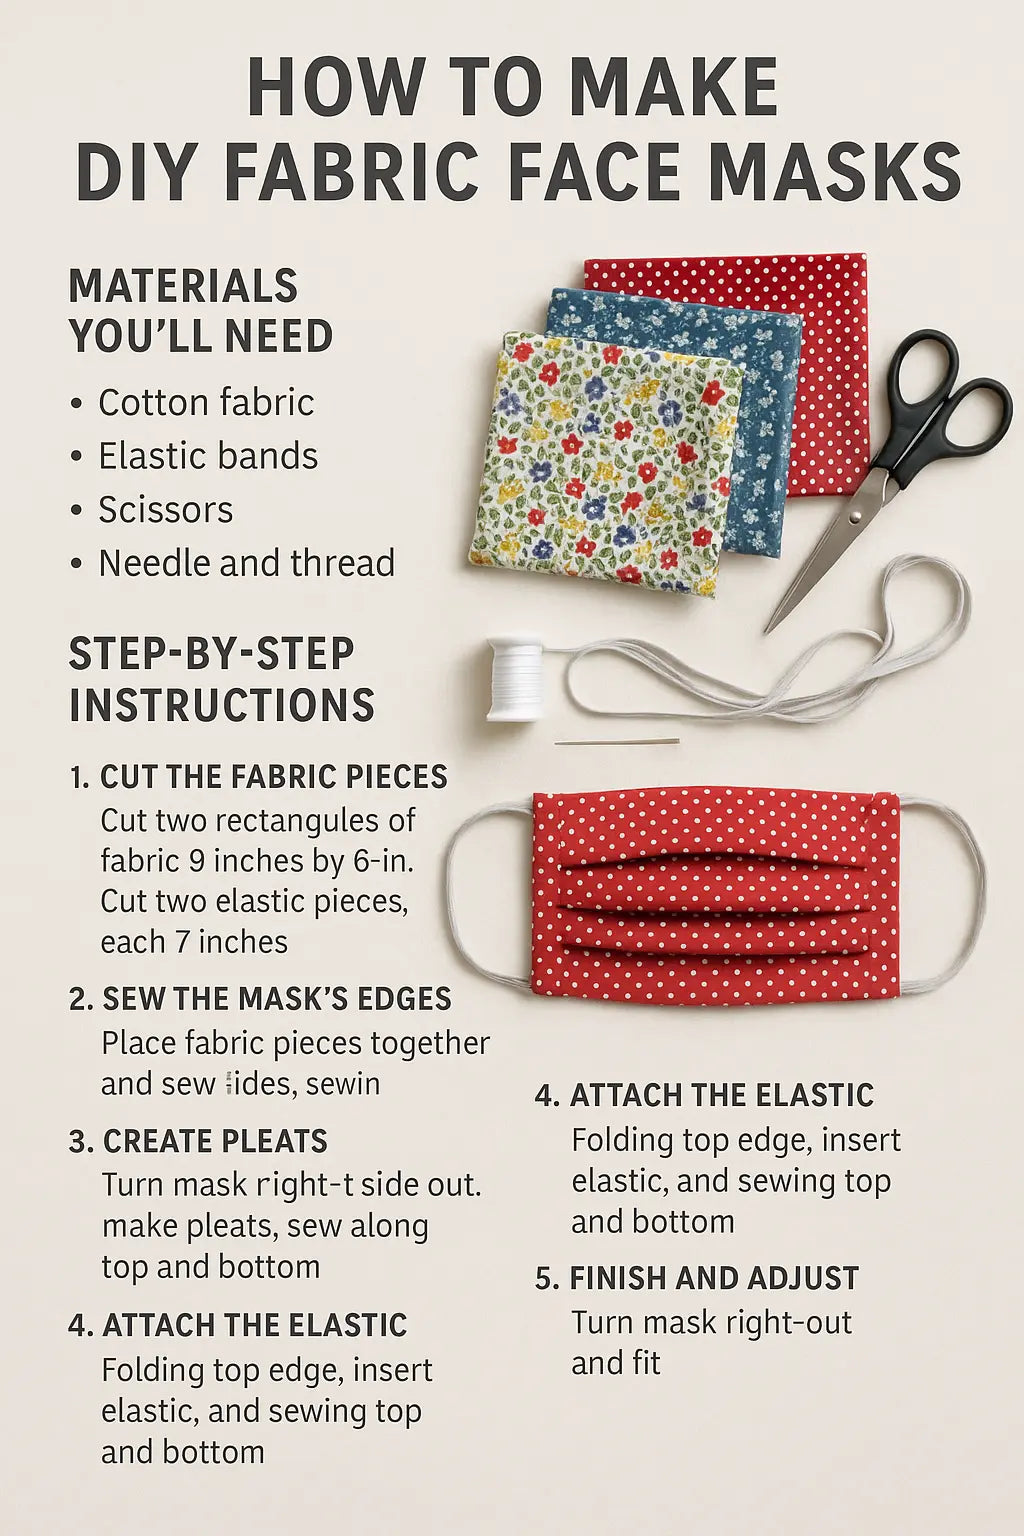
Cotton fabric (2-3 different prints or solid colors)
-
Elastic bands (Approximately 7 inches for each ear loop)
-
Scissors
-
Needle and thread (Or sewing machine)
-
Pins
-
Measuring tape or ruler
-
Iron (To press fabric)
Step-by-Step Instructions:
-
Cut the Fabric Pieces:
-
Start by cutting two rectangles of fabric, each measuring 9 inches by 6 inches. These will form the main part of the mask.
-
Cut two pieces of elastic, each measuring 7 inches. These will serve as the ear loops.
-
-
Sew the Mask's Edges:
-
Place the two fabric pieces right sides together and pin them in place.
-
Sew along the sides and bottom of the rectangle, leaving the top open for the nose and chin area. Use a ¼-inch seam allowance.
-
-
Create Pleats:
-
Once the mask is sewn together, turn it inside out and press it flat with an iron.
-
To add pleats, fold the bottom edge of the mask up into three evenly spaced pleats. Pin them in place.
-
Sew along the top and bottom edges to secure the pleats.
-
-
Attach the Elastic:
-
Fold the top edge of the mask over by about 1 inch, and pin the elastic to each side of the mask.
-
Sew the fabric down to form a casing for the elastic, making sure the elastic is securely stitched in place.
-
-
Finish and Adjust:
-
Turn the mask right side out. Try it on to ensure it fits comfortably around your ears and nose.
-
Adjust the length of the elastic or the pleats if needed to get the perfect fit.
-
Finished Product:
You now have a stylish, comfortable fabric face mask that’s perfect for everyday use. Customize the mask by using different fabric prints, adding a filter pocket, or adding decorative stitching.
Tips for Success:
-
Pre-wash your fabric before starting to ensure any shrinkage is accounted for.
-
If you want a tighter fit, you can use a piece of flexible wire along the nose edge to create a more snug seal.
-
For added protection, consider adding a layer of fabric or a filter between the two fabric layers.


