
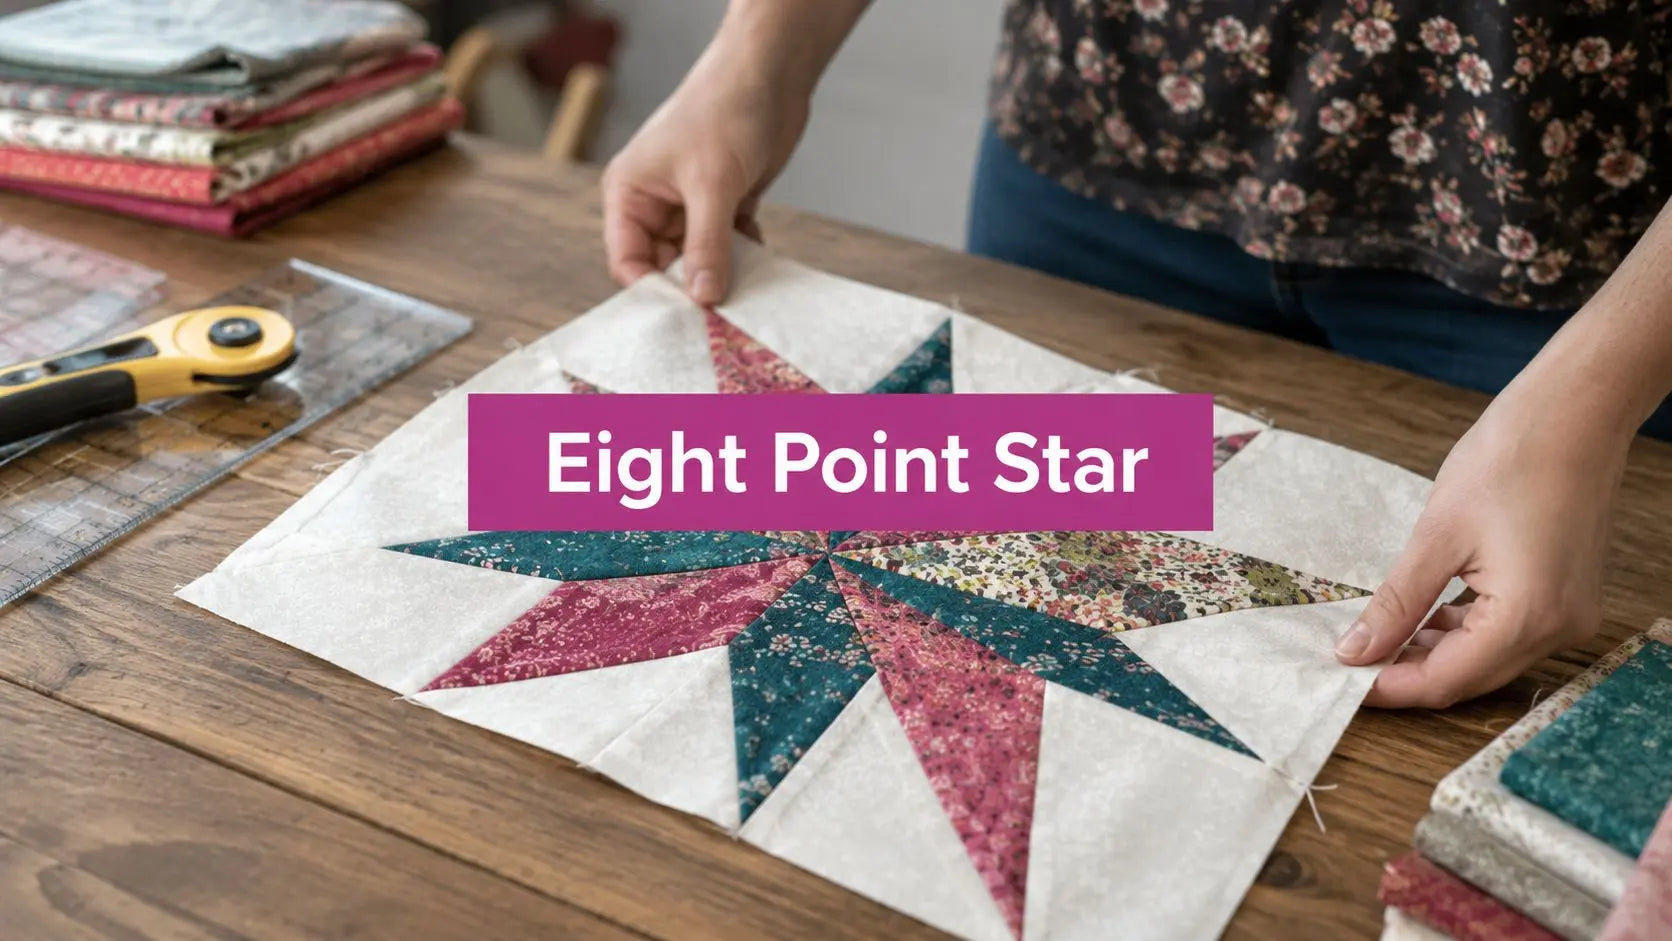
Admiring an eight point star quilt pattern from across the room is easy. Sewing one that lies flat, keeps its points sharp, and doesn't bunch up in the center is where most quilters hit a wall. That frustration usually comes down to two things: fabric choice and precision at every seam. The good news is that this block isn't reserved for advanced piecers. With the right construction method, careful pressing, and a few trade-offs made early, you can build an eight-point star that looks clean and intentional instead of forced.
Suggested URL slug: /blog/eight-point-star-quilt-pattern
Meta description: Master the eight point star quilt pattern with flat blocks and sharp points. Shop fabric, batting, and finishing tools at Linda's today.
The Enduring Allure of the Eight Point Star
A lot of quilters have had the same moment. You see a star quilt folded over a chair or spread across a bed, and the points look so crisp that the whole thing feels a little out of reach. The eight point star quilt pattern has that effect. It reads as classic, graphic, and skillful all at once.

What makes this design last isn't just the look. It has real history behind it. The eight-point star quilt pattern, known as the LeMoyne Star, was first published in the Ohio Farmer magazine in 1894, and it was named after the LeMoyne brothers, who founded New Orleans in 1718, according to this history of star quilt blocks.
Why quilters keep coming back to it
The block has structure. Eight points create movement without making the layout feel chaotic. In a scrappy quilt, it can feel warm and traditional. In a high-contrast palette, it turns bold and architectural.
That range is part of the appeal, but it also creates problems. A block with this much geometry won't forgive lazy cutting. If the seam allowance drifts, the points blunt. If the pressing gets bulky, the center pops up. If the background fabric fights the star, the shape disappears.
Practical rule: Sharp stars come from repeatable technique, not luck or “good quilting hands.”
The tricky part is solvable
Some quilters learn the eight point star quilt pattern through diamonds and Y-seams. That route can be beautiful, but it isn't the only route. A smart construction choice can remove a lot of the stress without changing the finished look in any meaningful way.
That's why many experienced piecers steer beginners toward methods that reduce bias handling and center bulk. The star still looks like a star. You just don't have to fight it on every seam.
If you're pulling fabrics for this project, it's worth choosing them with the finished star in mind rather than buying first and hoping the geometry works later. A thoughtful start usually saves more frustration than any rescue trick at the ironing board. If you need basics for the finishing stage, browsing batting options early can also help you picture the loft and hand you want in the final quilt.
Gathering Your Supplies and Fabric
Preparation matters more on this block than on many beginner squares and rectangles projects. The eight point star quilt pattern asks for clean cuts, consistent seam allowances, and fabrics that let the shape stay visible. If one of those is off, the block tells on you quickly.

What to put on the table before you start
Use tools that support accuracy, not speed alone.
- Rotary cutter: A sharp blade matters. Dull blades drag the fabric and shift your cut line.
- Self-healing mat: Grid visibility helps with repeat cuts and squaring.
- Acrylic ruler: Clear markings make it easier to align points and trim sub-units.
- Sewing machine with a reliable quarter-inch seam: This block doesn't tolerate wide swings in seam allowance.
- Neutral piecing thread: Keep the piecing thread unobtrusive unless you're intentionally showcasing the seam lines.
- Marking tool: You'll need visible diagonal lines or stitching guides on units like HSTs and Flying Geese.
- Iron and pressing surface: Pressing controls distortion and bulk as much as stitching does.
- Batting and backing fabric: It helps to think ahead about loft and drape instead of treating finishing as an afterthought.
For readers who like to keep project planning on one page, our team often points people to a related tutorial before they buy yardage, especially when they haven't settled on quilt weight or drape. This guide on how to choose the right quilt batting helps sort that out before the top is finished.
Fabric choice makes or breaks the block
Fabric selection often poses a challenge for many beginners. Busy backgrounds can swallow the star shape. A solid or small-scale background usually does a better job of keeping the points visible. At the same time, beginners often struggle with solids in the star itself because solids magnify slight alignment errors, while prints tend to be more forgiving, as discussed in this community conversation about eight-point star frustrations.
That sounds contradictory at first, but it isn't. The sweet spot for many first attempts is this:
- Background: Solid or subtle small print
- Star fabric: Print, tonal, or textured read
- Center square: High enough contrast to keep the star defined
One fabric that fits that “textured read” category is 082 Maraschino Cherry Moda Grunge - Fat Quarter. It's a Moda Fabrics Grunge Basics print by BasicGrey in 100% cotton, sized 18" x 22", and that kind of surface texture can soften tiny alignment issues better than a flat, unforgiving solid.
A practical yardage planning approach
Exact yardage depends on your block size, block count, borders, and whether you add sashing. Rather than guessing, plan from the block outward.
| Quilt plan | What to calculate first | Why it matters |
|---|---|---|
| Wall quilt | Block size and block count | Keeps fabric pull focused and avoids overbuying |
| Throw quilt | Blocks plus sashing or border | Sashing often changes the background total more than expected |
| Bed quilt | Full top layout, backing width, batting loft | Finishing materials affect drape and scale |
If you're undecided on color placement, cut one test block before cutting the whole quilt. That's cheaper than recutting an entire background because the points vanished.
A soft start saves fabric. It also saves morale, and that matters on a pattern with this much precision.
Choosing Your Method and Cutting Your Fabric
A lot of eight-point star trouble starts before the first seam. The block can look simple on paper, then open up with a puffy center, chopped points, or units that refuse to lie flat because the cutting plan did not match the construction method.
Pick the method first. Then cut for that method only.
Comparison of Eight-Point Star Piecing Methods
| Method | Best For | Pros | Cons |
|---|---|---|---|
| Half Square Triangles | Beginners and quilters who want to avoid Y-seams | Straightforward cutting, repeatable units, less handling of bias edges | More seams, which can build bulk at the center if pressing is inconsistent |
| Flying Geese | Intermediate piecers who want crisp directional points | Cleaner star arms, strong point definition, fewer seam intersections in some layouts | Demands accurate marking and a dependable scant quarter-inch seam |
| Traditional diamonds with templates | Confident piecers who want classic construction | Traditional geometry, fewer units to manage visually | Bias edges, start-stop sewing, and template accuracy leave less room for error |
For most quilters, HSTs are the safest place to start because they are predictable. The trade-off is bulk. Every extra seam has to be pressed with intention or the middle of the block will mound up instead of sitting flat.
Flying Geese often produce a cleaner profile through the star points, and I do recommend them for quilters who already trust their seam allowance. If your stitching runs even a thread wide, though, those long points shorten fast. You gain elegance and lose some forgiveness.
Traditional diamonds still have their place. They give a beautiful old-style star, but they ask for control from the first cut onward. If bias stretch already gives you trouble, this is not the method to learn on a large quilt.
Cutting rules that protect your points
Accuracy at the cutting mat saves more blocks than aggressive trimming later.
- Use a fresh blade: Frayed edges and skipped threads often start with a dull cutter.
- Cut fewer layers at once: A shorter stack stays truer, especially on angled shapes.
- Square the fabric before cutting units: If the first edge is off, every piece after it drifts.
- Match your ruler line to the fabric line, not the mat alone: Printed mats can be slightly off.
- Label cut stacks by unit type: Star points, background pieces, and center units get mixed up faster than quilters expect.
Template and diamond piecing need even tighter control. Marking your start and stop points before sewing helps the center join cleanly and keeps the outer points from twisting off line. Those marked intersections matter most where several seams meet, because that is where flat blocks are won or lost.
One more practical rule. Cut one test block before cutting for the whole quilt.
That single sample answers the questions that freeze people at the mat. Is the fabric contrast strong enough? Does the method suit how you sew? Can the center be pressed flat without forcing it? A test block takes a little extra time and usually saves a lot more fabric than it costs.
If you prefer to work from visual layouts before cutting a full quilt, a related on-site tutorial on quilt planning and project setup can help you think ahead to top handling and finishing, especially if this star quilt is heading to a frame later.
Piecing Your Perfect Eight-Point Star Block
For most quilters, the most dependable route to a clean eight point star quilt pattern is the HST method. It replaces the old fear of Y-seams with repeatable units, and it gives you room to correct alignment before the whole block is locked together.

A reliable method uses 6-inch squares to create 16 individual 2.5-inch Half Square Triangles, and sewing first, then cutting, reduces the distortion that often shows up with individually cut diamonds, as shown in this step-by-step eight-point star HST tutorial.
The basic HST workflow
This method stays manageable because every part repeats.
- Pair background and accent squares.
- Mark the diagonal stitching guides.
- Stitch with a scant quarter-inch allowance.
- Cut on the marked lines in the correct sequence.
- Press toward the darker fabric.
- Arrange the units before sewing rows.
That sequence matters. The “sew first, cut later” approach keeps the fabric more stable than handling lots of separate diamond shapes.
What the block needs from your hands
Precision matters most in three places.
- During marking: A crooked guide line becomes a crooked seam.
- During pressing: Ironing back and forth can stretch the bias edge. Press up and down instead.
- During layout: An HST rotated the wrong direction won't look wrong until you're halfway through joining rows.
A lot of point problems start at the board, not the machine. If the units aren't square and consistently pressed, the center will fight you.
Here's a visual walk-through if you like to see the sequence in motion before sewing:
Nesting seams for a flatter block
The center of an eight point star quilt pattern gets bulky fast because so many seam allowances converge. One fix is to press sub-units in opposite directions so the seams “nest” when joined. That makes intersections lock together instead of sliding apart.
Another useful habit is to keep dark fabrics on the same pressing side whenever possible. That improves the visual hand of the block and reduces shadowing on light backgrounds.
“If the block won't lie flat before quilting, quilting won't fix the construction.”
Pro tip from Linda's
Pro tip: To flatten the center where all eight points meet, swirl the final seam. After joining the block, gently release the few stitches crossing exactly at the center so the seam allowances can rotate in a tiny pinwheel. That spreads bulk instead of stacking it.
Our team in McKinney, Texas, tested this kind of center management on an Innova longarm and found that flatter piecing makes tensioning more predictable later, especially when stitching across dense seam intersections. The payoff shows up at the machine. The quilt top feeds more evenly, and you spend less time compensating for a hard bump in the center of every star.
From Blocks to Quilt Top Assembly
Once you have a stack of finished blocks, the project changes. Piecing skill stops being the whole story. Layout becomes the design decision that controls how the quilt feels when it's opened up.

A straight-set layout gives the eight point star quilt pattern a strong, orderly rhythm. Every block reads clearly. If your stars use dramatic contrast, this layout keeps the eye focused on each block as its own unit.
An on-point layout shifts the energy. Turning blocks creates more movement and a more traditional feel, but it also introduces setting triangles and edge decisions. That isn't harder in principle, but it does require cleaner planning.
Three layout directions that work well
- Straight set: Best when each block has a strong center and you want a graphic look.
- On point: Better for a more classic presentation with diagonal movement.
- With sashing: Helpful when blocks vary slightly in size or when the stars need visual breathing room.
Sashing is often underrated. It gives the eye a place to rest, and it creates a small buffer if some blocks finish just a touch differently. Cornerstones can also pull a secondary color through the quilt without making the layout feel crowded.
Designing with meaning in mind
In many Native American quilting traditions, the eight points of the star represent the four cardinal directions and the four stages of life, as noted by the International Quilt Museum's exhibition on Native American star quilts. If you're making a commemorative quilt, a graduation quilt, or a family gift, that symbolism can shape how you place color and repetition across the top.
That doesn't mean every layout needs a symbolic reading. It does mean the block can carry more than geometry if you want it to.
A quilt top starts to feel intentional when the layout supports the story the fabrics are already telling.
Assembly choices that reduce frustration
Before joining rows of blocks, check three things on a design wall or floor:
- Value balance: Make sure dark stars aren't all falling to one side.
- Center direction: Confirm all blocks are oriented the way you intended.
- Background continuity: Notice whether the background creates unwanted lines across the top.
If your blocks are accurate but the top still feels busy, sashing usually solves the problem faster than adding another print. If the top feels flat, cornerstones or a border can restore structure without competing with the star.
This is also the stage where many quilters realize they should've planned backing and batting sooner. That's normal. It's easier to make those finishing choices while the top is still on the design surface than after it's stacked in a project bin.
Quilting Binding and Finishing Your Star Quilt
A strong finish should support the piecing, not bury it. The eight point star quilt pattern already has a lot of geometry, so the quilting lines need restraint unless you're intentionally going for a dense, show-style surface.
Quilting designs that complement the star
Simple works well here.
- Echo quilting: Repeats the star shape and highlights the piecing.
- Straight-line grid quilting: Keeps the look crisp and modern.
- Light background fills with simpler star treatment: Useful when you want the negative space to do some work without overloading the block.
Batting choice affects that result more than many quilters expect. Loft changes dimension. Hand changes drape. A flatter batting usually supports a graphic star, while a puffier loft can emphasize the quilting texture over the piecing lines.
If you're shopping those finishing layers, this is the stage where it makes sense to compare battings and backing fabrics instead of treating them as an afterthought.
Needles matter over bulky intersections
The center of a star block can be dense, especially if the seams weren't fully swirled or nested. On a domestic machine, that can show up as skipped stitches or slight deflection. On a longarm, it can disrupt stitch formation if the needle isn't suited to directional penetration through bulky spots.
Our team in McKinney, Texas, tested this on an Innova longarm and found that 16 MR 3.5 R Point Regular Sharp 134MR is a useful option when stitching over thick star centers because the multi-directional design helps maintain clean penetration.

For quilters who like seeing products and finishing discussions in action, embedding a live shopping clip or product walk-through here can be useful. It keeps the decision tied to real machine handling rather than abstract specs.
Binding and aftercare
Binding frames the quilt. A contrasting binding sharpens the edge of the design. A blended binding makes the top feel calmer. Neither is automatically right. The better choice depends on whether you want the eye pulled outward to the border or held inside the stars.
After binding, storage and washing deserve attention, especially if the quilt includes dark star fabrics against lighter backgrounds. For general care practices, this guide on washing and storing quilts from SouthShore Fine Linens is a practical reference to keep bookmarked.
A careful finish does two things. It protects the work, and it lets the piecing stay the star of the quilt.
Eight Point Star Quilt Pattern FAQ
Why do my star centers get bulky and lumpy
You finish a block, set it on the table, and the center sits up like a little knob. That usually means too many seam allowances are meeting in one spot without a plan for where that bulk should go.
In eight-point stars, pressing makes the biggest difference. Nested seams help, but the primary fix is often at the center itself. Swirling the seam allowances around the middle spreads the layers so they do not stack directly on top of each other. If the center is already stiff and thick, reopen a few stitches, redistribute the seam allowances, and press again. More heat alone rarely fixes it, and it can stretch the block out of square.
What fabric should beginners use for an eight point star quilt pattern
Choose fabric that helps you see the shape clearly and forgives small inaccuracies. A small-scale print, tone-on-tone, or textured solid for the star usually works well. Pair it with a calm background that does not compete with the points.
Solids are less forgiving.
They show every wobble in a point and every seam that is a thread off. I like solids for experienced piecers or for quilters willing to make a test block first. If fabric choice has you stuck, start with contrast and clarity. A readable quilt top beats a stack of beautiful fabrics that never get cut.
How do I keep the points sharp
Sharp points start before sewing. Accurate cutting matters, but so does leaving enough fabric beyond the tip so the point survives the seam allowance. On diamond and triangle versions, mark your start and stop points at the corners and sew exactly to those marks. That small step keeps the unit from pulling out of shape and helps the star meet cleanly at the center.
Trimming matters too. If you trim aggressively, the point gets blunted before the block is even assembled. Check each unit before joining it to the next one. The point should sit just inside the seam line, not right on the raw edge.
Why won't my block lie flat
A flat block usually comes down to three trouble spots:
- inconsistent seam allowance
- units joined before they were squared up
- stretched bias edges from pressing or handling
The fix is easier when you isolate the problem. Lay the block flat and look for the first place it starts to ripple or twist. In my experience, one quadrant is often responsible for the whole block. If that section measures off, replace only that unit instead of remaking the entire block.
Is the HST method better than diamonds
If your priority is a flat block with crisp points, half-square triangles are often the easier method to control. They give you straight edges for assembly, and they reduce the amount of fussy matching at the center. That makes them a solid choice for beginners and for anyone making a full quilt instead of a single show block.
Diamond piecing gives a traditional look many quilters love, but it asks for more precision in cutting, marking, and pressing. Neither method is automatically better. The better choice depends on whether you want simpler construction or the satisfaction of a more traditional build.
If you're ready to turn your eight point star quilt pattern into a finished project, browse the fabrics, batting, needles, and notions at Linda's Electric Quilters to pull together the materials that match your method and your finish.


