
You're probably standing at your cutting table with one basic rectangle ruler in hand, looking at a pattern that calls for curves, wedges, or perfect trimmed units, and wondering if you really need another tool. That's the moment most quilters hit with specialty quilting rulers. The short answer is yes, sometimes you do. Not because the ruler wall is trying to tempt you, but because certain quilt shapes are easier, safer, and more accurate when the tool matches the job.
At Linda's in McKinney, we see this all the time. A quilter buys fabric for a Dresden, an orange peel, or ruler-guided longarm work, then realizes the standard ruler that handles strips and borders doesn't solve every problem. Specialty quilting rulers help you cut with intention, square units cleanly, align grain, and guide stitching in ways a plain straightedge can't.
Suggested URL slug: /blog/specialty-quilting-rulers
Meta description: Learn how specialty quilting rulers work, which ones you need, and shop tools at Linda's to finish your next quilt project.
Beyond the Basic Rectangle What Are Specialty Quilting Rulers
Walk into any quilt shop and the ruler display can feel like a language of its own. Long rectangles. Tiny trimmers. Curves. Wedges. Hexagons. The good news is that you don't need to memorize them all at once.
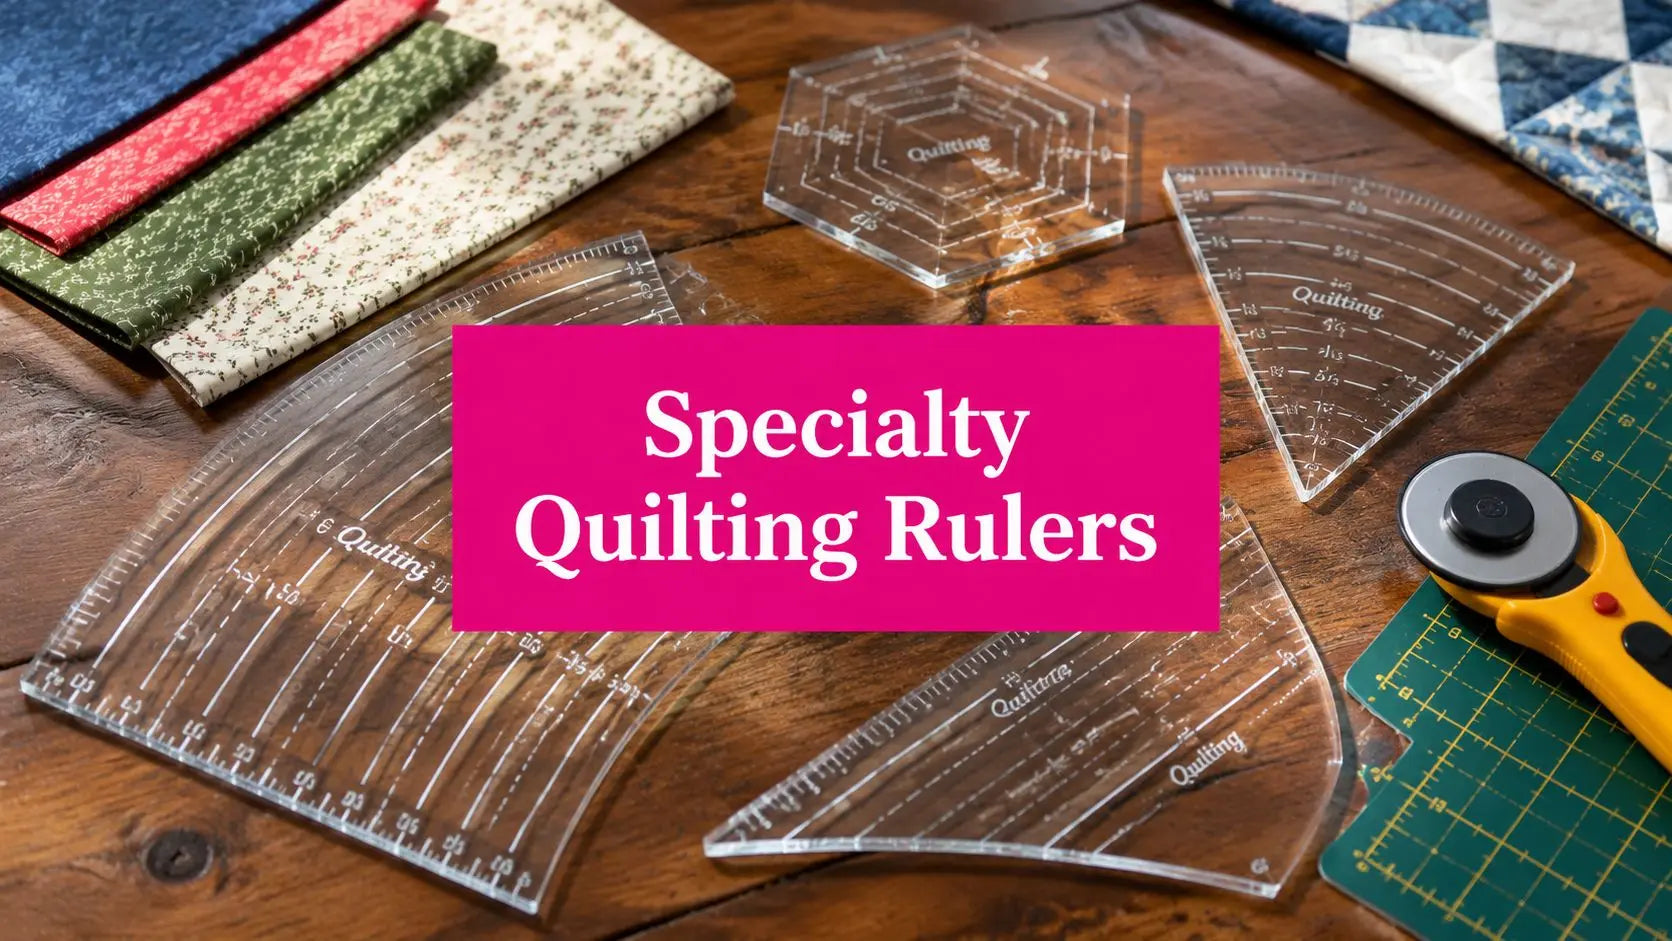
Specialty quilting rulers are precision tools designed for a specific task that a standard ruler doesn't handle well. According to this quilting ruler guide, they're typically made from clear acrylic, usually 1/4-inch thick, and include grid lines, measurement marks, and angle markings such as 15°, 30°, 45°, 60°, and 90°. That combination lets you do more than measure. It helps you align, trim, and repeat shapes accurately.

Why clear acrylic matters
The transparency is one of the biggest reasons these rulers work so well. You can see the print, the weave, and the edge of the fabric underneath. That matters when you're fussy cutting, trimming a unit to preserve the point, or lining up a stripe.
It also matters for grain. The same guide notes that proper grain alignment can reduce warp by up to 20% in finished pieces, because you're cutting along the straight grain instead of letting the fabric drift off line. For quilt assembly, that's a quiet advantage that pays off later when seams nest better and blocks stay square.
Practical rule: If a ruler helps you repeat a shape or trim a unit the same way every time, it's doing a specialty job, even if it looks simple.
What makes a ruler “specialty”
Not every specialty ruler is fancy. Some are just highly specific.
A few common examples:
- Curved rulers help with scallops, orange peel shapes, and gentle arcs that are hard to draft by hand.
- Wedge rulers make Dresden Plate blades and fan units consistent.
- Triangle and unit trimmers help trim pieced units so seam lines land where they should.
- Machine quilting rulers guide a ruler foot for straight lines, arcs, and repeated motifs on a domestic or longarm machine.
If you want perfect curves, you need a ruler that gives you a repeatable curve. If you want crisp points on a trimmed unit, you need a ruler that accounts for seam allowances. That's the essential reason behind specialty quilting rulers. They remove guesswork.
If you're gathering supplies for a new quilt, it also helps to pair ruler choices with your other materials, especially batting, because the loft and hand of the finished quilt can influence how sharply your piecing and quilting show.
Choosing Your Tools Key Selection Criteria
A ruler can look right and still be wrong for the way you quilt. Consequently, many quilters get frustrated. They buy based on shape, then discover the markings are hard to read, the acrylic feels slick, or the thickness doesn't match the machine setup.

Start with the task, not the brand
When you pick a ruler, ask one question first. What quilting problem am I trying to solve?
If the answer is “cut strips from yardage,” you probably need a workhorse rectangle. If the answer is “trim quarter-square triangle units” or “stitch a smooth arc with a ruler foot,” then a specialty ruler earns its place.
Look closely at these details:
- Marking clarity: Can you read the lines on both light and dark fabric?
- Grip: Does the ruler stay put, or does it drift as you cut?
- Shape logic: Does the ruler match the unit or motif you make often?
- Thickness: Is it meant for cutting on a mat, ruler work on a machine, or both?
Thickness is not a small detail
For longarm and ruler-foot quilting, thickness is a safety issue, not just a preference. This ruler-buying article points out a problem that doesn't get explained often enough. A low-shank style ruler at 1/8" can slide under the foot on a high-shank or longarm machine during the hopping motion. The stable solution for longarm work is a 1/4" (3mm) ruler.
That mismatch causes two kinds of trouble. First, the ruler can shift under the foot and throw off the line you're quilting. Second, it creates an avoidable safety problem near the needle area.
Our team in McKinney, Texas, tested this on an Innova longarm and found the difference is immediate. A properly thick ruler gives the hopping foot a firm edge to ride against. A thin ruler doesn't.
Use 1/8-inch rulers for rotary cutting on the mat. Use 1/4-inch rulers for ruler-guided machine quilting with the correct ruler foot.
Useful extras that support accuracy
Some tools aren't rulers, but they work right alongside them. The 1/4in Guide Ring Pink is a plastic measuring aid worn on a finger to help measure 1/4 inch from the ruler to the stitched line. It also works for hand sewing seam checks, and the set includes multiple ring sizes plus a stand and storage jar.
If you're still sorting out what features matter most, watch a ruler demo before buying. A visual walk-through usually tells you more than packaging copy because you can see how the ruler behaves at speed, whether the markings are practical, and how the hand position affects control. That's also a smart time to browse Linda's quilting ruler and template collection and compare the tools against the kinds of blocks you make.
The Essential Specialty Rulers Catalog
A specialty ruler makes the most sense when you start with the quilting result you want. If you want a scalloped border that repeats cleanly, you need a curve. If you want Dresden blades that all match, you need a wedge. If you want hexagons that line up without trimming each piece into submission, you need a ruler built for that shape.
That is the practical why behind this category.
Rulers for curves, points, and repeated shapes
Each ruler solves a different accuracy problem at the cutting table.
A curved ruler helps you cut or trim arcs with a steady, repeatable shape. That matters for orange peel blocks, scalloped edges, and any design where one uneven curve will catch your eye from across the room.
A wedge ruler controls angle and width at the same time. That is what makes it so helpful for Dresden Plate blades, fan blocks, and other radial designs. Instead of measuring each segment separately, you repeat the same angle until the circle comes together.
A hexagon ruler handles the geometry for you. The ruler keeps the side lengths and angles consistent, which is what lets hexagons nest together instead of drifting out of alignment row by row.
Here's a quick comparison you can use at the cutting table.
Specialty Quilting Ruler Comparison
| Ruler Type | Primary Use | Common Projects | Best For |
|---|---|---|---|
| Curved ruler | Cutting or trimming smooth arcs and scallops | Orange peel blocks, scalloped borders, curved applique prep | Quilters who want soft shapes and smooth visual flow |
| Wedge ruler | Cutting repeated angled segments | Dresden Plate blocks, fan blocks, circular designs | Quilters making radial designs with repeated blades |
| Hexagon ruler | Cutting six-sided shapes with consistent sides and angles | Hexagon quilts, modern geometric layouts, EPP prep | Quilters who want accurate geometry and repeated shapes |
Match the ruler to the problem
A good specialty ruler removes one stubborn step from the project.
If the challenge is a curve, choose a ruler whose arc fits the finished size you want. A ruler that is too shallow or too dramatic for the block will force you to adjust by eye, and that defeats the point.
If the challenge is repeated points or blades, choose a wedge ruler that matches the width and angle your pattern requires. That gives you pieces that stack, sew, and spin into place with less fuss.
If the challenge is precise layout, choose a hexagon ruler with markings you can clearly read on fabric. Center lines and seam allowance references are often more helpful than extra decorative markings.
If the challenge is trimming a specialty unit, use a ruler designed around that unit's seams. A general ruler can measure the outside edges, but a dedicated trimming ruler helps you line up the internal seam lines too. That is often what makes the difference between a block that finishes square and one that slowly creeps off size.
A ruler deserves space in your sewing room when it solves the same shape problem over and over.
Support rulers still do part of the job
Specialty rulers work best alongside a few dependable basics. A small trimming ruler helps with tight unit cleanup. A longer ruler helps with borders and strip cutting. The specialty tool handles the unusual shape. The support ruler keeps the rest of the process orderly.
This is also where many quilters get mixed up about thickness. Rotary cutting rulers for the mat are usually thinner and designed for cutting fabric accurately by hand. Rulers used for ruler-guided quilting on a longarm are thicker because the machine foot rides against them. If you buy a curve or template for machine quilting, check whether it is meant for domestic sewing, rotary cutting, or longarm use before it goes in your cart.
That one detail saves frustration.
Choose by outcome first, then by size, markings, and intended machine use. A specialty ruler is less mysterious when you treat it like a purpose-built template for one repeatable result.
Techniques in Action How to Use Key Specialty Rulers
Owning the ruler isn't the same as trusting it. Confidence comes when you use it a few times and see the result come out clean.

Using a curved ruler for a scalloped edge or curved trim
Curved cutting looks dramatic, but the process is steady and simple.
- Press the fabric first. Any ripple in the fabric becomes a wobble in the cut.
- Place the ruler so the curve sits where the finished edge should land. Check the grain before you cut.
- Hold the ruler firmly with your non-cutting hand. Keep the rotary cutter upright so the blade follows the acrylic edge.
- Cut in one smooth pass if you can. Stop only if your hand position becomes unsafe.
- Mirror the cut where needed. On repeated blocks, check that the curve direction matches the layout.
The reason this works is repeatability. Once the first unit looks right, you can place the ruler the same way for the rest.
Using a wedge ruler for Dresden Plate blades
Wedge rulers remove the math from a Dresden. That's their real gift.
Try this routine:
- Cut a straight strip first so the top and bottom edges are true.
- Align the wedge ruler on the strip according to the blade width your pattern uses.
- Make the first angled cut.
- Flip or slide as needed to make the second cut and complete the wedge shape.
- Keep units stacked in order if you're grading color or print placement around the circle.
A wedge ruler helps because every blade starts with the same angle. That consistency matters later when the plate closes neatly in the center.
Here's a visual tutorial if you like seeing hand placement and ruler movement in real time.
Squaring up is where many blocks get saved
After the fun cutting comes the discipline step. Squaring up.
According to this video reference, the number one essential ruler for most quilt construction is the 8.5 x 12.5 inch size, because many quilt blocks are specifically 12.5 inches and that ruler makes accurate squaring easier. If you only add one versatile rectangle to support your specialty rulers, that's a strong candidate.
For quilters who want a next technique after piecing curved or wedge units, a binding lesson is a natural follow-up because the edge finish can either sharpen or soften the look of those blocks. A related tutorial on quilt binding keeps the project moving without losing momentum.
Advanced Tools for Precision Quilting
Some rulers aren't about cutting fabric at all. They're about controlling stitched lines. That's where advanced quilting tools start to separate into systems rather than single templates.

Ruler systems for machine quilting
On a longarm or domestic machine with a ruler foot, the ruler becomes a guide rail. You're no longer cutting. You're controlling spacing, arc shape, echo distance, and motif placement.
That's where specialized templates help with:
- straight channels and crosshatching
- arcs and clamshell-style repeats
- spacing around blocks and borders
- centered motif placement using alignment lines
Longarm quilters often combine ruler work with pantographs depending on the quilt's purpose. For example, the 001 Stars and Loops Pantograph by Linda V. Taylor is a continuous line pantograph pattern that measures 121" long and comes in 5", 7", and 10" sizes. That's a different workflow than ruler-guided quilting, but many professionals use both depending on whether they want free-flowing edge-to-edge texture or more controlled geometric structure.
When a specialty system is worth it
When considering specialty rulers, quilters often ask about tools like Deb Tucker's Tucker Trimmer. The question usually isn't whether the ruler is clever. It is. The question is whether your project style justifies it.
This discussion of ruler-buying gaps notes that quilters want better guidance on which specialty angle tools and unit systems yield the highest precision for complex blocks such as V-Blocks and peaky or spike triangles, especially since 90% of projects need only basic 6"x24" rulers. That's the right framing.
If you make mostly simple patchwork, a full specialty system may sit unused. If you repeatedly make advanced units that need exact trimming logic, then a system ruler can remove guesswork and improve consistency from block to block.
Buy advanced ruler systems for the blocks you repeat, not the blocks you admire once.
The value isn't only the acrylic. It's the method built into the markings. A good advanced ruler tells you where to place the seam line, where to trim, and how to maintain the intended unit size without drifting off target.
Care Storage and Getting the Most From Your Investment
You finish a quilt top, reach for a favorite ruler, and notice a tiny nick along the edge. Suddenly the tool that helped you cut cleanly last month starts catching fabric or letting the rotary blade drift. Specialty rulers are simple tools, but they behave like measuring instruments. A little care protects both accuracy and safety.

Simple care habits that protect accuracy
Acrylic does not ask for much. It asks for consistency.
Wash rulers with mild soap, lukewarm water, and a soft cloth. That removes lint, marking residue, and skin oils without wearing away printed lines. Skip strong cleaners and rough scrubbers, especially on rulers with detailed measurement marks or specialty angle guides.
Heat is another quiet troublemaker. A ruler left near an iron, in a sunny window, or inside a hot car can warp just enough to affect how it sits on fabric. Even a slight bow matters when you are trimming units or guiding a machine for straight lines.
Storage matters for the same reason. Flat storage works well for many cutting rulers, while upright storage in a dedicated rack can work for larger rulers if they are fully supported and not bent under their own weight. The goal is simple. Keep edges straight, surfaces scratch-free, and markings easy to read.
Separate cutting rulers from quilting rulers
This is the part many quilters overlook.
Thin rulers made for rotary cutting and thicker rulers made for ruler-guided quilting are not interchangeable. On a domestic machine with a ruler foot, or on a longarm with a hopping foot, ruler thickness helps keep the foot riding safely against the edge instead of climbing over it. If you want clean machine-guided curves, channels, or straight lines, the ruler has to match the machine setup.
A good habit is to store these in different groups. Keep mat-cutting rulers near the cutting table. Keep domestic machine rulers and longarm rulers near the machine they fit. That saves time, but above all, it helps prevent using the wrong tool in the middle of a project.
Check the parts that affect results
A specialty ruler does not have to be cracked to cause trouble. Small damage creates small errors, and small errors travel.
Look over the edge for chips or rough spots. Run your finger carefully along the side to feel for nicks. Check for faded markings if you rely on alignment lines for trimming or angle placement. If a non-slip grip has started peeling or smoothing out, replace it so the ruler stays put when pressure goes on it.
Pair ruler care with blade care. A dull rotary blade drags across fabric and pulls harder against the ruler edge, which increases slipping and can scar the acrylic faster.
Organize by function, not by brand
The rulers you use most should be the easiest to reach. At Linda's in McKinney, we often suggest setting up your ruler storage the way you set up your thread or presser feet. Put the tools for one job together so your hands know where to go.
Try a simple system:
- Trimming rulers near the sewing machine for squaring blocks and units
- Long straight rulers by the cutting mat for borders, strips, and large cuts
- Shape rulers in sleeves, folders, or labeled bins so curves, wedges, and templates stay easy to find
- Machine quilting rulers in a separate rack or drawer, sorted by thickness and purpose
That setup helps you buy better, too. When you can see what you already own, you are less likely to purchase a second ruler that does the same job and more likely to notice the true gap in your collection.
A ruler that stays accurate, visible, and matched to the right machine will earn its keep for years.
Frequently Asked Questions About Specialty Rulers
Do beginners need specialty quilting rulers
No. Beginners can make many quilts with a small group of standard rulers. Specialty quilting rulers become useful when a pattern depends on repeated shapes, precise trimming, or ruler-guided machine quilting.
What's the most useful specialty ruler to buy first
That depends on what you make most. For many quilters, a trimming ruler or a medium rectangle for squaring blocks gets used sooner than a very specific shape ruler. If your project is a Dresden, a wedge ruler moves to the top of the list.
Can I use the same ruler for rotary cutting and longarm ruler work
Not always. The overlooked issue is thickness. Thin rulers made for mat cutting can be unsafe for ruler work on a machine, especially with a hopping foot. Match the ruler to the machine setup and foot style.
Are specialty rulers worth it if I only quilt occasionally
They can be, if one ruler solves a repeated problem. A ruler that helps you trim units accurately or cut a shape cleanly can remove frustration even for occasional quilting.
How do I know if a specialty ruler will actually get used
Look at your last few projects. If you keep making the same unit, curve, or border treatment, that's your answer. Buy for your real sewing habits, not for a someday technique.
If you're ready to finish your next project with the right ruler, batting, pantograph, or measuring notion, browse Linda's Electric Quilters. You'll find tools and supplies for piecing, longarm quilting, and the practical details that help a quilt come together cleanly.


