
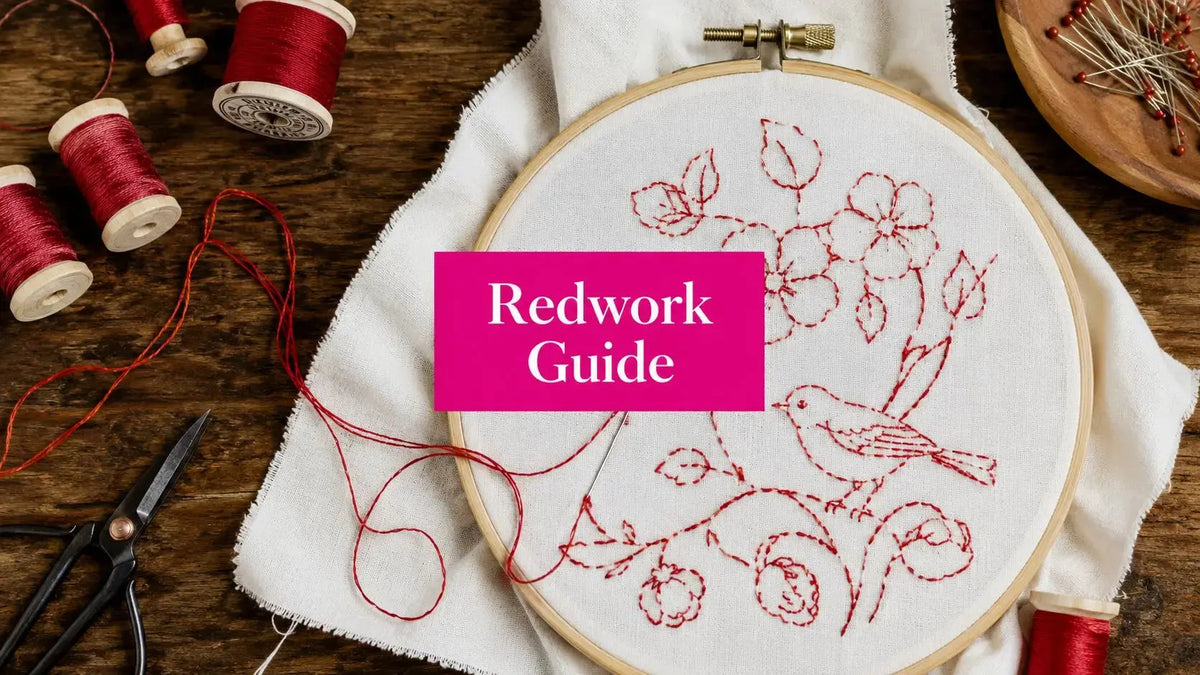
You've stitched a redwork motif that looks crisp in the hoop, then pulled it from the wash and found pink streaks on the white background. That's the moment embroidery red work becomes clear: it's not just a nostalgic style, it's a material choice, a stitch choice, and a washability choice. Get the thread and fabric right, and the technique is straightforward. Get them wrong, and the clean outline look disappears fast.
Why Your Redwork Embroidery Project Keeps Failing (And How to Fix It)
A redwork piece can look perfect when it comes off the machine or out of the hoop, then fail the minute it meets water. The usual culprit is red dye leaching, which is a known problem with red thread, so colorfastness testing isn't optional if the finished work will be washed. Practical makers also keep the water cold and use color-fixatives when they're working on quilts, gifts, or home décor that needs to survive laundering, as noted in the red thread guidance from Maggie Frames, which makes the wash-safety issue explicit. Red embroidery thread mastery and wash safety
What fails first
The first failure usually isn't the design. It's the thread. A bright red outline on white cotton looks clean until the dye migrates into the background, and then the whole piece reads muddy instead of sharp.
A second failure is overconfidence. Makers often assume all red thread behaves the same, then skip testing because the spool looks “good enough.” It isn't.
Practical rule: If the piece will be laundered, test the red thread on a scrap of the exact fabric before you stitch the project.
There's also a mindset shift worth making. Embroidery red work works best when you treat it like a technical process, not just a decorative one. That means checking thread behavior before you commit hours of stitching.
The fix that saves the project
Start with a damp white cloth test on the thread or a stitched scrap. If the cloth picks up color, treat that thread as risky for washable work. When I'm planning something for a quilt back, tea towel, or child's item, I'd rather change thread than hope the wash will be kind.
If you're shopping for a starter kit, look at thread, fabric, and stabilizer together instead of buying them one by one. Linda's Electric Quilters carries materials that fit this kind of workflow, and pairing the right supplies early saves a lot of unpicking later. For the same reason, make sure your fabric choice matches the final use, because a pretty stitch on the wrong ground cloth won't stay pretty.
The History and Defining Features of Redwork Embroidery

Embroidery red work took shape in late-19th-century America, and its strongest popularity sat in the period from 1888 to 1925, with broader references placing the peak use roughly between 1855 and 1925. Its rise was tied to Turkey red, a colorfast red thread developed in Turkey more than 200 years ago, because that dye helped address the old problem of bleeding in washable household textiles. General stores even sold 6-inch muslin squares printed with patterns in red ink before the Civil War, which made the technique available to ordinary households. QuiltIndex redwork exhibit
Why the look is so recognizable
The defining redwork look is plain, almost spare. It uses outline stitches on white or natural fabric, and the finished pieces show up on quilts, blankets, dishtowels, and clothing as line drawings in thread.
That restraint mattered. Cotton cost less than silk, so redwork fit everyday domestic life instead of sitting in a formalwork niche. It was useful and decorative at the same time, which is one reason it stayed visible for so long.
The historical window matters for another reason. Redwork became a hand-stitched domestic craft, then moved into mass teaching and mass pattern circulation in the later 1800s. Schoolgirls were taught it in some settings from roughly the 1860s to the 1920s, and the appearance of pre-printed penny squares and later iron-on transfers in the 1870s made pattern use much easier. Empire Quilters redwork timeline
A lot of people still treat it like nothing more than vintage charm. That misses the point. Embroidery red work also records how textile access changed, because the technique sits right at the intersection of domestic craft and industrial print distribution.
For a modern styling reference, Love The Label embroidered top review shows how line embroidery still reads cleanly in contemporary clothing, even when the garment is not historical at all. Redwork also depends on color behavior, and that matters today as much as it did on household linens. A thread that looks bright on the spool can still bleed after washing, which is why red dye choice and fabric testing decide whether the finished line stays crisp or runs into the ground cloth.
Essential Stitches and Classic Redwork Motifs

Redwork starts with outline stitches, not filled areas. That is why the design reads like a continuous drawing instead of a shaded illustration. In hand work, the core stitches are stem stitch, outline stitch, backstitch, running stitch, and split stitch, with French knots sometimes used for small accents. Embroidery Legacy redwork stitches
The stitches that hold the line
Stem stitch is the most common choice because it follows curves cleanly and keeps the line visually smooth. Backstitch feels firmer and more graphic, which helps on angles and sharper turns. Running stitch is quicker, but it can look too airy if the spacing drifts. Split stitch adds texture and density when you want a slightly heavier line.
Those choices matter because redwork fails fast when the line loses discipline. I see that most often in pieces where the stitch length changes from section to section, or where the thread is too heavy for the motif scale. The design starts to wobble, and once that happens, the eye goes straight to the mistake.
Machine redwork follows the same logic, even if the method is different. The outline should start and end at the same point, with no fills, so the machine builds the classic line by stitching the path in a way that mirrors hand outline work. That is why redwork stays efficient for machine execution, each outline is stitched as a single path rather than a filled shape. Phoebe Moon redwork technique tips
A clean redwork line is a stitching path problem, not a decoration problem.
Motifs that never fight the technique
Classic motifs are easy to recognize because they suit the outline style. Roosters, ducks, flowers, hearts, and anchors all work well because their shapes can be defined cleanly with line work instead of fill.
The motif choice matters just as much as the stitch choice. Redwork looks strongest when the subject has a readable silhouette and clear interior structure, because the line has to do all the visual work. Thin limbs, open petals, and simple curves usually stitch well. Dense shading, tiny interior details, and crowded backgrounds usually do not.
For a modern wardrobe example, the clean line language of redwork pairs naturally with simple motif embroidery on garments. The earlier linked Love The Label embroidered top review shows why outline embroidery still works on clothing without looking dated. On the quilt side, sports and fandom designs can use the same red, black, and white contrast language seen in the #1 Fan pattern.
Pro tip: For machine redwork digitizing, keep the object outline-only, use no fills, and make sure the start and end points coincide. That keeps the stitch path efficient and gives the line its polished, continuous look.
Hand Embroidery vs Machine Redwork Choosing Your Approach

The right choice depends on what you want the piece to do. Hand work gives you full control over tension and placement, which matters on heirloom items and small projects like dishtowels and pincushions. Machine redwork is the faster route for quilt panels and home décor, but it only behaves well when the design is digitized correctly, with outline paths and no fills.
| Criterion | Hand Redwork | Machine Redwork |
|---|---|---|
| Speed | Slow and deliberate | Fast and repeatable |
| Precision | Depends on the maker | Consistent once digitized well |
| Cost | Lower tool count | Higher equipment and digitizing needs |
| Creative flexibility | Very high | More dependent on file quality |
| Skill barrier | Moderate | Lower for stitching, higher for setup |
Where hand work wins
Hand redwork is the better fit when you want the meditative part of the process to matter. You can vary stitch tension, respond to the fabric as you go, and make subtle corrections that feel invisible in the final line.
It's also forgiving for one-off pieces. If you're making a keepsake towel or a small wall hanging, hand stitching lets the project breathe instead of forcing it through a machine workflow.
Where machine work wins
Machine redwork makes sense when you need consistency across larger surfaces. Quilt blocks, pillow fronts, and coordinated décor pieces all benefit from the uniform line quality and repeatability.
If the fabric weight changes, stabilizer choice matters more than ever. That's where Linda's stabilizer selection comes in handy, because tear-away suits lighter fabric while cut-away is often the safer choice for stretchy or heavier ground cloth. If you're shopping the machine path, that material pairing is the difference between crisp lines and distortion.
Recommended Fabrics Threads and Tools for Redwork Success
The fabric should be plain, tight, and stable. White or natural cotton muslin is the safest starting point, with lighter weight working well for hand embroidery and medium weight behaving better for machine stitching on quilts. Loose weave fabric lets the line sink or wobble, and that defeats the whole point of redwork.
What to buy and why
For thread, cotton perle in sizes 5 and 8 works well for hand work, while machine embroidery thread should be polyester or cotton-wrapped polyester if you want more stability. Because red is the problem color, test colorfastness before you stitch a full project, especially if the item will be washed.
Needles matter more than most beginners expect.
- Sharps needles in sizes 8 to 11 work well for hand redwork.
- Machine embroidery needles size 75/11 or 90/14 suit heavier threads better.
- Tear-away stabilizer works for lightweight fabrics.
- Cut-away stabilizer is safer for stretchy or dense materials.
A thread that stitches beautifully but bleeds in the wash is the wrong thread for the job.
| Thread type | Fiber content | Sheen | Colorfastness concern | Best use |
|---|---|---|---|---|
| Cotton perle | Cotton | Low to medium | Needs testing | Hand redwork |
| Cotton-wrapped polyester | Blend | Medium | Usually steadier | Machine redwork on quilts |
| Polyester embroidery thread | Polyester | Medium to high | Often more stable | Machine redwork on décor |
I've seen people chase the prettiest sheen and then regret the first wash. In practice, the smarter move is to match thread behavior to the final use, not just to the spool color. If you want one shopping stop, Linda's Electric Quilters stocks the kinds of fabrics, threads, and stabilizers that fit this kind of project planning.
Step-by-Step Redwork Project Workflow
A rooster block is a good first project because the shapes stay readable and the lines show every mistake. Start with a simple pattern, then transfer it with the method that fits your stitch style. Hand stitchers often use iron-on transfers or traced muslin squares, while machine stitchers usually prefer a paper-backed stabilizer print so the outline lands cleanly in the hoop. Redwork also rewards caution at the testing stage, because a pretty red thread that bleeds will ruin the block faster than a crooked stitch ever will.
How to build the block
- Choose the pattern carefully. Pick a design with clear outlines and few breaks.
- Transfer the motif. Use the method that keeps the lines visible without over-marking the fabric.
- Hoop the materials. Put the stabilizer in first, then mount the fabric taut without stretching it.
- Stitch the outline. Keep the thread path clean and avoid extra long thread tails.
- Finish with a cold wash if needed. Use color-safe detergent and press gently to preserve the line definition.
The biggest habit problem is rushing the hooping. If the fabric distorts before the first stitch, the finished line will never sit right. I check centering twice, then sew the first few inches slowly enough to confirm the tension is behaving. That is where most clean-looking blocks are won or lost.
For a practical reference on naming and marking embroidery designs, the Dirt Cheap Headwear embroidery guide is helpful because it shows how clean lettering and outline placement depend on control, not decoration alone.
The small detail that improves the line
When machine stitching, keep the outline path as even as the design allows, and slow down where curves tighten. That gives the line more body and helps on plain fabrics where a thin single pass can disappear. If the thread is suspect, test it before the project gets near water, because red dye transfer is the failure that can wipe out all the careful stitching.
If you want project ideas that can absorb redwork elements, browse pattern libraries and look for strong shape layouts. Small motifs can turn into larger blocks without losing the classic line look, and they still leave room for practical testing before you commit to a full piece.
Common Redwork Mistakes and How to Avoid Them

The mistakes are predictable, which is good news. If a redwork piece bleeds, puckers, or nests thread on the back, the problem usually started before the first stitch. Most failures come from the same three areas, thread, fabric, and technique.
Troubleshooting by symptom
| Symptom | Likely cause | What to do |
|---|---|---|
| Red marks on white fabric | Dye leaching | Test the thread, switch thread, use cold water |
| Bird's nests underneath | Thread path or tension issue | Re-thread, check the bobbin casing, slow the machine |
| Puckering | Hooping too tight or wrong stabilizer | Rehoop with less distortion, change stabilizer |
| Skipped stitches | Needle or tension mismatch | Change the needle, inspect the thread path |
Red bleeding is the one that hurts most because it can ruin an otherwise perfect block. Test with a damp white cloth before you stitch, and treat any transfer as a warning, not an inconvenience. If a project has already bled, rewash only after you've stabilized the problem, because more agitation can make the stain travel farther.
Thread tangles and looping on the underside usually point to setup, not bad luck. Re-thread the machine, inspect the bobbin casing, and slow your stitching until the line settles. Fabric distortion is the hooping equivalent of a loose foundation, once it's there, every outline shows it.
Clean redwork comes from removing guesswork before the machine ever starts.
The good part is that these failures are preventable. If you choose stable fabric, test the thread, and hoop with care, embroidery red work stays crisp and readable instead of turning blurry at the edges. If you want more help with a specific material stack or machine setup, Linda's customer support and educational videos are the right place to start.
Linda's Electric Quilters carries the fabrics, threads, stabilizers, and project resources that make embroidery red work easier to execute cleanly from the first stitch. If you're ready to build a redwork piece that stays sharp after washing, visit Linda's Electric Quilters and choose the supplies that match your next quilt, gift, or home décor project.


