
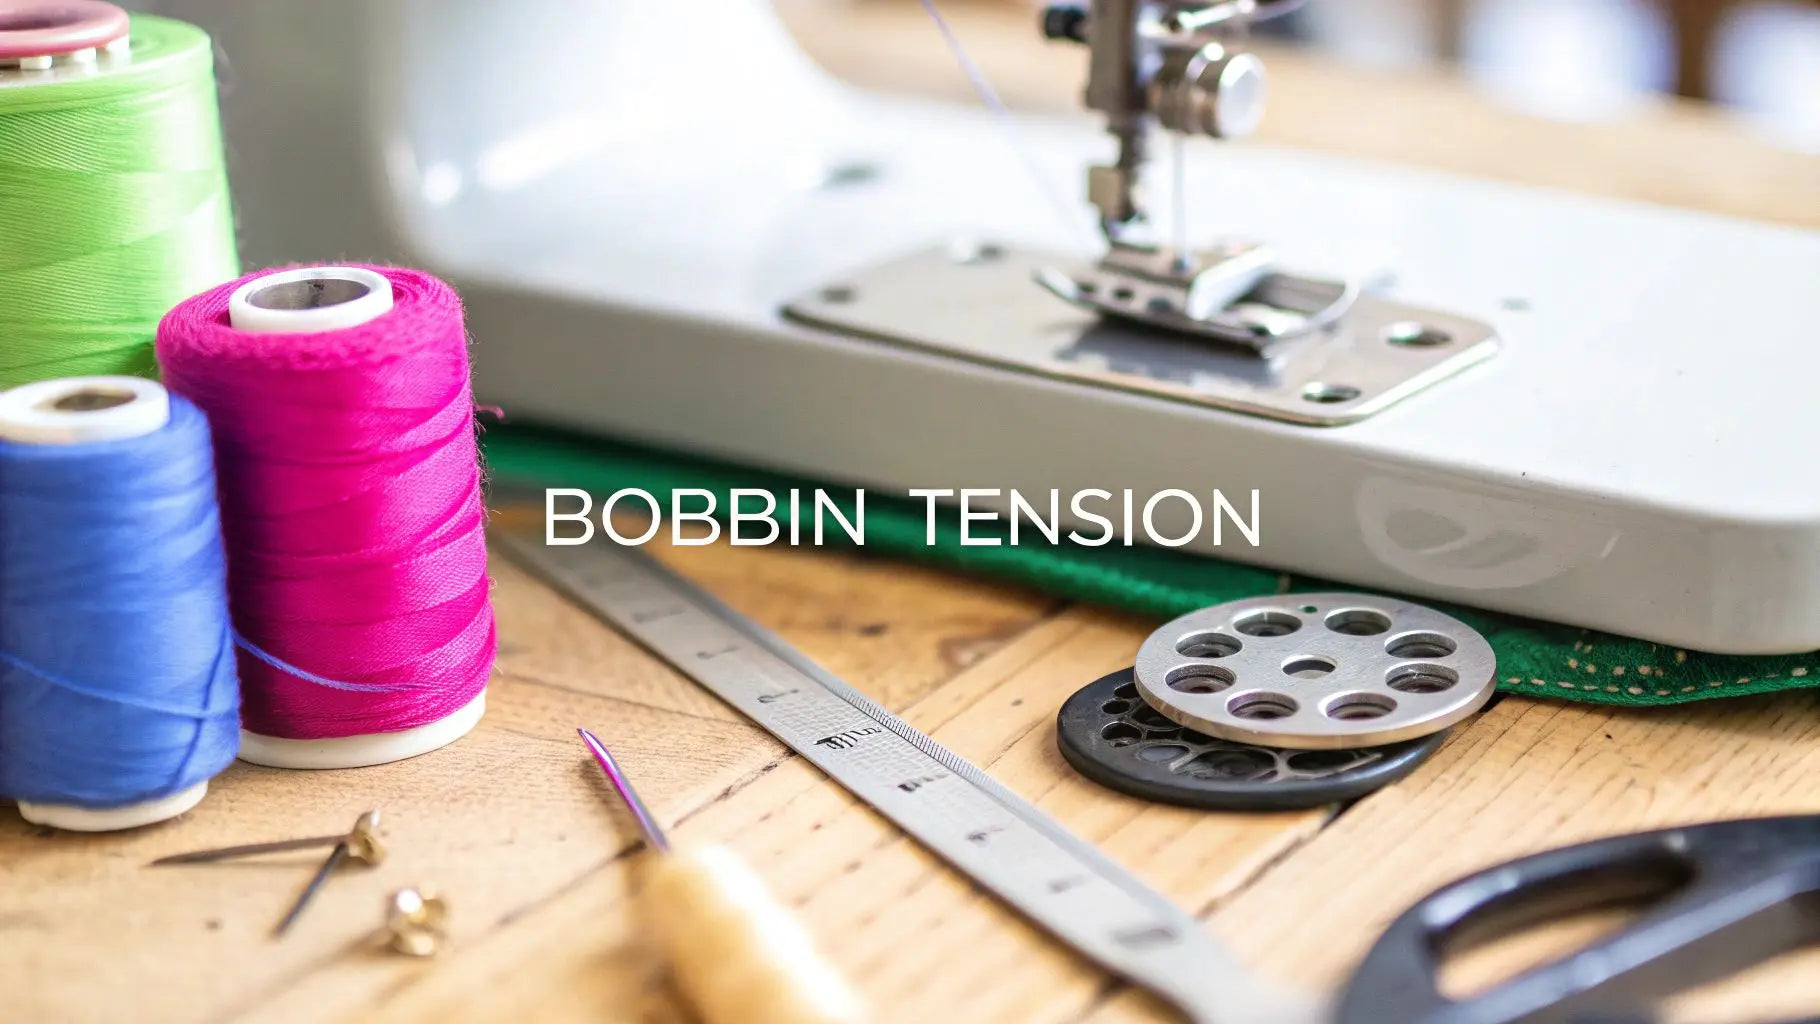
Don't be intimidated by adjusting your bobbin tension! Mastering this simple skill is a key step in any sewing project, and the process is actually quite straightforward. You just need to run a quick stitch test to diagnose the problem, then make a tiny turn of the screw on your bobbin case. Remember: righty-tighty, lefty-loosey.
Most of the time, you'll only need less than a quarter-turn to solve the problem. It’s a fast fix once you learn what to look for, helping you get back to your creative work without frustration.
Why Bobbin Tension Is Your Secret to Flawless Sewing

Before you grab a screwdriver, let’s talk about why bobbin tension is crucial for every project. Think of the top thread and bobbin thread as partners in a delicate dance. For that perfect, strong stitch, they need to meet right in the middle of your fabric layers and lock together seamlessly.
When that balance is off, things get frustrating fast. Have you ever sewn a seam that looks gorgeous from the top, only to flip it over and find a tangled mess of loops? That's the classic sign of a tension problem. It means the top thread is winning the tug-of-war and pulling the weaker bobbin thread all the way through to the back of your project.
Understanding the Stitch Balance
This imbalance can pop up for all sorts of reasons. Maybe you switched to a thicker fabric for your latest quilt, which changes the distance the threads have to travel to meet. Or maybe you're using a different weight of thread for a decorative touch. Any little change can throw the whole system out of whack.
The key is learning to read your stitches. Here’s a quick visual guide to diagnosing the issue:
- Loops on the Bottom: This is the most common issue. It means your top thread is too loose or your bobbin is too tight. Either way, the top thread is getting pulled down too far.
- Loops on the Top: If you can see little dots or loops of the bobbin thread on the top side of your fabric, your top tension is too tight. It's yanking that bobbin thread all the way up.
The goal is a perfect stitch where the "twist"—the spot where the top and bobbin threads interlock—is completely hidden inside the batting or middle of your fabric layers.
Learning to spot these signs is the first, most important step. This foundational knowledge saves you hours of seam-ripping and frustration, allowing you to focus on the joy of creating.
Mastering this one little skill will transform you from someone who just hopes for the best into a confident stitch mechanic. With a well-adjusted machine and high-quality bobbins from Linda's Electric Quilters, you'll have everything you need to finish your project with professional-looking results.
What Kind of Bobbin System Do You Have?

Before you can twist screws or turn dials, you need to know your machine. Figuring out how to adjust bobbin tension starts with one simple question: what kind of bobbin system are you working with?
It sounds technical, but it’s actually pretty straightforward. Nearly every home sewing machine uses one of two setups.
The first is a horizontal or top-loading system. On these machines, you pop open a clear plastic cover near the needle plate and drop the bobbin right in. They’re super convenient, and you can see how much thread you have left at a glance.
Then you have the vertical or front-loading system. This one has a separate metal bobbin case that you load from the front of the machine, usually behind a small door. You put the bobbin inside this case, then click the whole thing into place.
Why Does It Matter for Tension?
The difference isn't just about where the bobbin goes—it completely changes how you adjust the tension. This is the crucial part.
On a top-loading machine, the bobbin case is usually set at the factory, and they don't really want you messing with it. Most of the time, if your stitches are off, you'll be making tweaks to the upper tension dial instead.
With a front-loading system, however, you get direct access to a tiny screw right on the side of that metal bobbin case. That little screw is your best friend for fine-tuning your bobbin tension.
Not sure which one you have? Here’s a quick breakdown to help you spot the difference.
Bobbin System Quick Reference Guide
| Feature | Horizontal (Top-Loading) Bobbin | Vertical (Front-Loading) Bobbin |
|---|---|---|
| Location | Drops in from the top, under the needle plate. | Inserts into the front of the machine. |
| Bobbin Case | Built into the machine, usually plastic. | Removable, separate metal case. |
| Visibility | Easy to see thread supply through a clear cover. | Hidden behind a door; can't see the thread. |
| Tension Adjustment | Tension is often pre-set; adjustments are rare. | Adjusted via a small screw on the removable case. |
Knowing which system you're working with is half the battle won. Once you've got it figured out, you're ready to tackle any tension troubles that come your way.
Bobbin systems aren't just a design choice—they fundamentally change how tension is managed. Vertical systems give you direct control at the source, while horizontal systems rely more on a balanced relationship with the upper thread. You can discover more insights about mastering bobbin tension to learn more.
Now that you know your machine inside and out, you can make sure you’re using the right gear. Finding the perfect bobbins and supplies for your setup at Linda's Electric Quilters will get every project started on the right foot.
Running a Diagnostic Stitch Test to Reveal Issues
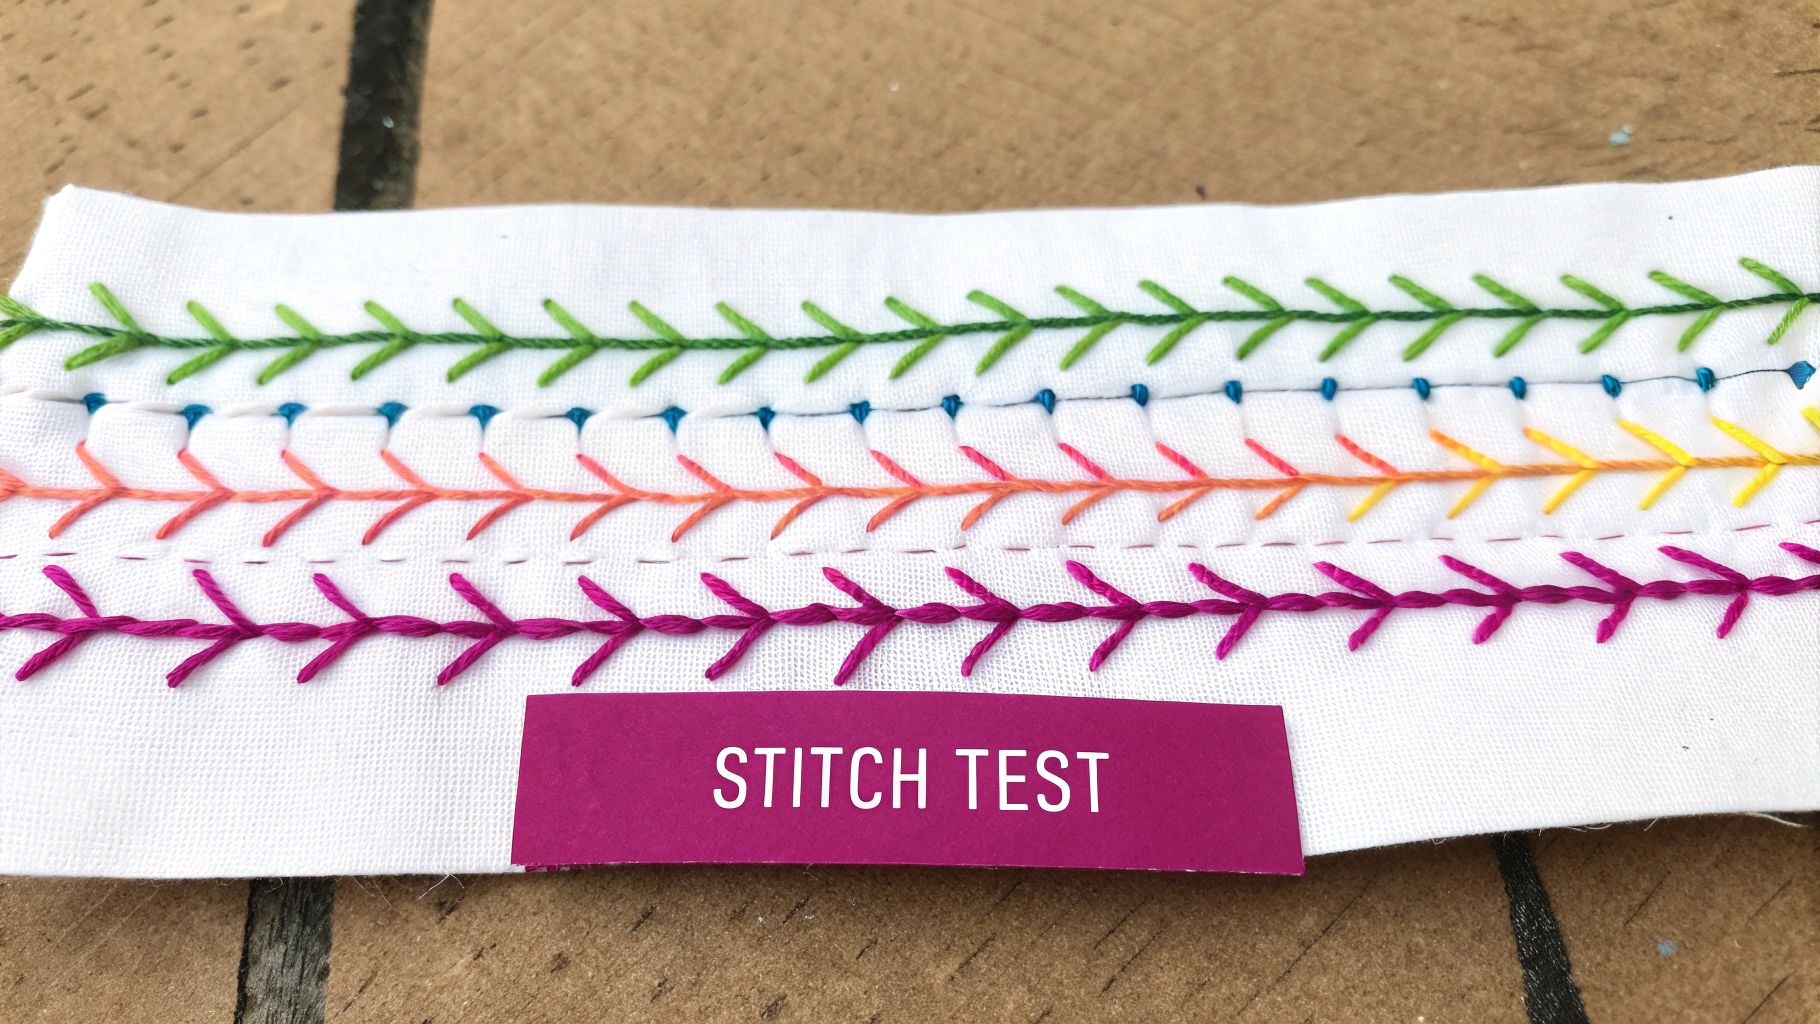
Before you touch a single dial, you need to play detective. The absolute best way to figure out what's gone wrong with your stitch is to create clear evidence. Instead of guessing, a simple diagnostic stitch test will tell you everything you need to know about the tug-of-war between your top and bobbin threads.
This isn't as complicated as it sounds; it’s really just a controlled experiment. The goal is to make the results as obvious as possible, so the first step is picking the right materials for your test. This will make it so much easier to see what’s going on.
Setting Up Your Diagnostic Test
To get a crystal-clear picture of the problem, you need contrast. A lot of it. Grab two spools of thread in colors that are worlds apart—think black and white, or navy and a bright yellow. Wind your bobbin with one color and thread the top of your machine with the other. This stark visual difference is the secret to seeing exactly how those threads are behaving.
Next, find a scrap of plain, light-colored, medium-weight fabric. A piece of muslin or basic quilting cotton is perfect because there’s no busy pattern to distract your eye. Fold it in half so you’re sewing through two layers, just like you would for a standard seam.
The classic method is to use contrasting thread colors and the thread weight you sew with most often. I usually set my stitch length to 2 mm (that’s about 12 stitches per inch) and start with the upper tension dial right in the middle, which is typically a 4 or 5 on most machines. You can always explore more about tension testing to really master the technique.
Reading the Results
Alright, now just sew a straight line a few inches long. Take a good, close look at both sides of your fabric scrap. Here’s what those stitches are telling you:
- Bobbin thread visible on top: See little dots or loops of the bobbin color peeking through on the top side? That means your top tension is too tight and is yanking the bobbin thread right up.
- Top thread visible underneath: If you flip the fabric over and see loops of the top thread color on the bottom, your bobbin tension is probably too tight (or your top tension is way too loose), pulling that top thread down.
Once you have a clear diagnosis, you’re ready to make a precise adjustment. Having the right high-quality thread and fabric for your projects makes all the difference. Stop by Linda's Electric Quilters to stock up on all the essentials you need to achieve that perfect stitch every single time.
Making Precise Adjustments to the Bobbin Case
Okay, you've done your stitch test and you know what the problem is. Now it's time to get hands-on and make a careful, precise adjustment to the bobbin case itself. This part can feel a little intimidating, but the secret is a "less is more" approach.
That tiny little screw on your metal bobbin case is incredibly sensitive. A minuscule turn—as small as 1/16th of a turn—can make a huge difference in how your stitches look. To keep from overdoing it, you have to work in these tiny increments.
Just remember the old saying: "righty-tighty, lefty-loosey." If your stitch test showed loops on the bottom of the fabric, that means your top thread is getting pulled down too far. The fix? You need to loosen the bobbin tension by turning the screw to the left.
The whole process is a patient cycle: make a tiny change, then test it out. This infographic breaks down that simple, three-step workflow.

As the graphic shows, you'll want to stitch a test line after every single micro-adjustment. It's the only way to see your results before you make another turn.
Performing the Classic Drop Test
If you have a machine with a vertical bobbin system, there's an old-school trick called the drop test that helps you get a feel for the tension before you even pop the case back in.
Here's how it works:
- Put your wound bobbin into its case.
- Hold the thread tail so the case dangles freely.
- Give your wrist a gentle flick.
The case should drop just a few inches and then stop. If it plummets to the floor, the tension is way too loose. If it doesn't move at all, it's too tight.
What you're looking for is a drop of about 3-4 inches. That’s the sweet spot for a moderate tension that works for most general sewing. That little drop test is a perfect example of how finely tuned these mechanisms are. You can discover more insights about bobbin mechanics if you want to geek out on the details.
Always, always, always test your stitches on a scrap piece of the same fabric after every single adjustment. This iterative process is what stops you from overcorrecting and helps you dial in that perfect stitch balance.
Getting that perfect tension takes patience and the right gear. Set your project up for success with premium bobbins and supplies from Linda's Electric Quilters, where you'll find everything you need to keep your machine humming along beautifully.
Troubleshooting Other Common Stitch Problems
Ever been there? You’ve tweaked the bobbin screw a dozen times, and your stitches still look off. It’s maddening. But before you throw your hands up, take a breath. More often than not, what looks like a tension nightmare is actually a symptom of a much simpler problem. Going back to basics can save you a world of frustration (and a lot of time with a seam ripper).
Believe it or not, a poorly wound bobbin is a huge culprit. If your thread is loose or uneven on the bobbin, it can't feed out smoothly. The result? Inconsistent tension, no matter how perfectly you’ve set the screw. Your goal should always be a bobbin that's wound tight and even.
Another common gremlin is improper threading. I can't tell you how many times I've seen a quilter wrestling with what they think is a bobbin issue, only to find they missed a single thread guide up top. It's always a good idea to unthread the machine completely and start over, nice and slow.
Look for Debris and Wear
Your bobbin area is a magnet for lint and tiny bits of thread, especially under that delicate little tension spring on the case. All that gunk can build up and prevent the spring from applying consistent pressure, which leads to those ugly loops on the back of your quilt.
A quick once-over with a small brush often solves what feels like a major mechanical failure. Gently slide the brush under the tension spring to clear out any hidden lint—you might be shocked at what comes out!
If you've cleaned the case, re-threaded your machine, and you're still having issues, it might be time to look at the spring itself. A tension spring can get bent or just plain worn out, losing its ability to provide steady pressure.
- Signs of a Worn Spring: Is the screw tightened way more than it should be? Does the tension seem to wander mid-seam? Your spring is probably tired.
- When to Replace: The good news is that replacement springs are cheap and can make an old bobbin case feel brand new again.
Running through this checklist first can help you pinpoint stubborn problems much faster. If you need replacement parts or some high-quality cleaning brushes for your project, head over to Linda's Electric Quilters to grab everything you need to get your machine stitching perfectly.
Common Questions About Bobbin Tension
Even when you feel like you've got a good handle on tension, a few nagging questions always seem to pop up. Don't worry, that's completely normal! Getting these details straight is what separates frustrating sewing sessions from flawless ones. Let's tackle some of the most common things I hear from fellow quilters.
How Often Should I Mess with My Bobbin Tension?
Honestly? Almost never. Your machine’s bobbin tension is set at the factory to be the perfect, stable baseline for most everyday sewing with standard thread. It's meant to be the one thing you don't have to fiddle with.
The only time you should even think about adjusting it is when you're making a dramatic change—like going from a regular 50wt thread to a super chunky 12wt for decorative quilting—or if you've exhausted every other option and are still getting funky stitches.
Top or Bobbin Tension: Which Do I Adjust First?
Always, always, always start with the top tension. Think of that dial on your machine (usually with numbers from 3 to 5) as your primary control. It's designed for you to adjust it as you switch between fabrics and threads.
Before you even dream of grabbing a screwdriver for the bobbin case, make sure you've done this checklist:
- Completely re-thread the top of your machine.
- Put in a brand new needle that's the right type and size for your project.
- Try adjusting the upper tension dial first to see if it solves the problem.
Only after trying all of that should the bobbin be considered.
Can I Just Use Any Old Bobbin?
That’s a hard no. Using the wrong bobbin is one of the fastest ways to create a tension nightmare. You absolutely have to use the bobbins made specifically for your machine's make and model.
I can't stress this enough: even a tiny, barely visible difference in a bobbin's height or shape can completely wreck your stitch quality. It throws the whole delicate balance off. Always double-check your manual and buy the right ones—it will save you so much grief.
Once you have these little details down, you're well on your way to stitch perfection.
Now that your tension is dialed in, make sure every part of your project is set up for success. For high-quality bobbins, threads, and accessories that will keep your machine humming along happily, check out the amazing selection at Linda's Electric Quilters. Find everything you need to finish your next masterpiece today!


