
Applying binding is that final, satisfying step that turns a pile of fabric into a finished blanket or quilt. It’s all about sewing a neatly folded fabric strip around the raw edges of your project, which gives you a durable, beautiful border. The basic flow is to prepare your binding, attach it to the front, miter those corners just right, and then finish it on the back, either by machine or with a relaxing bit of hand stitching. This guide will transform you from a beginner to a binding expert.
Your Guide to a Perfect Blanket Finish
Giving your blanket that clean, professional edge is the final touch that truly makes it sing. This guide will walk you through applying blanket binding, breaking down what can feel like a tricky step into a simple, rewarding process. Remember, a good binding isn't just for looks; it protects your quilt's edges so it can be loved and used for years to come.
We’ll start with the essentials, laying out the entire process from start to finish. You'll learn the difference between using pre-made binding versus making your own and get a clear picture of exactly what tools you'll need from Linda's to pull it off without a hitch.

Why Proper Binding Matters
A well-applied binding does way more than just look pretty. It’s absolutely critical for the longevity of your quilt or blanket. Without that protective edge, the fabric layers can start to separate, and the raw edges will fray over time, especially with regular use and washing.
Think of it as the frame for your beautiful artwork. It contains the whole composition, adds structural strength, and provides that polished appearance that signals a high-quality, lovingly finished piece. A professional finish is what turns a project into an heirloom.
Before you jump into binding, it’s worth exploring different blanket types, like Mohair Rugs and Siirt Bataniye blankets. The unique texture and weight of different materials can definitely influence your binding fabric and application choices.
Getting Started with the Right Supplies
There's nothing worse than getting into your sewing groove only to realize you're missing a crucial tool. Gathering everything you need before you begin makes the entire experience so much smoother and more enjoyable. It lets you focus on your stitching without any frustrating interruptions.
To help you get set up, here’s a quick-glance table of all the essential supplies.
Essential Tools and Materials for Binding
This table breaks down everything you'll need for a professional-looking binding. The best part? You can find all of these high-quality, tried-and-true supplies right here at Linda's to finish your project perfectly.
| Item | Purpose | Where to Find at Linda's |
|---|---|---|
| Fabric for Binding | This is the material that will neatly encase the blanket's edge. | Fabric Section - Quilting Cottons |
| Rotary Cutter & Mat | For cutting perfectly precise, straight fabric strips every time. | Notions Aisle - Cutting Tools |
| Acrylic Ruler | Guarantees your binding strips are a consistent width from start to finish. | Notions Aisle - Rulers & Templates |
| Sewing Machine | For attaching the binding quickly, securely, and with a beautiful stitch. | Machine Department |
| Coordinating Thread | Choose a color to match or create a fun contrast with your binding. | Thread Wall - All-Purpose Polyester |
| Sewing Pins or Clips | These little helpers hold the binding securely in place while you sew. | Notions Aisle - Pins & Clips |
| Iron & Ironing Board | An absolute must for pressing crisp seams and folding the binding neatly. | Notions Aisle - Pressing Tools |
Once you've got your gear ready to go, you're all set for a successful project right from the very first stitch.
Choosing and Preparing Your Binding
The secret to a beautifully finished blanket really comes down to the binding you choose. You're at a crossroads here: go with the convenience of a ready-made commercial binding, or craft your own for that perfectly custom look. While store-bought is quick, making your own gives you total creative freedom over the color, pattern, and feel of your finished project.
For a truly one-of-a-kind touch, nothing beats making your own binding. This lets you perfectly match (or creatively contrast!) the binding with your blanket's fabric, turning a simple edge into a standout design feature. Here at Linda's, our fabric experts love helping quilters find the perfect quilting cotton that not only complements a project but is built to last.
Calculating Your Binding Needs
Before you even think about cutting, you need to figure out exactly how much fabric you'll need. Trust us, there’s nothing worse than getting halfway around your quilt and realizing you're short on binding. The math is actually pretty simple.
- Measure the Perimeter: Just add up the lengths of all four sides of your blanket. Let's say you have a 60" x 70" blanket. That's 60 + 70 + 60 + 70, which gives you a total of 260 inches.
- Add a Little Extra: We always recommend adding at least 15 extra inches to your total perimeter measurement. This gives you plenty of wiggle room for joining the strips and mitering the corners without any stress. So, for our example, that’s 260 + 15 = 275 inches.
- Figure Out How Many Strips: Now, divide your total length (275 inches) by the usable width of your fabric, which is usually around 40 inches. That comes out to 275 / 40 ≈ 7 strips. Always round up to the next whole number to be safe.
Getting this calculation right from the start is the key to a smooth, headache-free process.
Straight Grain Versus Bias Binding
The direction you cut your fabric strips—either along the straight grain or on the bias—makes a huge difference. They each serve a very specific purpose.
- Straight-Grain Binding: This is when you cut your strips parallel to the fabric's selvedge. It’s incredibly stable, uses less fabric (which is always a plus!), and is the go-to choice for blankets with straight edges and clean, 90-degree corners.
- Bias Binding: This is cut at a 45-degree angle to the selvedge. That angle gives the fabric a natural stretch, making it the only option for blankets with rounded corners or pretty scalloped edges. It wraps around those curves beautifully without any puckering or fuss.
It's interesting to see how much care people are putting into their projects these days. The global blanket market was valued at around USD 8.44 billion in 2024, and a big part of that is a growing demand for durable, customized items. It just goes to show that techniques like picking the right binding really do extend a product's life and appeal. You can dig into more of these insights from Data Bridge Market Research.
Cutting and Joining Your Strips
Once you know your grain and have your measurements, it's time to get cutting. Most quilters cut binding strips between 2 ¼ to 2 ½ inches wide. This width gives you a nice, substantial edge that’s both beautiful and durable.
To create one long, continuous piece of binding, you'll want to join your strips with a diagonal seam. This little trick reduces a ton of bulk compared to a straight seam, which helps the binding lie perfectly flat against your quilt. Just place two strips right-sides-together at a right angle, sew diagonally from one corner to the other, and trim the excess fabric. Press that seam open, and keep going until all your strips are one.
The final prep step? Press the entire long strip in half lengthwise, with the wrong sides touching. And just like that, you’ve got a perfect, custom-made binding, all ready to be attached to your blanket.
Attaching the Binding to Your Blanket
Okay, this is it—the moment your project really starts to look and feel like a finished blanket. You’ve got your binding strip ready to go, so let's walk through the nitty-gritty of sewing it on. The whole game here is about consistency and a little bit of patience. That’s the secret sauce for getting that clean, professional look we're all after.
First thing’s first: set yourself up for a win. We're going to sew the binding onto the front of the blanket to start. Take your prepared strip and lay it down so its raw edge lines up perfectly with the raw edge of your blanket. Getting this alignment right is the key to a neat finish later.
Securing the Binding for a Smooth Start
To keep things from shifting or stretching while you sew, you’ll want to secure the binding in place. We are huge fans of quilting clips for this. They hold everything nice and firm without putting holes in your fabric. If you’re a pins person, just be sure to place them parallel to the edge so you can easily pull them out as you sew.
Here's a pro tip: don't start sewing right at a corner. It's so much easier to get a clean join if you begin about halfway down one of the sides. You'll thank yourself later when you come full circle. Make sure you leave a "tail" of about 8-10 inches of unsewn binding at the beginning. We’ll need that slack to join the ends neatly.
Sewing with Precision
With your binding all clipped up, it’s time to head to the machine. The goal here is a perfectly straight line of stitching.
- Seam Allowance: A ¼-inch seam allowance is the gold standard for quilt binding. Most sewing machine feet even have a little guide to help you keep it consistent.
- Stitch Length: We like to shorten the stitch length a bit, somewhere around 2.0 to 2.5 mm. It creates a really strong, durable seam that’ll stand up to years of washing and loving.
- Needle Choice: Always, always start with a sharp, new needle that’s right for your fabric. A fresh needle is your best defense against skipped stitches and fabric snags.
Sew at a nice, steady pace down that first side, removing clips or pins as you get to them. Taking your time is what prevents the puckering that can sometimes happen when you’re wrangling multiple layers of fabric.
This kind of attention to detail is what people notice. The global blanket market is huge—valued at USD 9.73 billion in 2024—and a lot of that is driven by high e-commerce standards. Shoppers look closely at every photo, making a perfect finish non-negotiable. If you want to dive deeper, you can see how quality finishes impact sales and other market trends.
Handling Tricky Fabrics
If you're working with something stretchy like minky or fleece, you’ve got to bring a little extra finesse to the table. A walking foot is an absolute game-changer here. It feeds both the top and bottom layers of fabric through the machine evenly, which pretty much eliminates stretching and puckering.
No walking foot? No problem. Just go slow and use extra clips to keep everything from wiggling around. By taking the time to carefully attach this first side of the binding, you're setting a solid foundation that makes the final finishing steps a total breeze. For all the essential tools you might need, from walking feet to specialty needles, Linda's has an amazing selection to help you succeed.
Mastering Mitered Corners for a Sharp Look
Let's be honest, those crisp, perfect corners are what really make a quilt binding pop. This is the moment where all your hard work comes together, creating those sharp, professional-looking edges we all strive for. Mastering the mitered corner is one of the most satisfying skills you can learn, and it’s a whole lot easier than it looks once you break it down.
The whole trick is in the timing and a specific little fold. You’ll sew down one side, stop at just the right spot, pivot your quilt, and do a quick fold that creates a perfect 45-degree angle. This simple move is what keeps your corners from getting bulky or rounded, ensuring each one lays beautifully flat.
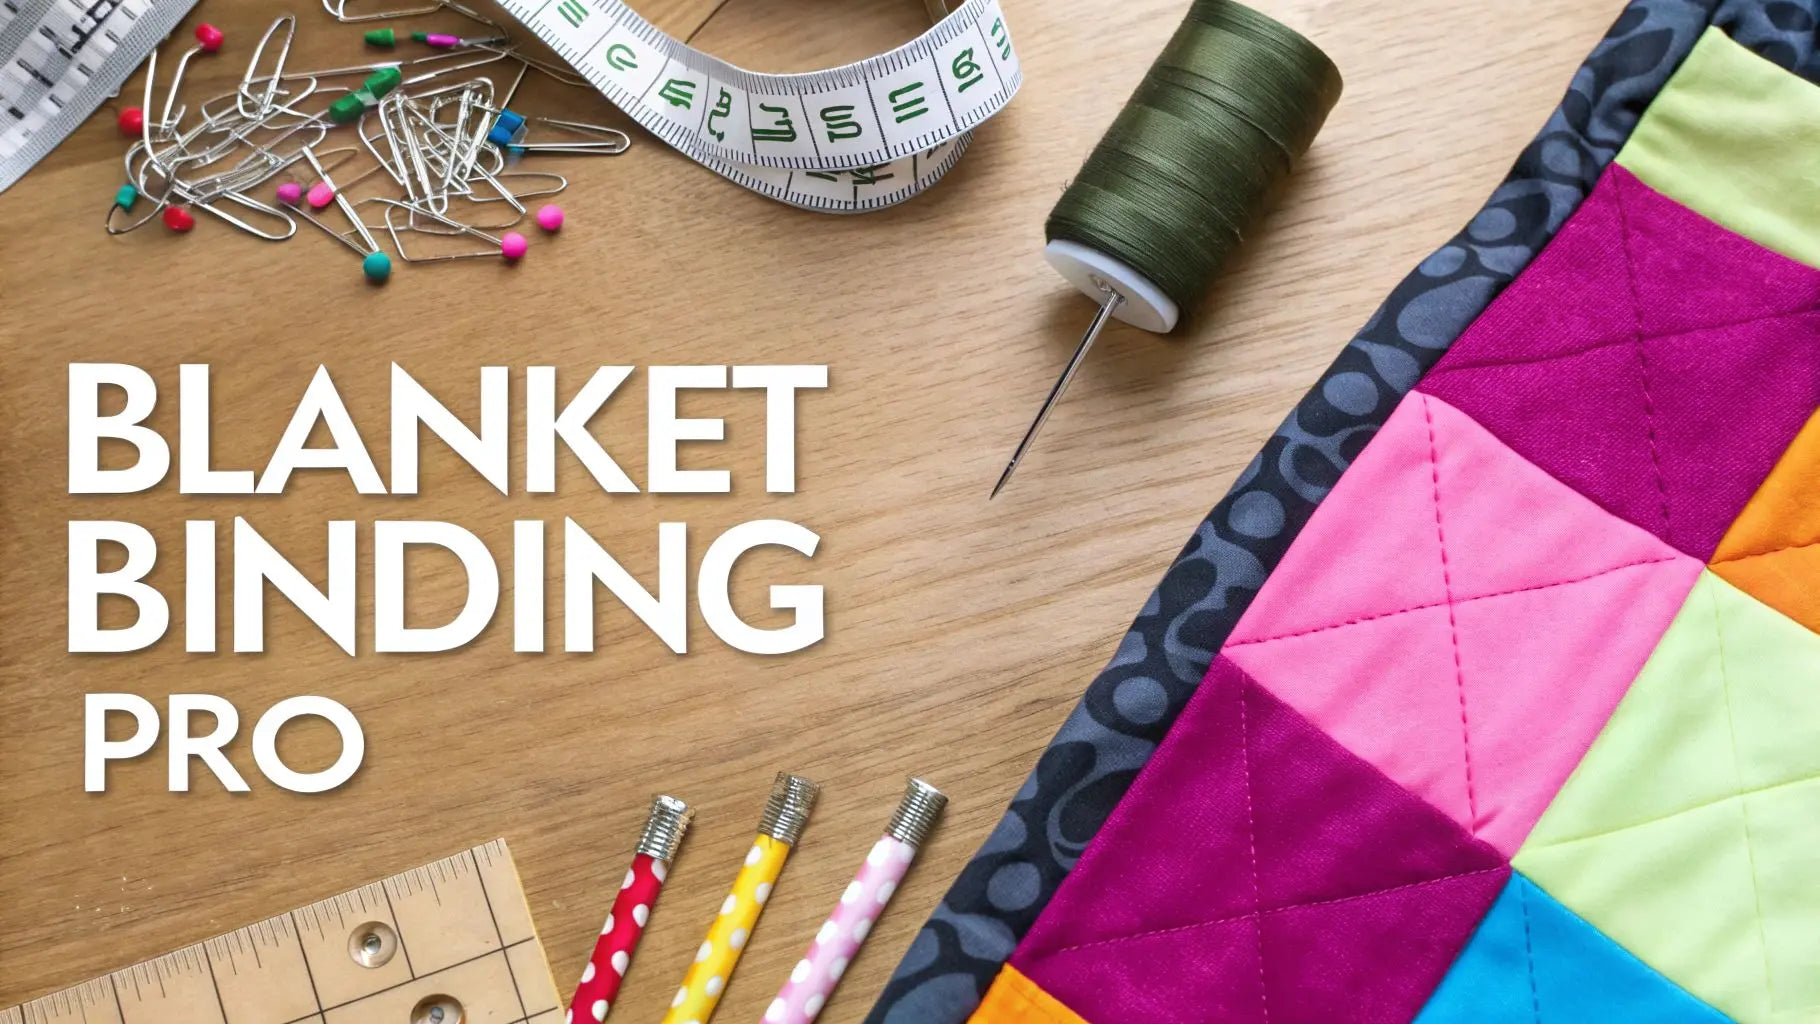
This little diagram shows the basic idea of getting your binding aligned and stitched, which is the foundation for getting that perfect corner.

As you can see, keeping your alignment and seam allowance consistent is everything. It sets you up for success before you even get to the corner.
The Corner Approach
As you’re sewing the binding down the first side of your blanket, you have to anticipate the turn. The absolute key is to stop sewing exactly ¼ inch before you hit the edge of the blanket—the same measurement as your seam allowance.
Do a couple of backstitches right there to lock your seam, then lift your presser foot and pull the project out. It feels a little weird at first, but don't sew all the way to the end! That tiny ¼-inch gap is what makes the whole miter possible.
The Magic Fold
Now for the fun part—the fold that creates the miter. With your blanket free from the machine, take the long tail of your binding and fold it straight up, away from the blanket. This should create a clean, 45-degree diagonal fold right at the corner. The raw edge of the binding strip should now form a straight line with the next raw edge of your blanket.
Hold that fold in place with your thumb. Now, simply fold the binding strip straight back down over itself. Line its raw edge up with the raw edge of the side you're about to sew. The top folded edge of your binding should now be perfectly even with the side you just finished sewing.
This two-part fold—up and away, then straight back down—is the entire secret to a perfect mitered corner. It neatly tucks away all the extra fabric that would otherwise create a lumpy mess, trapping it inside that crisp diagonal line you'll see on the front.
Once you have the binding folded down, pop a pin or a quilting clip on it to hold it steady. You’ll have a little triangle of fabric neatly tucked away underneath at the corner.
Completing the Corner
With your corner all folded and secured, slide it back under your sewing machine needle. You’ll start sewing right at the very top edge of this new side, again sticking to your ¼-inch seam allowance. Don't forget to backstitch for a few stitches at the beginning to lock that corner in place.
Now just continue sewing down this second side, and when you get close to the next corner, stop ¼ inch from the edge and repeat the exact same folding process. You’ll do this for all four corners. After a couple of tries, this motion becomes pure muscle memory, and it’s what takes your projects from looking homemade to beautifully handmade.
And if you need the best quilting clips and pins to make this step a breeze, stop by Linda's—we've got everything you need to nail those corners every time.
Finishing Your Binding for a Durable Edge
You've made it to the home stretch! The binding is on, those mitered corners are looking sharp, and now it's time for the final, most satisfying part: finishing the edge. This is what turns your project into a polished, durable blanket that's ready for years of snuggles.
First things first, grab your iron. Press the binding strip away from the center of the blanket. This one little step makes a world of difference, creating a crisp fold that helps you wrap the binding neatly to the back.
Once it's pressed, carefully fold the binding over the raw edge of your blanket. You want to make sure the folded edge completely covers that first line of stitching you made. This is your last chance to hide the evidence!

Machine Stitching for Speed and Strength
If you're making a blanket that's destined for a lot of love, heavy use, and frequent trips to the washing machine, machine stitching is your best friend. It’s fast, strong, and reliable. Before you head to your machine, make sure to secure the folded binding with plenty of quilting clips or pins—you don’t want anything shifting around.
The classic technique here is "stitch-in-the-ditch." It's a clever little trick. Working from the front of the blanket, you'll stitch directly in the seam—that "ditch"—where the binding meets the main body of the blanket. Your top thread disappears into the seam, while on the back, the bobbin thread catches the folded edge of the binding. The result is a clean, almost invisible finish from the front and a super-secure edge all around.
Hand Stitching for an Heirloom Touch
For those special projects where you want a truly invisible, heirloom-quality finish, nothing beats hand stitching. It definitely takes more time, but the beautiful result is worth every minute. When you're done, you won't see a single stitch from the front of your blanket. The absolute best stitch for this is the blind stitch, sometimes called a ladder stitch.
Here’s how to get it just right:
- Thread: A single strand of thread that matches your binding fabric is all you need.
- Needle: We always reach for a small, sharp needle. A milliner's or appliqué needle is perfect for this kind of detailed work.
- Technique: Start by hiding your knot inside the binding fold. Take a tiny, barely-there stitch into the blanket backing, right at the edge of the binding. Then, tunnel your needle through the fold of the binding for about ¼ inch before bringing it out. Repeat this process, and you’ll create tiny, hidden stitches that secure the binding flawlessly.
We’ve got all the specialty needles and threads for both machine and hand finishing right here in the notions aisle at Linda's.
Creating a Seamless Join
Okay, the final puzzle piece: joining the beginning and end tails of your binding into one smooth, continuous loop. Lay the two tails flat where they meet, letting them overlap. Now, trim them so the overlap is exactly the width of your binding strip—for example, 2 ½ inches.
You'll join these two ends with a diagonal seam, the same way you did when you first pieced your binding strips together. This diagonal trick is key because it distributes the bulk, making the join practically disappear. After sewing the seam, press it open, fold the binding in place, and stitch down that last little section.
These finishing details are what truly signal quality in the home textile world. It’s fascinating to see how consumer tastes are shifting—with a huge emphasis on wellness and sustainability, the global blanket market is expected to reach USD 24.8 billion by 2032. A beautifully applied binding isn't just about looks; it's a sign of a safe, long-lasting product. That’s why you’re seeing more brands using organic or recycled thread to meet the growing demand for sustainable goods. You can explore the full report on home textile trends to see where the market is headed.
Answering Your Blanket Binding Questions
Even with the best instructions, you're bound to run into a few head-scratchers when you’re finishing a quilt. It happens to all of us! Let's walk through some of the most common binding issues so you can get that project finished with confidence.
One of the biggest culprits of frustration is puckering. You’ve attached your binding, and suddenly it looks wavy or ruffled. What gives? Nine times out of ten, the problem is that either the binding or the quilt edge got stretched during sewing.
The easiest fix is to be proactive. Use a generous amount of pins or clips to keep everything stable. Better yet, a walking foot is your best friend here. It grips and pulls both layers of fabric under the needle at the same exact speed, which practically guarantees a smooth, pucker-free finish.
What About Super Thick Blankets?
Working with a big, fluffy quilt or a plush minky blanket? Your standard binding might not cut it. The secret is simply to cut your binding strips wider. A typical 2.25-inch or 2.5-inch strip is perfect for most quilts, but you’ll need to size up for the heavyweights.
- For plush fleece or minky: Try starting with a 2.75-inch or even a 3-inch wide strip.
- For quilts with high-loft batting: That extra width gives you the fabric you need to wrap all the way around that chunky edge without a struggle.
This little adjustment makes all the difference. It ensures the binding can fully enclose the edge and gives you plenty of fabric to catch on the back when you stitch it down.
The Right Tools for the Job: Needles and Thread
Don't underestimate the power of a fresh needle and good thread! For most cotton quilts, a standard 80/12 universal needle will work beautifully. But if you’re tackling something dense like canvas or a tightly woven batik, switching to a beefier 90/14 needle will save you from skipped stitches and broken needles.
For thread, you can't go wrong with a high-quality 50-weight cotton or polyester thread. It’s the Goldilocks of binding thread—strong enough to last, but fine enough that your stitches will melt right into the fabric for a really clean, professional look.
Our experts at Linda's always advise that people grab a heavy-duty thread thinking it'll be more durable, but it ends up looking clunky and can even leave noticeable holes in the fabric. A 50-weight thread is truly the sweet spot for a perfect binding.
With these common problems solved, you're ready to tackle any binding project that comes your way.
Ready to grab the supplies you need to nail that perfect finish? From specialty walking feet and needles to the perfect fabric for your custom binding, Linda's Electric Quilters has everything you need. Explore our amazing selection of over 30,000 products and get all the high-quality supplies to finish your project perfectly at https://lindas.com.


